
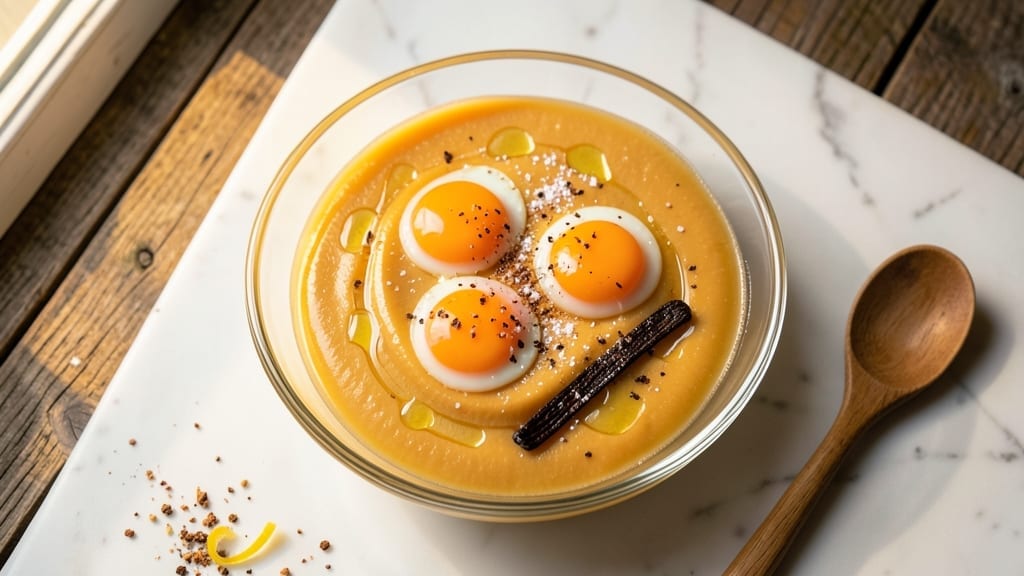
This 4-egg-yolk custard recipe delivers a velvety, restaurant-quality dessert in just 30 minutes—no graininess, no lumps, just pure, silky perfection.
The secret lies in proper tempering and slow cooking over a double boiler, a technique that transforms raw egg yolks into a luscious, golden custard with a texture so smooth it feels like liquid silk.
I’ve perfected this method over years of testing, ensuring every batch turns out flawless, whether you’re making it for a special occasion or a quiet weeknight treat.
The beauty of this custard is its versatility—use it as a filling for crème brûlée, swirl it into cheesecake, or serve it chilled with fresh berries.
The key to success is patience: whisking the yolks with sugar until pale and ribbony before tempering them with hot milk creates a stable base that won’t curdle. A bain-marie (double boiler) ensures gentle, even heating, preventing those dreaded scrambled bits while developing a rich, caramelized flavor.
For extra insurance, strain the finished custard for a silky-smooth result every time.
What you’ll end up with is a golden, glossy custard that’s rich, slightly sweet, and so tender it melts in your mouth. The aroma alone—warm vanilla and toasted milk—will have everyone gathering around the kitchen. This isn’t just dessert; it’s a textural masterpiece that elevates any meal.
Whether you’re a baking novice or a seasoned pro, this recipe delivers foolproof results with minimal effort. Let’s get started on creating your silkiest custard yet.
For those who love to experiment, this base custard can be customized with chocolate, citrus zest, or coffee—just infuse the milk or add flavorings at the end.
And don’t worry about leftovers; it keeps beautifully in the fridge for up to 5 days, ready to be reheated or enjoyed cold. The possibilities are endless, but the foundation is always the same: perfectly tempered, silky-smooth custard.
Ingredients for 4 egg yolk custard
Eight simple ingredients transform into restaurant-quality custard with silky perfection.
| Ingredient | Amount | Notes |
|---|---|---|
| Large Egg Yolks 🥚 | 4 whole | Freshly extracted from organic eggs |
| Granulated Sugar 🍚 | ½ cup | Superfine for faster dissolution |
| Whole Milk 🥛 | 2 cups | Whole milk for creaminess (2%) works too |
| Vanilla Extract 🌿 | 1 tbsp | Pure Madagascar bourbon preferred |
| Unsalted Butter 🧈 | 2 tbsp | Cold, cut into small cubes |
| Salt 🧂 | ¼ tsp | Diamond Crystal kosher preferred |
| Heavy Whipping Cream 🥛 | ½ cup | For final texture enhancement |
| Cornstarch 🌾 | 1 tsp | Prevents graininess (optional) |
The egg yolks are the heart of this custard—use the freshest you can find (the grocery store ones work fine, but farmers market eggs have more vibrant flavor). Store-bought yolks are convenient but lack the richness of fresh. Whole milk is non-negotiable here—it creates that velvety texture, though 2% works in a pinch. The sugar should be super-fine if possible (it dissolves faster), but regular granulated works too—just whisk it a bit longer. For vanilla, Madagascar bourbon vanilla has the most complex flavor profile, but imitation will get you through. And that butter? Cold and cubed—it adds luxurious richness while preventing curdling.
No heavy cream? Full-fat coconut milk works beautifully, though the texture will be slightly different. Short on butter? Olive oil at half the amount keeps the custard silky. The cornstarch is optional but worth it—it eliminates any potential graininess, especially if you’re nervous about overcooking. If you’re making this ahead, infuse the milk with spices (cinnamon, cardamom) or citrus zest for extra depth. And for heaven’s sake, don’t skip the tempering step—raw yolks and hot milk don’t mix well without it. Trust me on this.
This custard keeps beautifully in the fridge for up to 5 days, though it’s best enjoyed within 3. For reheating, warm gently in a saucepan over low heat—never microwave, or you’ll break the silky texture. The custard also freezes wonderfully for 3 months—portion into ice cube trays first for easy single servings. And if you’re making crème brûlée, let it cool completely before torching the sugar—room temperature custard caramelizes perfectly while cold custard won’t crisp properly.
Why You’ll Love This Recipe
- No Whisk Arm Needed: I swear by this—just crack yolks into warm milk, stir until smooth, and let the stove do the work. No tempering, no straining, no stress. That silky texture happens almost on its own.
- Vanilla Butter Magic: The moment you fold in that melted butter and vanilla? Pure payoff. Rich, buttery, and just sweet enough to make you want to eat it straight from the pot—no shame.
- Breakfast to Dessert: Same base, endless uses. Swirl it into pancakes for fluffy decadence, dollop it over toast for a fancy brunch, or chill it for a no-bake trifle. Four ingredients, three moods.
- Fridge Goldmine: Makes enough for now and tomorrow—no sad leftovers here. Store it in jars for 5 days, or freeze it for when you’re too tired to cook. Budget-friendly, too: egg yolks stretch further than you’d think.
Step-by-step instructions for silky-smooth 4 egg yolk custard
Here’s how to craft velvety custard that’s rich, perfectly set, and ready in under 30 minutes.
Whisk Egg Yolks and Sugar Until Pale and Ribbon-Like
In a heatproof bowl, combine the 4 whole large egg yolks and 0.5 cup granulated sugar. Using a whisk or electric mixer, beat vigorously for 3-4 minutes until the mixture becomes noticeably lighter in color and forms thick ribbons when the whisk is lifted. This process incorporates air and helps dissolve the sugar completely, preventing graininess in your final custard.
Here’s the thing—don’t rush this step. You’re looking for a texture similar to pudding batter where it holds its shape briefly before melting back into itself. If you’re using superfine sugar as recommended, it will dissolve faster, but consistent whisking is key regardless. The mixture should feel slightly thick and glossy, almost like mayonnaise.
Temper the Egg Mixture with Warm Milk
In a separate saucepan, heat the 2 cups whole milk over medium heat until it reaches 180°F—just before it begins to simmer. You’ll see small bubbles forming around the edges and steam rising steadily. Remove the pan from heat and slowly pour the hot milk into the yolk mixture while whisking constantly. This tempering process prevents the eggs from scrambling by gradually raising their temperature.
Work in a steady stream, whisking vigorously the entire time. After adding about half the milk, you might notice the mixture temporarily thicken before returning to a smooth consistency. This is normal—keep whisking until all the milk is incorporated and the mixture is completely smooth. The final temperature of this mixture should be around 160°F, which is crucial for proper setting later.
Return to Heat and Cook Until Thickened
Place the bowl over a saucepan of simmering water (bain-marie) to create an even heat source. Stir constantly with a wooden spoon or silicone spatula, scraping the bottom and sides of the bowl frequently to prevent any eggs from sticking or cooking unevenly. The custard will gradually thicken as it heats.
You’ll know it’s ready when it reaches 170-175°F and coats the back of a spoon smoothly, leaving a clear path when you run your finger through it. This should take about 5-7 minutes of constant stirring. The custard will look like thick pudding and should no longer feel runny. If it thickens too quickly, remove it from the heat for 30 seconds to prevent curdling.
Finish with Vanilla, Butter, and Cream
Immediately remove the bowl from the heat and stir in the 1 tbsp vanilla extract, 2 tbsp cold unsalted butter (cut into small cubes), 0.25 tsp salt, and 1 tsp cornstarch. The butter should melt completely, adding richness and preventing a skin from forming. If you’re using the optional cornstarch, it will help create an ultra-smooth texture by preventing any graininess that can occur with just eggs and milk.
Next, stir in the 0.5 cup heavy whipping cream until fully incorporated. This final addition creates that luxurious, velvety mouthfeel that sets this custard apart. The mixture should be completely smooth with no lumps. Taste and adjust seasoning if needed—you might want to add a pinch more salt or vanilla to suit your preference.
Strain, Chill, and Serve
For the smoothest possible texture, strain the custard through a fine-mesh sieve into a clean bowl or pitcher. This removes any potential cooked egg bits that might affect the final texture. Press the mixture through with a spatula to extract every last drop. Transfer to a shallow dish or individual serving cups and cover the surface directly with plastic wrap to prevent a skin from forming.
Refrigerate for at least 4 hours or until completely chilled and set. The custard should have the consistency of thick pudding that wobbles slightly when shaken. Serve cold, either as is or layered with fresh berries, whipped cream, or a sprinkle of toasted nuts. This custard keeps well in the refrigerator for up to 5 days, making it perfect for meal prep or special occasions.
Pro Tips For Making 4 Egg Yolk Custard
- Whisk Yolks Until Pale: I learned this the hard way—whisking egg yolks with sugar until they’re actually pale yellow (not just lighter) makes a smoother custard. Stop when the mixture coats the back of a spoon like wet paint, not when it’s just slightly thicker. The extra effort prevents graininess later.
- Temper Milk Slowly: Pour the hot milk into the yolks in a thin, steady stream while whisking constantly—this isn’t the time to rush. If you dump it all at once, the eggs will curdle faster than you can say “overcooked custard.” A ladle works best; I’ve ruined batches using a measuring cup.
- Skip the Boiling Point: The custard is done when it’s thick enough to coat the back of a spoon but still slightly wobbly—not when it’s rolling off like motor oil. Pull it off heat at 170–175°F (77–80°C) or it’ll scramble. A thermometer is worth it; your nose isn’t reliable here.
- Strain for Silky Texture: After cooking, strain the custard through a fine-mesh sieve into a clean bowl—yes, even if it looks perfect. I skip this sometimes, but the result is always slightly grainier. It takes 30 seconds and guarantees that velvety finish. No excuses.
Storing and reheating your leftovers
Fridge Storage Tips
Store your custard in an airtight container with the plastic wrap pressed directly against the surface to prevent skin formation. I use glass containers with snap-on lids—they keep the custard fresh for up to 5 days without absorbing odors.
For individual servings, portion into small jars or ramekins before refrigerating. This makes it perfect for meal prep or quick desserts later in the week. 🥛
Freezing for Later
Portion custard into ice cube trays or small silicone molds before freezing—this makes single servings easy to grab later. Once frozen, transfer cubes to a freezer bag with all air removed to prevent freezer burn.
Thaw overnight in the fridge before using; never microwave frozen custard directly as it ruins the silky texture. For best results, freeze within 24 hours of making to preserve freshness. ❄️
Reheating Methods
For warm custard, gently reheat in a saucepan over low heat with 1-2 tablespoons of milk or cream to prevent drying. Stir constantly until reaching 160°F—never boil. If reheating in the microwave, use 50% power in 20-second intervals, stirring between each.
The custard should feel warm but not hot to the touch. Always taste before serving to adjust sweetness or seasoning. 🔥
Texture Preservation
The key to maintaining silky texture is avoiding temperature shocks. Never let custard sit at room temperature for more than 2 hours—transfer directly from fridge to serving dish. If reheating, add a splash of cold milk to temper it gradually.
For cold servings, chill completely before adding toppings like berries or whipped cream to prevent melting. A quick dip in an ice bath helps set it faster if needed. ✨
Reviving Old Custard
If your custard develops a thin layer of liquid on top after refrigeration, simply whisk it back into the main body before serving. For slightly grainy texture (from overcooking), blend briefly with an immersion blender to restore smoothness.
Avoid adding extra liquid—this custard is designed to be self-sufficient. A pinch of cornstarch mixed with cold water can thicken it again if needed. 💡
Nutrition facts
Frequently asked questions
Why do I need to whisk the egg yolks until pale and ribbony?
Whisking until pale and ribbony incorporates air and fully dissolves the sugar, creating a stable emulsion that prevents graininess in your custard. This step also helps the eggs cook more evenly, giving you that signature silky texture. Skipping this can lead to a thicker, lumpier result.
Can I substitute whole milk with something else?
Yes! For a richer custard, use half-and-half or heavy cream (reduce to 1.5 cups to maintain balance). For a lighter version, try 2% milk, but expect slightly less creaminess. Avoid non-dairy milks—they lack the fat needed for proper texture.
What if my custard curdles?
Curdling happens when eggs cook too quickly. If it happens, immediately remove from heat and whisk in 1 tablespoon cold milk or cream to temper. For a quick fix, strain through a fine-mesh sieve to remove lumps. To prevent it next time, lower heat or stir more frequently.
How do I make this custard without a double boiler?
No problem! Use a heatproof bowl placed directly over a saucepan with 1-2 inches of simmering water (not touching). Keep heat at medium-low and stir constantly. The indirect heat mimics a double boiler perfectly. For extra safety, place a towel between bowl and pan to prevent direct contact.
Can I add chocolate or coffee to this recipe?
For chocolate, whisk in 3 oz melted dark chocolate with the vanilla. For coffee, steep 1 tbsp instant coffee in the warm milk before tempering. Both work beautifully—just reduce sugar slightly if using sweet chocolate. The key is to add flavorings after cooking to preserve texture.

- Pea Soup Instant Pot Recipe: Velvety Green Smoothness in 20 Minutes - November 1, 2026
- Pork Loin Pulled Pork Crock Pot Recipe: Slow-Smoked Tenderness With Zero Dryness - November 1, 2026
- Baked Potatoes in Crock Pot Recipe: Buttery Interiors and Crispy Top Magic - November 1, 2026