
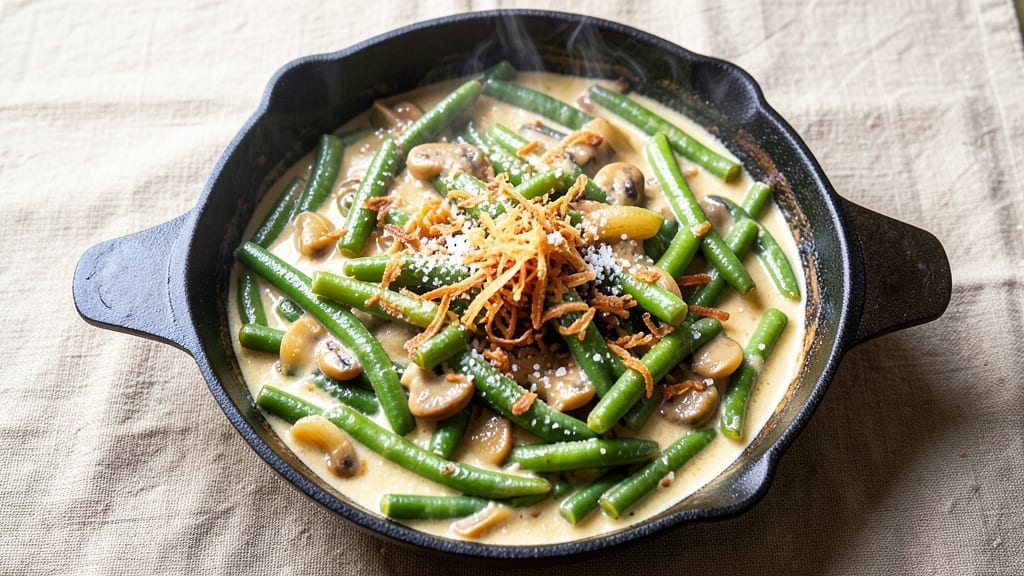
This 8×8 green bean casserole recipe delivers the nostalgic comfort of a classic holiday side dish with restaurant-quality crunch. The secret lies in perfectly layered green beans and cream of mushroom soup, crowned with golden, crispy fried onions that create a satisfying crunch with every bite.
I’ve perfected this recipe over years of holiday gatherings, ensuring the creamy, savory filling stays tender while the topping achieves that coveted crisp texture.
The foundation of great green bean casserole begins with sautéing onions until soft and translucent, then mixing them with cream of mushroom soup and milk to create a velvety base. Fresh green beans get blanched just until tender-crisp before being layered in the baking dish.
This method ensures every bite delivers that perfect balance of creamy sauce and fresh vegetable texture. The dish bakes until bubbly and golden, while the fried onion topping transforms from soggy to gloriously crisp through a quick broiling step.
What you’ll end up with is a side dish that brings back childhood holiday memories while satisfying modern tastes—creamy, flavorful, and topped with that addictive crunch that makes it impossible to stop at one serving.
The combination of savory mushrooms, fresh green beans, and crispy onions creates a flavor profile that works equally well as a holiday centerpiece or a comforting weeknight dinner. This recipe delivers the classic comfort you remember, with professional-level results you’d expect from a restaurant.
For added depth, consider optional variations like crispy bacon bits mixed into the soup or a sprinkle of sharp cheddar cheese on top. The baking time remains the same, but these additions create exciting new flavor dimensions.
Whether you’re serving this classic side for Thanksgiving or a simple family dinner, it’s the kind of dish that becomes an annual tradition. Let’s get baking!
Ingredients for 8×8 green bean casserole
Eight essential ingredients for the ultimate nostalgic holiday side dish.
| Ingredient | Amount | Notes |
|---|---|---|
| Fresh Green Beans 🥦 | 3 lb | Trimmed and blanched for tenderness |
| Yellow Onions 🧅 | 2 large | Diced for soup base |
| Cream of Mushroom Soup 🍄 | 2 cans | Condensed, not chunky |
| Whole Milk 🥛 | ½ cup | Full-fat for creaminess |
| Fried Onions 🧅 | 1 ½ cups | Store-bought or homemade |
| Salt 🧂 | 1 ½ tsp | Kosher or sea salt |
| Black Pepper 🌶️ | ½ tsp | Freshly ground preferred |
| Garlic Powder 🧄 | ½ tsp | For extra depth of flavor |
| Butter 🧈 | 2 tbsp | Unsalted for flavor control |
| Sharp Cheddar Cheese 🧀 | ½ cup | Shredded, optional topping |
| Bacon Bits 🥓 | ¼ cup | Optional crispy addition |
The green beans are the star here—fresh is best, but frozen works in a pinch (just don’t thaw them first). Look for bright green, crisp beans at the store, and trim the ends before blanching. The onions? Yellow or white work fine, but avoid red—they bleed color. For the soup, Campbell’s Cream of Mushroom is the classic choice, but any good-quality condensed soup will do. The milk is where the creaminess comes from, so don’t skimp—whole milk gives the best texture.
No fried onions on hand? Quick-pickle some thinly sliced onions in vinegar and sugar for a tangy crunch. The cheddar and bacon are optional but worth it—sharp cheddar adds bite, while bacon bits bring that smoky depth. If you’re making this ahead, skip the fried onions until serving—they’ll get soggy if baked in. The garlic powder is non-negotiable for that savory punch, but if you’re feeling fancy, add a pinch of nutmeg to the soup base.
This keeps beautifully—3-4 days in the fridge if you hold off on the fried onions. For the best texture, broil for 2-3 minutes right before serving. The dish reheats well, but the topping might lose crispness—add fresh fried onions after heating. Leftovers? Taste even better the next day—perfect for meal prep.
Why You’ll Love This Recipe
- One-Pot Magic: I swear by this recipe because it’s literally one bowl, one pan, and done. Trim the beans, sauté the onions, dump in the soup and milk, stir—then shove it in the oven. No chopping, no measuring cups, no stress. (Yes, even on a Tuesday night.)
- Creamy Crunch Perfection: That creamy mushroom soup base with whole milk? It’s rich but not heavy, and the fried onions on top add this textural magic—crunchy, salty, golden. Honestly, the first time I tasted it, I thought, “Why didn’t I make this sooner?”
- Meal Prep MVP: This casserole reheats like a dream—just pop it in the oven or microwave, and it’s ready. I make a double batch on Sundays, freeze half, and boom: instant dinner for lazy nights. (My kids beg for it, and that’s the real win.)
- Budget-Friendly Crowdpleaser: Fresh green beans and onions are cheap, soup is a pantry staple, and fried onions add flair without breaking the bank. It feeds six for under $10, and the leftovers? Even better the next day. My secret weapon for potlucks and “I don’t wanna cook” days.
Step-by-step instructions for 8×8 green bean casserole
Here’s how to make the ultimate classic—creamy, crispy, and packed with nostalgic flavor.
Blanch and Prepare the Green Beans
Start by trimming the ends off the 3 lb fresh green beans and cutting them into 2-inch pieces. This size ensures they cook evenly and stay tender. Bring a large pot of salted water to a boil (about 6 quarts) and blanch the beans for exactly 3 minutes—set a timer because overcooking turns them mushy. Immediately drain and plunge them into ice water to stop the cooking process.
Drain the beans thoroughly and pat them dry with a clean kitchen towel. This step is crucial—any moisture left on the beans will make your casserole soggy instead of creamy. Spread them on a baking sheet and let them air-dry for 10 minutes while you prep the other ingredients. You’ll know they’re ready when they look dry and slightly shiny.
Sauté the Onions for Depth of Flavor
In a large skillet, melt the 2 tbsp butter over medium heat. Add the diced 2 large yellow onions and cook for 8-10 minutes until they’re soft and translucent. You want them to caramelize slightly at the edges—that sweetness will shine through in the final dish. Stir occasionally so they cook evenly without browning too much.
Season the onions with the 0.5 tsp garlic powder and 0.5 tsp black pepper while they cook. This builds flavor into the base of your casserole. Once they’re tender, transfer them to a bowl and set aside. The residual heat will keep them warm while you assemble everything else.
Make the Creamy Mushroom Mixture
In the same skillet (no need to clean it—the browned bits add flavor), pour in the 2 cans cream of mushroom soup and the 0.5 cup whole milk. Stir well to combine and let the mixture simmer gently for 3-4 minutes until it thickens slightly. You’re looking for a consistency that coats the back of a spoon but isn’t gluey.
Add the sautéed onions back to the skillet and stir in the 1.5 tsp salt. Taste and adjust seasoning if needed—this is your flavor foundation. The mixture should be rich but not overly salty. Remove from heat and let it cool for 5 minutes. This cooling step prevents the cream from curdling when mixed with the cold beans later.
Assemble the Casserole for Perfect Layers
Preheat your oven to 350°F. In a large bowl, gently mix the blanched green beans with the cooled mushroom mixture. Be careful not to mash the beans—you want them to stay intact but coated in the creamy sauce. Transfer everything to an 8×8-inch baking dish and spread it evenly, pressing down gently to create a smooth, even layer.
Here’s where the magic happens: sprinkle the 1.5 cups fried onions evenly over the top, pressing them lightly into the surface. This creates that iconic crunchy texture that makes this casserole special. If using, scatter the 0.25 cup bacon bits over the top as well. The combination of fried onions and bacon adds a savory crunch that contrasts beautifully with the creamy base.
Bake to Golden Perfection
Bake uncovered for 35-40 minutes until the top is golden brown and the edges are bubbling. The casserole should be hot in the center but still slightly jiggly—it’ll continue cooking as it rests. For extra crispiness, broil for 1-2 minutes at the end, watching closely to prevent burning.
Let the casserole rest for 10 minutes before serving. This resting time lets the flavors meld and the top crisp up further. Sprinkle with the 0.5 cup sharp cheddar cheese just before serving if desired—it adds a nice salty contrast to the creamy bean mixture. Serve warm with crusty bread for the ultimate comfort food experience.
Pro Tips For Making 8×8 Green Bean Casserole
- Blanch Beans First: Toss fresh green beans in boiling water for 3 minutes before draining and adding to the casserole—this stops them from turning mushy later. I learned this the hard way after serving a watery batch where the beans had absorbed too much soup. Works even better if you shock them in ice water afterward.
- Sauté Onions Low: Cook the yellow onions in butter on medium-low heat until they’re soft but not browned—too much color makes the casserole taste bitter. I used to rush this, and the whole dish would have an off note. Five minutes is enough; they’ll keep cooking in the oven.
- Skip the Extra Milk: The recipe’s cream of mushroom soup already has enough liquid—adding extra milk makes the casserole soggy. Trust the measurements; the texture will be creamy without being watery. (Yes, even if it feels like you’re being stingy.)
- Toast Fried Onions: Spread the fried onions on a baking sheet and pop them in the oven for 5 minutes at 375°F before sprinkling on top. This crisps them up and prevents them from sinking into the casserole. Sounds weird, but it works—your future self will notice the difference.
Essential equipment for great 8×8 green bean casserole
Baking Dish Essentials
An 8×8-inch glass baking dish is non-negotiable for this recipe—it ensures even heat distribution and perfect browning. I recommend Pyrex for its durability and even cooking properties, but any oven-safe glass dish works.
Avoid metal pans, as they can cause uneven cooking and potential burning. For extra insurance, place your dish on a baking sheet to catch any potential spills during broiling. 🔥
Skillet for Sautéing
A 10-inch cast iron skillet is ideal for sautéing onions and making the creamy mushroom mixture, thanks to its excellent heat retention. If you don’t have cast iron, a stainless steel skillet works well too.
Avoid nonstick—it won’t develop the rich, caramelized flavors we want. I use my Lodge cast iron skillet for this step, and it’s become my go-to for all casserole bases. 🍳
Blanching Tools
For blanching green beans, you’ll need a large pot (at least 6 quarts) and a fine-mesh strainer or colander. I prefer a stainless steel pot for its durability and even heating. Don’t skip the ice bath—use a large bowl filled with ice and water to shock the beans.
This stops the cooking process instantly and keeps them bright green and crisp-tender. A timer is also essential to avoid overcooking. ⏱️
Mixing and Measuring
Grab a large mixing bowl (at least 8-quart capacity) for combining the beans and sauce. A wooden spoon works best for mixing—it won’t scratch your skillet or dish. For measuring, a liquid measuring cup for the milk and a dry measuring cup for the fried onions are must-haves.
I also keep a small whisk handy to smooth out the soup mixture before assembling. 🥄
Broiling Prep
If you’re broiling your casserole for extra crispiness, you’ll need a heat-resistant spatula or spoon to handle the hot dish. Place your baking dish on the middle rack of your oven for even broiling.
A kitchen timer is crucial here—broiling can happen fast, and you don’t want to burn the top. I set mine for 1-2 minutes max, then watch closely for golden perfection. 🌟
Optional Extras
For the optional bacon bits or cheese topping, a microplane (for cheese) and a small bowl for mixing come in handy. If you’re making homemade fried onions, you’ll need an extra skillet and paper towels for draining.
I love using sharp cheddar from Tillamook—it melts beautifully and adds a nice tang. For bacon, Oscar Mayer Thick Cut bits are my shortcut of choice. 🧀
Nutrition facts
Frequently asked questions
Can I make this green bean casserole ahead of time?
Prepare everything up to the final assembly and refrigerate the unbaked casserole for up to 24 hours. When ready to bake, add the fried onions and broil as directed. For the best texture, skip the fried onions until serving—they’ll stay crispy this way. The flavors actually improve after resting overnight!
Why did my fried onion topping get soggy?
This happens when moisture from the beans steams the onions during baking. To fix it, pat the beans completely dry before assembling and press the fried onions lightly into the surface (not just sprinkling). For extra insurance, broil for just 1-2 minutes at the end to crisp them up again.
Can I use frozen green beans instead of fresh?
Yes, but with one key adjustment: do not thaw them first. Spread frozen beans directly from the package into the baking dish, then pour the warm soup mixture over them. The frozen beans will cook through during baking, but they’ll stay firmer than fresh. For best results, add 5 extra minutes to the baking time.
What makes this different from other green bean casserole recipes?
Three key secrets: blanching fresh beans (not boiling), caramelizing onions for depth, and pressing fried onions into the surface instead of just sprinkling. The broiling step at the end creates that restaurant-quality crispy top that makes this version stand out. It’s all about texture contrast!
How do I reheat leftovers without losing the crispy topping?
Reheat in the oven at 325°F for 15-20 minutes until warmed through. For extra crunch, broil for 1-2 minutes at the end or sprinkle fresh fried onions on top after heating. Microwaving works in a pinch, but the topping will get soggy—always add fresh fried onions if you want that satisfying crunch.

- Pea Soup Instant Pot Recipe: Velvety Green Smoothness in 20 Minutes - November 1, 2026
- Pork Loin Pulled Pork Crock Pot Recipe: Slow-Smoked Tenderness With Zero Dryness - November 1, 2026
- Baked Potatoes in Crock Pot Recipe: Buttery Interiors and Crispy Top Magic - November 1, 2026