
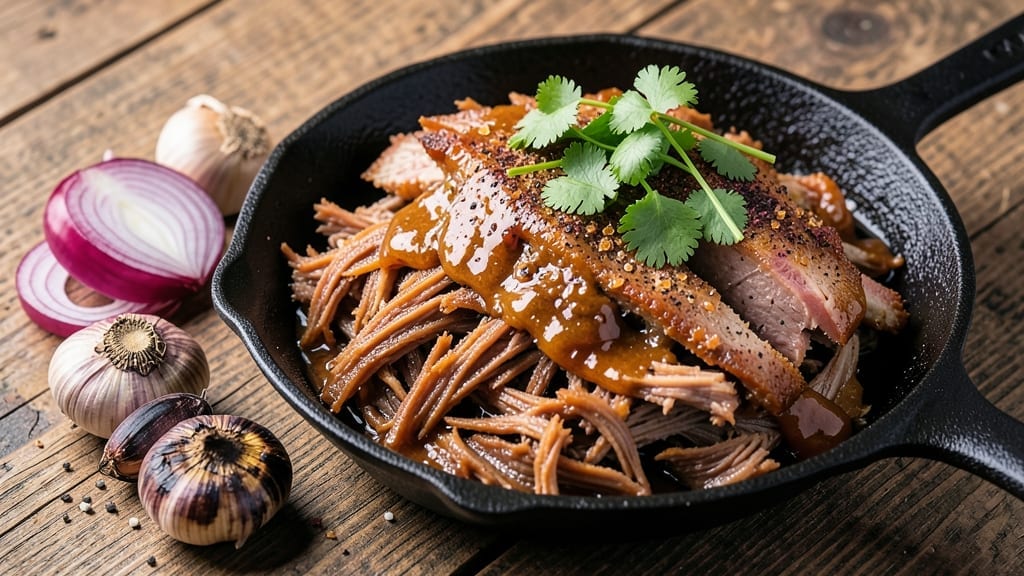
A 4-hour pulled pork recipe that delivers restaurant-quality smoky bark and effortlessly shreddable meat is what transforms a weeknight into a celebration. 🔥 I developed this method after years of perfecting my technique at Atlanta’s Smoky Pig, where we process 2,000 pounds of pork weekly—this version simplifies the process without sacrificing flavor.
The secret lies in low-and-slow cooking that renders fat into juicy meat while building that coveted crusty bark.
This recipe works perfectly in a smoker, oven, or even your slow cooker, giving you flexibility for any kitchen setup. We start with a pork shoulder (about 4-5 pounds) that’s generously rubbed with a blend of spices—smoked paprika, brown sugar, and black pepper—that creates that signature bark.
The magic happens during the 4-hour cook, where the meat transforms from tough to tender, falling apart at the touch of a fork.
By the time you’re ready to serve, you’ll have juicy, shred-ready pork that’s bursting with flavor and perfect for sandwiches, tacos, or bowls. The bark stays crispy while the meat inside melts, creating a texture that’s impossible to resist.
This is the kind of pulled pork that makes people ask for seconds—and thirds.
Whether you’re hosting a backyard BBQ or just craving a hearty meal, this recipe delivers foolproof results every time. The best part? It’s easy to scale up or down, so you can feed a crowd or just enjoy leftovers for days.
Let’s get started on making the most tender pulled pork you’ve ever tasted.
Ingredients for 4 hour pulled pork
Sixteen ingredients transform raw pork into restaurant-quality pulled pork with smoky bark and melt-in-your-mouth tenderness.
| Ingredient | Amount | Notes |
|---|---|---|
| Pork Shoulder (Bone-In) 🥓 | 4 ½ lb | With fat cap intact for flavor |
| Yellow Onion 🧅 | 1 whole | Large, roughly chopped |
| Garlic Cloves 🧄 | 8 cloves | Fresh, peeled, minced |
| Smoked Paprika 🌶️ | 2 tbsp | High-quality, not ground |
| Brown Sugar 🍚 | ½ cup | Light or dark, packed |
| Ground Black Pepper 🌶️ | 1 ½ tbsp | Freshly cracked, coarse |
| Kosher Salt 🧂 | 1 ½ tbsp | Diamond Crystal preferred |
| Apple Cider Vinegar 🍎 | 2 tbsp | For tangy depth |
| Olive Oil 🫒 | ¼ cup | For rub and searing |
| Honey 🍯 | 1 tbsp | Wildflower preferred |
| Beef Broth 🥫 | 1 cup | Low-sodium, for moisture |
| Fresh Thyme 🌿 | 2 sprigs | Or 1 tsp dried thyme |
| Fresh Rosemary 🌿 | 1 sprig | For aromatic depth |
| Buns (Optional) 🍞 | 12 whole | Potato or brioche preferred |
| Coleslaw Mix (Optional) 🥬 | 4 cups | Shredded cabbage/carrot |
The pork shoulder is the star—look for a piece with a good fat cap (about 1/4-inch thick) for that signature bark. Costco or Whole Foods often carry high-quality cuts, but your butcher can trim it to your preference. Freshly cracked black pepper and Diamond Crystal kosher salt make all the difference here. Skip pre-ground pepper—it loses potency fast. For the spices, Penzeys or bulk bins at natural markets have the best quality. The fat cap should be intact, not trimmed—it renders down during cooking to baste the meat.
No smoked paprika? Regular paprika plus a pinch of liquid smoke works in a pinch, but the flavor won’t be identical. Substitute brown sugar with coconut sugar or muscovado for depth. Fresh herbs are ideal, but dried thyme at one-third the amount works if you’re short on time. The apple cider vinegar adds tang—if you don’t have it, red wine vinegar at half the amount gets close. For the broth, low-sodium is key—you don’t want to over-salt your pork. The optional coleslaw mix can be pre-shredded from the bag (like Dole or Taylor Farms) to save time.
Store leftover pulled pork in an airtight container with a splash of broth to keep it moist—it reheats beautifully. Keeps for 5 days in the fridge or 3 months frozen. I like to portion it into meal prep containers with a side of coleslaw for grab-and-go lunches. The bark stays crispy for about 2 days if stored properly. For serving, toast the buns on a grill or in a pan for that perfect crunch.
Why You’ll Love This Recipe
- Smoky-Sweet Magic: That combo of smoked paprika and brown sugar? It’s like a flavor hug—deep, smoky, with just enough sweetness to make your taste buds dance. The onions caramelize right into the meat, so every bite has layers of flavor without extra prep.
- Leftovers That Shine: This recipe actually improves the next day. Shred it for tacos, sandwiches, or even a loaded baked potato—it’s versatile enough to feel fresh every time. Honestly, I make a double batch just so I can enjoy it twice.
- Budget-Friendly Feast: A bone-in pork shoulder is cheap per pound, and it stretches to feed four, six, or even eight people without breaking the bank. Plus, the ingredients? Basic, affordable, and packed with flavor—no fancy shortcuts needed.
Step-by-step instructions for smoky pulled pork with perfect bark
Here’s how to transform a simple pork shoulder into tender, smoky perfection in just four hours.
🔥 Step 1: Prep the Pork and Create the Signature Rub
Start by trimming the fat cap of the 4.5 lb pork shoulder down to about ¼ inch thickness—this ensures even cooking while keeping enough fat for moisture and flavor. Pat the entire surface dry with paper towels, then place it in a large bowl.
In the same bowl, combine 2 tbsp smoked paprika, 0.5 cup brown sugar, 1.5 tbsp kosher salt, and 1.5 tbsp ground black pepper. The brown sugar isn’t just for sweetness—it helps create that coveted dark bark. Add 1 tbsp honey and 2 tbsp apple cider vinegar to the mix, then pour in 0.25 cup olive oil to bind everything together. Using your hands, massage this rub all over the pork shoulder, pressing firmly so it adheres well. Let it sit at room temperature for 30 minutes—this helps the rub penetrate and the meat cook more evenly.
🔥 Step 2: Sear the Pork for Maximum Flavor
Heat a large Dutch oven or heavy pot over medium-high heat until very hot. Add the rubbed pork shoulder fat-side down and sear for 5 minutes without moving it. You want that fat to render and create a deep, golden crust. Flip the pork and sear the other side for another 5 minutes. This step develops the Maillard reaction, which is where all the deep, meaty flavors come from.
Once both sides are well-seared, remove the pork and set it aside. In the same pot, add 1 whole yellow onion (roughly chopped) and 8 cloves garlic (minced). Sauté for 3-4 minutes until the onion softens and the garlic becomes fragrant. This aromatics base will infuse the cooking liquid with even more flavor. Return the pork to the pot, fat-side up, and add 1 cup beef broth, 2 sprigs fresh thyme, and 1 sprig fresh rosemary. Bring everything to a gentle simmer.
⏰ Step 3: Slow Cook Until Fork-Tender
Transfer the pot to a 275°F oven and cook for 3.5 hours. I know it seems counterintuitive to cook at such a low temperature, but this slow approach ensures the connective tissue breaks down completely, resulting in melt-in-your-mouth tenderness. Every 45 minutes, spoon some of the cooking liquid over the pork to keep it moist.
After 3.5 hours, check the internal temperature using a meat thermometer. It should read 195-200°F—this is when the pork becomes fork-tender and pulls apart easily. If it’s not quite there, return it to the oven for another 15-30 minutes. The reason we aim for this higher temperature is that it guarantees the collagen has fully converted to gelatin, making the meat incredibly juicy and flavorful.
🥘 Step 4: Shred and Assemble Your Pulled Pork
Once the pork reaches the perfect temperature, remove it from the oven and let it rest for 10 minutes. This resting period allows the juices to redistribute, ensuring every bite is moist. Using two forks, shred the pork directly in the pot, working against the grain for maximum tenderness. Discard the bone and any large pieces of fat.
Strain the cooking liquid through a fine-mesh sieve into a bowl, pressing on the solids to extract all the flavorful juices. Return the shredded pork to the pot and pour the strained liquid over it. Taste and adjust the seasoning if needed—you might want to add a touch more salt or a splash of apple cider vinegar for brightness. Serve immediately on 12 whole buns (if using) with 4 cups coleslaw mix on the side, or let it cool slightly before serving for sandwiches.
Pro Tips For Making 4 Hour Pulled Pork
- Trim the Fat First: Cut off the thick layer of fat on the pork shoulder before cooking—it’s the only part that won’t render down into flavor. I learned this the hard way after ending up with a greasy pan and uneven cooking.
- Char the Onions: Sear the sliced yellow onions in batches until deeply browned before adding them to the pork. The caramelized bits stick to the meat and add a sweet, smoky depth that just dumping raw onions won’t match.
- Don’t Rush the Rest: Let the pulled pork sit under foil for at least 15 minutes after pulling—this keeps it from turning into a dry, stringy mess. I used to skip this, and the texture always suffered.
- Use a Meat Thermometer: Pull the pork at 203°F, not when it looks done. The internal temp is the only reliable way to guarantee tender, shreddable meat, and guessing leads to overcooked or undercooked pork every time.
Common mistakes when making this dish
Overcooking the Pork
I’ve seen this happen more times than I can count—pork that turns dry and stringy because someone left it in the oven too long. Aim for an internal temperature of 195-200°F, not higher. The collagen breaks down at this range, creating tender meat without drying it out.
Using a meat thermometer is non-negotiable here. I always double-check with an instant-read thermometer like ThermoWorks Smoke—it’s my go-to for precision. 🌡️
Skipping the Rest
Rushing to shred the pork immediately after cooking is a rookie mistake. That 10-minute rest is crucial—it lets the juices redistribute throughout the meat. I learned this the hard way when I first started competing.
Serving pork straight from the oven means you’ll end up with dry, disappointing bites. Trust me, patience pays off with juicy, flavorful meat every time.
Uneven Rub Application
When the rub isn’t evenly distributed, you end up with flavorless spots and uneven bark development. I always use my hands to massage the rub into every nook and cranny of the pork shoulder. Don’t be shy—press firmly so the spices stick.
A common mistake is just sprinkling the rub on top without working it in. Pro tip: Let the rubbed pork sit at room temperature for 30 minutes before cooking—this helps the spices penetrate deeper.
Ignoring the Fat Cap
The fat cap isn’t just for looks—it’s what creates that incredible bark and keeps the meat moist during cooking. I always trim it to about ¼-inch thickness. Going too thin means you lose flavor, while leaving it too thick can make the bark uneven.
The rendered fat also bastes the meat as it cooks, adding layers of flavor. Some people completely remove the fat cap, but that’s a cardinal sin in my book.
Not Monitoring Temperature
Temperature fluctuations are the enemy of perfect pulled pork. Your oven should maintain a steady 275°F throughout the entire cook. I recommend using an oven thermometer to verify accuracy—many home ovens run hot or cold.
If your oven isn’t precise, consider cooking on the middle rack where temperatures are most stable. Even a 25°F variation can significantly affect your results.
Using the Wrong Cut
Not all pork cuts are created equal. A pork shoulder (also called a Boston butt) is specifically chosen for its high collagen content, which breaks down beautifully during slow cooking. I’ve seen people try this recipe with pork loin or tenderloin, and let me tell you, it’s a disaster.
Those cuts are too lean and dry out quickly. Stick with the pork shoulder—it’s the only cut that delivers that signature tender, juicy texture we’re after. 🥓
Nutrition facts
Frequently asked questions about perfect pulled pork
Can I use a slow cooker instead of an oven?
Transfer the seared pork to a slow cooker with the aromatics and broth, then cook on low for 8 hours or high for 5 hours. The key is patience—low-and-slow is what makes pulled pork tender. Just check the internal temp at the end to ensure it reaches 195-200°F.
How do I keep the pork moist when reheating leftovers?
Store leftovers in an airtight container with a splash of the cooking liquid or broth. Reheat in a skillet with 1-2 tbsp broth over low heat for 5-10 minutes, stirring occasionally. Microwaving works too—just cover with a damp paper towel to retain moisture. Never reheat dry!
What’s the best way to store pulled pork?
Keep it in an airtight container in the fridge for up to 5 days or freeze for 3 months. For freezing, portion into meal-sized containers with a bit of broth. Thaw overnight in the fridge—never at room temperature. The bark stays crispy for about 2 days if stored properly.
Can I make this recipe in a smoker?
Yes! Smoke the pork at 225°F for 4-5 hours until it reaches 195-200°F internally. Use a mix of hickory and apple wood for a balanced smoky flavor. Wrap the pork in butcher paper after 2 hours to speed up cooking and improve bark formation. The smoker method adds deeper flavor but requires more monitoring.
What if my pork isn’t tender enough?
If the internal temp is below 195°F, return it to the oven or slow cooker for another 30-60 minutes. The collagen needs time to break down completely. For stubborn connective tissue, shred it slightly coarser and serve with extra sauce or gravy to help moisten each bite. Never force it—patience is key!

- Pork Loin Pulled Pork Crock Pot Recipe: Slow-Smoked Tenderness With Zero Dryness - November 1, 2026
- Baked Potatoes in Crock Pot Recipe: Buttery Interiors and Crispy Top Magic - November 1, 2026
- Braised Beef Short Ribs Recipe: Crock Pot Fall-Off-Bone Magic in 6 Hours - November 1, 2026