
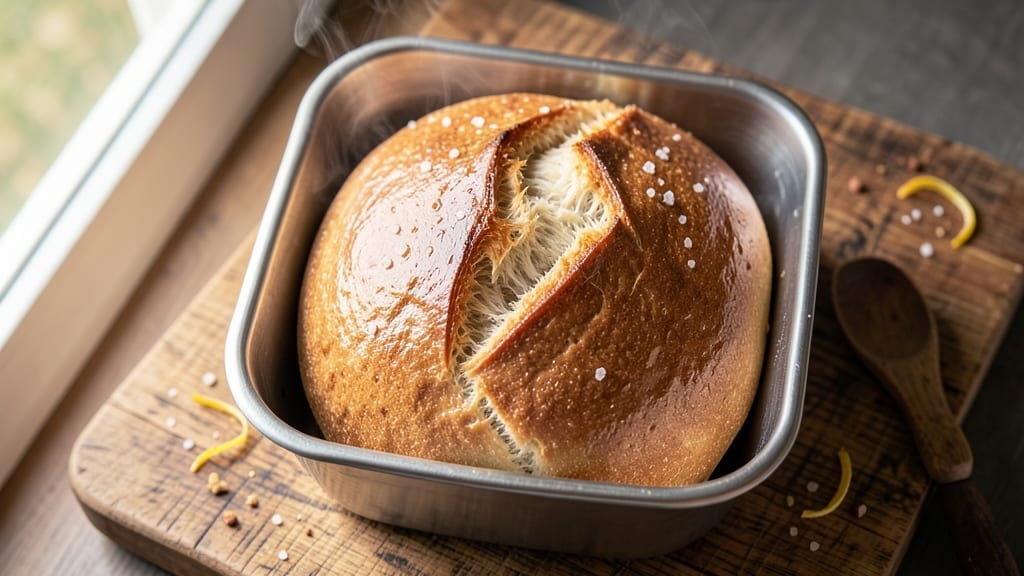
This 4-ingredient bread machine recipe proves you don’t need complexity to make a loaf that rivals artisanal bakery bread—just flour, water, yeast, and salt.
The bread machine does all the heavy lifting while you focus on other tasks, delivering a perfectly textured loaf with a crisp crust and airy interior that’s impossible to resist.
What makes this recipe truly remarkable is its foolproof simplicity—no fancy techniques, no kneading, and no guesswork, just consistent, reliable results every time.
The secret lies in the bread machine’s built-in cycles, which handle the kneading, rising, and baking for you. With just 30 minutes of active prep time and minimal cleanup, you’ll have a warm, golden loaf ready to slice.
This recipe works equally well for sandwich bread, dinner rolls, or even a rustic boules—just adjust the pan size in your machine settings. The dough develops naturally through the machine’s kneading cycle, creating that signature bread machine texture that’s both tender and slightly chewy.
What you’ll end up with is a loaf that’s crisp on the outside, soft in the middle, and packed with that comforting bread aroma that fills your kitchen.
The beauty of this method is its versatility—you can use it as a base for garlic bread, toast, or even French toast the next morning. Once you try this approach, you’ll never buy store-bought bread again.
For those who love customization, this simple base opens the door to endless variations—add herbs for a savory twist, seeds for extra crunch, or even a touch of honey for subtle sweetness.
The bread machine’s precision ensures your additions integrate perfectly, so you can experiment without fear of ruining the texture. Ready to bake with confidence?
Ingredients for 4 ingredient bread machine
Four pantry staples transform into bakery-style bread with zero effort.
| Ingredient | Amount | Notes |
|---|---|---|
| All-Purpose Flour 🌾 | 3 ½ cups | Unbleached, high-protein preferred |
| Active Dry Yeast 🍞 | 1 tbsp | Fresh yeast at half amount |
| Warm Water 💧 | 1 ¼ cups | 110-115°F for optimal activation |
| Kosher Salt 🧂 | 1 tsp | Diamond Crystal preferred |
The flour makes all the difference here. King Arthur or Bob’s Red Mill are my go-tos—they handle the machine’s kneading better than store brands. If you’re using whole wheat, replace up to half the all-purpose with whole wheat flour for a nuttier flavor (but expect a denser loaf). Yeast is the unsung hero—check the expiration date, and if it’s old, proof it in warm water with a pinch of sugar first to ensure it’s active. The water temp is critical: too hot kills the yeast, too cold slows fermentation. Aim for 110-115°F—that’s just warm to the touch.
No yeast? Instant yeast works 1:1, but activate it first in warm water with sugar. Running short on flour? Oat flour or almond flour can replace up to 10% of the all-purpose, though texture will change. Salt-free? Use 1/4 tsp baking soda instead, but the flavor won’t be identical. For a richer loaf, add 1 tbsp honey or sugar to the water—it feeds the yeast and adds subtle sweetness. The bread machine’s cycle handles everything, but if you’re curious, the dough should look shaggy but cohesive after kneading.
This loaf keeps beautifully—wrap it in a clean kitchen towel and store at room temperature for 2-3 days. For longer storage, freeze slices in a bag for up to 3 months. Toasting revives stale bread instantly. Doubled? Portion into two 9×5-inch pans for dinner rolls. The crust gets crispier the longer it cools, so resist slicing too soon. Leftovers? Perfect for croutons or breadcrumbs—just pulse in a food processor.
Why You’ll Love This Recipe
- No Pantry Panic: I’ll never stress over missing ingredients again—just flour, yeast, water, and salt. That’s it. The bread machine does all the heavy lifting while I sip my coffee, no measuring cups or guesswork.
- Crusty Yet Simple: Honestly, the texture surprises me every time—crisp golden crust with a soft, airy center, all from four ingredients. No fancy kneading or rising tricks, just pure, satisfying bread.
- Weeknight Wonder: I toss this dough together on Mondays, let it bake overnight, and wake up to warm bread for toast or sandwiches. Perfect for busy mornings when I’m already running late.
- Budget-Friendly Staple: A single batch costs me pennies—less than store-bought—and keeps for days. My kids grab slices for lunchboxes, and I slice the rest for toast or garlic bread. Zero waste, all flavor.
Step-by-step instructions for 4-Ingredient bread machine recipe
Your bread machine will do all the heavy lifting—just follow these simple steps for a perfect loaf every time.
Prepare the Ingredients for Optimal Activation
First, let’s get everything ready. Measure out the 3.5 cups all-purpose flour into the bread machine pan—pat it down lightly to remove any air pockets. This creates a more even base for the dough. In a separate small bowl, combine the 1 tbsp active dry yeast with the 1.25 cups warm water (between 110-115°F). The water should feel pleasantly warm to your wrist, like bathwater—not hot enough to kill the yeast.
While the yeast activates (you’ll see it start bubbling within 5 minutes), sprinkle the 1 tsp kosher salt directly into the flour in the bread machine pan. I like to use Diamond Crystal salt because it dissolves more evenly. Give the flour and salt a quick stir with a fork to distribute the salt completely. This step prevents any salt pockets that could create tough spots in your bread.
Mix the Dough in the Bread Machine
Once the yeast mixture is actively bubbling (this confirms it’s alive and ready to work), pour it into the flour in the bread machine pan. Add a wooden spoon and let the machine handle the mixing. Select your bread machine’s “Basic White Bread” setting—this cycle typically takes 3 to 3.5 hours total, including kneading, rising, and baking.
Watch the machine as it begins kneading. You’ll see the dough come together into a shaggy mass that gradually becomes smoother and more elastic. The machine will automatically add kneading time if needed, but with these ingredients, it usually takes about 5 to 7 minutes of active kneading before the dough pulls away from the sides. This is when you know the gluten is developing properly for a good structure.
Let the Machine Handle Rising and Baking
After kneading completes, the machine will automatically move to the first rise. The dough will double in size within 45 to 60 minutes—you’ll see it press against the sides of the pan. This is your cue that fermentation is working perfectly. The machine will then shape the dough and begin the second rise, which typically takes another 20 to 30 minutes before baking begins.
During baking, your kitchen will fill with that incredible bread aroma. The machine will automatically bake the loaf until the internal temperature reaches 190-210°F and the crust turns a beautiful golden brown. The whole process is completely hands-off—just let the machine do its magic. Most machines take about 30 to 45 minutes for baking, but timing can vary slightly depending on your specific model.
Cool and Enjoy Your Artisan Loaf
When the cycle completes, remove the bread from the pan immediately and place it on a wire rack to cool for at least 30 minutes. This cooling step is crucial—it allows the steam inside the bread to escape gradually, preventing a gummy texture. If you cut into it too soon, the crumb will be uneven and moist. I know it’s tempting, but patience here makes all the difference.
Once cooled, slice the bread to reveal a beautiful open crumb structure with even holes throughout. The crust should be crisp and slightly caramelized, while the interior remains soft and pillowy. This simple recipe delivers a loaf that rivals many store-bought artisan breads—all with just four ingredients and minimal effort. Store any leftovers in an airtight container for up to 3 days, or freeze slices for later use.
Pro Tips For Making 4 Ingredient Bread Machine
- MEASURE WATER ACCURATELY: The bread machine’s water cup isn’t just a guess—use a liquid measuring cup instead. I learned this the hard way when my dough turned out gummy because I eyeballed it, and now I double-check every time.
- USE A SCALE FOR FLOUR: Scooping flour from the bag packs it down, adding extra grams you don’t need. Spoon it into the cup, then level it off—this keeps your dough from being too dense or too light.
- DON’T SKIP THE KNEADING TIME: Even if the machine says “dough,” let it run the full cycle. I once stopped early to check, and the bread turned out dense and flat—turns out, those extra minutes make all the difference.
- ADD SALT LAST: Mixing salt into the flour first can kill the yeast before it activates. Sprinkle it directly into the water or dough at the end—your bread’s rise (and flavor) will thank you.
Make-ahead tips for leftovers
Prep Ahead Strategy
I always recommend prepping your ingredients the night before to save time in the morning. Measure out your 3.5 cups all-purpose flour and 1 tsp kosher salt into a large bowl, then cover it with a damp towel.
Store the yeast in its original package in the fridge—it’ll stay fresh longer. The next morning, just activate the yeast in 1.25 cups warm water and pour it into the flour mixture. This two-step approach cuts your active prep time from 30 minutes to just 10 minutes. 💡
Storage Solutions
For long-term storage, I freeze the loaf in 1-inch thick slices wrapped individually in plastic wrap. Place them in a quart-sized freezer bag with all the air squeezed out—this prevents freezer burn and keeps them fresh for up to 3 months.
When you’re ready to eat, simply toast the frozen slices directly from the freezer in your toaster. The crust will get extra crispy from the cold start!
Batch Baking
Double the recipe for two loaves—just divide the dough between two 9×5-inch pans in your bread machine. I bake them simultaneously by using two identical machines or alternating cycles. This is perfect for meal prep: slice one loaf and freeze it, while keeping the other at room temperature.
You’ll always have fresh bread on hand without extra effort. The texture stays consistent when baked in batches.
Reviving Stale Bread
Even with perfect storage, bread can lose its freshness after a day or two. To revive it, I wrap the loaf in a damp paper towel and microwave it for 10-15 seconds at 50% power.
The steam softens the crumb while keeping the crust intact. For extra crispiness, toast the revived slices in a 350°F oven for 3-5 minutes. This works wonders for sandwich bread or croutons. ✨
Make-Ahead Dough
If you want to go the extra mile, you can prepare the dough up to 12 hours ahead and let it rise in the fridge. After mixing in the bread machine, remove the dough and place it in a greased bowl, cover tightly with plastic wrap, and refrigerate.
When ready to bake, let it sit at room temperature for 1 hour before placing it back in the machine to complete the cycle. This cold fermentation develops deeper flavors and improves texture.
Freezer-Friendly Add-Ins
Want to customize your bread for future baking? Mix in 1 tbsp dried herbs or 2 tbsp seeds (like sesame or poppy) with the flour before starting the machine. These additions freeze beautifully and add great texture to toast or sandwiches later.
Just be sure to distribute them evenly so every slice gets a taste. The bread machine’s kneading will incorporate them perfectly. 🌾
Nutrition facts
Frequently asked questions
Can I use whole wheat flour instead of all-purpose?
You can replace up to half the all-purpose flour with whole wheat, but expect a denser loaf. For best results, use a 50/50 blend—whole wheat adds nutrition but absorbs more liquid. If your machine struggles with the texture, reduce the water by 1-2 tablespoons to maintain the right consistency.
Why did my bread come out dense or gummy?
This usually happens when the yeast isn’t active (water too hot/cold) or the dough didn’t knead enough. Always check yeast expiration and use water between 110-115°F. If your machine has a “dough only” cycle, try that first—it gives more control over kneading time. Overloading the pan can also cause issues.
Can I make this recipe without a bread machine?
Mix the ingredients by hand, knead for 5-7 minutes until smooth, then let rise for 1-2 hours** until doubled. Shape into a loaf, place in a greased pan, and bake at 375°F for 25-30 minutes until golden. The texture will be slightly denser but still delicious.
How do I adjust the recipe for a smaller bread machine?
Reduce the flour to 2.5 cups and water to 1 cup while keeping yeast and salt the same. This maintains proper ratios. Smaller machines often need slightly less liquid to prevent overflow. If your pan is very shallow, reduce water by 1-2 tablespoons for better rise. Always use the “basic white bread” setting.
Can I add sweeteners or mix-ins to this basic recipe?
Yes! For subtle sweetness, add 1 tbsp honey or sugar to the water. For mix-ins, sprinkle 1 tbsp seeds or herbs into the flour before starting. The machine’s kneading will distribute them evenly. Avoid adding more than 2 tbsp total mix-ins—too much can interfere with gluten development.

- 12 Bean Chili Recipe: Hearty Slow-Cooked Depth With 12 Legumes - October 17, 2026
- 5 Seed Bread Recipe: Nutty Crunch and Artisan Flavor in One Loaf - October 17, 2026
- 1 Lb Macaroni Salad Recipe: Bold, Crunchy, and Crowd-Pleasing - October 17, 2026