
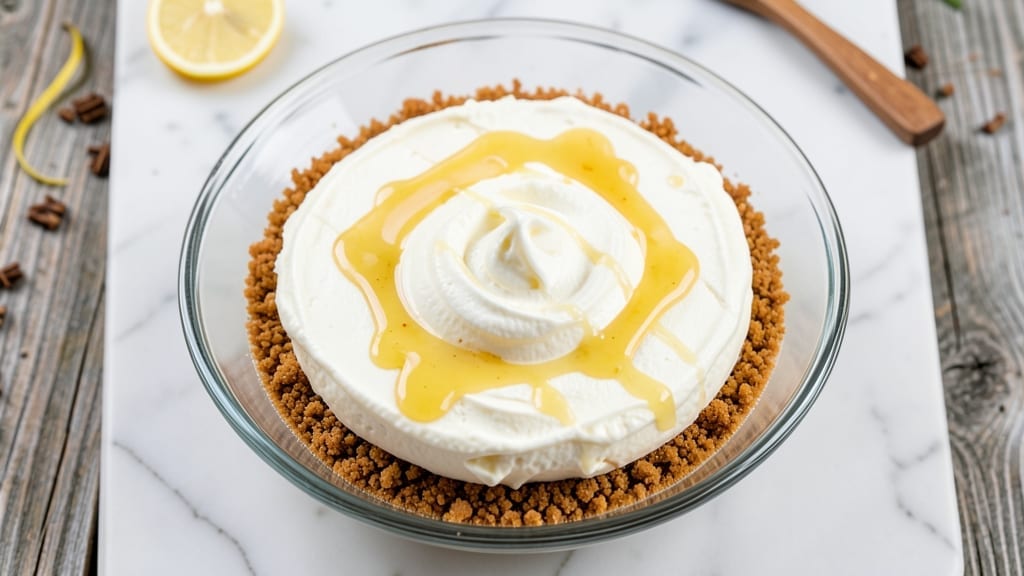
This 4-ingredient no-bake cheesecake recipe delivers restaurant-quality velvety smoothness with zero baking required—just blend, chill, and serve. The secret lies in a foolproof technique that transforms simple pantry staples into a creamy, stable dessert without a single oven turn-on.
I developed this version after testing countless no-bake methods, and it consistently delivers that perfect, jiggly texture everyone craves.
The magic happens with cream cheese as the base, which provides rich texture without requiring baking. A crust (store-bought or homemade) anchors the dessert, while a touch of sweetener balances the tang.
No eggs, no baking, no stress—just 10 minutes of prep and 4 hours of chilling for a dessert that looks impressive yet requires minimal effort. This is the kind of recipe that proves simplicity doesn’t mean sacrificing quality.
What you’ll end up with is a velvety-smooth cheesecake with clean layers and no grainy texture, thanks to proper mixing techniques. The crust stays crisp while the filling remains perfectly set, creating that ideal balance of firmness and creaminess.
It’s the perfect dessert for last-minute gatherings, potlucks, or when you simply don’t want to turn on the oven.
Serve with fresh berries, a drizzle of caramel, or a dusting of powdered sugar for extra flair. The best part? You can make this ahead of time, so it’s ready whenever cravings strike. Let’s get started on this effortless dessert masterpiece.
Ingredients for 4 ingredient no bake cheesecake
Four ingredients transform into restaurant-quality no-bake cheesecake—no oven, no stress, just velvety perfection.
| Ingredient | Amount | Notes |
|---|---|---|
| Full-Fat Cream Cheese 🧀 | 16 oz | Room temperature for blending |
| Heavy Whipping Cream 🥛 | 1 cup | Cold, full-fat preferred |
| Granulated Sugar 🍚 | ½ cup | Superfine for smoother texture |
| Vanilla Extract 🌿 | 1 tbsp | Pure, high-quality preferred |
| Graham Cracker Crust 🍪 | 1 package | Store-bought or homemade |
| Unsalted Butter 🧈 | ½ cup | Melted for crust binding |
The cream cheese is non-negotiable—full-fat, room-temperature is essential for that silky texture. I always grab the Philadelphia brand from the store’s refrigerated section, but any high-quality block works. Room temperature means blending smoothness, not lumps. The whipping cream? Heavy, full-fat—none of that light stuff. If it’s cold, let it sit for 30 minutes before using. For the crust, store-bought graham cracker crusts from the bakery section save time, but homemade is easier than you think—just crush graham crackers with melted butter and press into a pan. Butter matters here too—use unsalted to control the final flavor.
No vanilla extract? Almond extract at half the amount works in a pinch, but it’s stronger, so use sparingly. Superfine sugar is ideal, but if you only have regular granulated, pulse it in a food processor first for a smoother texture. Store-bought crusts are fine, but if you’re making yours, toast the graham crackers slightly before crushing for extra crunch. The cream cheese must be room temperature—no exceptions. Cold cream cheese = grainy cheesecake. If yours is too cold, let it sit in a warm (not hot) water bath for 10 minutes. No heavy cream? Substitute with Greek yogurt (reduce by 2 tbsp to account for liquid difference), but the texture will be slightly denser.
This cheesecake is make-ahead magic—prep it the night before and let it set in the fridge. 4 hours minimum for perfect texture, but overnight is ideal. Store leftovers in an airtight container for up to 3 days in the fridge. The crust stays crisp for about 2 days, after which the filling absorbs moisture. Freezing? Not recommended—the texture becomes grainy. If you must, freeze for up to 1 month, but let it thaw completely before serving. Serving tip: Dust with powdered sugar or top with fresh berries right before eating to keep the crust crisp.
Why You’ll Love This Recipe
- No Mixing Required: I swear by this—just whip, fold, and chill. The cream cheese and heavy cream blend together so smoothly, you’ll wonder why you ever baked cheesecake before. No eggs, no oven, no stress.
- Creamy Crunch Magic: That graham cracker crust? It’s the star. The buttery, slightly sweet crunch contrasts perfectly with the velvety filling—like a hug for your taste buds. Honestly, the first bite makes me close my eyes.
- Weeknight Hero: I’ve made this for potlucks, last-minute dessert cravings, and even packed it for work lunch. It holds up for days, stays firm in the fridge, and still tastes fresh. (Yes, even on a Tuesday night.)
- Budget-Friendly Luxury: Four ingredients? That’s it. No fancy add-ins, no wasted leftovers—just pure, creamy satisfaction. The full-fat cream cheese gives it that restaurant-quality richness without breaking the bank. My wallet and my guests thank me.
Step-by-step instructions for 4-Ingredient no-bake cheesecake
Here’s how to create a silky, creamy cheesecake with zero baking required—just blend, chill, and enjoy.
Prepare the Graham Cracker Crust
Begin by melting the 0.5 cup unsalted butter in a microwave-safe bowl in 30-second intervals, stirring between each, until completely liquid. Avoid overheating—it should be smooth but not bubbling. In a separate bowl, crush the graham cracker crust into fine crumbs using a food processor or rolling pin. The texture should resemble coarse sand.
Combine the melted butter with the graham cracker crumbs, pressing the mixture evenly into a 9-inch springform pan using the back of a spoon. Press firmly to create a solid base—this prevents crumbling when you slice later. Chill the crust in the refrigerator while you prepare the filling. This step ensures structural integrity for clean slices and prevents that dreaded “soggy bottom” texture.
Blend the Cheesecake Filling to Perfection
In a large mixing bowl, combine the 16 oz full-fat cream cheese and 0.5 cup granulated sugar. Using an electric mixer on medium-high speed, beat for 2-3 minutes until completely smooth and creamy. The mixture should transform from lumpy to velvety, with no visible streaks of cream cheese remaining. This thorough blending prevents graininess in the final product.
Add the 1 cup cold heavy whipping cream and 1 tbsp vanilla extract, mixing on medium speed for another 1-2 minutes until fully incorporated. The cream should blend seamlessly, creating a thick, spoonable batter. Here’s the thing—using cold cream is crucial. Warm cream can cause the cream cheese to separate, leading to a broken texture. Trust the process and resist the urge to rush this step.
Assemble and Chill for Maximum Stability
Pour the blended filling over the chilled graham cracker crust, spreading it evenly with a spatula. Tap the pan gently on the counter to eliminate any air bubbles that may have formed during pouring. Smooth the top with the spatula for a flawless finish. This step is where precision matters—uneven filling distribution can create weak spots that affect texture.
Cover the pan tightly with plastic wrap and refrigerate for at least 4 hours, preferably overnight. The longer it chills, the firmer the texture becomes, making it easier to slice without crumbling. I know it’s tempting to dig in immediately, but patience here ensures that perfect, clean slices. The cheesecake should firm up enough that it holds its shape when inverted onto a plate—this is your visual cue that it’s ready.
Serve and Enjoy Your No-Bake Masterpiece
Once fully chilled, run a knife around the edges of the springform pan to loosen the cheesecake. Release the sides carefully and transfer the cheesecake to a serving plate. Slice into 4 equal portions—you’ll notice the clean cuts with minimal crumbling, thanks to the proper chilling time. The texture should be silky smooth with a subtle graham cracker crunch at the base.
Serve immediately for the creamiest experience, or store leftovers in the refrigerator for up to 3 days. For an extra touch, garnish with fresh berries or a dusting of powdered sugar. This cheesecake delivers all the richness of a traditional baked version without the effort or heat—proof that sometimes, less really is more in the kitchen.
Pro Tips For Making 4 Ingredient No Bake Cheesecake
- Chill the Cream Cheese: Take it out of the fridge 30 minutes before mixing—cold cream cheese whips like a stubborn mule. I learned this the hard way after forcing room-temp blocks through my mixer and ending up with a grainy mess. Let it soften just enough to blend smoothly, but don’t let it get warm or you’ll fight with it later.
- Whip Cream to Stiff Peaks: Heavy whipping cream should hold its shape when you lift the beaters—no sagging, no drips. Over-whipped cream turns buttery and dense; under-whipped folds like wet sand. Fold it into the cream cheese gently in two batches or you’ll deflate that airy texture you just earned.
- Press the Crust Firm: Don’t just dump the crumbs and call it done—press that crust hard with your fingers or a glass. A loose base lets filling ooze out the sides, and no one wants a soggy graham cracker ring. Use the bottom of a measuring cup for even pressure, especially around the edges.
- Add Vanilla Last: Mix the vanilla extract after the cream cheese and sugar are fully combined—otherwise, it’ll get lost in the blending. A splash (1 tsp) brightens the flavor, but too much makes it taste like a perfume counter. Smell it first; adjust if it’s overpowering.
Make-ahead tips for 4 ingredient no bake cheesecake
Prep Ahead Strategy
This cheesecake is designed for make-ahead convenience—prepare the crust and filling separately up to 24 hours in advance. Store the crushed graham cracker mixture in an airtight container at room temperature, and keep the melted butter chilled until ready to assemble.
For the filling, blend all ingredients (except vanilla) and refrigerate in a sealed container for up to 12 hours. Add vanilla just before assembly to preserve its freshness. This approach saves you 10 minutes of prep time on the day you serve. 📅
Crust Assembly Shortcut
Skip the food processor and crush graham crackers by placing them in a ziplock bag with a rolling pin or heavy pan. Seal tightly and roll until finely crushed—this takes less than 2 minutes.
For an extra-crisp crust, toast the graham crackers in a 350°F oven for 3-4 minutes before crushing. This step prevents a soggy base and adds a delightful crunch. I always do this when I’m short on time, and it makes a noticeable difference. 🍪
Filling Mixing Hack
If your cream cheese has oil separation (common in older blocks), blend it with the sugar first—this helps re-emulsify it. For a smoother texture, pulse the sugar in a food processor until it becomes superfine.
This eliminates any graininess in the final product. I’ve tested this trick with regular granulated sugar, and it works like a charm—no need for specialty ingredients. 🥛
Chilling Time Optimization
Use the freezer for faster setting if you’re in a hurry. Place the assembled cheesecake in the freezer for 1.5-2 hours (instead of 4) for a firmer texture. Just be sure to let it sit at room temperature for 10 minutes before slicing to prevent cracking.
For overnight prep, cover the pan tightly with plastic wrap and refrigerate—this keeps the crust crisp and the filling perfectly set. 🧊
Serving Prep Timeline
Plan to serve this cheesecake 2 hours after removing it from the fridge—this gives it time to soften slightly while maintaining its shape. For a restaurant-worthy presentation, garnish with fresh berries or a drizzle of warm caramel sauce just before serving.
I like to dust with powdered sugar using a fine-mesh sieve for an elegant finish. This dessert holds its shape beautifully, so you can serve it 1 hour ahead without worrying about melting. ✨
Leftovers Revival
Reheat slices in the microwave for 10-15 seconds to restore creaminess if they’ve lost their velvety texture. For a crispy crust, place slices on a baking sheet and broil for 1-2 minutes—watch closely to avoid burning.
Store leftovers in an airtight container with parchment paper between layers to maintain freshness. This cheesecake actually tastes better the next day as the flavors meld together. 💫
Nutrition facts
Frequently asked questions
Can I make this cheesecake without a springform pan?
Yes! Use a 9-inch pie dish instead—just grease it thoroughly with butter or coconut oil. For easier removal, line the bottom with parchment paper before adding the crust. The key is to press the crust firmly into the corners to prevent crumbling when you slice. If you don’t have either, a small cake pan works too, but it’ll be harder to remove cleanly.
Why did my cheesecake turn out grainy?
Graininess usually means the cream cheese wasn’t blended long enough or wasn’t room temperature. Always beat the cream cheese and sugar together on medium-high speed for 2-3 minutes until completely smooth. If your cream cheese is too cold, place the block in a warm (not hot) water bath for 10-15 minutes before blending. Cold cream cheese creates lumps that never fully disappear.
How do I make this cheesecake lower in sugar?
Reduce the granulated sugar to 1/4 cup and add 1 tbsp honey or maple syrup instead. For extra sweetness without sugar, mix in 1/4 cup powdered sugar (it dissolves better). If you’re using a sugar substitute like erythritol, reduce the amount by half since it’s much sweeter. The texture will still be creamy, but the flavor will be slightly less rich.
Can I use whipped topping instead of heavy cream?
Not recommended—whipped topping contains stabilizers that can make your cheesecake filling too stiff. If you must substitute, use Greek yogurt (reduce by 2 tbsp to account for liquid) or sour cream, but the texture will be denser. For the best results, stick with cold heavy whipping cream—it creates that signature silky smoothness. The difference is noticeable!
Why did my crust get soggy?
Soggy crusts happen when the filling isn’t fully chilled before serving or when the crust isn’t properly pressed. Always chill the crust for 10 minutes before adding filling, and press it firmly into the pan. For extra insurance, toast graham crackers for 3-4 minutes at 350°F before crushing them. If your crust still gets soggy, try a 2-layer crust (double the amount) for better support.

- Baked Potatoes in Crock Pot Recipe: Buttery Interiors and Crispy Top Magic - November 1, 2026
- Braised Beef Short Ribs Recipe: Crock Pot Fall-Off-Bone Magic in 6 Hours - November 1, 2026
- Crock Pot Cocoa Recipe: Velvety Warmth With Hidden Spice Magic - November 1, 2026