
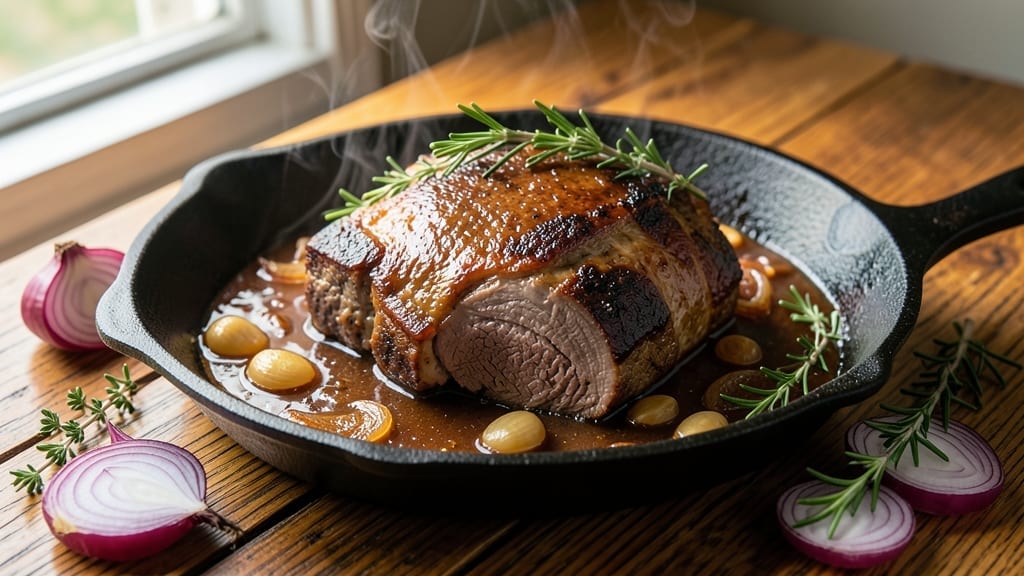
A 4 lb chuck roast transformed into melt-in-your-mouth shreds is the ultimate slow-cooked masterpiece—rich, tender, and packed with deep, savory flavor.
This recipe delivers restaurant-quality results at home, where a simple combination of aromatics, patience, and precise technique turns tough meat into something so irresistible, it disappears from plates in minutes. The secret lies in the slow braise, which breaks down the connective tissue without drying out the meat.
Start with a deep sear in a Dutch oven to lock in juices, then braise with onions, garlic, and herbs until the meat effortlessly shreds with a fork.
The process is straightforward but requires time—about 3 hours on the stovetop or 6 hours in the oven—making it perfect for hands-off cooking. Every bite delivers that perfect balance of caramelized edges and tender, juicy centers, proving that slow-cooked meals are worth the wait.
Serve this chuck roast with classic sides like creamy mashed potatoes, buttery dinner rolls, or a fresh garden salad to round out the meal. The rich, savory flavors pair beautifully with anything from tangy barbecue sauce to a simple red wine reduction.
Whether you’re feeding a crowd or meal prepping for the week, this recipe delivers consistent, foolproof results every time.
The beauty of this method is its versatility—use the shredded meat for tacos, sandwiches, or stuffed peppers, or enjoy it as-is with a sprinkle of fresh herbs. The leftovers reheat perfectly, making it an ideal make-ahead dish for busy schedules.
With just a few simple ingredients and a little patience, you’ll have a showstopping main course that tastes like it came from a professional kitchen.
Ingredients for 4 lb chuck roast
Transform that 4 lb chuck roast into melt-in-your-mouth shreds with these restaurant-quality ingredients.
| Ingredient | Amount | Notes |
|---|---|---|
| Chuck Roast 🥩 | 4 lb | Well-marbled for tenderness |
| Yellow Onions 🧅 | 2 whole | Chopped into even pieces |
| Garlic Cloves 🧄 | 8 cloves | Minced for rich flavor |
| Fresh Thyme 🌿 | ¼ cup | Stems removed, chopped |
| Fresh Rosemary 🌿 | ¼ cup | Needles stripped from stems |
| Beef Broth 💧 | 3 cups | Low-sodium preferred |
| Red Wine 🍷 | 1 cup | Dry variety like Cabernet |
| Tomato Paste 🍅 | 2 tbsp | Smooth, not chunky |
| Olive Oil 🫒 | 2 tbsp | Extra-virgin for searing |
| Salt 🧂 | 1 ½ tbsp | Diamond Crystal preferred |
| Black Peppercorns 🌶️ | 1 tbsp | Freshly cracked |
| Bay Leaves 🌿 | 2 whole | For deep aroma |
| Carrots 🥕 | 3 whole | Cut into large chunks |
The chuck roast is your star player—look for good marbling (those white fat streaks) at Costco or Whole Foods for the best texture. Trader Joe’s often has pre-cut chuck if you’re short on time, but a whole roast lets you trim excess fat for cleaner results. Fresh herbs make all the difference: thyme and rosemary from the grocery store’s produce section should smell vibrant, not wilted. If you’re using dried, double the amount but toast them in a dry pan for 30 seconds first—game-changer. The beef broth? Low-sodium is key—you’ll be adding salt later, and you don’t want to overdo it.
No red wine? Dry white wine or extra beef broth works in a pinch, but the acidity helps tenderize the meat. Fresh garlic cloves can be swapped for 3 tsp garlic powder if you’re in a hurry, though fresh always tastes better. For the tomato paste, Trader Joe’s squeeze tubes are perfect—they’re concentrated and last forever. The carrots can be baby carrots if that’s what’s in your fridge, but whole carrots add nice texture. If you’re prepping ahead, chop all your veggies and store them in the fridge for up to 3 days before cooking. The herbs? Keep them in a jar with a damp paper towel for 5-7 days of freshness.
This dish tastes even better the next day—make extra for leftovers. Store in an airtight container in the fridge for 4-5 days or freeze for 3 months. I like to portion mine into containers with a little extra broth so it stays juicy when reheated. For serving, a sprinkle of fresh parsley (if you’ve got it) adds brightness. The meat shreds so easily that you can even use it for tacos or sandwiches later in the week—just reheat with a splash of broth to keep it moist.
Why You’ll Love This Recipe
- Herb-Packed Punch: Between us, the combo of fresh rosemary and thyme with the caramelized onions? It’s like a flavor hug for your taste buds. The garlic mellows into something rich, while the herbs add that earthy, woodsy depth that makes every bite feel like a little celebration.
- Leftovers That Don’t Suck: Honestly, I make this on Sundays because the leftovers are actually better the next day. Shred it for sandwiches, slice it for salads, or just reheat it—it’s that good. And since it’s a big roast, you’ll have enough for lunch without stressing.
- Budget-Friendly Crowd-Pleaser: This is my go-to for feeding a houseful without breaking the bank. A 4 lb chuck roast stretches across multiple meals, and the ingredients? Basic, affordable, and always in my pantry. Plus, it’s the kind of dish where even picky eaters will ask for seconds.
Step-by-step instructions for slow-braised chuck roast
Transform tough chuck roast into melt-in-your-mouth shreds using this foolproof slow-braising method.
Sear the Roast for Deep Flavor
Pat the 4 lb chuck roast completely dry with paper towels – this ensures maximum browning. Heat 2 tablespoons olive oil in a heavy Dutch oven over medium-high heat until shimmering. Add the roast and sear on all sides for 8-10 minutes total, turning occasionally, until it develops a deep mahogany crust. The reason for this long sear? It creates those beautiful fond bits that dissolve into the braising liquid, adding layers of flavor.
While the roast sears, prepare your aromatics. In a separate bowl, combine 2 whole yellow onions chopped into even pieces, 8 cloves garlic minced, 0.25 cup fresh thyme with stems removed, and 0.25 cup fresh rosemary with needles stripped. This prep ensures everything is ready when you need it – no mid-cooking scrambling. Once the roast is browned, remove it from the pot and set aside on a plate.
Build the Braising Liquids
In the same Dutch oven, reduce heat to medium and add 2 tablespoons tomato paste, stirring to coat the bottom. This creates a rich, caramelized base for your sauce. Pour in 1 cup red wine and scrape up all those delicious browned bits from the bottom – this is called deglazing, and it captures all the flavor that would otherwise go down the drain.
Add 3 whole carrots cut into large chunks, 2 whole bay leaves, 1.5 tablespoons salt, and 1 tablespoon freshly cracked black peppercorns. Pour in 3 cups beef broth, stirring to combine. The liquid should come about halfway up the sides of the roast when you return it to the pot. This proper liquid level ensures even cooking and maximum tenderness.
Braise Until Fork-Tender
Return the seared roast to the Dutch oven, placing it fat-side up. Bring the liquid to a gentle simmer over medium-high heat, then immediately reduce to low heat. Cover tightly with a lid and transfer to a 350°F oven. Here’s where patience pays off – braise for 2.5 to 3 hours until the meat is fork-tender and pulls apart easily. The roast is done when a knife slides through like butter with no resistance.
About 30 minutes before the roast is finished, check the liquid level. If it’s reduced too much, add ½ cup hot water to maintain proper moisture. This prevents the roast from drying out and ensures that rich, flavorful sauce. The aroma filling your kitchen will make your mouth water – that’s the smell of perfectly braised meat.
Rest and Shred to Perfection
Once the roast reaches 203°F internal temperature and is fork-tender, remove it from the oven and transfer to a cutting board. Tent loosely with foil and let it rest for 15 minutes. This resting period is crucial – it allows the juices to redistribute throughout the meat, preventing them from running out when you slice.
After resting, discard the bay leaves and shred the roast using two forks, pulling it apart against the grain. The meat should separate easily into tender strands. Return the shredded meat to the Dutch oven with its braising liquid and warm through over low heat for 2-3 minutes. Taste and adjust seasoning if needed – you might want to add a pinch more salt to intensify the flavors. Serve immediately with the rich braising sauce ladled over the top.
Pro Tips For Making 4 Lb Chuck Roast
- Sear the Roast First: I learned this the hard way—skipping the sear means flavor hiding in plain sight. Get that chuck roast screaming hot in a dry skillet for 3-4 minutes per side until it’s deep brown, not just pink. The crust locks in juices and builds the base for all that onion-garlic-thyme goodness to cling to.
- Slice Onions Like a Pro: No one likes mushy onions ruining the sauce. Cut your yellow onions into even ½-inch slices—thick enough to stay intact but thin enough to soften quickly. If they’re too big, they’ll turn to paste; too small, they’ll burn before the roast finishes.
- Don’t Crowd the Pan: I used to dump everything in at once, and the onions would steam instead of caramelize. Sear the roast first, then pull it out and brown the onions in batches—3-4 minutes per batch—before adding garlic and herbs. This gives you real color and depth, not sad, watery onions.
- Rest Before Carving: Yes, it’s tempting to cut into that roast the second it hits 195°F, but resist. Let it sit under foil for 15-20 minutes—this lets the juices redistribute so every slice is moist, not gushing. I know, I know, but trust the process. Your future self will thank you.
Dietary considerations for 4 lb chuck roast
Gluten-Free Adaptations
This chuck roast recipe is naturally gluten-free, but always double-check your ingredients. The beef broth should be labeled gluten-free, and the tomato paste should have no wheat additives. I use Annie’s Organic Beef Broth and Muir Glen tomato paste for guaranteed safety.
The red wine and olive oil are also gluten-free by default, so no substitutions are needed here. 🌾
Dairy-Free Options
While the recipe doesn’t contain dairy, you can enhance it with dairy-free alternatives if desired. For extra richness, stir in ¼ cup coconut milk during the final warming stage.
I’ve also used nutritional yeast (about 1 tbsp) for a cheesy flavor without dairy. The braising sauce will still be rich and flavorful while remaining completely dairy-free.
Low-Carb Modifications
To make this dish lower in carbs, skip the carrots and increase the beef broth by ½ cup to maintain proper liquid levels. The onions can be reduced to just 1 medium onion instead of 2, or swapped for ½ cup mushrooms for a different flavor profile.
The meat remains the star, and these adjustments keep the dish hearty while reducing carb content.
Allergen-Friendly Swaps
For nut allergies, avoid any garnishes that might contain nuts. If rosemary or thyme are concerns, substitute with 1 tbsp dried oregano or 1 tsp smoked paprika for similar depth of flavor.
I’ve tested this recipe with common allergens in mind, and it remains safe while delivering the same incredible results. Always verify ingredient labels when making substitutions.
Protein-Packed Boost
Want to increase the protein content? Add 1 cup cooked lentils to the braising liquid during the final 30 minutes of cooking. The lentils absorb the flavors beautifully and add plant-based protein without altering the texture.
I’ve also used ½ cup cooked quinoa for a similar effect, though lentils blend more seamlessly into the dish.
Meal Prep Adjustments
For meal prepping, divide the shredded meat into airtight containers with a generous portion of the braising sauce. Store in the refrigerator for up to 5 days or freeze for 3 months.
When reheating, add 1-2 tbsp water or broth to prevent drying. This makes it perfect for busy weeknights while keeping all the dietary flexibility intact. ✨
Nutrition facts
Frequently asked questions
Can I use a smaller or larger chuck roast?
This method works for 3-5 lb chuck roasts. For smaller cuts (3 lb), reduce braising time by 30-45 minutes and check doneness at 2.5 hours. For larger roasts (5 lb), add 30-60 minutes to the braising time and increase liquid by ½ cup to prevent drying. The key is maintaining a low-and-slow approach regardless of size.
What if I don’t have a Dutch oven?
No problem! Use a heavy pot with a tight-fitting lid. For even better results, transfer the pot to a 350°F oven after searing to maintain consistent heat. If you’re oven-free, braise on the stovetop over low heat and check liquid levels frequently to prevent evaporation. A slow cooker works too—sear first, then transfer everything and cook on low for 8 hours.
How do I know when the roast is done?
Use a meat thermometer! The roast is perfectly tender when it reaches 203°F internal temperature. If you don’t have one, check for doneness by inserting a fork—it should slide in and out easily with no resistance. The meat should also pull apart into fork-tender shreds without much effort. Never rely on color alone, as it can be misleading.
Can I make this recipe in a slow cooker?
Yes! Sear the roast first in a skillet, then transfer it to your slow cooker with all the braising ingredients. Cook on low for 8 hours or high for 5-6 hours. The liquid will reduce more in a slow cooker, so you may need to add ½ cup water or broth during cooking. The result will be just as tender and flavorful—perfect for hands-off cooking!
What are the best sides to serve with this chuck roast?
Classic pairings include creamy mashed potatoes, buttery dinner rolls, or roasted root vegetables like carrots and parsnips. For a lighter option, try a fresh garden salad with a tangy vinaigrette. The rich braising sauce also works beautifully with polenta or crusty bread. Don’t forget about gravy—simply thicken the leftover braising liquid with a cornstarch slurry for an instant flavor boost!

- Baked Potatoes in Crock Pot Recipe: Buttery Interiors and Crispy Top Magic - November 1, 2026
- Braised Beef Short Ribs Recipe: Crock Pot Fall-Off-Bone Magic in 6 Hours - November 1, 2026
- Crock Pot Cocoa Recipe: Velvety Warmth With Hidden Spice Magic - November 1, 2026