
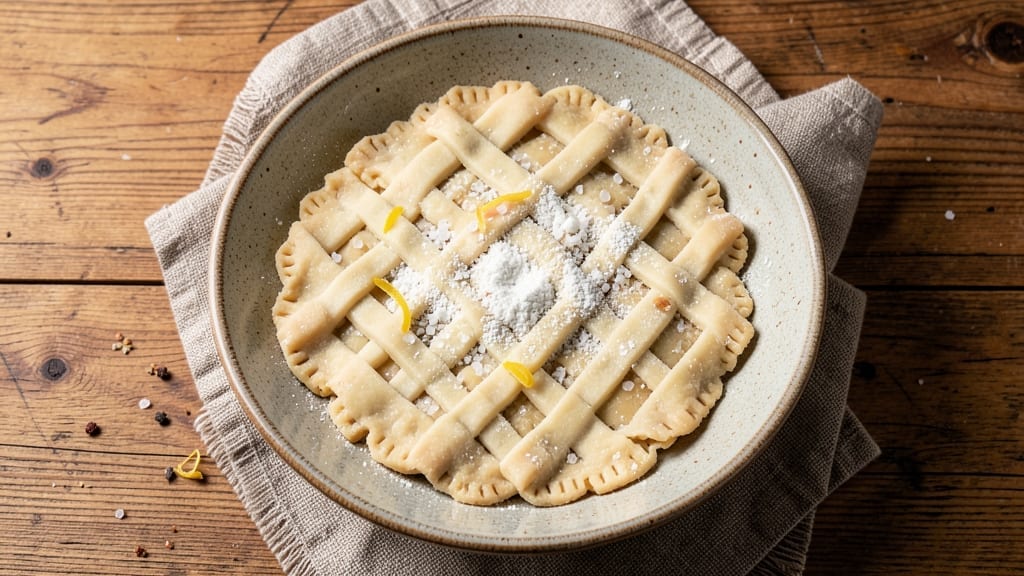
Mastering a flaky pie crust with just four ingredients transforms every dessert from good to extraordinary—and this recipe delivers that perfect, crisp, layered texture without the stress.
The secret lies in cold fat and precise technique, ensuring tender layers that stay crisp even when filled with anything from fruit to meat. I’ve tested this method countless times, and it never fails to impress, whether you’re baking a classic apple pie or a savory chicken pot pie.
This recipe uses only flour, cold butter, salt, and ice water, creating a crust that’s sturdy enough to hold heavy fillings yet delicate enough to shatter into flaky perfection. The key steps—chilling the dough, working quickly, and avoiding overhandling—are simple but critical for achieving that signature flakiness.
Blind-baking tips are included for recipes like quiche or custard pies, where a pre-baked crust is essential.
What you’ll end up with is a golden, crisp-edged crust that’s tender yet sturdy, capable of holding back juicy fillings without sogging. The layers separate cleanly, revealing the beautiful lattice of butter that makes this crust legendary.
Whether you’re a beginner or a seasoned baker, this method ensures consistent results every time.
Pair this crust with sweet fillings like berries, pumpkin, or pecan pie, or use it for savory dishes like pot pies or quiches. The versatility makes it a staple in any kitchen—once you try it, you’ll never go back to store-bought.
Ingredients for 4 pie crust
Four simple ingredients create the perfect flaky pie crust for any filling.
| Ingredient | Amount | Notes |
|---|---|---|
| All-Purpose Flour 🌾 | 2 ½ cups | Sifted for even texture |
| Unsalted Butter 🧈 | 1 cup | Cold, cubed into 1/2-inch pieces |
| Ice Water 💧 | ⅓ cup | Freshly chilled, not tap |
| Fine Sea Salt 🧂 | ½ tsp | Diamond Crystal preferred |
The butter is the star here—use European-style butter with 82% fat content for maximum flakiness. Most grocery stores carry it, but specialty shops like Whole Foods or Penzeys have the best selection. Keep those butter cubes cold—place them in the freezer 10 minutes before starting. The flour should be sifted for an even texture, especially if you’re using a mix with added leavening. I always grab King Arthur flour for its consistent quality, but any all-purpose brand works fine. The salt matters too—Diamond Crystal has a finer grain that dissolves better than table salt.
No ice water? Cold water from the fridge works in a pinch, but it won’t be quite as effective. The flour can be swapped for whole wheat at a 50/50 ratio, though the crust will be less tender. Running short on butter? Lard or coconut oil at the same quantity creates a flaky crust, but butter gives that classic flavor. For extra richness, some bakers add a tablespoon of cornstarch to the flour mix—it helps with crispiness. The dough should come together just when you add all the water, so don’t overwork it. If it feels sticky, add a few more grams of flour, but don’t go overboard.
This dough keeps for up to 4 days wrapped tightly in plastic in the fridge. For longer storage, divide it into two discs, wrap each in parchment, then foil. Freezes beautifully for up to 3 months—thaw overnight in the fridge before rolling. The key to perfect flakiness is keeping everything cold. Roll the dough between two sheets of parchment to avoid sticking. For blind baking, I always use pie weights or dried beans covered with parchment. The crust reheats well—just bake at 375°F for 10-15 minutes after adding filling.
Why You’ll Love This Recipe
- Four Hands, One Crust: I’ve made this with my kids—flour on the counter, butter cut into flour like we’re doing a science experiment—and it still comes out golden and flaky. No food processor, no fancy tools, just your hands and a little patience.
- Butter’s Secret Weapon: Cold butter cut into the flour creates those tiny pockets of air—that’s what makes it crispy yet tender. Honestly, skipping the shortcuts here gives you a crust that actually tastes homemade, not store-bought.
- Pie or Hand Pies: Use it for a classic apple pie, or roll it out for hand pies on a busy weeknight. My freezer is always stocked with pre-made crusts because they’re just as good reheated as fresh.
- Pantry Staple Magic: Flour, butter, salt—you’re already buying these. The ice water trick keeps it from getting gummy, and a batch lasts for weeks in the fridge. Budget-friendly? More like effortlessly affordable.
Step-by-step instructions for flaky pie crust
Master this classic technique for restaurant-quality crust with minimal effort.
Cut and Mix Cold Butter into the Flour
Place the 2.5 cups all-purpose flour in a large mixing bowl. Add the 0.5 tsp fine sea salt and whisk to combine. Cut the 1 cup unsalted butter into ½-inch cubes—this size ensures proper coldness for flaky layers. Using a pastry cutter or two forks, work the butter into the flour until you have pea-sized crumbs with some larger butter pieces remaining.
Here’s the thing—you want to avoid overworking the dough. Stop when the mixture resembles coarse crumbs with some flour still visible. This texture is crucial for creating those delicate layers when baked. If you see flour disappear completely, you’ve mixed too much, which will lead to a tough crust.
Gradually Add Ice Water for Perfect Moisture
Sprinkle the 0.33 cup ice water over the flour-butter mixture, 1 tablespoon at a time, gently tossing with a fork after each addition. The ice water should be cold enough to form a dough that holds together when pressed but doesn’t stick to your hands. You may not need all the water—stop when the dough just comes together.
Don’t rush this step. The water needs to fully hydrate the flour while keeping the butter cold. If the dough feels too dry, add another teaspoon of ice water. If it’s too sticky, let it rest for 5 minutes before proceeding. The goal is a dough that’s just firm enough to handle without being tough.
Form and Chill the Dough for Maximum Flakiness
Turn the dough onto a lightly floured surface and gently shape it into a 1-inch thick disk. Wrap it tightly in plastic wrap and refrigerate for at least 1 hour—this resting period is non-negotiable. The cold temperature firms up the butter, preventing it from melting during rolling and ensuring those signature flaky layers.
I know it’s tempting to skip the chilling, but trust me—this is where the magic happens. The longer you chill (up to 24 hours works even better), the more distinct your layers will be. After chilling, the dough should be cold enough that it barely softens when you touch it. This is your signal that it’s ready for rolling.
Roll and Transfer for Perfect Crust
On a lightly floured surface, roll the chilled dough into a 12-inch circle, about ⅛-inch thick. The key here is to keep the dough cold—if it starts to warm up, return it to the fridge for 10 minutes before continuing. Gently fold the dough in half, then in half again to make handling easier when transferring.
Unfold the dough and carefully transfer it to your pie dish, letting it gently drape over the edges. You can trim excess dough from the edges for a clean finish. The crust should fit snugly in the dish without stretching—this prevents shrinking during baking. If needed, gently press the bottom with your fingertips to help it settle into the dish.
Pro Tips For Making 4 Pie Crust
- Cut Butter in Small Batches: Cut the cold butter into the flour in 1-tablespoon increments—this keeps the dough from overheating and turning greasy. I used to dump it all in at once, and my crusts always ended up too soft and hard to roll.
- Use a Food Scraper for Rolling: Skip the rolling pin and use a food scraper instead—it glides smoothly and won’t tear the dough like a pin can. This is especially helpful if your dough is slightly warm or sticky.
- Chill the Dough Properly: Wrap the dough in plastic and refrigerate for at least 1 hour, or freeze it for 20 minutes if you’re in a rush. Cold dough is easier to handle and less likely to shrink in the oven.
- Add Salt to the Water: Sprinkle a pinch of fine sea salt into the ice water before mixing—it balances the flavor and prevents the crust from tasting bland. I learned this after making a pie that needed more salt halfway through baking.
Wine and beer pairings for these flavors
Sweet Fillings
Pair this crust with apple pie using Granny Smith and Honeycrisp apples—their tartness balances the buttery crust beautifully. For a richer option, try pecan pie with a corn syrup and bourbon filling, or blueberry pie with a lemon zest twist for brightness.
The flaky layers complement the juiciness of peach pie when baked with a touch of vanilla bean. 🍏
Savory Fillings
For chicken pot pie, fill with shredded rotisserie chicken, creamy mushroom gravy, and carrots.
A spinach and ricotta quiche works perfectly with this crust—add Gruyère cheese for extra depth. Beef bourguignon in a pie crust transforms into a hearty dinner, while sausage and kale fillings create a rustic, flavorful dish. 🥧
Wine Pairings
A dry Riesling (like Dr. Loosen Blue Slate) cuts through the richness of sweet fillings, balancing fruit flavors beautifully. For savory pies, a Pinot Noir (such as Meiomi) complements the depth of meaty fillings.
Sparkling Prosecco adds a festive touch to fruit tarts or lemon meringue pies. 🍷
Beer Pairings
A crisp Belgian witbier (like Hoegaarden) enhances berry pies with its citrusy notes. For pecan or pumpkin pie, a honey-brown ale (such as Samuel Adams Noble Experiment) adds a caramel sweetness.
Savory pies pair well with a malty amber ale (like Fat Tire), which stands up to rich gravies. 🍺
Seasonal Adjustments
In summer, swap butter for coconut oil to prevent melting in warm kitchens. For fall, add 1 tsp cinnamon to the dough for pumpkin or apple pies.
In winter, boost richness with brown butter in the crust. Spring calls for herb-infused olive oil (like rosemary or thyme) for savory pies. 🌿
Nutrition facts
Frequently asked questions
Why does my pie crust turn out tough instead of flaky?
Overworking the dough or using warm butter melts the fat too soon, preventing those signature layers. Always keep everything cold—even your rolling surface—and stop mixing as soon as the butter forms pea-sized crumbs. The dough should feel cool to the touch when ready to roll.
Can I make this crust ahead of time?
Shape the dough into a disk, wrap tightly, and refrigerate for up to 4 days or freeze for 3 months. Thaw overnight in the fridge before rolling. Pre-chilled dough is easier to handle and gives even better results.
What’s the best way to blind-bake this crust?
Preheat oven to 375°F, line the crust with parchment, and fill with pie weights or dried beans. Bake for 15 minutes, remove weights, and bake 5-10 more minutes until golden. Egg wash adds shine—just brush on before the final bake.
Can I substitute butter with something else?
Yes! For a lighter crust, use coconut oil (same quantity) or lard for extra richness. Shortening works too, but butter gives the best flavor. Just keep everything cold—shortening stays solid longer than oil.
How do I fix a cracked or shrinking crust?
Cracks happen when dough warms too much. Press cracks gently with your fingertips, then bake as usual. To prevent shrinking, chill the dough longer and avoid over-rolling. For extra insurance, dock the bottom with a fork before baking.

- Pea Soup Instant Pot Recipe: Velvety Green Smoothness in 20 Minutes - November 1, 2026
- Pork Loin Pulled Pork Crock Pot Recipe: Slow-Smoked Tenderness With Zero Dryness - November 1, 2026
- Baked Potatoes in Crock Pot Recipe: Buttery Interiors and Crispy Top Magic - November 1, 2026