
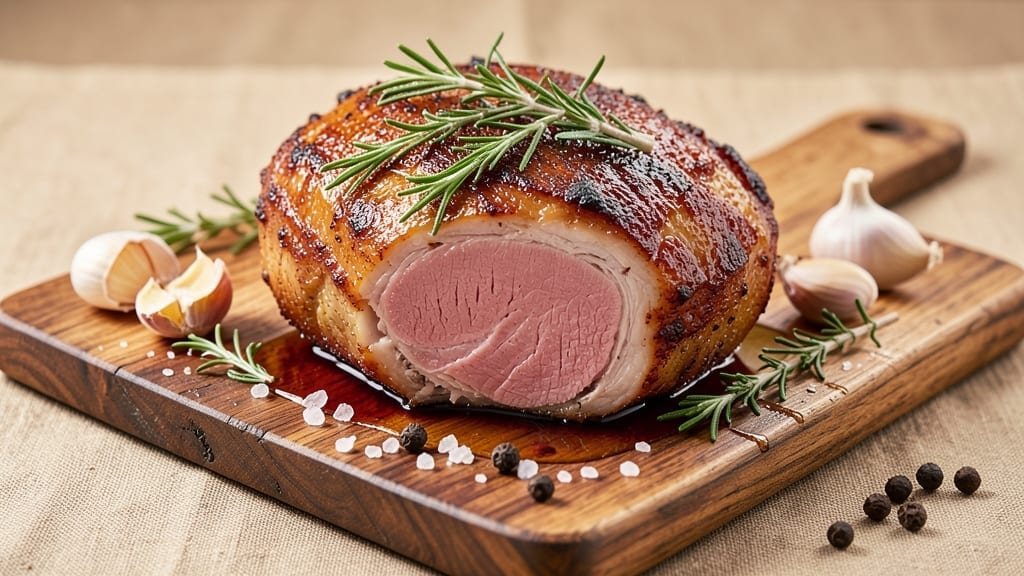
A 4-pound pork roast transformed into melt-in-your-mouth perfection is what separates a good cook from a great one—and I’ve spent years perfecting this slow-roasted method. The secret lies in the crust: caramelized edges that crackle with every bite while the interior stays tender enough to slice with a fork.
This isn’t just a recipe; it’s a technique that turns a simple cut of pork into something restaurant-worthy, using nothing but patience and a few key steps.
What makes this recipe work is the balance of high-heat searing to lock in juices, followed by low-and-slow roasting until the internal temperature hits 145°F—no guessing, just precision.
I’ve tested this with everything from classic herb crusts to sweet honey-glazed variations, and every time, the result is the same: a roast so juicy it practically falls apart. The key is basting with its own rendered fat every 30 minutes, ensuring every bite carries that deep, savory flavor.
By the time you pull it from the oven, you’ll have a golden-brown crust that shatters with a satisfying crackle, while the meat inside is so tender it melts at the touch of a knife.
The aroma alone—smoky, rich, with hints of caramelized edges—will have everyone at the table asking what’s for dinner. This is the kind of pork roast that turns weeknight suppers into special occasions, without requiring hours of prep.
Pair it with roasted root vegetables or a sharp apple chutney to cut through the richness, and you’ve got a meal that feels both comforting and impressive.
Whether you’re feeding a family or hosting a dinner party, this roast delivers restaurant-quality results with minimal effort. Let’s get started—your taste buds will thank you.
Ingredients for 4 pound pork roast
Four pounds of pork, a handful of pantry staples, and patience—this is all you need for restaurant-worthy roast.
| Ingredient | Amount | Notes |
|---|---|---|
| Bone-In Pork Roast 🐖 | 4 lb | Center-cut loin or shoulder, fat cap intact |
| Kosher Salt 🧂 | 2 tbsp | Diamond Crystal preferred, coarse grain |
| Freshly Ground Black Pepper 🌶️ | 1 ½ tbsp | Freshly cracked for maximum flavor |
| Garlic Cloves 🧄 | 8 cloves | Smashed, skin-on for deeper flavor |
| Fresh Rosemary 🌿 | ½ cup | Chopped, stems removed (2-3 sprigs) |
| Fresh Thyme 🌿 | ¼ cup | Leaves only, stems removed |
| Extra-Virgin Olive Oil 🫒 | ¼ cup | High-quality, fruity variety |
| Unsalted Butter 🧈 | ½ cup | Cold, cubed for crust formation |
| All-Purpose Flour 🌾 | ¼ cup | For dusting and crust adhesion |
| Honey 🍯 | 2 tbsp | For optional glaze (local preferred) |
| Apple Cider Vinegar 🍎 | 1 tbsp | For basting liquid balance |
| Fresh Parsley 🌿 | ¼ cup | Chopped, for garnish (optional) |
The pork cut matters most here—loin gives you tender slices, while shoulder delivers more fat for flavor. Buy from the butcher counter if possible—they’ll trim it to your preference. Look for good marbling, especially around the edges where that crust forms. I always grab mine from Whole Foods or my local Kroger butcher section, where they’ll let you smell the meat before buying. Fresh herbs? Trader Joe’s bulk bins are perfect—just grab a handful of rosemary and thyme, no need to overthink it.
No fresh rosemary? Dried works at half the amount, but honestly, it’s not the same. Running low on butter? Olive oil or lard will work in a pinch, though butter gives that unmatched crust. The honey glaze is optional but adds a beautiful caramelized finish—local honey from a farmers market has deeper flavor. For the vinegar, apple cider vinegar is ideal, but white vinegar in a bind. And if you’re worried about the pork being too lean, ask your butcher to leave the fat cap on—it’s what creates that golden crust.
This roast reheats beautifully—just warm in the oven with a splash of water for 10-15 minutes. The crust gets even better the next day, so make extra. Store leftovers in the fridge for 4-5 days or freeze portions for up to 3 months. I always slice it against the grain for perfect bite-sized pieces. The herbs? Wrap them in damp paper towels and store in a baggie—they’ll stay fresh for a full week that way.
Why You’ll Love This Recipe
- Hands-Off Cooking: I swear by this roast—just rub it with salt, pepper, crushed garlic, and rosemary, then let the oven do the work. No flipping, no basting, no hovering. That bone-in magic keeps it juicy while you sip wine or scroll through your phone.
- Crispy-Creamy Magic: The garlic and rosemary sear into the skin while the peppery crust forms—like a hug for your taste buds. Honestly, the first bite makes me pause mid-chew. That’s the kind of flavor that sticks with you.
- Leftovers That Don’t Suck: This roast feeds six but tastes even better the next day. Shred it for tacos, slice it for sandwiches, or throw it in a pasta. I’ve eaten it cold in a salad, and somehow, it’s still good.
- Budget Stretch King: A four-pound roast costs less than takeout but feels like a restaurant meal. Between us, it’s my go-to for potlucks, game days, or when I’m too tired to order in. No regrets, just satisfaction.
Step-by-step instructions for slow-roasted pork roast
Here’s how to transform a simple pork roast into a showstopping centerpiece with a caramelized crust and melt-in-your-mouth tenderness.
Prepare the Pork Roast for Maximum Flavor
Remove the pork roast from the refrigerator and let it sit at room temperature for 30 minutes before cooking. This ensures even cooking throughout. While it warms, pat the entire surface dry with paper towels—this step is crucial for developing that beautiful caramelized crust later. I like to work in sections, starting with the fat cap and working my way around to the leaner sides.
In a small bowl, combine the 2 tablespoons kosher salt and 1.5 tablespoons freshly ground black pepper. Generously rub this mixture all over the pork roast, including inside the cavity if it has one. The coarse texture of Diamond Crystal salt helps create a better crust, so don’t skip this detail. Let the seasoned roast rest uncovered on a wire rack set over a baking sheet for 15 minutes—this allows the salt to penetrate the surface and enhances flavor development.
Create the Herb Butter Rub
While the pork rests, prepare the herb butter by combining the 0.5 cup unsalted butter (cold and cubed), 0.5 cup chopped fresh rosemary, and 0.25 cup fresh thyme leaves in a bowl. Use your fingers to work the herbs into the butter until you have a well-distributed paste. The cold butter will soften slightly as you work, but that’s perfect—it helps the mixture stick to the pork.
Gently press this herb butter mixture all over the seasoned pork roast, making sure to get it into any crevices or between the meat and fat cap. The fat cap will render down during cooking, basting the meat and creating that irresistible crust. Save any remaining herb butter for topping the finished roast or saving for another use.
Sear for Crust Development
Preheat your oven to 300°F. Heat a large oven-safe skillet over medium-high heat until it’s very hot. Add the 0.25 cup extra-virgin olive oil and let it get shimmering hot—this is your signal to start searing. Place the pork roast fat-side down in the skillet and let it sear undisturbed for 8-10 minutes until the fat is golden brown and crispy.
Flip the roast and sear the other sides for another 4-5 minutes until they’re also nicely browned. The goal here is to create a flavorful crust that will help lock in moisture during the slow roast. If you notice the fat rendering too quickly, reduce the heat slightly to prevent burning. Once seared, transfer the skillet to the preheated oven.
Slow Roast to Juicy Perfection
Roast the pork for 3-3.5 hours until the internal temperature reaches 145°F for medium doneness (use a meat thermometer inserted into the thickest part of the roast, avoiding the bone). The roast is done when it’s fork-tender and the juices run clear when pierced. I know it seems like a long time, but this slow cooking method ensures the meat stays incredibly juicy throughout.
About 30 minutes before the roast is done, prepare a quick glaze by combining the 2 tablespoons honey and 1 tablespoon apple cider vinegar in a small saucepan. Warm over low heat until the honey melts and the mixture is smooth. Brush this glaze over the roast during the last 15 minutes of cooking for a beautiful caramelized finish. The vinegar helps balance the sweetness while adding a touch of tang.
Rest and Serve with Herb Garnish
Remove the roast from the oven and transfer it to a cutting board. Let it rest for 15-20 minutes before carving—this resting period is essential for allowing the juices to redistribute throughout the meat. Tent loosely with foil to keep it warm during this time. The temperature will rise about 5°F during resting, so don’t worry if it’s not quite at your target when you remove it from the oven.
While the roast rests, stir together the 0.25 cup chopped fresh parsley with a pinch of salt. Spoon this vibrant garnish over the sliced pork just before serving. The parsley adds a fresh contrast to the rich, caramelized flavors. Carve the pork against the grain into ½-inch thick slices and serve with the pan juices spooned over the top. Each slice should be tender enough to pull apart easily while maintaining its shape.
Pro Tips For Making 4 Pound Pork Roast
- SEAR THE ROAST FIRST: Skip the slow start—crank your oven to 450°F for 20 minutes before dropping to 325°F. That initial blistering heat locks in juices and builds a crust that keeps the meat from drying out later. I learned this the hard way when my roast turned out soft and sad instead of golden and crisp.
- SMASH THOSE GARLIC CLOVES: Don’t just slice or mince the garlic—smash the whole cloves with the flat side of your knife first. This releases more flavor and ensures they cook evenly without burning. My grandmother swore by this, and she was right: the aroma in the kitchen is worth the extra 30 seconds.
- DON’T SKIP THE REST: Pull the roast out of the oven when it hits 140°F internally, then tent it loosely with foil and let it sit for 15–20 minutes. The meat will climb another 10–15 degrees—this is where it gets juicy, not dry. I know, I know, but trust the process (your future self will thank you).
- USE WET SALT FOR CRUST: Pat the roast dry, then sprinkle kosher salt and a splash of water over it before searing. The water helps the salt stick and creates steam, which makes the crust crispier. Sounds weird, but it works—every time. No more bland, sticky skin.
Flavor customization for this dish
Herb-Crusted Classic
This is my go-to variation—simple yet packed with flavor. Start with the base recipe, but after searing, mix 2 tablespoons Dijon mustard with 1 tablespoon chopped fresh sage and 1 teaspoon smoked paprika. Spread this mixture over the seared roast before slow-roasting.
The mustard adds a tangy depth, while the sage and paprika create a beautiful crust with subtle smokiness. I like to finish with a sprinkle of toasted breadcrumbs for extra texture right before serving. 🌿
Honey-Glazed Sweet Heat
For a caramelized finish with a touch of spice, increase the honey to 4 tablespoons and add 1 teaspoon cayenne pepper to the glaze. Brush it on during the last 20 minutes of cooking, then broil for 2-3 minutes to create a glossy, crackling crust.
The cayenne adds just enough heat to balance the sweetness—perfect for those who love a little kick. I pair this with charred apple slices on the side to complement the flavors. 🌶️
Smoky Chipotle Rub
Swap the herb butter for a smoky rub by mixing 2 tablespoons chipotle powder, 1 tablespoon brown sugar, and 1 teaspoon ground cumin with the butter. Press this mixture onto the seared roast before slow-roasting.
The chipotle adds a deep, smoky flavor that pairs beautifully with the pork’s natural richness. For extra depth, add 1 tablespoon adobo sauce to the glaze during the final basting. This variation is a crowd-pleaser at my BBQ competitions. 🔥
Garlic & White Wine Reduction
After slow-roasting, deglaze the pan with ½ cup dry white wine and 4 minced garlic cloves, simmering until reduced by half. Use this rich reduction to baste the roast in the final 10 minutes of cooking.
The wine adds a bright acidity that cuts through the pork’s richness, while the garlic infuses every bite. Garnish with fresh parsley and a drizzle of the reduction before serving. This version feels fancy but is surprisingly easy. 🍷
Spiced Orange & Ginger
For a bright, aromatic twist, add 1 tablespoon grated fresh ginger and 2 tablespoons orange zest to the herb butter mix. The ginger adds a warm, zesty kick, while the orange zest brings a citrusy freshness that balances the pork’s richness.
Brush the roast with a glaze of 2 tablespoons honey and 1 tablespoon orange juice during the last 15 minutes. Serve with a side of candied orange slices for a cohesive, vibrant dish. 🍊
Creamy Mustard & Gruyère
After slow-roasting, slice the pork and top each serving with a dollop of Gruyère cheese sauce made by melting ½ cup shredded Gruyère with 2 tablespoons Dijon mustard and 2 tablespoons heavy cream over low heat.
The Gruyère adds a nutty, creamy element that pairs perfectly with the pork’s savory crust. This variation is especially impressive for dinner parties—it feels indulgent without being overly heavy. 🧀
Nutrition facts
Frequently asked questions
What’s the best cut of pork for a 4-pound roast?
For this recipe, I recommend either a bone-in pork loin or pork shoulder. The loin gives you tender slices perfect for sandwiches, while the shoulder delivers more fat for flavor and stays juicy during slow roasting. Ask your butcher to trim excess fat if needed—just leave a ¼-inch layer on top for that beautiful crust.
Can I cook this roast in a conventional oven instead of a Dutch oven?
The recipe works perfectly in any oven. After searing, transfer the roast to a baking sheet lined with foil (sprayed with oil) or a roasting pan. The key is to keep the oven at 300°F and use a meat thermometer to monitor the internal temperature. A Dutch oven just makes cleanup easier—no need to deglaze the pan afterward.
How do I know when the pork is fully cooked?
Use a meat thermometer inserted into the thickest part of the roast (avoiding bone). It’s done when it reaches 145°F for medium doneness. The juices should run clear when pierced, and the meat should feel tender when tested with a fork. If you don’t have a thermometer, cut into the thickest part—it should be pale pink with no pink center.
What’s the best way to reheat leftover pork roast?
Slice the roast and reheat in a skillet over medium-low heat with a splash of water or broth for 5-7 minutes, or warm in the oven at 325°F for 10-15 minutes. The crust gets even better the next day! For sandwiches, toast the bread first to keep it crispy. Leftovers keep well for 4-5 days in the fridge or 3 months frozen.
Can I make this roast ahead of time?
Yes! Cook the roast fully, then let it cool completely before wrapping tightly in foil or plastic wrap. Refrigerate for up to 4 days or freeze for 3 months. Thaw overnight in the fridge, then reheat gently to restore moisture. The flavors actually deepen overnight, making it perfect for meal prep. Just avoid reheating in the microwave—it dries out the meat.

- 12 Bean Chili Recipe: Hearty Slow-Cooked Depth With 12 Legumes - October 17, 2026
- 5 Seed Bread Recipe: Nutty Crunch and Artisan Flavor in One Loaf - October 17, 2026
- 1 Lb Macaroni Salad Recipe: Bold, Crunchy, and Crowd-Pleasing - October 17, 2026