
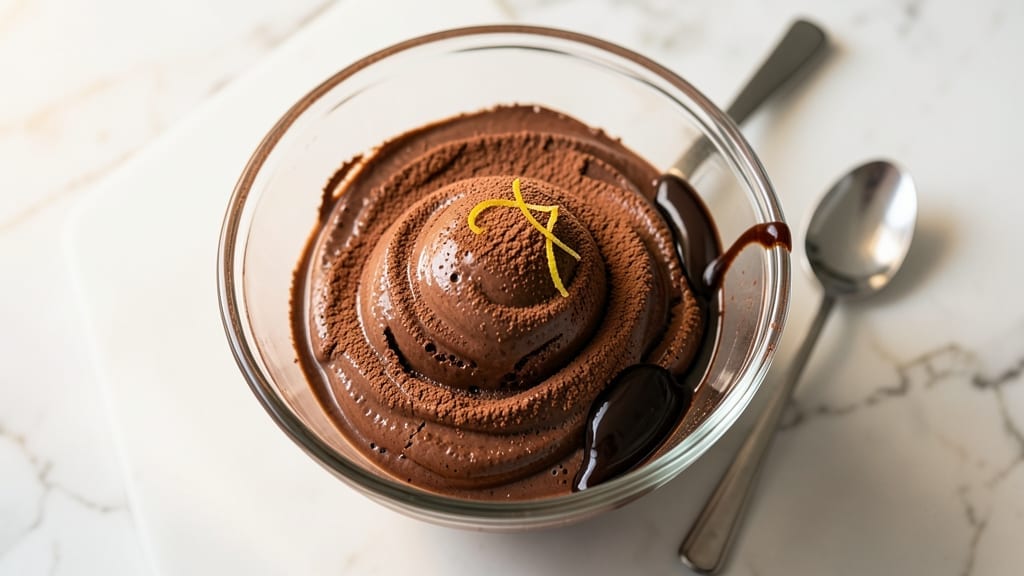
Creating a 4-quart chocolate ice cream recipe that delivers ultra-rich texture without an ice cream maker is all about technique—specifically, the right balance of ingredients and freezing method. This recipe transforms simple pantry staples into velvety, melt-in-your-mouth perfection, with a deep cocoa flavor that lingers long after the last bite.
The secret lies in a stabilized base that prevents iciness while keeping the texture lusciously creamy, even without a machine.
What sets this apart is the no-churn method, which relies on heavy cream and condensed milk to create a naturally thick, spoonable mixture before freezing. No special equipment needed—just a few essential ingredients and patience. The result?
A chocolate ice cream so rich and dense it rivals artisanal brands, with a smooth finish that’s impossible to resist. This approach also makes it easier to customize with mix-ins like fudge chunks, peanut butter swirls, or even a hint of espresso for depth.
The process is straightforward: combine warm milk, condensed milk, and cocoa powder to create a silky base, then fold in whipped cream and vanilla for structure. Freeze in stages, stirring once to break up ice crystals and ensure a uniform, creamy texture.
By the time it’s ready, you’ll have a 4-quart batch of ice cream that’s restaurant-quality, with a velvety mouthfeel and a flavor profile that’s bold yet balanced. Perfect for sharing or saving for yourself—either way, it disappears fast.
This recipe also adapts easily to dietary preferences, whether you’re adding a splash of almond milk for a lighter version or using vegan butter and coconut cream for a plant-based twist.
The key is maintaining the right fat-to-sugar ratio, which guarantees that creamy, dreamy texture no matter how you customize it. Let’s get started on making ice cream that tastes like it came from a high-end dessert shop.
Ingredients for 4 quart chocolate ice cream
Nine essential ingredients transform into velvety 4-quart chocolate ice cream without an ice cream maker.
| Ingredient | Amount | Notes |
|---|---|---|
| Heavy Whipping Cream 🥛 | 4 cups | Full-fat for best texture |
| Sweetened Condensed Milk 🥛 | 14 oz | Standard 14 oz can |
| Whole Milk 🥛 | 1 cup | Room temperature preferred |
| Unsweetened Cocoa Powder 🍫 | ½ cup | High-quality Dutch-processed |
| Granulated Sugar 🍚 | ½ cup | Fine granulation preferred |
| Pure Vanilla Extract 🌿 | 2 tsp | Bottled vanilla preferred |
| Salt 🧂 | ¼ tsp | Fine sea salt preferred |
| Dark Chocolate Chips 🍫 | 1 cup | 70% cocoa for richness |
| Butter 🧈 | ½ cup | Unsalted, softened slightly |
| Espresso Powder ☕ | 1 tsp | Optional for depth |
The heavy cream is non-negotiable—full-fat ensures that creamy texture you crave. Grab the highest-fat version your store carries, usually labeled 40% or higher. Trader Joe’s and Whole Foods have excellent options, but the standard grocery store brand works fine. The condensed milk should be sweetened—unsweetened won’t work here. For the cocoa, Dutch-processed (like Hershey’s Special Dark or Ghirardelli) creates a smoother flavor. The butter matters too—unsalted prevents over-salting, and European-style (like Plugrá) adds richness if you’re feeling fancy.
No heavy cream? Coconut cream works in a pinch (though texture will differ slightly). Swap the espresso powder for instant coffee granules if that’s what you have. The dark chocolate chips can be chopped chocolate bars—just ensure they’re 70% cocoa or higher for that deep, satisfying flavor. For the vanilla, imitation vanilla won’t cut it—bottled pure vanilla extract is a must. The sugar can be brown sugar if you prefer a caramel note, but granulated keeps it classic. If you’re making this ahead, pre-whip the cream and store it separately until ready to fold—saves time later.
This ice cream keeps 2-3 weeks in the freezer, though it’s best within 10 days for peak texture. For smoother scooping, let it sit at room temperature for 10-15 minutes before serving. To prevent ice crystals, stir once after 2 hours of freezing, then seal tightly. Portion into airtight containers if freezing long-term—parchment paper between layers prevents freezer burn. The chocolate chips can be added fresh before freezing, or folded in after the first hour if you prefer a marbled effect.
Why You’ll Love This Recipe
- Let’s talk leftovers: this stuff stays creamy for weeks. I keep a quart in my freezer at all times because it’s always better than store-bought. Plus, the ingredients are cheap—condensed milk and cocoa powder stretch your budget without sacrificing taste. My secret weapon for stress-free desserts.
- No Mixing Madness: I swear by this recipe because it’s literally just stirring. No blenders, no ice cream makers—just a whisk and a bowl. The condensed milk and cocoa powder dissolve effortlessly into the cream, and before you know it, you’ve got a velvety base ready for the freezer.
- Rich Without Guilt: Here’s what sold me—the balance of sweetness and depth. The cocoa powder gives it that real chocolate flavor (not the powdered junk), while the heavy cream keeps it luscious. Honestly? It’s the kind of ice cream that makes you pause mid-scoop and think, “Wait, is this too good?”
- Party in a Pan: This recipe makes four quarts—that’s enough to impress a crowd or stock your freezer for lazy Sundays. Between us, I’ve used it for potlucks, date nights, and even as a “dessert emergency” when company drops by. (Yes, even on a Tuesday night.)
Step-by-step instructions for ultra-rich chocolate ice cream
Here’s the method for velvety chocolate ice cream that requires no special equipment.
Whisk Dry Ingredients into the Condensed Milk
In a large mixing bowl, combine the 14 oz sweetened condensed milk, 0.5 cup unsweetened cocoa powder, 0.5 cup granulated sugar, 2 tsp pure vanilla extract, 0.25 tsp salt, and 1 tsp espresso powder. Use a whisk to break up any cocoa powder lumps and create a smooth paste. This ensures even distribution of flavor and prevents gritty texture in the final product.
I like to press the cocoa powder through a fine-mesh sieve first to eliminate any clumps, then stir it into the condensed milk. The sugar and salt dissolve completely at this stage, creating a rich chocolate base. Let this mixture sit for 5 minutes while you prepare the remaining ingredients—this gives the cocoa time to fully hydrate and develop its flavor.
Incorporate the Cream and Milk
In a separate bowl, gently whisk together the 4 cups heavy whipping cream and 1 cup whole milk until smooth. This step prevents the cream from curdling when combined with the warm condensed milk mixture. The temperature contrast is critical—room temperature milk and cold cream blend more evenly.
Gradually pour the cream mixture into the chocolate base while whisking continuously. This slow incorporation prevents the condensed milk from curdling due to temperature shock. The resulting mixture should be thick and smooth, with a deep chocolate color. If you notice any streaks of fat separation, whisk vigorously for another 30 seconds to re-emulsify.
Melt the Chocolate and Butter
In a microwave-safe bowl, combine the 1 cup dark chocolate chips and 0.5 cup softened butter. Microwave in 20-second intervals, stirring between each interval, until the chocolate and butter melt completely and form a smooth sauce. You’re looking for a glossy, liquid mixture that coats the back of a spoon—this indicates proper melting without scorching.
I recommend using the lowest microwave power setting to avoid overheating. If the mixture looks too thick after melting, stir in 1 tablespoon of the whole milk to thin it slightly. This melted chocolate mixture will add depth and richness to the ice cream base, creating that signature ultra-smooth texture.
Combine All Ingredients and Chill
Pour the melted chocolate mixture into the chocolate-cream blend and whisk until fully incorporated. The mixture should be homogeneous, with no visible streaks of chocolate or butter. Taste at this stage—you may need to adjust the sweetness or chocolate intensity to your preference. If it tastes too sweet, add a pinch more salt; if too bitter, stir in a bit more sugar.
Cover the bowl with plastic wrap pressed directly onto the surface to prevent a skin from forming. Refrigerate for at least 4 hours, preferably overnight. This chilling step is crucial for developing the proper texture. The mixture should thicken noticeably but remain pourable. If you’re short on time, you can place the bowl in the freezer for 1 hour to speed up the process, but this may affect the final creaminess.
Freeze and Stir for Creamy Texture
Transfer the chilled mixture to a loaf pan or airtight container, leaving about ½ inch of space at the top for expansion. Cover with plastic wrap and freeze for 4 hours. Here’s the key technique: every 30 minutes during the first 2 hours of freezing, remove the container from the freezer and vigorously stir the mixture with a fork. This prevents large ice crystals from forming, which is what makes homemade ice cream so grainy.
After the initial 2 hours, you can stop stirring. The ice cream should be fully frozen after 4-6 hours total, with a smooth, creamy texture. If you prefer a firmer consistency, freeze for an additional 1-2 hours. To serve, let the ice cream sit at room temperature for 5-10 minutes before scooping for the perfect texture—soft enough to scoop easily but still cold and creamy.
Pro Tips For Making 4 Quart Chocolate Ice Cream
- Whisk the Cocoa: DESCRIPTION: Don’t just dump the cocoa powder in—whisk it into the warm milk first until it’s fully dissolved. I used to skip this, and my ice cream always had weird gritty bits. A quick whisk with a fork or small whisk ensures smooth, velvety texture from the start.
- Chill the Cream: DESCRIPTION: Pop the heavy whipping cream in the fridge for 30 minutes before mixing it in. Cold cream whips better and blends more evenly with the condensed milk base—no one wants lumpy ice cream, and this small step makes a real difference.
- Skip the Boil: DESCRIPTION: The recipe might call for heating the milk mixture, but resist the urge to boil it. Just warm it to 160°F (71°C)—enough to melt the sugar and cocoa, but not enough to scramble the proteins in the cream later. Overheating turns rich ice cream into something thin and sad.
- Freeze Fast: DESCRIPTION: Don’t let the mixture sit at room temp for hours before churning. Pour it into the ice cream maker as soon as it’s mixed and cold—ideally within 30 minutes. The faster it starts freezing, the creamier the final texture. (Yes, even if you’re impatient like me.)
Storing and reheating this 4 quart chocolate ice cream
Freezer Storage Basics
Store your 4-quart chocolate ice cream in an airtight container with a tight-fitting lid—glass loaf pans or BPA-free plastic containers work best. Leave ½-inch headspace at the top to account for expansion during freezing. I use Pyrex 8×8-inch baking dishes because they’re sturdy and stack well in the freezer.
Label with the date to track freshness—this ice cream stays excellent for 2-3 weeks, though texture peaks within 10 days. 🧊
Preventing Ice Crystals
To maintain that ultra-smooth texture, stir the mixture vigorously with a fork every 30 minutes during the first 2 hours of freezing. This breaks up ice crystals before they form. After that initial phase, you can stop stirring—just seal the container tightly.
For extra protection, press plastic wrap directly onto the surface before adding the lid to minimize air exposure. This technique keeps your ice cream creamy for days, not grainy. ❄️
Portioning for Convenience
Divide the ice cream into individual servings (like 1-quart mason jars) if you plan to keep it long-term. This makes it easier to grab single scoops without thawing the whole batch. Wrap each portion tightly with parchment paper before sealing the container to prevent freezer burn.
I also recommend using freezer-safe silicone lids—they create a better seal than plastic. Portioning also lets you enjoy the ice cream at its peak texture without waiting for the whole batch to soften. 🍦
Thawing for Serving
Let your ice cream sit at room temperature for 10-15 minutes before scooping to achieve the perfect soft-serve consistency. For a quicker thaw, place the sealed container in the fridge for 30-45 minutes—this prevents melting while warming gently. Never microwave ice cream, as it ruins the texture.
If your ice cream develops a hard crust, run the container under warm water for 10 seconds to soften the surface before scooping. This keeps every bite creamy and delicious. ✨
Reviving Grainy Texture
If your ice cream develops ice crystals over time, don’t toss it! Blend the entire batch in a food processor for 10-15 seconds until smooth. This breaks up the crystals and restores that velvety mouthfeel.
For a quicker fix, stir in 1 tablespoon of heavy cream or 1 teaspoon of corn syrup—both help soften the texture. I’ve revived ice cream this way even after 3 weeks in the freezer. It’s a lifesaver for forgotten batches! 💫
Long-Term Freezing Tips
For storage beyond 3 weeks, transfer the ice cream to a sealed freezer bag, squeezing out excess air to prevent freezer burn. Place the bag flat in the freezer to save space, and write the date on the bag with a freezer-safe marker.
If you’re storing for months, consider adding 1 extra tablespoon of butter to the original recipe—it acts as a natural preservative. Just remember to re-stir after thawing to redistribute the fats for the best texture. 🔥
Nutrition facts
Frequently asked questions
Can I make this recipe without an ice cream maker?
This recipe uses a no-churn method that relies on heavy cream and condensed milk to create a thick, spoonable mixture before freezing. The key is stirring every 30 minutes during the first 2 hours of freezing to prevent ice crystals. No special equipment needed—just patience and a fork!
How do I adjust the sweetness if I prefer it less sugary?
Start by reducing the granulated sugar by 2 tablespoons and taste after combining all ingredients. If it still tastes too sweet, add a pinch more salt (up to 0.5 tsp) to balance flavors. For a deeper chocolate taste without extra sugar, increase the cocoa powder by 1 tablespoon. Always taste before freezing!
What’s the best way to add mix-ins like nuts or fudge?
For even distribution, fold in mix-ins after the mixture has chilled but before freezing. Use 1 cup total of add-ins (e.g., ½ cup chopped nuts + ½ cup fudge chunks). Stir gently to avoid breaking up delicate pieces. For a marbled effect, swirl in mix-ins after the first 1 hour of freezing.
Why did my ice cream turn grainy after freezing?
Graininess usually means ice crystals formed. To fix it, blend the entire batch in a food processor for 10-15 seconds or stir in 1 tablespoon heavy cream. For prevention, ensure you stirred every 30 minutes during the first 2 hours of freezing and used full-fat cream. Also, avoid opening the container too soon!
Can I make this recipe dairy-free?
Yes! Replace heavy cream with 4 cups coconut cream (chilled overnight), condensed milk with 14 oz coconut condensed milk, and butter with ½ cup vegan butter. Use almond milk for the 1 cup liquid milk. The texture will be slightly denser but still creamy. For best results, add 1 tbsp xanthan gum to stabilize.

- 12 Bean Chili Recipe: Hearty Slow-Cooked Depth With 12 Legumes - October 17, 2026
- 5 Seed Bread Recipe: Nutty Crunch and Artisan Flavor in One Loaf - October 17, 2026
- 1 Lb Macaroni Salad Recipe: Bold, Crunchy, and Crowd-Pleasing - October 17, 2026