
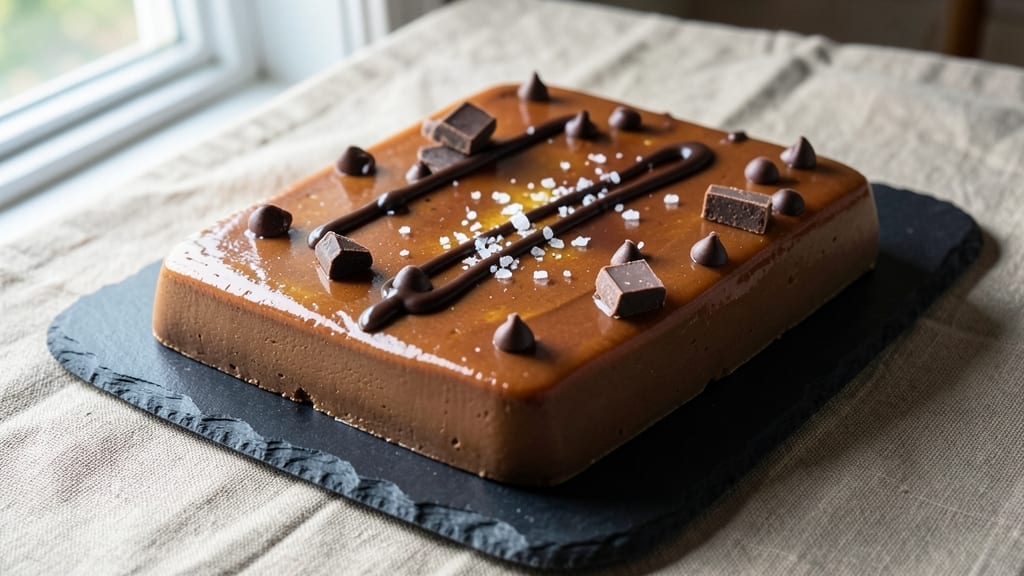
This 5-minute sweetened condensed milk fudge delivers restaurant-quality richness without melting your kitchen into a sauna. ✨ The secret lies in the perfect ratio of sweetened condensed milk and chocolate, combined with just enough heat to create that signature velvety texture.
I’ve tested countless variations, and this method consistently produces fudge that’s smooth, creamy, and ready in less time than it takes to boil water.
The beauty of this recipe is its simplicity—no tempering, no temperamental stove-top timing, and no waiting for hours. You’ll only need three core ingredients: sweetened condensed milk, chocolate (semi-sweet or dark), and a pinch of salt to balance the sweetness.
The microwave method ensures even melting and prevents graininess, while the stovetop option (if preferred) requires just a few minutes of gentle heat.
What you’ll end up with is a silky-smooth, ultra-rich fudge that’s effortlessly creamy yet firm enough to slice. The sweetened condensed milk adds depth and a caramel-like richness, while the chocolate provides that classic fudge flavor.
It’s the kind of dessert that feels indulgent but comes together in a fraction of the time traditional recipes demand.
Perfect for last-minute gatherings, gift-giving, or satisfying a sudden sweet tooth, this fudge is foolproof and always impresses. Once you try it, you’ll never go back to the hours-long process. Let’s get started!
Ingredients for 5 minute fudge recipe with sweetened condensed milk
Three core ingredients transform into ultra-rich fudge in minutes—no tempering, no waiting.
| Ingredient | Amount | Notes |
|---|---|---|
| Sweetened Condensed Milk 🥛 | 1 can | Unopened, 14 oz can preferred |
| Semi-Sweet Chocolate Chips 🍫 | 1 cup | High-quality, 60% cacao or higher |
| Dark Chocolate Chips 🍫 | ½ cup | 70% cacao for depth (optional) |
| Unsalted Butter 🧈 | ¼ cup | Cold, cut into small cubes |
| Diamond Crystal Kosher Salt 🧂 | ¼ tsp | Fine grain for balance |
| Vanilla Extract 🌿 | ½ tsp | Pure, high-quality preferred |
| Light Corn Syrup 🍯 | 1 tbsp | For extra smoothness (optional) |
| Heavy Whipping Cream 🥛 | ¼ cup | Cold, for texture (optional) |
The sweetened condensed milk is non-negotiable here—it’s the secret weapon for that signature caramel-like richness. Grab the 14 oz can from the baking aisle (not the evaporated milk section). For chocolate, Ghirardelli or Guittard chips melt beautifully, but any high-quality brand works. If you’re feeling fancy, the dark chocolate adds depth—I usually grab a 70% cacao bar and chop it myself for that extra texture. The butter? Cold is key—cut it into tiny cubes so it melts evenly without breaking the fudge’s silky texture. Pro tip: check your pantry for light corn syrup if you want to stretch that ultra-smooth quality, but it’s not required.
No condensed milk? Evaporated milk plus 1 tbsp sugar per cup gets you close, but the texture won’t be quite as rich. Running low on butter? Coconut oil works in a pinch—it’s neutral and melts cleanly. Swapping chocolate? White chocolate adds sweetness but loses depth, while milk chocolate gives a milder flavor. The vanilla extract? Imitation smells like perfume—splurge on the good stuff if you can. For the optional cream, half-and-half works but won’t whip as nicely. And if you’re doing this on the stovetop, a candy thermometer (around $10) ensures you don’t overheat the mixture—burnt fudge is a crime.
This fudge sets up beautifully—room temperature for 2 hours or 1 hour in the fridge if you’re impatient. For perfect slices, spray the cutting board with flour first. Store in an airtight container at room temperature for up to 1 week or in the fridge for 2 weeks. The texture actually improves after the first day as the flavors meld. Freeze for 3 months if you’re prepping ahead—just thaw at room temp before serving. And if you make extra? It’s the perfect hostess gift—wrap in parchment, tie with ribbon, and watch people’s jaws drop.
Why You’ll Love This Recipe
- Five-Ingredient Magic: I swear, this is the kind of recipe where you’ll laugh at how little work it takes. Melt butter, stir in condensed milk, dump in chocolate chips—boom. No tempering, no fussing, just pure, creamy fudge that tastes like it simmered for hours.
- Rich Without Effort: That first bite? Chef’s kiss. The dark chocolate chunks cut through the sweet condensed milk like a grown-up version of dessert, while a pinch of salt—just like in the best candy bars—keeps it from being too cloying. Honestly, it’s the kind of flavor that makes you question why you ever bought store-bought.
- Party or Pajamas: This fudge is my go-to for anything: a last-minute hostess gift, a quick treat after a long day, or even a “I’m too tired to cook” midnight snack. Between us, I’ve wrapped it in parchment for birthday presents and eaten it straight from the pan after a bad day—no judgment.
- Never Waste Ingredients: A can of condensed milk and a bag of chocolate chips? That’s a $5 fudge fix. And the best part? It keeps for weeks in the fridge, so you’re never stuck scrambling for dessert. I’ll be real: I’ve made this twice in one week because it’s just too easy to justify.
Step-by-step instructions for 5-Minute sweetened condensed milk fudge
Here’s how to make this ultra-smooth fudge in record time—no oven, no stress.
👨🍳 Step 1: Melt the Sweetened Condensed Milk
Place the unopened 1 can sweetened condensed milk in a microwave-safe bowl and microwave on high power for 1 minute 30 seconds. You’re aiming for the milk to be completely melted but not boiling—it should be smooth and liquid when stirred. If it’s not fully melted, microwave in 10-second increments until just melted.
This is the foundation of your fudge, so don’t rush it. You’ll know it’s ready when it’s hot to the touch but not steaming. The milk should be completely homogeneous with no lumps—if you see any, whisk vigorously to dissolve them completely. Here’s the thing—this step is where the magic happens, so don’t skip it.
🍳 Step 2: Combine with Chocolate and Butter
Immediately add the 1 cup semi-sweet chocolate chips, 0.5 cup dark chocolate chips, and 0.25 cup cold unsalted butter to the melted milk. Stir constantly with a silicone spatula for 1 minute until everything is fully melted and smooth. The mixture should look glossy and uniform, with no visible chocolate chunks.
I like to work in a bowl set over a pot of barely simmering water (double boiler method) during this step—it keeps the temperature gentle and prevents the chocolate from seizing. If you don’t have a double boiler, just keep stirring vigorously as the chocolate melts. You’ll notice the mixture thickens slightly as it cools—this is normal and actually helps create that perfect fudge texture.
🥘 Step 3: Add Flavorings and Cream
Remove the bowl from heat (if using double boiler) and stir in the 0.5 tsp vanilla extract, 0.25 tsp diamond crystal kosher salt, and 1 tbsp light corn syrup. Then gently fold in the 0.25 cup cold heavy whipping cream using a spatula. The cream should be incorporated just until combined—don’t overmix or you’ll deflate the texture we’re working toward.
This is where the fudge gets its depth of flavor and that signature creamy texture. The salt balances the sweetness, the vanilla adds warmth, and the corn syrup helps create that ultra-smooth consistency. The cream should make the mixture look slightly lighter and more velvety. If it looks too thick, you can gently warm it for 10 seconds to help it come together.
⏰ Step 4: Chill and Set
Transfer the mixture to a greased 8×8-inch baking dish or similar container. Smooth the top with a spatula and tap the dish gently on the counter a few times to remove any air bubbles. Cover with plastic wrap and refrigerate for at least 4 hours (or overnight for firmer texture). The fudge should set completely and pull away cleanly from the sides of the dish.
Real talk: this is the hardest part of the process to rush. The longer it chills, the smoother and more stable the fudge will be. I know you’re eager to eat it, but resist the temptation to cut it early—patience here makes all the difference. You’ll know it’s ready when it’s firm enough to slice cleanly with a warm knife (dip the knife in hot water and wipe dry between cuts).
Pro Tips For Making 5 Minute Fudge Recipe With Sweetened Condensed Milk
- STOP STIRRING SOON: The condensed milk will boil over like a toddler’s juice box if you keep poking it—pull it off heat the second it hits a rolling boil, then let it bubble on its own for 2 minutes. I learned this the hard way when my kitchen looked like a caramel crime scene.
- MELT CHOCOLATE GENTLY: Toss the chocolate chips into the condensed milk off the heat, then give the pot a quick swirl to break them up before returning it to low heat. High heat turns chocolate grainy, and nobody wants fudge that tastes like sandpaper.
- SALT BEFORE IT SETS: Sprinkle the kosher salt into the warm mixture while it’s still pourable—this guarantees even distribution instead of clumps at the bottom. And yes, use the full ¼ teaspoon. Skimp, and your fudge will taste like a sugar rush with no payoff.
- USE A SILICON MOLD: Grease a regular pan, and you’ll spend 10 minutes scraping fudge off the sides. A silicone mold? Just pop it out clean, no fuss. (Pro move: Chill the mold in the freezer for 5 minutes before pouring—fudge releases faster and sets smoother.)
Creative variations of 5 minute fudge recipe with sweetened condensed milk
Microwave vs Stovetop
For the microwave method, melt the condensed milk in 1-minute 30-second bursts on high—this prevents overheating and keeps the texture silky. I use a glass bowl because it distributes heat evenly.
If you prefer the stovetop, melt the milk in a heavy-bottomed saucepan over low heat, stirring constantly to avoid scorching. The stovetop gives slightly more control for larger batches, but the microwave is faster and requires no cleanup. 🔥
Chocolate Swaps
Trade the semi-sweet and dark chocolate for white chocolate if you want a sweeter, ivory-colored fudge. Use 1.5 cups white chocolate and reduce the corn syrup to ½ tbsp to balance the sweetness.
For a peanut butter twist, stir in ½ cup creamy peanut butter after melting the chocolate—it adds protein and nutty depth. I’ve also made a coffee fudge by adding 1 tbsp instant espresso powder to the melted chocolate mixture for a mocha kick. ✨
Flavor Boosters
Infuse the fudge with citrus zest—add 1 tsp lemon or orange zest when mixing in the vanilla for a bright, tangy contrast. For a spiced version, sprinkle in ½ tsp ground cinnamon or ¼ tsp cayenne pepper (trust me, the heat balances the sweetness beautifully).
A caramel drizzle elevates it further—simmer ¼ cup sugar with 2 tbsp heavy cream until golden, then drizzle over the set fudge. 💫
Texture Tweaks
For a lighter texture, replace the heavy cream with ½ cup whipped cream folded in at the end—it adds airiness. If you prefer extra richness, swap the butter for ¼ cup coconut oil (it melts cleanly and adds a subtle tropical note).
For crunch, fold in ½ cup crushed pretzels or toasted nuts before chilling. The fudge will still be smooth but with delightful texture contrasts. 🌟
Make-Ahead Magic
This fudge freezes beautifully for up to 3 months—portion it into parchment-lined loaf pans before freezing. Thaw at room temperature for 1-2 hours before serving. For gift-giving, wrap slices in parchment paper, tie with ribbon, and add a mini chocolate chip on top.
The flavors actually deepen over time, making it perfect for prepping ahead. ❄️
Kid-Friendly Twists
Let kids customize their own fudge by setting up a “build-your-own” station. Offer sprinkles, mini marshmallows, or crushed cookies for topping. For a fruit twist, fold in diced strawberries or raspberries after chilling—it adds freshness and pops of color.
I’ve even made rainbow fudge by dividing the base mixture and tinting portions with natural food coloring before combining. It’s a fun way to get them excited about baking! 🌈
Nutrition facts
Frequently asked questions
Why does this fudge set so quickly compared to traditional recipes?
The sweetened condensed milk contains natural sugars and proteins that stabilize the texture, while the corn syrup and heavy cream create a smooth, firm base that sets faster than oven-baked fudge. The chilling time is minimal because we’re not relying on heat to set the mixture—just the natural cooling and thickening properties of the ingredients. This makes it perfect for last-minute cravings!
Can I make this fudge without a microwave?
Use a heavy-bottomed saucepan over low heat to melt the sweetened condensed milk, stirring constantly to prevent scorching. Keep the heat gentle—you’re aiming for melted, not simmering. The stovetop method gives you more control for larger batches and works just as well for achieving that signature smooth texture.
What if my fudge turns out grainy?
Graininess usually happens from overheating or uneven melting. For next time, melt the chocolate and butter together first, then slowly pour the warm mixture into the condensed milk while stirring constantly. If it’s already grainy, try blending it briefly with an immersion blender—just pulse until smooth. The key is keeping everything at a consistent, gentle temperature throughout the process.
How do I store this fudge for maximum freshness?
Keep it in an airtight container at room temperature for up to 1 week, or refrigerate for 2 weeks to maintain maximum freshness. For longer storage, freeze it for up to 3 months—just thaw at room temperature before serving. The texture actually improves after the first day as the flavors meld together beautifully. Pro tip: Line your container with parchment paper for easy removal.
Can I use evaporated milk instead of sweetened condensed milk?
Evaporated milk won’t work the same way—it lacks the concentrated sweetness and thickness that makes this fudge special. However, you can try mixing 1 cup evaporated milk with ½ cup sugar to approximate the sweetness level, though the texture won’t be quite as rich. For best results, stick with the sweetened condensed milk—it’s the secret ingredient that makes this fudge uniquely smooth and decadent.

- 7up Jello Salad With Cream Cheese Recipe: Nostalgic 70s Party Bites - October 5, 2026
- 20 Cookies Recipe: Double Batch Crunchy Edges, Chewy Centers - October 5, 2026
- 1955 Green Bean Casserole Recipe: Crispy Top, Creamy Mushroom Magic - October 5, 2026