
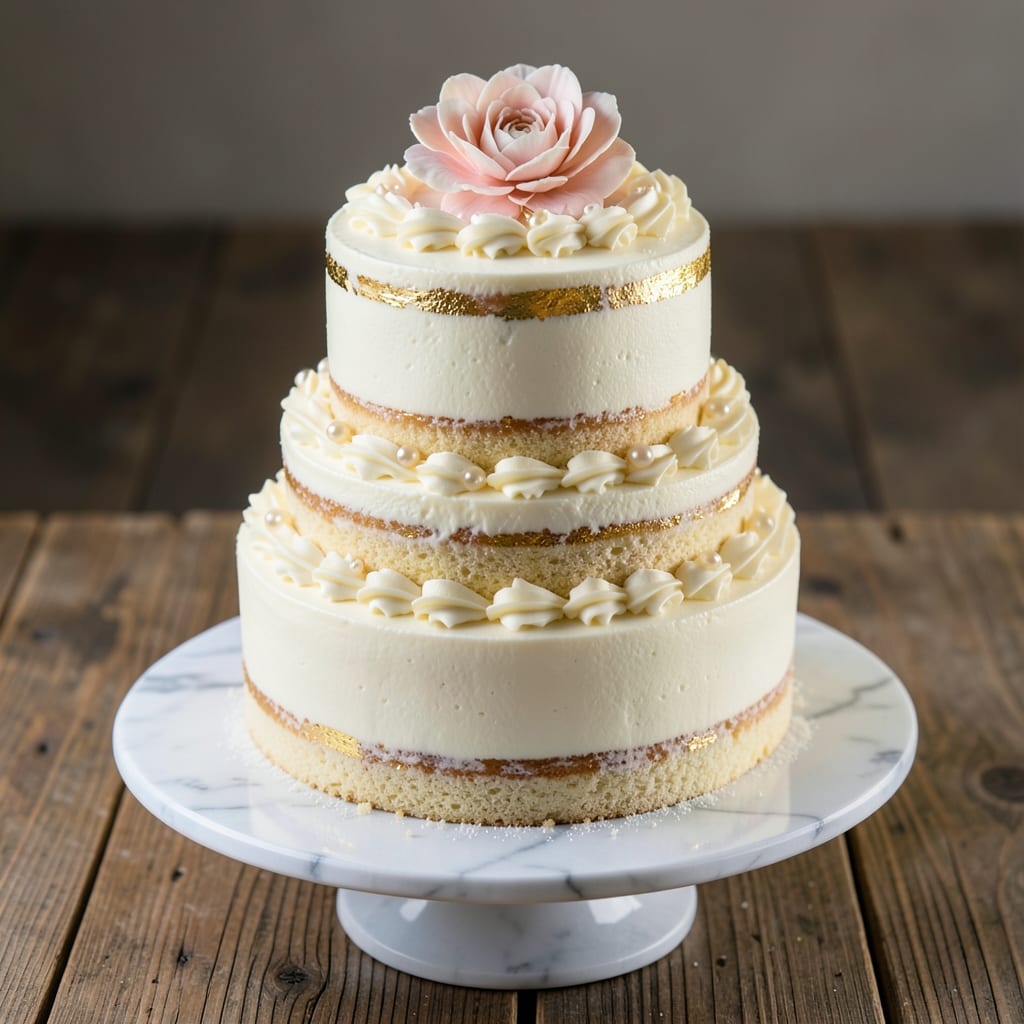
This 4-tier vanilla cake recipe delivers the kind of elegant, cloud-light vanilla perfection that makes every slice feel like a celebration. 💛 The secret lies in a foolproof baking method that ensures each layer rises to fluffy heights while maintaining a tender crumb—no dense centers here.
After perfecting this recipe for weddings and special occasions, I’ve refined it to be reliable enough for home bakers yet impressive enough to rival professional bakeries.
What sets this cake apart is the three-step baking process: baking the layers at a precise 350°F for exactly 25-30 minutes, cooling them properly between layers, and using a stable vanilla buttercream that holds its shape without cracking.
The frosting isn’t just sweet—it’s rich with real vanilla extract, giving every bite that signature aroma and flavor that vanilla lovers crave.
By the time you’re done assembling, you’ll have a stunning four-tiered masterpiece with perfectly balanced layers, smooth sides, and a frosting so light it almost disappears between bites.
The cake stands tall and elegant, ready for tiered stands or a dramatic reveal—whether for a wedding, anniversary, or just because you deserve a showstopper dessert.
For customization, consider adding layers of raspberry jam between tiers or dusting with powdered sugar for a classic finish. The beauty of this recipe is its versatility—it’s as stunning as it is delicious, and the techniques here will give you the confidence to tackle any tiered cake. Let’s get baking!
Ingredients for 4 tier vanilla cake
Four elegant layers, one dreamy vanilla flavor—these ingredients create showstopping cake perfection.
| Ingredient | Amount | Notes |
|---|---|---|
| All-Purpose Flour 🌾 | 5 cups | Sifted for light texture |
| Granulated Sugar 🍚 | 2 ½ cups | Superfine preferred for smoothness |
| Unsalted Butter 🧈 | 2 cups | Room temperature, European style |
| Large Eggs 🥚 | 8 whole | Room temperature, separated |
| Pure Vanilla Extract 🌿 | 2 tbsp | Bourbon or Madagascar preferred |
| Baking Powder 🧂 | 1 ½ tsp | Diamond Crystal preferred |
| Salt 🧂 | ½ tsp | Fine sea salt preferred |
| Whole Milk 🥛 | 1 ½ cups | Room temperature |
| Powdered Sugar 🍚 | 6 cups | For buttercream, sifted |
| Real Vanilla Extract 🌿 | 2 tbsp | For buttercream richness |
| Heavy Whipping Cream 🥛 | 1 ½ cups | Cold for buttercream |
| Raspberry Jam 🍓 | ½ cup | For optional filling |
| Powdered Sugar Dusting 🍚 | ¼ cup | For final decoration |
| Tiered Cake Stands 🎂 | 4 pieces | Matching height for presentation |
| Toothpicks 📌 | 12 whole | For securing layers |
The flour and sugar are non-negotiable for that signature cloud-light texture. King Arthur or Gold Medal flour gives the best rise, and superfine sugar dissolves smoothly for a tender crumb. Butter matters too—European-style like Plugrá or Miyoko’s has higher fat content for richer layers. Eggs should be separated carefully: whites whipped to stiff peaks for structure, yolks folded gently to keep air. Vanilla extract? Bourbon or Madagascar has deeper flavor than imitation—worth the splurge for special occasions. Buy extra; you’ll want it for future cakes.
No superfine sugar? Pulse regular granulated in a food processor for 30 seconds. Almond milk can replace whole milk in a pinch, but the cake will be slightly denser. For the buttercream, vegetable shortening at half the butter amount makes it more stable in heat. Short on vanilla? Seeds from a vanilla bean scraped into the extract works wonders. The jam filling is optional but adds a pop of color—strawberry or apricot work beautifully too. If you’re feeling fancy, add a splash of vanilla bean paste to the buttercream for extra aroma.
Bake the layers immediately after mixing—flour absorbs moisture fast. Wrap cooled layers in plastic wrap and store in the fridge for up to 3 days before assembling. Buttercream keeps for 5 days refrigerated or 3 months frozen. For the big reveal, assemble the cake on the stands just before serving. Use the toothpicks to secure layers while the frosting sets, then remove before slicing. Dust with powdered sugar right before serving to keep it looking fresh—it melts fast in humidity.
Why You’ll Love This Recipe
- No Fuss Layers: I swear by this method—just mix, bake, repeat. Four tiers? No stress. The buttercream comes together in five minutes with the same ingredients you already have, and the vanilla extract does all the heavy lifting for that real flavor.
- Vanilla Bliss: That first bite? Pure comfort. The sugar and butter create this melt-in-your-mouth crumb, while the vanilla extract—real stuff, not imitation—makes every slice taste like a bakery secret. Honestly, I’ve tried store-bought, and this beats it every time.
- Party Ready: Birthdays, showers, or just because—this cake holds its shape, stays moist, and looks impressive without the fuss. Stack it with fresh berries or a dusting of powdered sugar, and suddenly you’re the hero of any gathering. (Yes, even on a Tuesday night.)
- Budget-Friendly Stretch: Four tiers sound fancy, but the ingredients are basic and cheap. A stick of butter, a cup of sugar, eggs from your fridge—this recipe turns pantry staples into something special. Plus, leftovers? They’ll disappear faster than you can say “second slice.”
Step-by-step instructions for cloud-light vanilla layers
Here’s how to bake, fill, and stack your dream four-tier vanilla cake.
🍳 Step 1: Bake the Perfect Vanilla Layers
Preheat your oven to 350°F and prepare four 8-inch round cake pans by greasing them thoroughly with butter and dusting with flour. Line the bottoms with parchment circles for easy removal.
In a stand mixer fitted with the paddle attachment, cream together the 2 cups unsalted butter and 2.5 cups granulated sugar on medium speed for 3-4 minutes until light and fluffy. Add the 8 whole large eggs one at a time, mixing well after each addition. Scrape down the sides as needed.
In a separate bowl, whisk together the 5 cups all-purpose flour, 1.5 teaspoons baking powder, and 0.5 teaspoon salt. Gradually add the dry mixture to the butter mixture in three additions, alternating with the 1.5 cups whole milk. Begin and end with flour. Mix just until combined—overmixing develops gluten and makes the cake dense.
Divide the batter evenly among the four prepared pans. Bake for 25-30 minutes or until a toothpick inserted in the center comes out clean. Let the cakes cool in their pans for 10 minutes, then transfer to a wire rack to cool completely. Here’s the thing—don’t rush this cooling step. Warm cakes will crumble when you try to level them later.
👨🍳 Step 2: Level and Prepare the Layers
Once completely cool, use a long serrated knife to level the tops of each cake layer. Place one cake on a cutting board and press down firmly with the knife, rotating as you go. This ensures even layers for perfect stacking. Discard the trimmed pieces or save for cake pops.
Place the first cake layer on a cake stand or plate. Spread about 2 tablespoons of raspberry jam evenly over the top, leaving a ½-inch border uncovered. This jam layer adds moisture and a subtle fruity contrast to the vanilla. Repeat this process for all four layers, keeping them stacked in order.
🥘 Step 3: Make the Cloud-Light Buttercream
In a large bowl, beat the 1.5 cups heavy whipping cream with an electric mixer until soft peaks form. Gradually add the 6 cups powdered sugar and 2 tablespoons real vanilla extract, mixing on low speed until just combined. Increase the speed to medium-high and beat for 3-4 minutes until the buttercream is smooth, fluffy, and holds stiff peaks.
I like to add the powdered sugar gradually to avoid a cloud of sugar dust. If the buttercream is too thick, add 1 teaspoon milk at a time until it reaches a spreadable consistency. Here’s the secret—chill the bowl and beaters in the freezer for 10 minutes before whipping. This helps stabilize the buttercream and makes it easier to pipe.
🔪 Step 4: Assemble the Four-Tier Cake
Place the first cake stand on your work surface. Spread about 1½ cups of buttercream evenly over the top of the first cake layer, extending slightly over the edges. This creates a “crust” that helps hold the layers together. Place the second cake layer on top, gently pressing down to adhere.
Repeat this process for the remaining layers, using about 1 cup buttercream between each layer. For extra stability, insert 3 toothpicks at an angle through each layer, securing them to the stand below. This prevents the tiers from shifting when you add the final buttercream.
Once all layers are stacked, spread the remaining buttercream over the top and sides of the entire cake. Use an offset spatula to create smooth, even sides. For a professional finish, dip the spatula in warm water between swipes to help the buttercream spread smoothly. Chill the cake in the refrigerator for 30 minutes before decorating.
🎂 Step 5: Decorate and Dust for Final Flair
After chilling, dust the entire cake with the 0.25 cup powdered sugar dusting using a fine-mesh sieve. Gently tap the sieve to create an even, snowy layer of powdered sugar. This adds a beautiful, elegant finish and complements the vanilla flavor perfectly.
For extra presentation, arrange fresh berries or edible flowers between the tiers. Use a small offset spatula to carefully slide decorations into place. Serve the cake at room temperature for the best texture and flavor. Each slice should reveal perfectly moist layers, creamy buttercream, and that delicate jam filling.
Pro Tips For Making 4 Tier Vanilla Cake
- Whisk Eggs Room-Temp: DESCRIPTION: Cold eggs from the fridge won’t emulsify properly with butter, and you’ll end up with a cake that’s dense and greasy. Run them under warm water for 30 seconds first—just enough to loosen the whites without turning them into a warm bath. Trust me, your tiers won’t collapse mid-bake.
- Sift Flour Like a Pro: DESCRIPTION: I learned this the hard way—lump-free flour isn’t just for show. Sift it directly into the dry ingredients (not the mixing bowl) to avoid clumps that create tunnels in your cake. Use a fine-mesh sieve, and tap it sharply against the bowl’s edge to break up any stubborn bits. Your crumb will thank you.
- Don’t Overmix the Batter: DESCRIPTION: The moment your butter and sugar look fluffy and pale, stop mixing. Keep going, and you’ll develop the gluten in the flour, turning your light vanilla cake into a chewy brick. Scrape the bowl once with a spatula—if streaks disappear instantly, you’re golden. If not, keep it brief.
- Chill the Pans: DESCRIPTION: Grease your pans and pop them in the fridge for 10 minutes before baking. Cold pans help the cake rise straight instead of doming or cracking. I skip this when I’m rushed, and the tiers always look wonky—so don’t be like me. A little patience here saves rework later.
Serving suggestions for this dish
Presentation Stands
Invest in matching tiered cake stands—they’re non-negotiable for stability and elegance. I love Wilton’s 4-tier acrylic stands because they’re lightweight yet sturdy, and the clear design lets your cake shine.
For a rustic touch, wooden cake boards with varying heights work beautifully. Always check that each stand is level before assembling—uneven tiers will throw off your entire presentation. 🎂
Garnish Ideas
Fresh berries are my go-to for adding color and freshness between tiers. Raspberries or blackberries pair perfectly with vanilla, but edible flowers like violets or pansies elevate the look dramatically. For a classic touch, dust the tiers with powdered sugar using a fine-mesh sieve—tap gently to avoid clumping.
A sprinkle of toasted coconut flakes or crushed pistachios adds texture and visual interest.
Serving Tools
Use a serrated cake knife for clean slices—it glides through layers without crushing them. A long metal spatula helps lift each tier safely from the stand. For serving, I recommend individual dessert plates (about 6-inch diameter) to showcase each slice beautifully.
Label the cake with a small chalkboard sign or calligraphy card for a personal touch—guests will love the extra detail. ✨
Temperature Tips
Serve the cake at room temperature for the best texture—cold buttercream can feel waxy, while warm cake loses its structure. If your kitchen is warm, chill the cake for 10-15 minutes before slicing to maintain shape.
Avoid cutting near the toothpicks securing the tiers; remove them first with a small pair of tweezers or needle-nose pliers for a clean finish. 💡
Make-Ahead Magic
Assemble the cake 1 day ahead—it tastes even better after flavors meld! Store it in an airtight container at room temperature or refrigerate for up to 3 days. Bring to room temperature before serving.
For long-term storage, freeze the unfrosted layers (wrapped individually) for up to 3 months. Thaw overnight in the fridge before assembling. This is a lifesaver for last-minute celebrations! ⏰
Nutrition facts
Frequently asked questions
How do I prevent my cake layers from cracking when assembling?
Let each layer cool completely before leveling and frosting—warm cake is more fragile. Use a serrated knife for clean cuts and chill the buttercream for 10 minutes before piping. Spread a thin “crust” of buttercream around the edges of each layer before stacking to create a strong bond.
Can I make this cake without a stand mixer?
Use a hand mixer or even whisk for the buttercream (though it’ll take longer). For the cake batter, mix by hand in a large bowl with a sturdy spatula. The key is patience—cream the butter and sugar for 5-7 minutes by hand to achieve lightness. Just don’t overmix the dry ingredients.
What’s the best way to transport a 4-tier cake?
Assemble the cake on a sturdy cake board or plate, then wrap it tightly in plastic wrap. Place it on a tray with sides to prevent shifting. For long distances, transport it vertically (not horizontally) to maintain stability. Keep it in a cool, dry place—never in the trunk of a hot car.
How do I adjust this recipe for a 3-tier cake?
Reduce the batter to 3 pans (about 1¾ cups batter per pan) and halve the buttercream to 3 cups. Use 3-inch cake stands instead of 4-inch for proper height ratios. The assembly technique remains the same—just work with fewer layers. Perfect for smaller gatherings!
Why did my buttercream turn grainy?
This usually happens when powdered sugar absorbs moisture. Sift the sugar first, then add it gradually while mixing on low speed. Chill your bowl and beaters before whipping, and avoid overmixing. If it’s already grainy, strain it through a fine-mesh sieve or add 1 teaspoon lemon juice to dissolve the sugar crystals.

- 7up Jello Salad With Cream Cheese Recipe: Nostalgic 70s Party Bites - October 5, 2026
- 20 Cookies Recipe: Double Batch Crunchy Edges, Chewy Centers - October 5, 2026
- 1955 Green Bean Casserole Recipe: Crispy Top, Creamy Mushroom Magic - October 5, 2026