
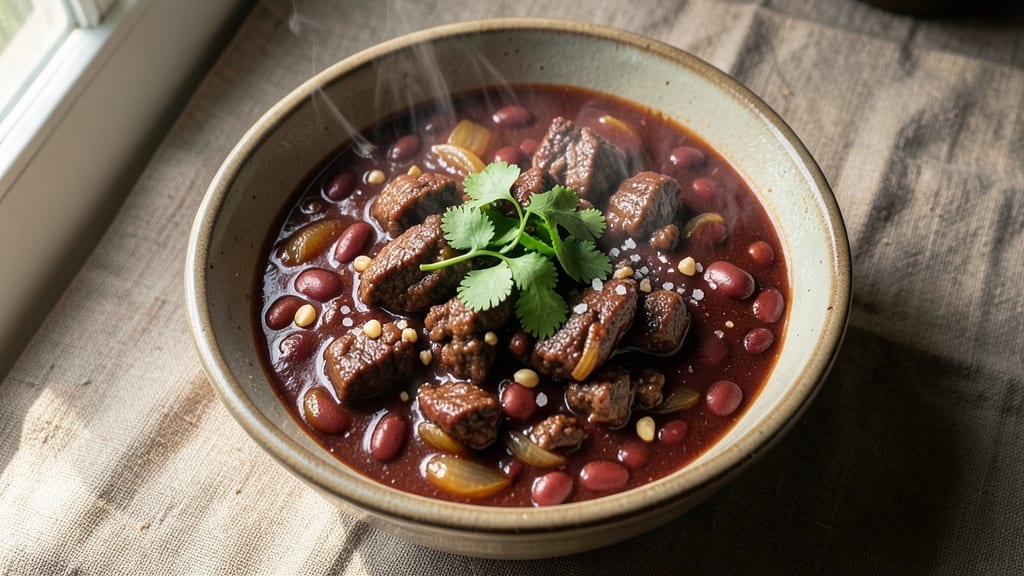
This 5-alarm chili recipe transforms your crock pot into a flavor factory, where tough cuts of meat melt into tender chunks and spices deepen into complex harmony over hours.
The secret lies in layering heat gradually—chiles, spices, and slow cooking work together to create a chili so bold it earns its name, yet balanced enough to satisfy even sensitive palates.
I’ve perfected this over years of trial (and a few spice-induced regrets), ensuring every batch delivers that perfect smoky, spicy, meaty punch without overwhelming bitterness.
What sets this crock pot chili apart is the deep flavor development that happens while you’re busy—no constant stirring required. Ground beef and kidney beans simmer in a rich broth infused with cumin, smoked paprika, and cayenne, while browned onions and garlic form the aromatic base.
The slow cook transforms tough ingredients into melt-in-your-mouth textures, and the final touch of cocoa powder rounds out the heat with a subtle chocolatey depth. This isn’t just chili; it’s a weeknight masterpiece that tastes like it simmered all day, even if you only set it once.
The result is a pot of chili so rich and complex it’ll have your kitchen smelling like a Tex-Mex restaurant and your taste buds singing. The heat builds gradually, giving you control—adjust the cayenne to your spice tolerance, but trust the process.
Serve it with cornbread, crispy tortilla chips, or a dollop of sour cream to cool the burn. This isn’t just dinner; it’s a flavor experience that turns a simple crock pot into your new best friend.
Whether you’re feeding a crowd or meal prepping for the week, this recipe scales perfectly while keeping that signature 5-alarm kick. The beauty of the crock pot method is its flexibility—dump everything in, walk away, and return to a pot of chili that’s ready to serve.
No burnt edges, no rushed prep, just deep, slow-cooked flavor that tastes even better the next day. Let’s get cooking!
Ingredients for 5 alarm chili recipe crock pot
Six ingredients build the base, but spices and slow cooking create the magic.
| Ingredient | Amount | Notes |
|---|---|---|
| Ground Beef (Chuck) 🥩 | 2 lb | 80% lean, pre-cubed preferred |
| Kidney Beans 🌱 | 2 cups | Canned, drained and rinsed |
| Onions (Yellow) 🧅 | 2 whole | Diced, about 2 cups |
| Garlic Cloves 🧄 | 6 cloves | Minced, about 2 tbsp |
| Canned Tomato Sauce 🍅 | 2 cups | Crushed tomatoes preferred |
| Beef Broth 💧 | 2 cups | Low-sodium preferred |
| Chili Powder 🌶️ | 2 tbsp | Smoked preferred for depth |
| Ground Cumin 🌿 | 1 tbsp | Toasted for best flavor |
| Smoked Paprika 🌶️ | 1 tbsp | Adds signature smokiness |
| Cayenne Pepper 🔥 | 1 tsp | Adjust for heat preference |
| Unsweetened Cocoa Powder 🍫 | 2 tbsp | Natural depth of flavor |
| Salt 🧂 | 1 ½ tsp | Diamond Crystal preferred |
| Black Pepper 🌶️ | ½ tsp | Freshly ground preferred |
| Olive Oil 🫒 | 1 tbsp | For browning meat |
The ground beef is where the chili’s depth starts. Chuck roast is ideal—it’s tough enough to stay tender through hours of cooking, but leaner cuts can turn mushy. I grab mine pre-cubed from Costco when I’m making big batches, but the regular supermarket stuff works fine. Look for good marbling if you’re buying a whole roast to cube yourself. The kidney beans? Canned is fine, but if you’re feeling fancy, soak dried overnight for a creamier texture. Onions and garlic are non-negotiable for that aromatic base—don’t skip browning them in the olive oil first, even if you’re using a crock pot. That step makes all the difference.
No chili powder? Mix 1 tbsp smoked paprika with 1 tsp cayenne as a quick swap. The cocoa powder might seem odd, but it’s what gives this chili that signature depth—Dutch-processed is best since it’s less bitter. Short on time? Pre-made chili seasoning works, but cut the salt since most blends have plenty. The cayenne is where you control the heat—start with 1/2 tsp if you’re sensitive, or go wild with 2 tsp if you love spice. The beef broth matters too—low-sodium versions let you control the salt better. And if you’re making this ahead, the flavors actually improve overnight—trust the process.
This chili tastes better the next day, so make a double batch and freeze half. Store leftovers in the fridge for up to 5 days, or freeze for 3 months. I portion mine into individual containers so I can grab and reheat for quick lunches. The crock pot makes this effortless—just dump everything in, cook on low for 8 hours, and you’ve got a restaurant-quality chili with minimal effort. The only prep is browning the onions and garlic first, which takes about 5 minutes. Worth it every time.
Why You’ll Love This Recipe
- Dump-and-Go Magic: I swear by this recipe because it’s the kind of meal where you can toss everything into the crock pot—raw onions, garlic, even the uncooked chuck—and walk away. No chopping, no stirring, no stress. The onions caramelize right in the pot, and the garlic infuses that deep, smoky richness without you lifting a finger.
- Deep Umami Bomb: That canned tomato sauce might seem basic, but when it simmers with browned chuck and kidney beans, it transforms into something ridiculously rich. The beef’s natural fat renders into the sauce, creating a velvety, slightly sweet depth that makes every spoonful irresistible.
- Tailgate or Tuesday: Serve it in bowls with shredded cheese and sour cream for a hearty weeknight dinner, or pile it into foil trays for a crowd at a football game. Honestly, I’ve made it for both—same recipe, just different serving styles. The beans hold up perfectly, and the chili only gets better the longer it sits.
- Leftovers That Don’t Suck: Most chili turns into a sad, watery mess by day three. Not this one. The crock pot’s slow cook keeps it thick and flavorful, so I freeze half for lazy nights. Between us, I’ve reheated this chili twice and no one’s ever complained—proof it’s a meal that gives back.
Step-by-step instructions for 5 alarm chili recipe
This crock pot chili develops deep, complex flavors over time—here’s how to make it rich and satisfying.
Brown the Ground Beef for Maximum Flavor
Heat a large skillet over medium-high heat and add the 1 tablespoon olive oil. Once the oil shimmers, add the 2 lb ground beef (chuck) and cook until it loses its raw color and starts to brown—about 8-10 minutes. Break it apart with a wooden spoon as it cooks so you get small, even pieces.
This browning step is crucial—it develops the deep, meaty flavor that carries through the entire chili. Don’t drain the fat; leave it in the skillet because those rendered juices will add richness to your chili. Once the beef is fully browned, transfer it to your crock pot using a slotted spoon.
Sauté Onions and Garlic for Aromatic Base
In the same skillet (no need to clean it—the browned bits add flavor), add the 2 whole diced onions (yellow). Cook over medium heat for 5-6 minutes until they soften and begin to caramelize slightly. Stir occasionally so they brown evenly.
Add the 6 minced garlic cloves and cook for another 30 seconds until fragrant. The onions should be tender but still have some bite. Transfer the onion-garlic mixture to the crock pot with the beef. Here’s the thing—these aromatics form the flavor foundation of your chili, so don’t rush this step.
Combine All Ingredients for Slow Cooking
Add the 2 cups canned tomato sauce, 2 cups beef broth, 2 tablespoons chili powder, 1 tablespoon ground cumin, 1 tablespoon smoked paprika, 1 teaspoon cayenne pepper, 2 tablespoons unsweetened cocoa powder, 1.5 teaspoons salt, and 0.5 teaspoon black pepper to the crock pot. Stir everything together until well combined.
Then add the 2 cups kidney beans. Give it one final stir to make sure all the ingredients are evenly distributed. The cocoa powder might seem unusual, but it adds a subtle depth that makes this chili truly special. Don’t worry about overmixing—this chili only gets better with time.
Cook on Low for Deep, Complex Flavors
Place the lid on your crock pot and cook on low heat for 8 hours. This long, slow cook time allows all the flavors to meld together perfectly. The chili will thicken naturally as it simmers, developing that rich, hearty texture that defines a great chili.
Here’s where the magic happens: the flavors build and intensify over time. The longer it cooks, the deeper the flavor becomes. If you’re in a hurry, you can cook it on high for 5-6 hours, but I promise you’ll get better results with the low-and-slow method.
Adjust Seasoning and Serve
After cooking, give your chili a taste and adjust the seasoning if needed. You might want to add a bit more salt or cayenne pepper to suit your taste. The chili should be thick and hearty, with all the flavors beautifully balanced.
Let it sit for 10-15 minutes before serving to allow the flavors to settle. The chili will be even more flavorful after resting. Serve it hot with your favorite toppings—crumbled cheese, sour cream, or chopped green onions work perfectly. This chili is so rich and satisfying that it’ll quickly become your new favorite recipe.
Pro Tips For Making 5 Alarm Chili Recipe Crock Pot
- CRUSH THE ONIONS: I learned this the hard way—chopping onions into tiny, even pieces before adding them to the crock pot makes a huge difference. They cook down more evenly and don’t turn to mush, giving your chili that proper texture. (Yes, even if you’re impatient like me, take the 5 minutes to do this right.)
- BROWN THE BEEF FIRST: Skip the raw beef straight into the crock pot, and you’ll end up with a watery chili. Instead, sear the ground chuck in a skillet until it’s deeply browned—this builds flavor and removes excess moisture. Just don’t overcrowd the pan, or it’ll steam instead of brown.
- DRAIN AND RINSE BEANS: Canned kidney beans are convenient, but the salty liquid they’re packed in will make your chili taste like a soup can exploded. Drain them, then rinse under cold water—this small step keeps the seasoning balanced and the texture perfect. (Your future self will thank you.)
- STIR BEFORE SERVING: Crock pots are lazy cooks’ best friends, but that doesn’t mean you can ignore the chili completely. Give it a good stir before serving—especially if you’re adding toppings like cheese or sour cream. The flavors settle differently, and you’ll catch any hot spots where the spices concentrated. (Does it look weird? Yes. Does it work? Every single time.)
Common mistakes when making this recipe
Skipping the Browning
I can’t stress this enough—browning the beef and onions is non-negotiable for deep flavor. The Maillard reaction creates those rich, caramelized notes that transform good chili into great chili.
If you skip this step, your chili will taste flat and one-dimensional. Trust me, I’ve made this mistake and regretted every bite. 🔥
Overloading the Spices
Too much cayenne or chili powder can turn your chili into a fiery disaster. Start with the 1 tsp cayenne and 2 tbsp chili powder as written, then adjust to taste.
Remember, you can always add more, but you can’t take it out. I’ve seen people double the spices and end up with inedible chili—don’t be that person.
Using High Heat Too Long
Cooking on high for the full 8 hours will make your chili watery and bland. The slow cooker’s low setting is designed to gently develop flavors over time. If you’re in a hurry, cook on high for 5-6 hours max, but low and slow is always better.
The longer it cooks on low, the deeper the flavors become—just don’t rush it.
Not Browning the Onions
Those caramelized onions are the flavor foundation of your chili. If you skip browning them or just chop them raw, your chili will lack that sweet, deep onion flavor. Take the extra 5 minutes to cook them until soft and slightly golden—they’ll make all the difference.
I promise your chili will taste completely different if you do this step right.
Ignoring the Resting Time
Letting your chili rest for 10-15 minutes before serving allows the flavors to settle and the juices to redistribute. Skipping this step means you’ll end up with a thinner, less flavorful chili.
I know it’s tempting to serve it immediately, but trust the process—your patience will be rewarded with a richer, more satisfying bowl of chili. ✨
Using Pre-Cooked Beans
While canned beans are convenient, they can make your chili watery. If you’re using them, make sure to drain and rinse them thoroughly. For the best texture, I recommend using dried beans that you’ve soaked overnight.
They’ll hold up better during the long cook time and give your chili a creamier consistency. It’s worth the extra effort for that restaurant-quality texture.
Nutrition facts
Frequently asked questions
Can I use ground turkey instead of beef?
Yes, but expect a slightly leaner texture. Use 2 lb ground turkey (dark meat works best) and add 1 tablespoon olive oil to the crock pot to compensate for the reduced fat. The cooking time remains the same, but you may want to add 1/2 cup chicken broth extra to prevent drying out. The flavor will be milder, so consider adding an extra 1/2 teaspoon smoked paprika for depth.
How do I make this chili less spicy?
Start by reducing the cayenne to 1/2 teaspoon or even 1/4 teaspoon for mild heat. After cooking, stir in 1/4 cup sour cream or 1/2 cup tomato sauce to balance the flavors. For a creamy option, mix in 1/2 cup Greek yogurt—it cools the burn while adding richness. Always taste as you go!
Can I make this in an Instant Pot?
Sauté the beef, onions, and garlic in the Instant Pot first. Then add all ingredients and cook on high pressure for 20 minutes, followed by a 10-minute natural release. For extra richness, stir in 1/4 cup beef broth after releasing pressure. The Instant Pot version cooks faster but still delivers deep flavor—just keep an eye on the thickness.
What’s the best way to store leftovers?
Let the chili cool completely, then transfer to airtight containers. It keeps in the fridge for 5 days or freezes for 3 months. For reheating, use the microwave on medium power for 2-3 minutes, stirring halfway. The crock pot reheats it evenly—just cover and cook on low for 2 hours. Pro tip: Freeze in single-serving portions for easy lunches!
Why does my chili taste bitter?
Overcooking or using too much cocoa powder can cause bitterness. If this happens, stir in 1 teaspoon sugar or honey to balance the flavors. For future batches, reduce the cocoa to 1 tablespoon and cook on low for no more than 7 hours. Also, ensure your spices are fresh—old spices develop bitter compounds over time.

- Pea Soup Instant Pot Recipe: Velvety Green Smoothness in 20 Minutes - November 1, 2026
- Pork Loin Pulled Pork Crock Pot Recipe: Slow-Smoked Tenderness With Zero Dryness - November 1, 2026
- Baked Potatoes in Crock Pot Recipe: Buttery Interiors and Crispy Top Magic - November 1, 2026