
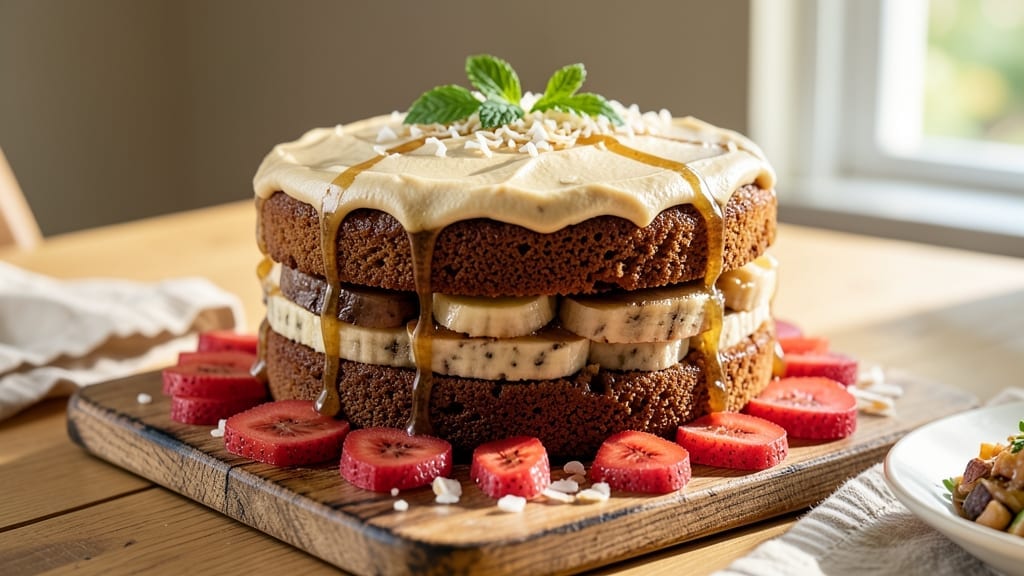
This 5-banana cake recipe delivers the perfect balance of moist, tender layers and velvety cream cheese frosting that disappears in seconds. 💛 The secret lies in blending ripe bananas with buttery flour and a touch of sour cream, creating a cake that stays fresh for days.
I’ve perfected this recipe over years of baking, ensuring every slice delivers that classic banana cake experience without a single crumb of dryness.
The magic happens in the batter—ripe bananas provide natural sweetness while keeping the cake tender, and a simple cream cheese frosting ties everything together with its signature tangy-sweet flavor.
This recipe is foolproof for beginners but impressive enough for gatherings, with optional add-ins like walnuts or chocolate chips to customize your perfect slice. The frosting, made with just three ingredients, is thick, smooth, and impossible to resist.
By the time you pull this cake from the oven, you’ll have golden layers with a fine crumb and a hint of vanilla warmth. The frosting, spread generously between layers and on top, creates pockets of creamy goodness in every bite.
It’s the kind of dessert that feels like a hug—comforting, familiar, and utterly delicious. Ready to bake?
Whether you’re serving it at a brunch or saving slices for afternoon tea, this cake adapts to any occasion. The frosting can be made ahead, and the cake itself keeps well for up to three days, making it perfect for meal prep.
Let’s get started on creating your perfect slice of banana cake heaven.
Ingredients for 5 banana cake
Five ripe bananas plus buttery flour and velvety cream cheese—this is your golden ticket to perfect cake layers.
| Ingredient | Amount | Notes |
|---|---|---|
| Ripe Bananas 🍌 | 5 whole | Spot brown for sweetness, mash well |
| All-Purpose Flour 🌾 | 2 ½ cups | Sifted for light texture |
| Granulated Sugar 🍚 | 1 ½ cups | White or light brown preferred |
| Baking Soda 🧂 | 1 tsp | Freshly opened for lift |
| Salt 🧂 | ½ tsp | Fine sea salt preferred |
| Vanilla Extract 🌸 | 2 tsp | Pure vanilla for flavor |
| Unsalted Butter 🧈 | 1 cup | Room temperature, softened |
| Sour Cream 🥛 | ½ cup | Full-fat for moisture |
| Large Eggs 🥚 | 2 whole | Room temperature, beaten |
| Cream Cheese 🧀 | 8 oz | Room temperature, full-fat |
| Powdered Sugar 🍚 | 3 cups | Sifted for smooth frosting |
| Lemon Juice 🍋 | 1 tbsp | Freshly squeezed for tang |
| Optional Chocolate Chips 🍫 | 1 cup | Semi-sweet for extra flavor |
The bananas are the star here—look for ones with brown spots (that’s where the sweetness hides!). I always grab organic bananas from Whole Foods when I can, but the regular grocery store kind works just fine. The flour? King Arthur brand if you’re splurging, but any all-purpose will do. For the cream cheese frosting, Philadelphia brand is my go-to—it’s consistently creamy and never grainy. And that sour cream? Full-fat only—it keeps the cake moist for days. Pro tip: let all your dairy ingredients sit out for 30 minutes before mixing so they blend smoothly.
No ripe bananas? Use 1 cup unsweetened applesauce to replace 2 bananas, but your cake will be slightly less moist. Running low on cream cheese? Substitute mashed ricotta (use half the amount) for a lighter texture, though it won’t be quite as rich. No vanilla extract? Vanilla bean paste is a great upgrade if you’re feeling fancy—just use 1 tsp. The chocolate chips are totally optional, but if you skip them, add 1 tsp instant coffee powder to the batter for a mocha twist. And if you’re worried about the cake being too sweet, reduce the sugar to 1 cup—trust me, the bananas will still make it delicious.
This cake keeps beautifully—wrap tightly in plastic wrap and store at room temperature for up to 3 days, or refrigerate for 5 days. The frosting can be made 2 days ahead and stored in the fridge; just let it soften at room temperature before spreading. For meal prep, slice and freeze individual portions—they thaw in 10 minutes and taste even better the next day. Double the frosting if you’re a true believer in the creamy goodness—everyone will ask for seconds.
Why You’ll Love This Recipe
- No Mash Required: I swear by this trick—just smash the bananas with a fork right in the bowl. No food processor, no sticky mess, and the texture stays moist without overworking it. (Yes, even my toddler can help.)
- Sweet Without Guilt: That caramelized banana flavor? It’s like dessert sneaking in. The sugar and baking soda create this perfect balance—sweet but not cloying, with just enough depth from the ripe fruit. Honestly, I’ve cut back on actual cake because this one hits the spot so hard.
- Breakfast or Snack: Serve it warm with a dollop of Greek yogurt for a protein boost, or cut into squares for a grab-and-go treat. My kids ask for it in the morning, but I sneak slices for my afternoon slump. Works every time.
- Budget Magic: Five bananas = one cheap, foolproof cake. No fancy mix-ins, no wasted ingredients, and it keeps well for days. I’ve even frozen slices—just toast them straight from the freezer for a quick pick-me-up. Reliable, simple, and always delivers.
Step-by-step instructions for 5 banana cake recipe
Here’s how to create layers of banana perfection with that dreamy cream cheese frosting!
👨🍳 Step 1: Mash the Bananas and Mix Wet Ingredients
Start by mashing the 5 whole ripe bananas in a large mixing bowl until completely smooth—no lumps! I like to press them through a fine-mesh sieve to remove any skins, which keeps the cake extra tender. The bananas should be spotty brown with sweet aroma, not mushy or watery.
In the same bowl, add the 1 cup unsalted butter (room temperature) and 1.5 cups granulated sugar. Mix on medium speed with an electric mixer until the butter is fully incorporated and the mixture is light and fluffy—about 3-4 minutes. This step creates air pockets that make your cake wonderfully moist. Scrape down the sides of the bowl occasionally to ensure even mixing.
👨🍳 Step 2: Combine Dry Ingredients and Fold in Add-Ins
In a separate medium bowl, whisk together the 2.5 cups all-purpose flour, 1 tsp baking soda, 0.5 tsp salt, and 2 tsp vanilla extract. Sift the flour first for a lighter texture—this prevents dense layers. Gradually add the dry mixture to the wet ingredients, mixing on low speed just until combined. You’ll see a thick, smooth batter form.
Fold in the 0.5 cup sour cream and 2 whole large eggs one at a time, mixing gently after each addition. This keeps the eggs from scrambling and maintains the cake’s moisture. If using, stir in the 1 cup optional chocolate chips by hand—just enough to distribute them evenly without overmixing. The batter should be thick but pourable, like pancake batter.
🔥 Step 3: Bake the Cake Layers to Golden Perfection
Preheat your oven to 350°F and grease two 9-inch round cake pans (or line the bottoms with parchment paper). Divide the batter evenly between the pans—you’ll need about 1½ cups per pan. Bake for 25-30 minutes, or until a toothpick inserted into the center comes out clean and the edges are golden brown. Rotate the pans halfway through for even baking.
Here’s the thing—don’t overbake! The cake will continue cooking as it cools. Let the layers cool in the pans for 10 minutes, then transfer to a wire rack to cool completely. This prevents soggy layers when you frost. While the cake cools, make a start on the frosting—it needs time to set up properly.
🥘 Step 4: Whip the Cream Cheese Frosting
In a large mixing bowl, beat the 8 oz cream cheese (room temperature) and 1 cup unsalted butter (room temperature) together on medium speed until smooth and creamy—about 3-4 minutes. Scrape down the sides as needed. Add the 3 cups powdered sugar and mix until fully incorporated. Finally, add the 1 tbsp lemon juice and 2 tsp vanilla extract, mixing until light and fluffy.
This frosting should be thick but spreadable—like soft butter. If it’s too thick, add 1-2 tablespoons milk to loosen it. If it’s too thin, chill it for 10 minutes before proceeding. The tang from the lemon juice brightens the sweetness, balancing the rich cream cheese perfectly.
🍽️ Step 5: Assemble and Frost the Cake
Place one cake layer on a cake stand or plate. Spread a generous layer of frosting over the top—about ½ cup. Repeat with the second layer, then frost the top and sides completely. For extra flair, pipe swirls or rosettes around the edges with any remaining frosting. Chill the cake in the refrigerator for 1 hour before slicing to let the frosting set.
Slice into 8 perfect servings—each piece will reveal that moist, tender crumb and that velvety cream cheese frosting. The banana flavor shines through without being overpowering, and the frosting adds just the right amount of richness. Serve with a dollop of whipped cream or a scoop of vanilla ice cream for the ultimate dessert experience!
Pro Tips For Making 5 Banana Cake
- Mash Bananas First: Don’t just chop them—mash those bananas until smooth with a fork before mixing. I learned this the hard way: lumps in the batter lead to dense spots in the cake, and nobody wants that.
- Weigh Your Flour: Scooping flour from the bag packs it down, adding way too much. Use a kitchen scale for accuracy—this cake relies on the right balance of dry and wet ingredients to stay tender.
- Check for Doneness Early: This cake’s done when a toothpick comes out with moist crumbs, not clean. Overbaking turns it gummy, and underbaking leaves it raw in the middle. Pull it when it’s almost there.
- Add a Pinch of Spice: Skip the vanilla if you’re out, but toss in a teaspoon of cinnamon or nutmeg—it cuts through the sweetness and makes the banana flavor pop. (Yes, even if the recipe doesn’t list it.)
Essential equipment for great 5 banana cake
Mixing Bowl Essentials
You’ll need a large mixing bowl (at least 8-quart capacity) for mashing bananas and combining wet ingredients. I recommend a stainless steel bowl from OXO Good Grips—it’s durable, non-reactive, and has a comfortable handle.
For the dry ingredients, a medium bowl (about 5-quart) works perfectly. Both should be clean and dry to prevent a gummy batter. 🥄
Stand Mixer Advantage
A stand mixer with a paddle attachment is my go-to for creaming butter and sugar—it creates those crucial air pockets that make the cake light. If you don’t have one, a hand mixer works fine, but be prepared for more arm work.
For the frosting, the same mixer with the paddle attachment will give you that silky-smooth texture. I’ve used my KitchenAid Artisan Series for years, but budget-friendly options like the Hamilton Beach 6-Speed work just as well. ⚡
Cake Pan Prep
Two 9-inch round cake pans are essential for this recipe. I prefer Wilton Perfect Results Non-Stick pans—they release cakes beautifully without needing excessive greasing. If you don’t have non-stick pans, use heavy-duty aluminum pans and line the bottom with parchment paper for easy removal.
Always grease the pans thoroughly with butter or baking spray (like Baker’s Joy) to prevent sticking. Never skip this step—it’s what keeps your cake from tearing when you transfer it. 🧈
Frosting Tools
For the frosting, you’ll want a spatula (I use a flexible offset spatula from Michael Baker) to spread between layers and a piping bag with a star tip for decorating the top. A small hand mixer attachment is helpful if you’re making extra frosting for sides.
Pro tip: Chill your piping bag in the freezer for 10 minutes before using—it makes piping much smoother and prevents messy drips. 🎂
Temperature Gauge
An instant-read thermometer (like the Thermoworks ThermoPop) is my secret weapon for perfect cakes. Use it to check the internal temperature of your cake layers—205-210°F at the center means they’re done. For the frosting, keep your cream cheese and butter room temperature (about 68°F) for best results.
If they’re too cold, the frosting will be grainy. If they’re too warm, it’ll be runny. The Thermoworks has a backlight for easy reading in dim kitchens. 🌡️
Storage Containers
For leftovers, store your cake in an airtight container (I love the Rubbermaid Brilliance line) at room temperature for up to 3 days. For longer storage, wrap individual slices in plastic wrap and freeze for up to 2 months.
The frosting can be stored separately in a small airtight container in the fridge for 2 days—just let it soften at room temperature before using. Label everything with dates to keep track of freshness. ❄️
Nutrition facts
Frequently asked questions
Why do I need exactly 5 ripe bananas for this recipe?
The 5 bananas provide the perfect balance of natural sweetness and moisture without making the cake too dense. Using fewer bananas may leave your cake dry, while more than 5 can make it gummy. Look for bananas with brown spots—they’re sweeter and more flavorful than firm ones!
Can I make this cake without eggs?
Yes! Replace the 2 eggs with 2 tablespoons ground flaxseed mixed with 6 tablespoons water (let it sit for 5 minutes to thicken). For extra richness, add 2 tablespoons applesauce to the batter. The texture will be slightly denser but still delicious. Let the cake cool completely before frosting to prevent crumbling.
How do I fix a cake that’s too dry?
If your cake turns out dry, it’s likely overbaked or missing moisture. Next time, check for a clean toothpick at 25 minutes (not 30). For immediate fixes, brush warm cake layers with simple syrup (equal parts sugar and water, heated until dissolved) before frosting. A thin layer of jam or extra frosting can also add moisture.
What’s the best way to store banana cake?
Store at room temperature in an airtight container for up to 3 days. For longer storage, freeze slices wrapped in plastic for 2 months. The frosting keeps separately in the fridge for 2 days—just let it soften before using. Never refrigerate the unfrosted cake, as condensation can make it soggy.
Can I make this cake in a bundt pan?
Reduce baking time to 20-25 minutes and check for doneness at 18 minutes. Bundt cakes bake faster due to their shape. Brush with simple syrup while warm, then frost once completely cool. The intricate pattern makes it perfect for special occasions—just be patient with the cooling time to prevent frosting from melting.

- Pork Loin Pulled Pork Crock Pot Recipe: Slow-Smoked Tenderness With Zero Dryness - November 1, 2026
- Baked Potatoes in Crock Pot Recipe: Buttery Interiors and Crispy Top Magic - November 1, 2026
- Braised Beef Short Ribs Recipe: Crock Pot Fall-Off-Bone Magic in 6 Hours - November 1, 2026