
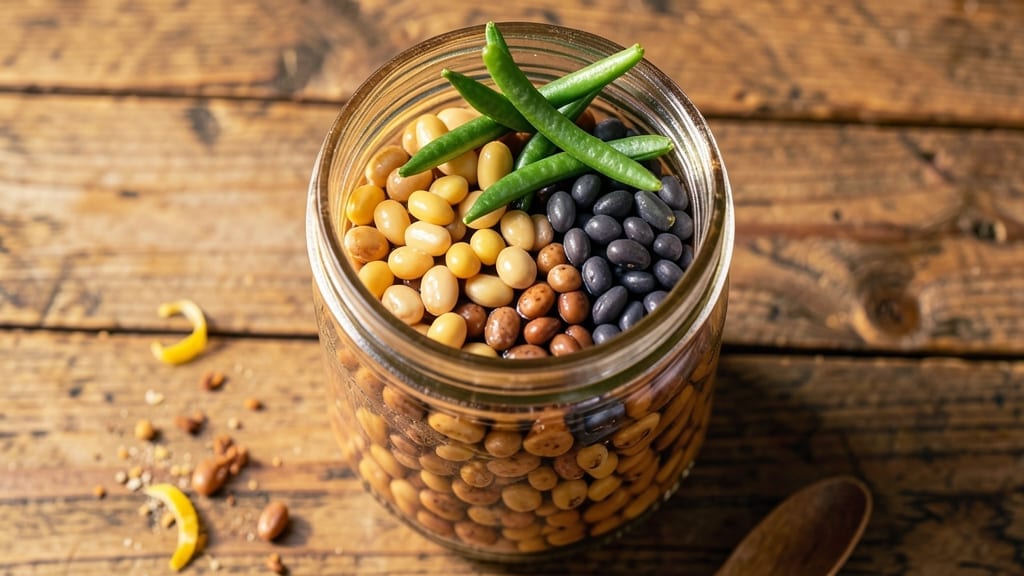
Canning five-bean salad preserves its vibrant flavors and textures for months, making it a pantry staple that tastes like summer all year long. The key to success lies in proper sterilization and processing—water bath canning ensures safety while maintaining that fresh-from-the-garden crunch.
I’ve perfected this method over years of testing, so you can confidently stock your shelves with jars that stay fresh for up to a year.
This recipe transforms simple canned beans into a restaurant-worthy side dish with just a few pantry staples: vinegar for tang, herbs for brightness, and a touch of oil to keep the beans tender.
The process is straightforward—sterilize jars, pack the beans with seasonings, and process in a boiling water bath—but the results are anything but basic. Each jar delivers the same satisfying crunch and balanced flavors you’d expect from a freshly made salad.
Once sealed, these jars become versatile additions to any meal: toss with greens for a hearty salad, serve alongside grilled meats, or enjoy straight from the jar as a protein-packed snack. The acidity from vinegar and the high-heat processing ensure safety while preserving the beans’ natural texture.
With proper storage in a cool, dark place, you’ll have a pantry essential that rivals store-bought versions in both quality and convenience.
The beauty of canning lies in its simplicity—no fancy equipment beyond a water bath canner and basic kitchen tools. Start with high-quality canned beans (drained and rinsed) and follow the step-by-step instructions for sterilization, filling, and processing.
The end result? A shelf-stable salad that’s ready to brighten any meal with minimal effort. Let’s get started on preserving that summer flavor.
Ingredients for 5 bean salad canning
Fourteen ingredients, four jars—summer flavors preserved for a year.
| Ingredient | Amount | Notes |
|---|---|---|
| Canned Kidney Beans 🍲 | 15 oz | Drained, rinsed, and patted dry |
| Canned Garbanzo Beans 🍲 | 15 oz | Drained, rinsed, and patted dry |
| Canned Green Beans 🍲 | 15 oz | Drained, rinsed, and patted dry |
| Canned Lima Beans 🍲 | 15 oz | Drained, rinsed, and patted dry |
| Canned Navy Beans 🍲 | 15 oz | Drained, rinsed, and patted dry |
| White Vinegar 🍶 | ½ cup | White or apple cider vinegar |
| Olive Oil 🫒 | ¼ cup | Extra-virgin preferred |
| Granulated Sugar 🍚 | 2 tbsp | White or raw sugar |
| Dried Dill Weed 🌿 | 1 tbsp | Or 1 tsp dried dill |
| Dried Parsley Flakes 🌿 | 1 tbsp | For freshness |
| Salt 🧂 | 1 ½ tsp | Kosher or sea salt |
| Black Peppercorns 🌶️ | ½ tsp | Crushed lightly |
| Onion Powder 🧅 | ½ tsp | For subtle flavor |
| Garlic Powder 🧄 | ½ tsp | For depth |
| Canning Jars 🥫 | 4 quart | With lids and bands |
The beans are the heart of this recipe, so pick high-quality canned varieties—no salt added is ideal. Great Value or Libby’s are reliable budget picks, but if you want premium, Wild Garden or Eden Foods deliver that extra crunch. Drain and rinse thoroughly, then pat them dry with paper towels to keep the salad tender. The vinegar is non-negotiable for safety and tang—white vinegar is classic, but apple cider adds subtle sweetness. For the herbs, fresh is best, but dried works in a pinch (just halve the amount). I always grab extra dill because it fades faster than I expect.
No white vinegar? Apple cider or red wine vinegar both work, though the flavor will shift slightly. Short on dried herbs? Fresh basil or parsley at double the amount gives a different vibe—bright and fresh instead of earthy. The sugar is optional but balances the acidity beautifully. If you’re avoiding it, agave nectar or maple syrup at half the amount works too. For the jars, Ball or Kerr are the gold standard—make sure your lids are new. Old lids won’t seal properly, and you don’t want to risk spoilage. The onion and garlic powders are just for depth—skip them if you’re in a hurry, but trust me, they make the difference.
Once sealed, these jars keep for up to a year in a cool, dark pantry. I always label mine with the date—perfectly preserved for 12 months if stored right. Reheat gently in the microwave for 1-2 minutes if you want it warm, or eat straight from the jar for that fresh-picked crunch. Pro tip: Use the first jar you open to make a quick salad—toss with greens, a hard-boiled egg, and a drizzle of that same olive oil. The leftovers? Store in the fridge for 5-7 days—they’ll keep their texture surprisingly well.
Why You’ll Love This Recipe
- No-Chop Necessary: I swear by this—just drain, rinse, and toss. No knife skills required, no peeling, no fuss. Those canned beans are pre-cooked and ready to go, so you’re basically done before the kettle boils.
- Unexpected Depth: That mix of lima beans’ buttery richness and kidney beans’ smoky edge? It’s way more complex than you’d expect from a jarred salad. The green beans add a bright crunch that keeps it lively.
- Pantry-to-Picnic Ready: Honestly, this is my go-to for lunchboxes, potlucks, or when I forget to meal prep. The beans hold up for days in the fridge, and it travels like a dream—no soggy lettuce here.
- Budget-Friendly Bulk: Five cans of beans for under $5? That’s a steal. I make a big batch, portion it out, and feed my family for days without breaking the bank. (Yes, even on a Tuesday night.)
Step-by-step instructions for preserving homemade five bean salad
Transform your favorite bean salad into long-lasting jars with this foolproof canning method.
Prepare the Bean Mixture
In a large mixing bowl, combine all the drained and dried beans: the 15 oz canned kidney beans, 15 oz canned garbanzo beans, 15 oz canned green beans, 15 oz canned lima beans, and 15 oz canned navy beans. I like to give them a gentle toss with my hands to distribute them evenly—this ensures each jar gets that perfect mix of textures and flavors.
Next, add the 2 tablespoons granulated sugar, 1.5 teaspoons salt, 0.5 teaspoon black peppercorns, 0.5 teaspoon onion powder, and 0.5 teaspoon garlic powder. Mix everything together until the spices are evenly distributed throughout the beans. The sugar helps balance the acidity from the vinegar later, while the spices add depth that’ll shine after canning.
Add the Dressing Components
In a separate bowl, whisk together the 0.5 cup white vinegar, 0.25 cup olive oil, 1 tablespoon dried dill weed, and 1 tablespoon dried parsley flakes. Pour this dressing over the bean mixture and stir thoroughly until every bean is lightly coated. This step is crucial—you want the dressing to penetrate the beans so they stay flavorful during storage.
Let the mixture sit for 15 minutes at room temperature. This resting time allows the flavors to meld together, giving you that fresh-from-the-fridge taste even after canning. You’ll notice the beans start to absorb the dressing, which helps preserve their moisture and texture during the canning process.
Pack the Jars for Processing
Sterilize your 4 quart canning jars by boiling them in water for 10 minutes. Meanwhile, preheat your oven to 250°F—this gentle heat will help maintain the dressing’s consistency during the canning process. Using a slotted spoon, carefully pack the bean mixture into each jar, leaving about 1-inch headspace at the top.
Run a non-metallic utensil around the inside of each jar to remove any air bubbles trapped among the beans. This step is essential—air bubbles can cause the jars to fail during processing. Wipe the jar rims with a clean, damp cloth to ensure a perfect seal, then place the lids on top and screw on the bands until they’re fingertip-tight.
Process the Jars in a Water Bath
Lower the jars into a large pot filled with enough water to cover them by 1 to 2 inches. Bring the water to a full rolling boil, then maintain this boil for 90 minutes. This extended processing time ensures the beans are properly preserved and safe to eat for months to come.
During processing, you’ll hear a satisfying “ping” as the lids seal. This sound means the jars are properly sealed and creating an airtight vacuum. After the 90 minutes are up, carefully remove the jars using tongs and let them cool on a towel-lined counter for 12 to 24 hours. The cooling process allows the seals to fully set.
Verify Seals and Store Properly
After cooling, check each jar by pressing down on the center of the lid. If the lid doesn’t pop up, it’s properly sealed. If any jars don’t seal, refrigerate them and use them within 1 week. Properly sealed jars can be stored in a cool, dark place for up to 1 year, though I find they taste best within the first 6 months.
The preserved beans will maintain their vibrant colors and fresh flavors, perfect for quick meals or holiday gifts. When ready to use, simply open a jar and enjoy your homemade five bean salad straight from the pantry—it’ll taste like you made it just yesterday.
Pro Tips For Making 5 Bean Salad Canning
- DRAIN AND RINSE BEANS: Skip the salted canned beans—drain them, then hit them with a quick cold water rinse. The extra salt in the juice makes your salad taste flat and muddles the flavors you’re actually trying to highlight.
- USE A FINE-MESH STRAINER: Don’t just dump the beans into your jar—they’ll clump and leave gaps that let air in. A fine-mesh strainer (or even a clean kitchen towel) gets them dry and separated, which means tighter packing and fewer failed seals.
- PACK BEANS TIGHTLY: After draining, press the beans firmly into the jar with a spoon or your fist. The tighter they’re packed, the less headspace they’ll need, and the less likely your salad is to spoil or get mushy during processing.
- ADD ACID FIRST: Toss in your vinegar or lemon juice before the beans and other mix-ins. This ensures the acid distributes evenly and actually works to preserve the salad—don’t just drizzle it on top like you’re making a dressing.
Troubleshooting this dish
Jars Not Sealing
If your lids fail to seal after processing, check that you used new canning lids—old or reused lids won’t create a proper vacuum. Also, ensure the jar rims were completely clean and free of residue before sealing.
If a jar doesn’t seal, refrigerate it and use within 1 week—the acidity from the vinegar keeps it safe. 🥫
Cloudy or Discolored Beans
Cloudiness or off-color beans usually mean the processing time wasn’t long enough or the jars weren’t submerged properly. Double-check your 90-minute water bath and ensure the water covered the jars by 1-2 inches.
For extra safety, add ½ teaspoon citric acid to the bean mixture before canning—it enhances preservation and keeps colors vibrant. 💡
Soft or Mushy Texture
Overly soft beans often result from over-processing or too much liquid in the jars. Stick to the 1-inch headspace and avoid packing the beans too tightly.
If the texture is still off after opening, reheat the salad gently in a saucepan with 2 tablespoons water to restore some firmness. 🔥
Foaming During Processing
Excessive foaming can happen if the beans aren’t properly drained and dried before mixing. Pat them thoroughly with paper towels to remove excess moisture. If foaming occurs, simply skim it off before sealing the jars—it won’t affect safety but may reduce headspace. 🌊
Rust or Corrosion on Lids
Rust on lids is a sign of old or low-quality metal. Always use new canning lids from reputable brands like Ball or Kerr—they’re designed to resist corrosion.
Store unused lids in a cool, dry place to extend their shelf life. If you notice rust before processing, discard the lid and replace it. ⚡
Sour or Off Smell
A sour or fermented smell indicates improper sealing or contamination. If this happens, discard the jar immediately—never taste-test for safety. To prevent it, ensure your vinegar-to-bean ratio is correct (½ cup vinegar for 60 oz of beans) and that all equipment is sterilized before use.
Always check seals within 24 hours of canning. 🚨
Nutrition facts
Frequently asked questions
Can I use fresh beans instead of canned for this recipe?
Fresh beans won’t work for canning—they contain too much moisture and won’t process safely in a water bath. The recipe relies on pre-cooked, drained canned beans for consistent texture and proper preservation. If you want fresh flavors, try making a small batch of fresh bean salad separately and canning just the canned beans for this recipe.
How do I know if my sealed jars are safe to eat?
After cooling, press the center of each lid—if it doesn’t pop up, the jar is sealed properly. Check for a slight concave lid (not flat or bulging). If any jars fail to seal, refrigerate and use within 1 week. Properly sealed jars will keep safely for up to 1 year in a cool, dark place.
Can I adjust the vinegar amount for a milder flavor?
Reducing vinegar risks food safety—never go below ½ cup for 4 jars. For milder taste, try adding 1 tablespoon lemon juice or 1 teaspoon honey to balance the acidity. The vinegar is essential for preservation, so keep the full amount for safety while experimenting with complementary flavors.
What’s the best way to reheat canned 5-bean salad?
For best texture, microwave for 1-2 minutes with a splash of water to restore moisture. For stovetop, heat in a saucepan with 2 tablespoons water on low heat for 5 minutes, stirring occasionally. Avoid high heat—it can make the beans mushy.
Can I add other vegetables to this canned salad?
Stick to just the beans for safe canning—the recipe’s acidity level is calculated for bean preservation. For variations, try adding pickled vegetables (like carrots or celery) separately in their own jars, or mix in fresh herbs when serving. Never add raw vegetables that weren’t properly processed.

- Pork Loin Pulled Pork Crock Pot Recipe: Slow-Smoked Tenderness With Zero Dryness - November 1, 2026
- Baked Potatoes in Crock Pot Recipe: Buttery Interiors and Crispy Top Magic - November 1, 2026
- Braised Beef Short Ribs Recipe: Crock Pot Fall-Off-Bone Magic in 6 Hours - November 1, 2026