
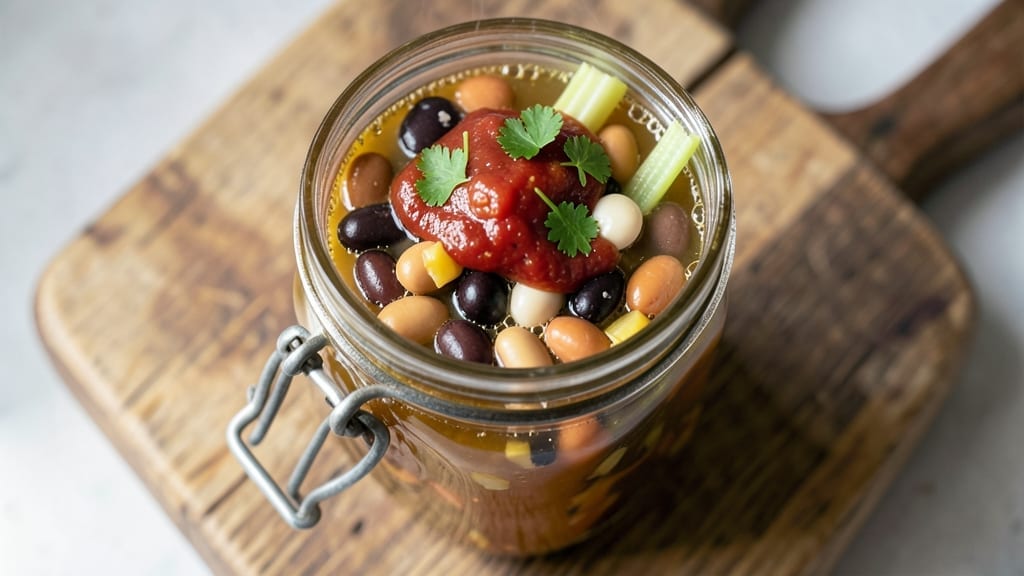
Transforming simple pantry staples into hearty 5-bean soup in a jar is the ultimate meal-prep solution—rich, flavorful, and ready whenever you are. The beauty of this recipe lies in its adaptability: simmer on the stovetop, slow cook for hands-off convenience, or pressure cook in an Instant Pot for speed.
I’ve perfected this technique to ensure every bean is tender and every sip delivers that comforting, savory depth you crave.
The process starts with soaking and draining dried beans to reduce cooking time, then simmering them with aromatic vegetables, herbs, and broth until everything melds into a velvety, satisfying soup.
What makes this recipe truly special is its flexibility—it works as a vegetarian main or can be elevated with bacon or ham for non-vegetarians. The result? A soup so flavorful it tastes like it’s been simmering for hours, even if you’re short on time.
Once you’ve achieved that perfect balance of textures and flavors, the real magic happens when you transfer the soup to sterilized jars. The jars not only keep the soup fresh for up to a week but also make it easy to grab and go.
Whether you’re meal prepping for the week or simply want to enjoy a comforting bowl of soup on a chilly evening, this method delivers restaurant-quality results without the fuss.
Reheating is effortless—just warm the jars in the microwave or on the stovetop, and you’re ready to enjoy a bowl of hearty, nourishing soup that’s as good as it gets.
This recipe is designed to be your go-to for quick, satisfying meals that don’t sacrifice flavor or quality. Let’s get started on creating your own pantry-to-table masterpiece.
Ingredients for 5 bean soup in a jar
Pantry staples meet hearty comfort—just 16 ingredients for soup that tastes like love.
| Ingredient | Amount | Notes |
|---|---|---|
| Dried Navy Beans 🌱 | 1 ½ cups | Rinsed and picked over |
| Dried Black Beans 🌱 | 1 cup | Rinsed and picked over |
| Dried Kidney Beans 🌱 | ½ cup | Rinsed and picked over |
| Dried Pinto Beans 🌱 | ½ cup | Rinsed and picked over |
| Dried Great Northern Beans 🌱 | ½ cup | Rinsed and picked over |
| Vegetable Broth 💧 | 6 cups | Low-sodium preferred |
| Yellow Onion 🧅 | 1 whole | Diced, medium size |
| Carrot 🥕 | 2 whole | Chopped, medium size |
| Celery Stalks 🧅 | 3 whole | Chopped, medium size |
| Garlic Cloves 🧄 | 4 cloves | Minced, fresh preferred |
| Tomato Paste 🍅 | 2 tbsp | Squeeze tube preferred |
| Dried Thyme 🌿 | 1 tsp | Or 1 tbsp fresh |
| Bay Leaves 🌿 | 2 whole | Remove before serving |
| Salt 🧂 | 1 ½ tsp | Diamond Crystal preferred |
| Black Pepper 🌶️ | ½ tsp | Freshly ground |
| Olive Oil 🫒 | 1 tbsp | Extra-virgin preferred |
The beans are the soul of this soup, so pick a mix you love. I grab mine from the bulk section at Whole Foods—they’re cheaper and fresher than the pre-packaged bags. If you’re short on time, soak overnight to cut cooking time. For the broth, low-sodium is key—you’ll be adding plenty of salt later. The onion, carrot, and celery combo is classic for a reason—it’s called a ‘mirepoix’ and builds flavor like magic. Chop them evenly so they cook at the same rate.
No black beans? Substitute more navy or pinto—they’re all similar in texture. Short on thyme? Oregano or rosemary work too. The tomato paste can be skipped if you’re not a fan, but trust me, it adds depth. For the garlic, fresh is best, but powdered works in a pinch. If you’re making this ahead, freeze the dry beans and broth separately—just add them together when you’re ready to cook. The olive oil is non-negotiable—it helps the flavors meld together beautifully.
This soup keeps like a dream. Sterilized jars are a must—boil them for 10 minutes before filling. Once sealed, it stays fresh for up to a week in the fridge or 3 months in the freezer. Reheat gently on the stove or microwave until steaming. Double the batch—you’ll want leftovers. The flavors only get better as it sits, so don’t rush it. Perfect for meal prep or a cozy night in.
Why You’ll Love This Recipe
- No-Soaking Required: I’ll be real—this recipe changed my life when I realized I could skip the overnight soak. Just toss those dried beans (navy, black, kidney, pinto, and great northern) straight into the jar with broth, tomatoes, and spices, then let the slow cooker do the work. My lazy Sundays now include a steaming pot of soup with zero prep guilt.
- Deep, Earthy Harmony: Between us, that mix of beans—creamy great northerns, smoky black beans, and meaty kidney beans—creates a flavor I can’t get anywhere else. A splash of vinegar and a pinch of smoked paprika? That’s the secret to the rich, complex taste that makes me reach for seconds.
- Meal Prep Magic: Honestly, this is my go-to for busy weeks. Make a big batch, store it in jars, and you’ve got lunch or dinner covered for days. I even freeze portions—just reheat and serve. Perfect for college students, office lunches, or nights when you’d rather binge-watch than cook.
- Budget-Friendly Pantry Staple: Five types of beans for under $5? Yes, please. This soup stretches into multiple meals without breaking the bank, and the flavors only get better the next day. My wallet and my taste buds both win—what’s not to love?
Step-by-step instructions for 5 bean soup in a jar
This hearty soup comes together with minimal effort but maximum flavor—let’s make it.
Sauté the Vegetable Base
Heat the 1 tablespoon olive oil in a large Dutch oven or heavy pot over medium heat. Add the 1 whole yellow onion, 2 whole carrots, and 3 whole celery stalks, all chopped, and cook for 5-7 minutes until the vegetables begin to soften and the onion turns translucent.
Here’s the thing—don’t rush this step. You want the vegetables to develop some color and caramelize slightly before adding the rest. Stir occasionally to prevent burning. When the vegetables are tender but still hold their shape, add the 4 cloves minced garlic and cook for another 30 seconds until fragrant. This aromatic base forms the flavor foundation for your soup.
Add Tomato Paste and Seasonings
Stir in the 2 tablespoons tomato paste and cook for 1 minute until it darkens slightly and the raw taste disappears. This step deepens the soup’s richness and balances the earthy flavors of the beans.
Next, add the 1 teaspoon dried thyme, 2 whole bay leaves, 1.5 teaspoons salt, and 0.5 teaspoon black pepper. Stir everything together and cook for 30 seconds to toast the spices gently. This releases their essential oils and intensifies their flavors. The mixture should smell warm, earthy, and inviting—like a cozy kitchen in autumn.
Combine Beans and Broth
Add all the rinsed beans: 1.5 cups dried navy beans, 1 cup dried black beans, 0.5 cup dried kidney beans, 0.5 cup dried pinto beans, and 0.5 cup dried great northern beans. Stir to coat the beans with the vegetable mixture, ensuring they absorb some of the flavors.
Pour in the 6 cups vegetable broth and bring the mixture to a boil over high heat. Once boiling, reduce the heat to low and cover the pot. Let it simmer gently for 10 minutes to allow the beans to begin rehydrating and the flavors to meld together. This initial simmer helps break down the beans’ skins slightly, making them more tender later.
Simmer Until Beans Are Tender
After the initial 10-minute simmer, uncover the pot and continue simmering over medium-low heat for 1.5 to 2 hours. You’ll know the beans are ready when they’re fork-tender but still hold their shape—no need for them to be mushy. Stir occasionally and add water as needed if the soup gets too thick.
I like to check the beans at the 1-hour mark—if they’re still quite firm, give them another 30-45 minutes. The key is patience here. Rushing will leave you with tough, undercooked beans. The soup should have a thick, hearty consistency with the beans easily pierced by a fork but not falling apart.
Adjust Seasoning and Serve
Remove the 2 whole bay leaves from the soup and discard them. Taste the soup and adjust the seasoning if needed—you might need a bit more salt or pepper, depending on your broth. The soup should be rich, savory, and well-balanced with the earthy flavors of the beans and the sweetness of the carrots.
Serve the soup warm, either in bowls or directly from the jar for a portable meal. A sprinkle of fresh parsley or a dollop of sour cream can add a nice finishing touch. This soup tastes even better the next day as the flavors continue to develop, so it’s perfect for meal prep or leftovers.
Pro Tips For Making 5 Bean Soup In A Jar
- SOAK BEANS OVERNIGHT: Dried beans are stubborn—skip the quick-soak and let them sit in cold water for 8+ hours. I used to rush this with a 2-hour soak, but the beans still felt dense and took forever to soften. Cold water breaks them down better, and the soup ends up creamier.
- SORT BEANS FIRST: Pick through your dried beans before soaking—remove stones, broken bits, and any weird-looking ones. I learned this after chomping down on a pebble mid-bite. A quick scan in a colander saves your teeth and keeps the texture consistent.
- SIMMER GENTLY AFTER BOIL: Once the beans hit the pot, bring to a boil, then lower the heat immediately to a bare simmer. I’ve seen people leave it boiling, and the beans turn mushy while the outside stays hard. A steady simmer keeps them tender without falling apart.
- ADD SALT LATE: Hold off on salting the water until the beans are almost done—about 30 minutes before they’re tender. Salt early, and the skins toughen up, making them chewier. Save the salt for the last stretch to keep those beans silky.
Make-ahead tips for this 5 bean soup in a jar
Prep Ahead Strategy
Start by soaking all the dried beans together in a large bowl overnight with plenty of water—this cuts cooking time by 1-2 hours. Use a quart-sized mason jar for each cup of beans, filling it halfway with water.
The next morning, drain and rinse them thoroughly before adding to your soup. This step is non-negotiable for tender beans—trust me, it makes all the difference. ⏰
Jar Sterilization
Sterilize your jars and lids by boiling them in water for 10 minutes before filling. I use a large pot with enough water to cover the jars completely. Once sterilized, place them upside down on a clean kitchen towel to dry.
This prevents spoilage and keeps your soup fresh for up to 1 week in the fridge. Pro tip: Label each jar with the date so you can track freshness. ✨
Batch Cooking Tips
Double the recipe and divide it evenly between 4-6 sterilized pint jars. This ensures you always have a ready-to-go meal, and the flavors deepen as the soup sits. Store the jars in the fridge and reheat directly from the jar—no need to transfer.
For freezer storage, leave 1 inch of headspace in each jar to prevent expansion and potential leaks. 🧊
Slow Cooker Adaptation
Transfer all ingredients to a 6-quart slow cooker and cook on low for 8-10 hours or high for 4-5 hours. The slow cooker’s gentle heat ensures the beans become tender without splitting.
Once done, let the soup cool slightly before transferring to jars. This method is perfect for hands-off meal prep—just set it and forget it. 🍲
Instant Pot Shortcut
Use the Instant Pot’s high-pressure setting for a 30-minute cook time after the initial sauté. Add 1 cup water to the pot before sealing the lid, then cook for 30 minutes on high pressure.
Quick-release the pressure and let the beans sit for 10 minutes before transferring to jars. This method is a game-changer for busy weeknights. ⚡
Flavor Development
Let the soup sit overnight in the fridge before eating—this allows the flavors to meld and intensify. The beans will absorb more liquid, creating a richer, more cohesive texture.
If you’re short on time, at least let it rest for 4 hours before serving. Patience here is key to restaurant-quality results. 💫
Nutrition facts
Frequently asked questions
Can I substitute canned beans instead of dried?
Yes, but the texture will be different. Use 3 (15 oz) cans of each bean type (total 15 cups) and reduce the broth to 4 cups to maintain thickness. Drain and rinse the beans thoroughly before adding. Canned beans cook faster but lack the depth of flavor dried beans develop during simmering.
How do I prevent the soup from getting too thick when stored in jars?
Leave at least 1 inch of headspace when filling jars and seal them properly. If the soup thickens in the fridge, simply add 1-2 tablespoons of broth or water when reheating. For freezer storage, leave 2 inches of headspace to account for expansion during freezing.
Is this soup safe to eat if I forget to sterilize the jars?
Not recommended. Sterilization prevents spoilage bacteria. If you skipped this step, refrigerate the soup immediately and consume within 24 hours. For long-term storage, always sterilize jars by boiling for 10 minutes before filling. The risk of foodborne illness isn’t worth the convenience.
Can I add meat to make it non-vegetarian?
Brown 8 oz diced bacon or ½ lb ham before sautéing the vegetables, then proceed with the recipe. For extra flavor, add the meat back after the beans are tender. Remove any excess fat before storing in jars to maintain freshness.
Why do my beans turn out mushy?
Overcooking is the most common cause. Check beans at the 1-hour mark—they should be tender but still hold their shape. If they’re mushy, reduce simmering time to 1 hour next time. Also ensure you’re using fresh beans (not old, hardened ones) and proper liquid ratios.

- Pea Soup Instant Pot Recipe: Velvety Green Smoothness in 20 Minutes - November 1, 2026
- Pork Loin Pulled Pork Crock Pot Recipe: Slow-Smoked Tenderness With Zero Dryness - November 1, 2026
- Baked Potatoes in Crock Pot Recipe: Buttery Interiors and Crispy Top Magic - November 1, 2026