
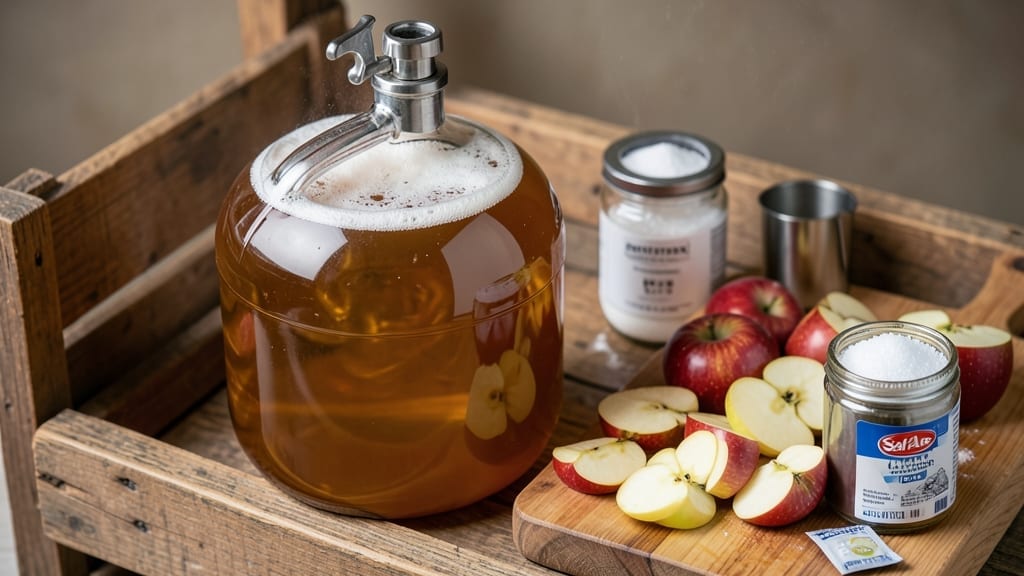
Making 5-gallon hard apple cider transforms crisp fall apples into a rich, spiced batch perfect for gatherings—no prior brewing experience needed. The process starts with sanitized equipment and a balance of sugar, yeast, and water to create a smooth, flavorful base.
What sets this recipe apart is the 30-minute prep time before fermentation begins, making it ideal for busy hosts who still want homemade quality.
Sanitization is critical—sterilize all containers and tools to prevent contamination during the primary fermentation (5-7 days) and secondary fermentation (2-4 weeks). The spice blend (cinnamon, cloves, and orange peel) infuses depth, while precise sugar measurements control alcohol content (typically 5-8% ABV).
This method ensures a crisp, balanced cider that rivals commercial brands but tastes distinctly homemade.
Once fermented, bottle your cider and age for at least 2 weeks to develop flavor complexity. Chill before serving to highlight its bright apple notes and subtle spice warmth. The result is a crowd-pleasing beverage that pairs beautifully with fall desserts or hearty appetizers—ideal for harvest parties or holiday cheer.
Always check local laws regarding home brewing, and store bottles in a cool, dark place to preserve freshness. With careful attention to detail, you’ll craft a smooth, aromatic cider that’s far superior to store-bought options. Ready to brew?
Ingredients for 5 gallon hard apple cider
Twelve pounds of apples kick off this crowd-pleasing hard cider—balanced sweetness meets fall spices for perfect gatherings.
| Ingredient | Amount | Notes |
|---|---|---|
| Fresh Apples (mix of varieties) 🍎 | 12 lb | Honeycrisp, Fuji, or Granny Smith preferred |
| Granulated White Sugar 🍚 | 4 lb | Adjust for desired sweetness/ABV |
| Liquid Yeast Nutrient 🧪 | 1 tsp | For yeast health during fermentation |
| Campden Tablets (Potassium Metabisulfite) 💊 | 1 whole | Sanitizes juice, crush before adding |
| Ale Yeast (e.g., SafAle US-05) 🍺 | 1 package | For clean fermentation profile |
| Cold Water 💧 | 4 ½ gallons | Chlorine-free preferred |
| Ground Cinnamon 🌿 | 1 tbsp | True Ceylon cinnamon recommended |
| Whole Cloves 🌶️ | 6 whole | Lightly crushed for aroma |
| Orange Peel 🍊 | 1 whole | Organic, zest only (no pith) |
| Sanitizer Solution (e.g., Star San) 🧼 | ½ cup | For equipment sterilization |
| Plastic Food-Grade Carboys (5 gallon) 🍶 | 2 whole | With airlocks included |
| Bottles (12 oz swing-top or flip-top) 🥤 | 50 whole | Sanitized before filling |
| Bottle Caps (12 oz) 🔒 | 50 whole | For carbonation retention |
Apple selection is non-negotiable. Local orchards or specialty grocers like Whole Foods carry ideal varieties—Honeycrisp for sweetness, Granny Smith for tartness. Avoid bruised fruit, which spoils quickly. The Campden tablet (1 crushed) eliminates wild yeast/bacteria; add it to the must while stirring. For yeast, SafAle US-05 delivers crisp, clean fermentation, but LalBrew L-01119 adds subtle fruitiness. Store spices in airtight containers away from light—their potency drops dramatically after 6 months.
No Campden tablet? White vinegar (1 tbsp) or lemon juice (2 tbsp) works in a pinch, though it adds flavor. Substitute orange peel with 1 tsp lemon zest or ½ tsp cardamom for warmth. Running short on bottles? Grolsch-style swing-tops from Homebrew Supply are reusable and seal perfectly. For sugar adjustments: 1 lb less sugar = ~1% lower ABV. Always use food-grade plastic for fermentation—glass can shatter if sealed improperly during carbonation.
Sanitize equipment with Star San (1 tsp per gallon) or bleach solution (1 tsp per quart), then rinse thoroughly. Primary fermentation takes 5-7 days at 68-72°F; secondary fermentation requires 2-4 weeks for flavor development. Bottle in a cool (55-65°F) space to prevent over-carbonation. Once bottled, store in a dark, 50-60°F cellar for 4-6 weeks before serving—patience here transforms harsh alcohol into smooth complexity.
Why You’ll Love This Recipe
- No-Fuss Fermentation: I swear by this recipe because it’s basically set-it-and-forget-it. Crush apples, add sugar and yeast nutrient, toss in a Campden tablet for sanitation—done. No fancy equipment, no hovering over the stove. My first batch fermented while I binge-watched a show.
- Apple Orchard in a Glass: Honestly, the flavor is what keeps me coming back. Mixing tart Granny Smiths with sweet Honeycrisp gives that perfect balance—bright, crisp, with just enough honeyed depth. The US-05 yeast does its magic, turning it into something smooth and drinkable, not that harsh cider you sometimes find.
- Crowd-Pleasing Any Day: Between us, this is my go-to for tailgates, holiday gatherings, or just because. It’s not just for fall—serve it chilled with spiced nuts in winter or ice-cold in summer. I’ve even gifted bottles to neighbors, and they always ask for seconds.
- Budget-Friendly Batch Brew: Five gallons means you’re not just making a few drinks—you’re stocking up. Apples are cheap in season, sugar is a dollar, and yeast lasts forever. Plus, once fermented, it keeps for months. My freezer’s always got a few bottles ready for lazy weekends. (Yes, even on a Tuesday night.)
Step-by-step instructions for crafting 5-Gallon hard apple cider
Follow this precise method to transform fresh apples into a rich, spiced hard cider ready for bottling.
Prepare and Sanitize Equipment
Begin by thoroughly cleaning and sanitizing all equipment to prevent contamination. Rinse the two 5-gallon plastic food-grade carboys and 50 swing-top bottles with hot water, then soak them in the 0.5 cup sanitizer solution for 10 minutes. Pay special attention to the airlocks and bottle caps—these must be completely free of residue. While sanitizing, crush the 1 whole Campden tablet between two spoons and dissolve it in 1 cup of the 4.5 gallons cold water in a separate container. This solution will sanitize your must and prevent bacterial infections during fermentation.
Real talk: Skipping sanitation here leads to off-flavors and potential spoilage. I’ve seen batches ruined by wild yeast or bacteria—don’t let that happen to you. After sanitizing, rinse all equipment with chlorine-free cold water to remove any sanitizer residue. This step ensures your cider develops only the flavors you intend.
Process the Apples and Create the Must
Quarter the 12 lb fresh apples (mix of varieties) and remove any cores or seeds. Place them in a large pot and cover with 3.5 gallons of the 4.5 gallons cold water. Bring to a boil over medium-high heat and cook for 20-25 minutes until the apples break down completely and the liquid turns a pale golden color. You’re looking for a smooth, pulp-free liquid—this is your must.
While the apples cook, lightly crush the 6 whole cloves and the 1 whole orange peel (using only the zest, no pith) between your palms. Once the apples have cooked, strain the mixture through a fine-mesh bag or cheesecloth into your sanitized carboy, pressing gently to extract all the liquid. Add the crushed spices and 1 tbsp ground cinnamon to the carboy. Stir in the remaining 1 gallon cold water and the dissolved Campden tablet solution.
Add Sugar and Yeast Nutrient
Dissolve the 4 lb granulated white sugar completely into the must by stirring vigorously for 5 minutes. The sugar should fully integrate, leaving no grainy residue at the bottom. This step is critical—undissolved sugar can lead to uneven fermentation and potential stuck fermentation. Add the 1 tsp liquid yeast nutrient and mix well to distribute evenly throughout the must.
Here’s the thing—sugar content directly impacts your final ABV. For a balanced hard cider around 5-7% ABV, this amount of sugar is ideal. If you prefer a drier cider, reduce sugar by 0.5 lb. Conversely, for a sweeter finish, increase by 0.5 lb. Taste the must at this stage—it should be sweet and tart, with clear spice notes from the cinnamon, cloves, and orange.
Pitch the Yeast and Begin Fermentation
Sprinkle the 1 package Ale Yeast (SafAle US-05) over the surface of the must, then gently stir for 30 seconds to distribute it evenly. Avoid creating too much agitation—this can introduce oxygen and lead to oxidation. Attach the airlock to the carboy and place it in a dark, temperature-controlled space between 65-72°F. Fermentation should begin within 12-24 hours, visible by bubbles rising steadily in the airlock.
Monitor the fermentation closely during the first 48 hours. You’ll notice the must foam vigorously as the yeast consumes sugars and produces alcohol and carbon dioxide. After 72 hours, the fermentation should slow significantly. This is when you’ll want to transfer the cider to a secondary carboy if you’re using one, or simply continue fermenting in the primary until fermentation completes—typically 7-10 days total. The cider is ready for bottling when it’s clear and the airlock bubbles have slowed to 1-2 bubbles per minute.
Bottle and Condition the Cider
Once fermentation is complete, sanitize the 50 swing-top bottles and 50 bottle caps once more. Using a siphon or sanitized tubing, carefully transfer the cider from the carboy to each bottle, leaving about 1 inch of headspace at the top. This space allows for carbonation buildup during conditioning. Seal each bottle tightly with the sanitized caps.
Store the bottles in the same 65-72°F environment for 2-4 weeks to allow for carbonation to develop naturally. You’ll know it’s ready when the bottles feel slightly firm to the touch when shaken gently—this indicates proper carbonation. After conditioning, your hard apple cider is ready to serve. Chill for 1 hour before opening to enhance the flavors and enjoy the rich, spiced profile you’ve crafted.
Pro Tips For Making 5 Gallon Hard Apple Cider
- Crush Apples Coarse: DESCRIPTION: Skip the blender—chop apples into ½-inch chunks with a knife or food processor on pulse. Smaller pieces release more flavor and sugar, but don’t turn it into apple sauce. I learned this the hard way after fermenting a batch that tasted like juice and nothing else.
- Dissolve Sugar Fully: DESCRIPTION: Heat the must to 75°F before adding sugar—it dissolves faster and prevents clumping. Stir like you’re mad for 10 minutes, then check for residue. I’ve pulled batches with undissolved sugar crystals that turned into a gummy mess mid-ferment.
- Wait 24 Hours After Campden: DESCRIPTION: Don’t pitch yeast until 24 hours after adding Campden tablets. The sulfites need time to work, or you’ll end up with sluggish fermentation. I rushed it once and spent a week waiting for the yeast to wake up—don’t make my mistake.
- Use a Hydrometer Early: DESCRIPTION: Test gravity at 24 hours, not just at the end. A stuck fermentation (below 1.010) means you’ll need to add more yeast or sugar. I ignored this once and ended up with a batch that tasted flat—boring, really.
Pro cooking tips for this dish
Temperature Control
Fermentation thrives between 65-72°F—any lower slows yeast activity, while higher temps risk off-flavors. I keep my carboy in a cool basement closet (not fridge) to maintain consistency.
Use a thermometer (like the iSi Calibrated Digital) to monitor—fluctuations above 75°F can produce fusel alcohols, giving your cider a harsh, solvent-like taste. 🌡️
Yeast Handling
Never pitch yeast directly into cold must—it needs 68-72°F water to activate. Sprinkle SafAle US-05 over the surface, then stir gently for 30 seconds to avoid oxygen exposure. For extra insurance, rehydrate the yeast in ½ cup warm water (95°F) for 10 minutes before adding.
This step boosts viability, especially in cooler climates where fermentation stalls. 🍺
Spice Infusion
Crush spices lightly—whole cloves and cinnamon sticks release aroma gradually, while over-crushing can make them bitter. Add spices after fermentation begins (Day 3) to prevent them from extracting tannins during the initial yeast frenzy.
For deeper flavor, steep 1 cinnamon stick in the must for 24 hours before fermentation, then remove it. 🌿
Carbonation Management
Leave 1 inch headspace in bottles to prevent over-carbonation (which can cause explosions). If your cider feels too fizzy after conditioning, transfer it to a carbonation stone setup (like Blichmann Beer Gun) to adjust pressure safely.
For still cider, skip secondary fermentation and bottle early—just ensure 1-2 bubbles per minute in the airlock before bottling. ✨
Equipment Upgrades
Skip the cheap plastic carboy—opt for food-grade PET (like Blichmann Brew Keg) for better durability and easier cleaning. For sanitizing, Star San is foolproof, but bleach solution (1 tsp/gallon) works in emergencies.
My must-have tool is a sanitized siphon (I use AutoSiphon) to avoid oxygen exposure during transfers. 💡
Flavor Troubleshooting
If your cider tastes too sweet, reduce sugar by 0.5 lb next time—yeast converts 1 lb sugar ≈ 1% ABV. For sour notes, fermentation went too long; bottle at 1-2 bubbles/minute for crispness. Harsh alcohol? Lower temps or use LalBrew L-01119 yeast, which produces cleaner fermentation.
Taste your must before pitching yeast—this helps diagnose issues early. 💪
Nutrition facts
Frequently asked questions
How long does it take to make 5-gallon hard apple cider?
Total time from start to finished product is about 3-6 weeks. The active brewing process takes 7-10 days for primary fermentation, followed by 2-4 weeks of secondary fermentation and conditioning. The 30-minute prep time mentioned refers only to the initial setup before fermentation begins.
Can I use store-bought apple juice instead of fresh apples?
Yes, but fresh apples yield better flavor and texture. If using store-bought juice, choose 100% pure, unsweetened apple juice with no preservatives. You’ll need 5 gallons of juice and can skip the cooking step, but add 2 extra pounds of sugar to account for the missing natural sweetness from fresh fruit.
What alcohol content can I expect from this recipe?
The recipe yields approximately 5-7% ABV depending on fermentation efficiency. Each pound of sugar converts to roughly 1% alcohol, so the 4 lb sugar provides the base alcohol content. For stronger cider (8-10% ABV), increase sugar to 5-6 lb, but monitor fermentation closely to prevent stuck fermentation.
How do I know when my cider is ready to bottle?
Your cider is ready when fermentation slows to 1-2 bubbles per minute in the airlock and the liquid appears clear. This typically happens after 7-10 days. You can also test by taking a hydrometer reading—when it stabilizes at 1.000-1.005, bottling is safe. Always leave 1 inch headspace in bottles to prevent over-carbonation.
Can I make this recipe with less equipment?
Yes, but with some adjustments. Use a large sanitized food-grade bucket (like a 5-gallon plastic bucket with a lid) instead of carboys for fermentation. For bottling, clean glass swing-top bottles work perfectly. The key is maintaining strict sanitation—every container must be thoroughly cleaned and sanitized to prevent contamination during the 5-7 day primary fermentation.

- Baked Potatoes in Crock Pot Recipe: Buttery Interiors and Crispy Top Magic - November 1, 2026
- Braised Beef Short Ribs Recipe: Crock Pot Fall-Off-Bone Magic in 6 Hours - November 1, 2026
- Crock Pot Cocoa Recipe: Velvety Warmth With Hidden Spice Magic - November 1, 2026