
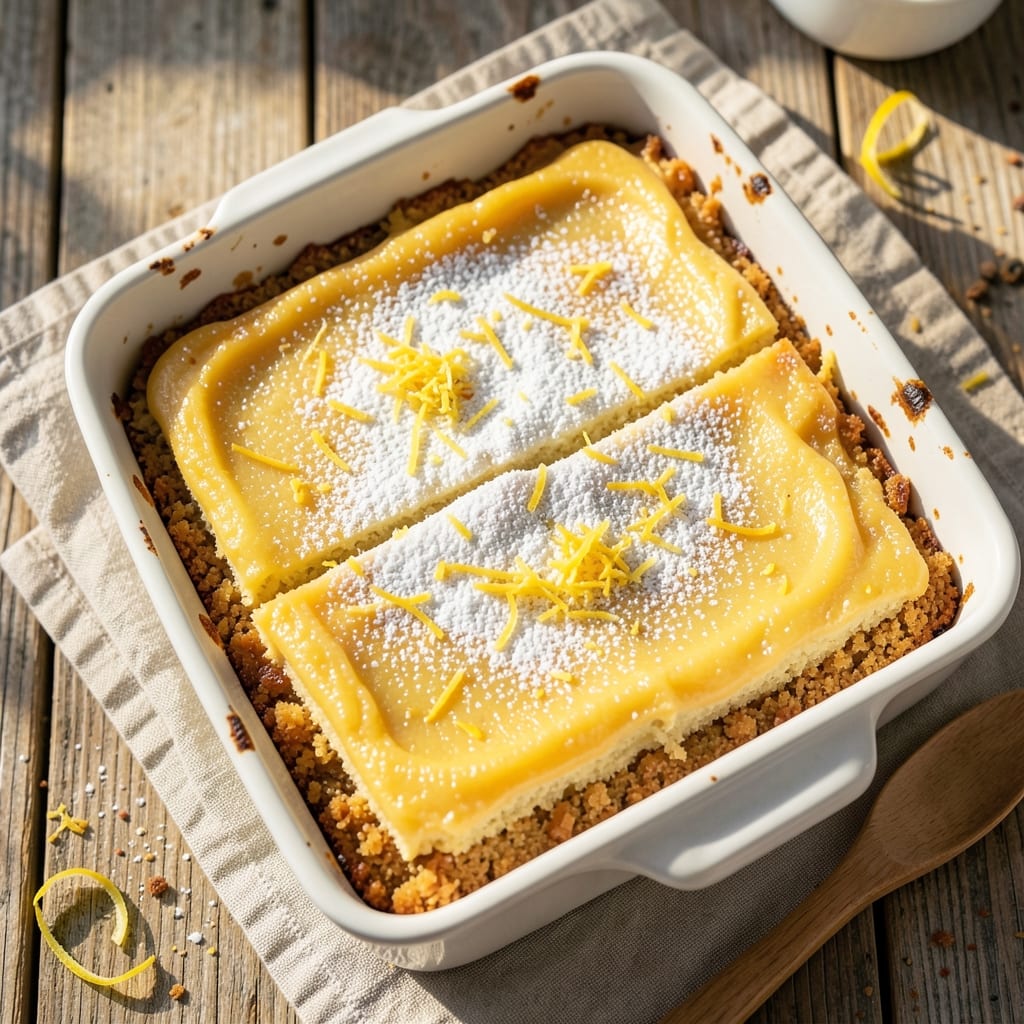
This 5-star lemon bar recipe delivers a perfect balance of buttery shortbread crust and silky lemon curd that tastes like a professional bakery. I developed this recipe after years of testing—every layer matters for that restaurant-quality finish.
The secret lies in precise baking times and a tangy cream cheese twist that elevates the filling beyond basic lemon bars.
The crust starts with cold butter and fine sugar for a tender, crumbly base that holds up perfectly, while the lemon curd gets its signature tang from fresh lemon juice and zest. What sets this apart is the cream cheese addition—it adds richness without overpowering the bright citrus flavor.
Baking at the right temperature ensures a golden crust and a smooth, jiggly filling that sets just enough to hold its shape.
By the time you’re done, you’ll have a dessert that looks as impressive as it tastes—crisp edges, creamy filling, and a dusting of powdered sugar for that signature 5-star presentation.
The aroma alone will have everyone asking for seconds, and the balance of sweet and tart makes it a crowd-pleaser for any occasion.
Serve chilled with a dollop of whipped cream or a light glaze for extra elegance. This recipe scales perfectly for parties, potlucks, or just treating yourself to something special. Let’s get baking!
Ingredients for 5 star lemon bar
Buttery crust meets tangy lemon curd for a dessert that wows every time.
| Ingredient | Amount | Notes |
|---|---|---|
| Unsalted Butter 🧈 | 1 cup | Cold, cubed for crust |
| Granulated Sugar 🍚 | 1 ½ cups | Fine sugar for crust |
| All-Purpose Flour 🌾 | 2 cups | Sifted, plus extra for pan |
| Kosher Salt 🧂 | ¼ tsp | Fine grain preferred |
| Lemon Juice 🍋 | 1 cup | Freshly squeezed, strained |
| Lemon Zest 🍋 | ½ cup | Finely grated, organic preferred |
| Large Egg Yolks 🥚 | 4 whole | Room temperature |
| Granulated Sugar 🍚 | 1 ½ cups | For lemon curd |
| Cream Cheese 🧀 | 8 oz | Full-fat, room temperature |
| Powdered Sugar 🍚 | 1 cup | For dusting |
| Heavy Cream 🥛 | ½ cup | Optional, for whipped topping |
| Vanilla Extract 🌿 | 1 tsp | Pure vanilla preferred |
The butter is non-negotiable—European-style unsalted gives the best flavor. Grab it from Whole Foods or Williams Sonoma if you want premium, but regular supermarket brands work too. Keep it cold until mixing—this is key for that tender, crumbly texture. For the flour, King Arthur is my go-to, but any all-purpose will do. The fine sugar should be white granulated, not raw or brown. The lemon juice needs to be freshly squeezed—organic lemons from the grocery store work best, but avoid the bottled stuff. Zest those lemons well; the more vibrant the color, the brighter the flavor. The cream cheese should be full-fat—low-fat versions won’t give you that signature richness.
No cream cheese? Substitute with Greek yogurt plus 1 tbsp melted butter—it won’t be identical, but it gets close. Short on lemon juice? Add 1 tsp more zest to compensate. The vanilla extract can be imitation, but pure Madagascar bourbon vanilla makes all the difference. For the sugar, turbinado or sanding sugar can replace powdered sugar for a decorative touch, though it won’t dissolve as smoothly. If you’re making this ahead, bake the crust a day in advance—it keeps better and saves time. The lemon curd can be made up to 3 days ahead and stored in the fridge, covered tightly.
The crust keeps for 5 days at room temperature in an airtight container, though it’s best within 2 days for maximum crispness. The lemon curd stays fresh for 5 days in the fridge, but it’s best enjoyed within 3 days. For a restaurant-quality finish, dust the bars with powdered sugar right before serving. If you’re making these for a crowd, double the recipe—the crust and filling scale perfectly. Store assembled bars in the fridge for up to 4 days, though they’re best eaten within 2 days for optimal texture. For a special touch, add a light lemon glaze made with powdered sugar and lemon juice before dusting.
Why You’ll Love This Recipe
- No-Fuss Layers: I swear by this recipe because it’s basically foolproof—just cream butter and sugar, fold in dry ingredients, bake, then dump that tangy lemon curd on top. No piping, no fuss, just chef’s kiss texture every time.
- Zesty Magic: That bright lemon curd? It’s the star. Fresh juice cuts through the buttery crust, and the sugar in the curd keeps it silky-smooth without being cloying. Honestly, one bite and you’ll forget about store-bought desserts.
- Party or Picnic: These cut into perfect squares, travel well, and disappear fast—whether it’s a potluck, a lunchbox treat, or your go-to after-dinner dessert. (Yes, even on a Tuesday night.)
- Budget Bright Spot: Uses pantry staples—no specialty ingredients—and a single sheet pan means minimal cleanup. Plus, the leftovers? They’re just as good the next day, so you’ll never regret baking a batch.
Step-by-step instructions for 5 star lemon bars
Here’s how to achieve a buttery, crackly crust and silky lemon curd that earns rave reviews every time.
Prepare the Crust Mixture
In a large bowl, combine the 1 cup unsalted butter (cold, cubed) with the 1.5 cups granulated sugar. Use a pastry cutter or your fingers to work the butter into the sugar until the mixture resembles coarse crumbs with pea-sized butter pieces remaining. This texture is crucial—it creates that signature crackly crust.
Next, whisk together the 2 cups all-purpose flour and 0.25 teaspoon kosher salt in a separate bowl. Gradually add the dry ingredients to the butter-sugar mixture, mixing just until combined. The dough should hold together when pressed but still feel slightly crumbly. Avoid overmixing—this develops gluten and makes the crust tough.
Press the Crust into the Pan
Preheat your oven to 350°F. Press the dough evenly into a 9×13-inch baking pan, using your fingers or the bottom of a glass to create an even, ⅛-inch thick layer. The edges should extend slightly over the pan’s sides. This extra dough will create a decorative border after baking.
Bake the crust for 18-20 minutes, or until the edges are light golden brown. Watch carefully—it should be set but not darkened. Remove from the oven and immediately prick the entire crust with a fork, creating small holes all over. This prevents air bubbles and ensures the lemon filling bakes evenly.
Make the Lemon Curd Filling
While the crust bakes, whisk together the 4 whole large egg yolks, 1.5 cups granulated sugar, 1 cup lemon juice, and 0.5 cup lemon zest in a medium bowl. The mixture should be smooth and pale yellow. In a separate small bowl, combine the 8 ounces cream cheese and 0.5 cup heavy cream until completely smooth—no lumps should remain.
Gradually pour the cream cheese mixture into the egg mixture while whisking constantly. This step is critical—adding the cream cheese too quickly can cause curdling. Once fully combined, strain the mixture through a fine-mesh sieve into a clean bowl to remove any zest fibers. This ensures a silky-smooth filling.
Bake the Lemon Filling
Pour the lemon curd over the hot crust, spreading it evenly to the edges. Return the pan to the oven and bake for 20-25 minutes, until the filling is just set but still slightly wobbly in the center. The edges should be golden, and the center should look slightly underdone—it will firm up as it cools.
Remove from the oven and let cool completely at room temperature. This cooling process is essential—rushing it causes the filling to crack. Once fully cooled, sprinkle the 1 cup powdered sugar evenly over the top. Use a fine-mesh sieve for an even, snowy finish. Let the bars sit for 10 minutes before slicing to allow the powdered sugar to adhere.
Chill and Serve
Transfer the lemon bars to the refrigerator and chill for at least 4 hours, or preferably overnight. This step is non-negotiable—it allows the flavors to meld and the texture to set properly. When ready to serve, cut into 16 equal bars using a sharp knife dipped in hot water between cuts for clean slices.
Serve at room temperature for the best texture contrast—the crust remains crisp while the lemon curd stays cool and tangy. For an extra touch, add a few drops of vanilla extract to the powdered sugar before sprinkling if you prefer a slightly sweeter profile. These bars will keep in the refrigerator for up to 5 days, though they rarely last that long!
Pro Tips For Making 5 Star Lemon Bar
- Chill the Butter First: Take your cold butter out of the fridge and let it sit at room temp for exactly 10-15 minutes before creaming—just until it’s soft enough to press with your finger but not greasy. I learned this the hard way after making a butter mess that turned my crust into a sad, greasy brick instead of crisp layers.
- Toast the Flour: Spread your flour and salt in a single layer on a baking sheet and toast in a 350°F oven for 5-7 minutes while you preheat the pan. This removes raw flour taste and prevents a bland crust—my grandmother swore by this, and she was right: the difference is subtle but noticeable.
- Skip the Crowd in Pan: Don’t press the dough all the way to the edges—leave a ½-inch border uncovered. The butter needs room to spread as it bakes, or you’ll end up with a thick, uneven crust. (Yes, even if you’re impatient like me.)
- Strain the Lemon Juice: Use a fine-mesh sieve to strain your lemon juice before mixing it into the filling—this removes pulp and seeds that can make the glaze grainy. I was skeptical until I tried it: the texture is silky smooth, and the flavor stays bright without bitterness.
Pro cooking tips for 5 star lemon bar
Crust Perfection
For that signature crackly, buttery crust, I swear by using European-style unsalted butter (like Plugrá or Bérenger) chilled until firm. Cut it into ½-inch cubes and mix it with sugar using a pastry cutter—never a food processor.
The goal is pea-sized butter pieces in a coarse crumb texture. Press the dough into the pan with even pressure, using the bottom of a glass measuring cup for smooth edges. If it cracks while baking, just patch it with extra dough—no one will notice! 🧈
Lemon Curd Secrets
The cream cheese makes all the difference—use full-fat Philadelphia brand at room temperature for silky smoothness. Whisk it into the egg mixture slowly to prevent curdling. Strain the zest through a fine-mesh sieve to remove fibers that make the filling grainy.
For extra brightness, add 1 tsp more lemon zest if your lemons weren’t super vibrant. The filling should be just set when done—it’ll firm up as it cools, so don’t overbake! 🍋
Baking Like a Pro
Preheat your oven to 350°F for at least 15 minutes—this ensures even baking. Bake the crust until it’s light golden (not brown) at the edges. After adding the filling, return to the oven and bake until the center is slightly wobbly—this gives that signature jiggly texture.
Let the bars cool completely before dusting with powdered sugar, or it’ll melt into a sticky mess. I use a sieve for an even, snowy finish that looks restaurant-quality. 💫
Chilling Matters
Never skip the 4+ hour chill—this is where the magic happens! The flavors meld, the crust firms up, and the filling sets properly. If you’re short on time, chill overnight for maximum perfection. For clean cuts, dip your knife in hot water between slices.
Store leftovers in an airtight container in the fridge for up to 5 days, though they rarely last that long. The contrast of crisp crust and cool filling is what makes these bars unforgettable. ❄️
Equipment Must-Haves
Invest in a 9×13-inch baking pan (I love Wilton nonstick) and a fine-mesh sieve for powdered sugar. A pastry cutter or your fingers work for the crust, but a spatula helps spread the filling evenly. For precision, use a digital kitchen scale to measure ingredients—especially the flour.
And trust me, a sharp knife (like Wüsthof) makes all the difference when slicing. These tools take your lemon bars from “good” to “5-star worthy” every time. ✨
Nutrition facts
Frequently asked questions
Can I make these lemon bars without cream cheese?
Yes! For a lighter version, replace the cream cheese with ½ cup Greek yogurt plus 1 tablespoon melted butter. The texture will be slightly tangier but still delicious. If you want a closer match, use 4 ounces cream cheese plus ½ cup sour cream for a balance of richness and smoothness.
Why did my lemon curd turn grainy?
Grainy curd usually means zest fibers or under-whisked eggs. Always strain the zest through a fine-mesh sieve and whisk the egg mixture until completely smooth before adding cream cheese. For extra silky results, whisk the eggs over double boiler heat for 3-5 minutes before mixing with other ingredients.
How do I prevent the crust from cracking?
Prevent cracks by pressing the dough evenly and firmly into the pan, leaving no gaps. After baking, prick the crust with a fork all over to release steam. If cracks appear, patch them with extra dough before adding the filling. For extra insurance, chill the dough for 30 minutes before pressing into the pan.
Can I make this recipe gluten-free?
Swap the all-purpose flour for a 1:1 gluten-free baking flour blend (like Bob’s Red Mill). Add ½ teaspoon xanthan gum to help bind the crust. For the filling, use gluten-free ingredients as listed—no changes needed. The texture will be slightly different but still delicious.
How do I store leftovers?
Store assembled lemon bars in an airtight container in the fridge for up to 5 days. For longer storage, freeze individual portions wrapped tightly in plastic for up to 3 months. Thaw overnight in the fridge before serving. The crust stays crisp and the filling remains creamy when stored properly.

- Baked Potatoes in Crock Pot Recipe: Buttery Interiors and Crispy Top Magic - November 1, 2026
- Braised Beef Short Ribs Recipe: Crock Pot Fall-Off-Bone Magic in 6 Hours - November 1, 2026
- Crock Pot Cocoa Recipe: Velvety Warmth With Hidden Spice Magic - November 1, 2026