
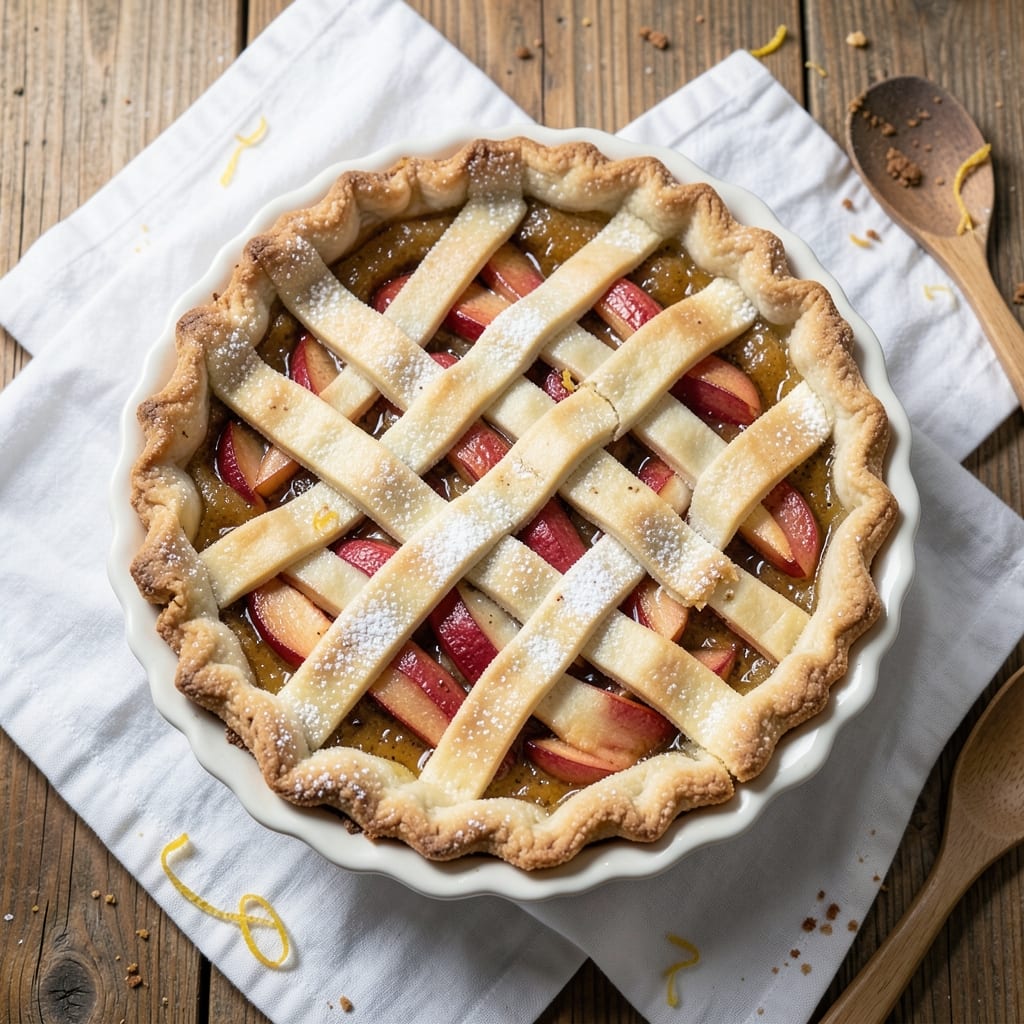
A 5-inch pie recipe lets you enjoy perfect, single-serving desserts without the fuss of a full pie dish. Whether you crave a classic apple pie, a rich chocolate custard, or a savory hand pie, this size delivers restaurant-quality results in a fraction of the time.
The key lies in precise crust handling and filling techniques that prevent shrinking or overbaking.
This recipe works with both homemade and store-bought crusts, giving you flexibility while ensuring a crisp, flaky base every time. For fillings, we’ll focus on ratios that guarantee even cooking—no more soggy bottoms or undercooked centers.
Baking at the right temperature (typically 375°F) and using a pie weight or dried beans keeps your crust golden without burning.
What you’ll achieve is a beautifully proportioned pie with a tender, flaky crust and perfectly set filling—whether it’s spiced fruit, creamy custard, or savory meat and cheese.
The 5-inch size makes it ideal for personal treats, meal prep, or elegant single servings. Each step is designed to minimize mess and maximize flavor.
Ready to master the art of the perfect small pie? We’ll cover everything from crust preparation to filling techniques, ensuring your 5-inch creation looks and tastes like it came from a bakery. Let’s get started with a recipe that’s as versatile as it is impressive.
Ingredients for 5 inch pie
Four servings of perfect pie—crisp crust, golden top, and filling that never shrinks.
| Ingredient | Amount | Notes |
|---|---|---|
| All-Purpose Flour 🌾 | 1 ½ cups | Sifted for light texture |
| Unsalted Butter 🧈 | ½ cup | Cold, cubed for flakiness |
| Ice Water 💧 | ¼ cup | Chilled for crisp crust |
| Granulated Sugar 🍚 | ¼ cup | For crust sweetness |
| Salt 🧂 | ½ tsp | Diamond Crystal preferred |
| Apple Pie Filling 🍎 | 1 ½ cups | Store-bought or homemade |
| Egg Wash 🥚 | 1 whole | Beaten with 1 tsp water |
| Granulated Sugar 🍚 | 1 tbsp | For egg wash topping |
| Pie Weights or Dried Beans 🌾 | ½ cup | For pre-baking crust |
| Cinnamon 🌿 | ½ tsp | Ground for filling |
| Lemon Juice 🍋 | 1 tbsp | Fresh for brightness |
| Vanilla Extract 🌸 | ½ tsp | Pure for flavor |
| Heavy Cream 🥛 | ¼ cup | Optional for custard filling |
| Cornstarch 🌾 | 1 tbsp | For thickening custard |
The crust is where magic happens. Store-bought pie crusts (like Pillsbury or Whole Foods) save time, but homemade shines brighter—just don’t overwork the dough. For butter, European-style (like Plugrá) has more fat for flakiness. Chill your dough for at least 30 minutes before rolling, or it’ll stick to everything. If you’re using a 5-inch pie dish, check the depth—most need 1-inch sides for proper filling height.
Filling swaps are endless. Apple pie filling? Use store-bought (like Libby’s) or make your own with peeled, sliced apples, sugar, and spices. For custard, vanilla bean paste (like Gourmet Vanilla) adds depth. Need a savory twist? Swap fruit for caramelized onions and Gruyère cheese. Pre-baking the crust with pie weights or beans prevents soggy bottoms—skip this step only for custards. And always brush the crust with egg wash (plus extra sugar for sparkle) before baking.
Crusts keep 2 days wrapped in the fridge or 3 months frozen (wrap tightly in plastic). Fillings? 3 days max in the fridge—custards thicken when chilled. For make-ahead pies, bake the crust, freeze it with parchment, then fill and bake straight from frozen (add 10 minutes to baking time). Reheat gently at 350°F to keep the crust crisp.
Why You’ll Love This Recipe
- No-Fuss Dough Magic: I swear by that cold butter cut into flour—it’s the secret to a flaky crust that takes zero effort. No food processor, no rolling stress, just your fingers and a pinch of patience (or lack thereof).
- Sweet Buttery Crunch: That sugar sprinkled on the edges? It caramelizes into a golden, buttery crust that’s ridiculously satisfying. One bite and you’ll forget it’s just flour, butter, and a little sugar working their magic.
- Portion Control Perfection: Five-inch pies? Finally, a dessert that’s actually single-serving without feeling stingy. Great for picnics, potlucks, or when you just want one slice and no leftovers staring at you.
- Budget-Friendly Luxury: Four ingredients—flour, butter, sugar, salt—and you’ve got something that tastes like a bakery bought it. Honestly, my grocery bill thanks me every time I make these instead of store-bought.
Step-by-step instructions for perfect single-serve apple pie
Here’s how to craft a delicate 5-inch pie with a flaky crust and perfectly balanced filling.
Prepare the Crust for a Flaky Texture
In a large bowl, combine the 1.5 cups all-purpose flour and 0.5 tsp salt. Cut in the 0.5 cup unsalted butter using a pastry cutter or your fingers until the mixture resembles coarse crumbs with pea-sized butter pieces. This texture is crucial—it ensures maximum flakiness when baked.
Add the 0.25 cup ice water and 0.25 cup granulated sugar gradually, mixing just until the dough comes together. Avoid overworking it. Divide the dough into two equal portions, flatten into discs, wrap in plastic, and chill for at least 1 hour. The cold dough prevents shrinking and makes rolling easier.
Roll and Assemble the Crust
On a lightly floured surface, roll one dough disc into a 5-inch circle about ⅛-inch thick. Transfer carefully to a 5-inch pie pan, pressing gently into the edges to create a slight rim. Trim any excess dough, leaving a ½-inch overhang. This will help create a decorative edge later.
Roll the second dough disc into another 5-inch circle. Place the 0.5 cup pie weights or dried beans over the filled bottom crust. Pour in the 1.5 cups apple pie filling, spreading it evenly. The weights prevent the bottom crust from puffing up during baking. Freeze the pie for 20 minutes to firm up the filling slightly.
Pre-Bake the Bottom Crust
Preheat your oven to 375°F. Bake the bottom crust with weights for 12-15 minutes until the edges begin to golden. Remove the weights and filling, then bake for an additional 3-5 minutes until the crust is set but not browned. This step ensures a sturdy base that won’t sog during filling assembly.
Brush the baked bottom crust with the egg wash (1 whole egg beaten with 1 tsp water), then sprinkle with 1 tbsp granulated sugar for a touch of sweetness. Return to the oven for 2 minutes to set the egg wash and create a subtle sheen.
Add the Filling and Top Crust
Return the apple filling to the pre-baked crust. In a small bowl, whisk together the 0.25 cup heavy cream, 1 tbsp cornstarch, 0.5 tsp cinnamon, 1 tbsp lemon juice, and 0.5 tsp vanilla extract. Pour this mixture evenly over the apple filling. The cornstarch will help thicken the filling as it bakes.
Roll the second dough disc into another 5-inch circle and place it over the filling. Trim the edges to ¼-inch overhang, then crimp decoratively using your fingers or a fork. Cut 4-5 slits in the center to allow steam to escape. Brush the top crust with egg wash for a golden finish.
Bake to Golden Perfection
Bake at 375°F for 35-40 minutes, until the crust is deep golden brown and the filling is bubbling through the slits. If the edges brown too quickly, cover them loosely with aluminum foil. The pie is done when the filling is thickened and the crust sounds hollow when tapped.
Let the pie cool for at least 1 hour before slicing. The filling will set as it cools, creating that perfect balance of tender crust and flavorful filling. Serve warm with vanilla ice cream for the ultimate single-serving experience.
Pro Tips For Making 5 Inch Pie
- Chill the Dough: DESCRIPTION: Roll out the dough between two sheets of parchment paper and freeze it for 10 minutes before transferring to the pan. I learned this the hard way—skipping it makes the crust sag like a sad soufflé when you add filling.
- Cut Butter Cold: DESCRIPTION: Grate the unsalted butter before mixing it into the flour—it incorporates faster and stays colder longer. My grandmother swore by this, and she was right: warm butter = tough crust, no matter how much you love shortcuts.
- Skip the Overmixing: DESCRIPTION: Work the ice water into the dough just until it holds together—no more. Overmixing develops gluten, and that’s the fast track to a chewy, dense crust instead of the flaky layers you’re after.
- Preheat the Pan: DESCRIPTION: Place your 5-inch pie pan in the oven while preheating to 375°F (190°C). The dough will crisp up faster and won’t shrink like it’s trying to escape when it hits the hot oven. (Yes, even if you’re impatient like me.)
Troubleshooting perfect results
Soggy Bottom Fix
Pre-baking the bottom crust with pie weights or dried beans is your secret weapon against soggy bottoms. I always use ½ cup of beans spread evenly over the crust before adding filling.
Bake this setup at 375°F for 12-15 minutes until the edges start to golden. Remove the weights before adding filling to prevent steam buildup that causes sogginess. 🌡️
Uneven Crust Edges
If your crust edges brown too quickly while the center stays pale, cover them with aluminum foil during the final 10-15 minutes of baking. For extra insurance, chill your pie on a baking sheet before sliding it into the oven—this prevents heat from escaping through the bottom.
I also recommend using a 5-inch pie dish with slightly sloped sides for even heat distribution.
Filling Not Setting
Undercooked filling is usually caused by insufficient thickening. For fruit fillings, add 1 tbsp cornstarch per 1 cup liquid to your mixture. For custard fillings, whisk in 2 tbsp cornstarch mixed with 2 tbsp cold water before baking.
Always bake until the filling is bubbling through the slits in the top crust—this guarantees a perfect set. 🍎
Crust Shrinking During Baking
Overworked dough shrinks dramatically when baked. Keep your dough cold (chill for at least 1 hour) and handle it minimally when rolling. For extra stability, use a 5-inch pie dish with a slightly textured bottom—this gives the crust something to grip onto.
I also recommend using European-style butter (like Plugrá) for better flakiness and structure.
Top Crust Not Browning
A pale top crust usually means the egg wash wasn’t applied properly or the oven temperature fluctuates. Brush the top crust with egg wash (1 egg + 1 tsp water) twice—once before baking and again halfway through.
For extra color, sprinkle with 1 tbsp granulated sugar before the final bake. If your oven runs hot, reduce the temperature to 350°F for the last 10 minutes of baking. 🔥
Filling Leaking
Overfilled pies leak during baking. For a 5-inch pie, use no more than 1.5 cups filling—this ensures proper coverage without overflow. If you’re using a custard filling, chill it for 30 minutes before pouring to thicken slightly.
For extra insurance, brush the top crust edges with egg wash before crimping to create a seal. Always bake on the middle rack of your oven for even heat distribution.
Nutrition facts
Frequently asked questions
Can I use a store-bought crust for a 5-inch pie?
Store-bought crusts (like Pillsbury or Whole Foods) save time while still delivering great results. Just be sure to chill the dough for 30 minutes before rolling to prevent shrinking. For extra flakiness, brush the bottom crust with egg wash before adding filling.
What’s the best way to prevent a soggy bottom?
Pre-bake the bottom crust with pie weights or dried beans for 12-15 minutes at 375°F before adding filling. This creates a sturdy base that won’t absorb moisture. Remove the weights before adding filling to avoid steam buildup.
How do I adjust the recipe for a custard filling?
For custard pies, replace the apple filling with 1.5 cups of your favorite custard mixture (like pumpkin or chocolate). Skip the pre-baking step—custards need moisture to set properly. Add 1 tbsp cornstarch mixed with 1 tbsp cold water to thicken the filling before baking.
Can I make this pie ahead of time?
Yes! Assemble the pie (without baking) and refrigerate for up to 24 hours. For make-ahead baking, freeze the unbaked pie (with filling) on a tray, then bake straight from frozen (add 10-15 minutes to baking time). Reheat gently at 350°F to maintain crust crispness.
What if my crust edges brown too fast?
Cover the edges with aluminum foil during the final 10-15 minutes of baking. For even browning, place your pie on a baking sheet before sliding it into the oven. If your oven runs hot, reduce the temperature to 350°F for the last 10 minutes of baking.

- Baked Potatoes in Crock Pot Recipe: Buttery Interiors and Crispy Top Magic - November 1, 2026
- Braised Beef Short Ribs Recipe: Crock Pot Fall-Off-Bone Magic in 6 Hours - November 1, 2026
- Crock Pot Cocoa Recipe: Velvety Warmth With Hidden Spice Magic - November 1, 2026