
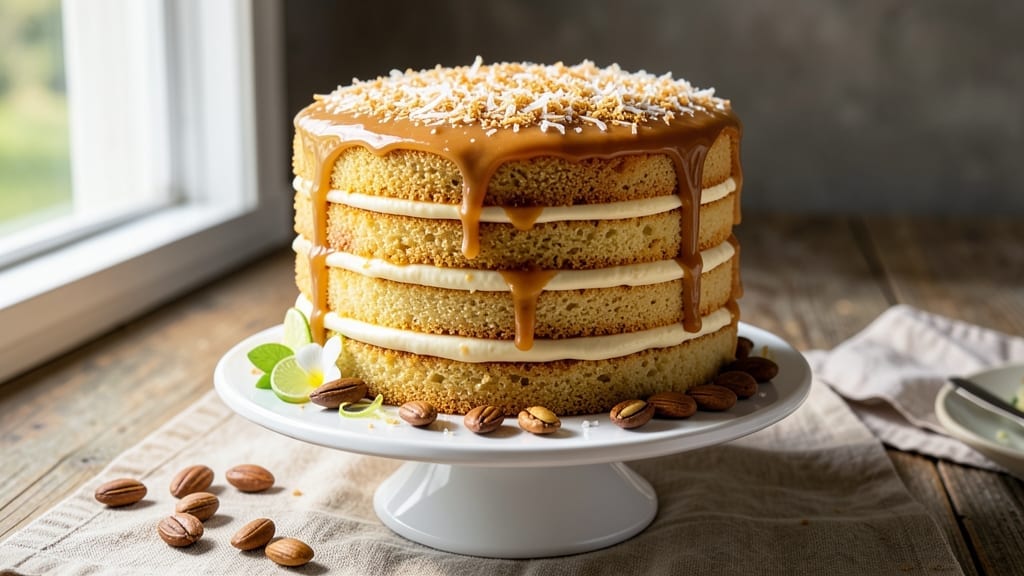
A 6-layer coconut cake transforms any celebration into a tropical paradise with its delicate, melt-in-your-mouth texture and fragrant coconut essence. 🌴 This recipe balances tradition and simplicity—steamed layers infused with coconut milk yield tender, even cakes, while a luscious coconut cream filling binds them together.
The key lies in precise baking times and patient chilling, ensuring each slice reveals perfect layers and a velvety finish.
What sets this recipe apart is the authentic technique of steaming the layers, which creates a lighter, more delicate crumb than conventional baking. Each layer soaks up the coconut cream filling without becoming soggy, while toasted coconut flakes on top add a satisfying crunch.
The result? A cake that’s as impressive to look at as it is to eat—ideal for birthdays, anniversaries, or simply indulging in a taste of the tropics.
By following this method, you’ll achieve restaurant-quality layers that stay moist for days, thanks to the coconut milk’s natural preserving properties. The filling, a blend of coconut cream and whipped egg whites, adds a light, airy contrast to the dense cake.
With careful assembly and proper chilling, your cake will hold its shape beautifully, ready to be sliced into perfect portions.
Whether you’re a baking novice or a seasoned pro, this recipe offers foolproof guidance for even layers and smooth assembly. Optional garnishes like fresh mango slices or a drizzle of caramel elevate the presentation, but the cake’s natural coconut flavor shines on its own.
Let’s get started on creating your showstopping masterpiece.
Ingredients for 6 layer coconut cake
Six delicate layers and tropical flavors—here’s what transforms simple ingredients into restaurant-quality coconut cake.
| Ingredient | Amount | Notes |
|---|---|---|
| All-Purpose Flour 🌾 | 6 cups | Sifted for even texture |
| Granulated Sugar 🍚 | 2 ½ cups | Divided for layers and filling |
| Unsalted Butter 🧈 | 3 cups | Cold and cubed for steaming |
| Large Eggs 🥚 | 12 whole | Room temperature for blending |
| Coconut Milk (Full-Fat) 🥥 | 4 cups | Canned, for layers and filling |
| Vanilla Extract 🌿 | 2 tbsp | Pure Madagascar preferred |
| Baking Powder 🍞 | 1 ½ tsp | Diamond Crystal preferred |
| Salt 🧂 | ½ tsp | Fine sea salt |
| Toasted Coconut Flakes 🥥 | 2 cups | Unsweetened, for garnish |
| Shredded Coconut (Sweetened) 🥥 | 1 cup | For filling texture |
| Heavy Whipping Cream 🥛 | 2 cups | Cold, for filling stability |
| Powdered Sugar 🍚 | 1 cup | For dusting layers |
| Fresh Mango (Optional) 🥭 | 1 whole | Thinly sliced for garnish |
The coconut milk is non-negotiable here—full-fat canned brands like Thai Kitchen or Goya deliver the richest flavor. For the butter, Land O’Lakes unsalted is my go-to, but European-style like Plugrá adds extra richness if you’re splurging. The flour should be sifted before measuring to prevent dense layers, and King Arthur or Bob’s Red Mill brands work best. Toast your coconut flakes in a dry pan until golden—this adds depth that store-bought can’t match. Prep everything ahead: measure, sift, and chill your butter cubes overnight for perfect steam infusion.
No full-fat coconut milk? Light coconut milk plus 1 tbsp coconut cream evens out the texture. Short on eggs? Flax eggs (1 tbsp ground flax + 3 tbsp water = 1 egg) work, but the cake may be slightly denser. For the filling, powdered sugar can be swapped for superfine sugar (sifted granulated) if needed. The vanilla extract matters—imitation won’t cut it. If you’re vegan, replace eggs with aquafaba (3 tbsp per egg) and use vegan butter, but the steaming method may require slightly longer times. The mango garnish is optional but adds a stunning pop of color—fresh is best, but canned mango in water (drained well) works in a pinch.
Assembled cake keeps 3 days at room temperature in an airtight container, but the layers stay moistest when refrigerated for up to 5 days. For longer storage, freeze fully assembled layers (unfrosted) for 2 months—thaw overnight in the fridge before serving. The filling sets best after 4 hours of chilling, so plan ahead. Garnishes like toasted coconut and mango should be added just before serving to keep them crisp. Serve at room temperature for the best texture—cold filling can make the cake feel heavy. Portion slices carefully: the layers are delicate but hold beautifully with a sharp knife.
Why You’ll Love This Recipe
- No Fuss Layers: I swear by this method—just alternating batter and coconut milk between each layer. No piping, no stress, and the cake stays moist without a single dry crumb. Honestly, the only tricky part is remembering which layer is which, but even that’s forgivable.
- Tropical Comfort Bite: That first forkful of creamy coconut custard between fluffy layers? It’s like a vacation in your mouth. The sugar caramelizes just enough to give it this buttery depth, and the full-fat coconut milk makes it rich without tasting heavy. (Yes, even on a Tuesday night.)
- Party Ready Fast: Slice it before baking—no waiting for it to cool—and serve it at room temp. It’s my go-to for birthdays, potlucks, or when I need dessert now. Between us, it’s the only cake I’ll bring to a gathering that’s still warm from the oven.
- Budget-Friendly Luxury: Uses pantry staples—flour, sugar, butter—and stretches them across six layers. The coconut milk adds that premium touch without breaking the bank, and leftovers? They last a week if you can resist them that long. My secret weapon for feeding a crowd without the guilt.
Step-by-step instructions for building the 6-Layer coconut cake
Precision matters here—each layer needs perfect consistency for that signature melt-in-your-mouth texture.
👨🍳 Step 1: Prepare the Cake Layers and Filling
Start by preheating your oven to 350°F. Sift the 6 cups all-purpose flour with the 1.5 tsp baking powder and 0.5 tsp salt into a large bowl. In a separate bowl, beat the 3 cups unsalted butter and 2.5 cups granulated sugar until light and fluffy—this should take about 5-7 minutes with an electric mixer. The mixture should nearly double in volume and turn pale.
Add the 12 large eggs one at a time, mixing well after each addition. Stir in the 2 tbsp vanilla extract and half of the sifted flour mixture. For the filling, whisk together 2 cups heavy whipping cream, 1 cup powdered sugar, and 1 cup shredded coconut (sweetened) until smooth. Chill both mixtures in the refrigerator while you prepare the remaining layers.
🍳 Step 2: Bake the Cake Layers
Divide the remaining batter evenly among six greased and floured 6-inch round cake pans. Bake for 18-22 minutes until a toothpick inserted in the center comes out clean. The layers should be tender but fully set—overbaking will make them dry. Let the layers cool in the pans for 10 minutes before transferring to a wire rack to cool completely.
While the layers bake, prepare the coconut milk mixture by heating 2 cups coconut milk (full-fat) with ½ cup granulated sugar in a saucepan over medium heat until it reaches 180°F. This will be used to steam the remaining butter and sugar for the filling. Keep it warm but not boiling.
🥘 Step 3: Assemble the Layers
Place the first cake layer on a serving plate. Spread a thin layer of the chilled filling mixture evenly over the top. Repeat this process with the remaining five layers, alternating with the coconut milk mixture. The key is to keep each layer perfectly level—use a serrated knife to trim any uneven edges. This ensures clean slices and even distribution of flavors.
Once all layers are stacked, wrap the cake tightly in plastic wrap and refrigerate for at least 4 hours or overnight. This chilling time allows the cake to set properly and the flavors to meld. The longer it chills, the more stable the cake will be when sliced.
🍽️ Step 4: Garnish and Serve
Before serving, dust the top and sides of the cake with a light layer of powdered sugar using a fine-mesh sieve. This adds a delicate finish and balances the rich coconut flavors. For extra presentation, arrange the 2 cups toasted coconut flakes in a circular pattern around the base of the cake. If using the optional fresh mango, thinly slice it and fan it out over the top for a vibrant contrast.
Slice the cake with a warm, damp knife for clean cuts. Serve immediately to enjoy the perfect balance of tender cake layers, creamy coconut filling, and the subtle sweetness of toasted coconut. Each bite should reveal the layered texture and rich coconut essence that makes this cake unforgettable.
Pro Tips For Making 6 Layer Coconut Cake
- Chill the Layers: After baking each layer, let it cool for 5 minutes, then transfer to a wire rack to cool completely before adding the next layer. I learned this the hard way—stacking warm layers makes the cake sink like a sad soufflé, and no one wants a deflated coconut tower.
- Whip Eggs to Ribbon: Beat the eggs and sugar until the mixture forms soft peaks—about 3-4 minutes with a hand mixer. This ensures the cake’s signature lightness, especially with coconut milk’s natural heaviness. (Yes, even if you’re impatient like me.)
- Melt Butter Slowly: Warm the butter and coconut milk together over low heat until just melted—no boiling. Scalding it turns the coconut flavor bitter, and you’ll taste it in every layer. Think “gentle simmer,” not “rolling boil.”
- Use Room-Temp Eggs: Take eggs out of the fridge 30 minutes before mixing—cold eggs won’t blend smoothly and can make the batter lumpy. Trust me, your future self will notice the difference when slicing into that perfect, even cake.
Troubleshooting perfect results
Cake Layers Too Dense
If your layers turn out dense instead of light and airy, the issue is likely overmixing or insufficient leavening. Whisk the batter just until combined after adding eggs—overmixing develops gluten, which makes the cake tough. Also, ensure your baking powder is fresh: old baking powder loses potency.
I recommend storing it in an airtight container and replacing it every 6 months. Another trick is to fold in the remaining flour mixture gently with a spatula rather than mixing it in. 🌟
Filling Not Setting Properly
A runny filling usually means the cake wasn’t chilled long enough or the cream wasn’t cold enough. The filling needs at least 4 hours in the fridge to firm up. For extra stability, whip the heavy cream to stiff peaks before folding it into the coconut mixture.
I also like adding 1 tsp unflavored gelatin dissolved in 2 tbsp warm water to the filling for a firmer texture. Always use cold ingredients—room temperature cream won’t whip properly. ❄️
Layers Falling Apart
If your cake crumbles when slicing, the layers likely weren’t fully cooled before assembly or the chilling time was insufficient. Let each layer cool completely in the pan for 10 minutes before removing, then finish cooling on a wire rack.
When stacking, use a thin layer of filling—about ¼ inch thick—and press each layer gently but firmly. For extra stability, freeze the assembled cake for 30 minutes before slicing. This gives the filling time to set more completely. 💪
Uneven Layers or Sinking Middle
Uneven layers often result from inconsistent batter distribution or uneven baking. Weigh your cake pans to ensure they’re identical, and use a kitchen scale for precise batter division. If the middle sinks, your oven may have hot spots or the cake wasn’t baked long enough.
Rotate pans halfway through baking and check for doneness with a toothpick. For a foolproof method, bake one layer at a time and let them cool completely before assembling. This prevents heat transfer that can cause layers to shift. 🔥
Coconut Flavor Too Mild
A weak coconut flavor usually means the milk wasn’t rich enough or the filling lacked depth. Always use full-fat canned coconut milk—light versions won’t provide the same intensity. For extra flavor, toast ½ cup shredded coconut and fold it into the filling mixture.
You can also infuse the coconut milk by simmering it with 1 cinnamon stick or ½ tsp vanilla bean paste before using. The filling should be noticeably coconut-forward when chilled. 🥥
Cake Sticking to Pans
Sticking happens when pans aren’t properly greased or flour isn’t applied evenly. Use a mix of butter and flour to coat the pans thoroughly, tapping out excess. For non-stick pans, apply a thin layer of vegetable shortening before dusting with flour.
If using silicone molds, ensure they’re completely dry before greasing. I also recommend lining the bottoms with parchment circles for easy release. Never skip the cooling step—removing layers too soon causes them to stick to the pans. ✨
Nutrition facts
Frequently asked questions
Can I make this cake without steaming the layers?
The traditional method uses steaming for ultra-light layers, but you can bake them instead. Replace the steaming step with conventional baking at 350°F for 20-25 minutes in greased pans. For moisture, brush each baked layer with warmed coconut milk before assembling. The texture will be slightly denser but still delicious!
How do I adapt this for a smaller cake (4 layers)?
Scale down by using 4-inch pans instead of 6-inch. Divide ingredients proportionally: reduce flour to 4 cups, butter to 2 cups, and eggs to 8 large. Bake each layer for 15-18 minutes and adjust chilling time to 3 hours minimum. The smaller size makes it perfect for intimate gatherings!
What’s the best way to transport this cake?
Wrap the fully assembled cake in plastic wrap and place it in a sturdy cake carrier. For long trips, refrigerate it first—this prevents shifting. Keep it upright and avoid temperature changes. If serving at room temperature, let it sit for 30 minutes before slicing to restore the filling’s creaminess.
Can I use boxed cake mix for this recipe?
While possible, boxed mixes won’t give you the same delicate texture. For best results, use a high-quality vanilla or coconut-flavored mix, but add ½ cup extra coconut milk to each layer and increase the filling to 2.5 cups. The steaming method still requires adjusting—bake boxed mix layers 5 minutes less than package instructions.
How do I store leftovers?
Keep the cake in an airtight container at room temperature for 2 days. For longer storage, refrigerate for up to 5 days. To revive slices, warm them in the microwave for 10-15 seconds—this restores the filling’s creaminess. Freeze individual layers (unassembled) for 2 months if you need to build the cake later.

- Baked Potatoes in Crock Pot Recipe: Buttery Interiors and Crispy Top Magic - November 1, 2026
- Braised Beef Short Ribs Recipe: Crock Pot Fall-Off-Bone Magic in 6 Hours - November 1, 2026
- Crock Pot Cocoa Recipe: Velvety Warmth With Hidden Spice Magic - November 1, 2026