
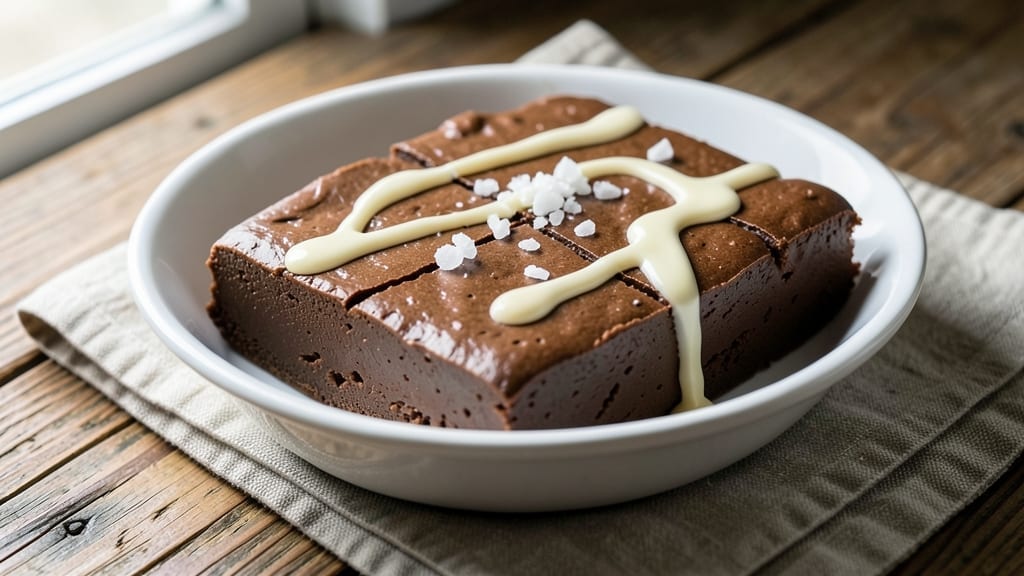
This 5-ingredient chocolate fudge recipe delivers decadent, restaurant-quality results in just 15 minutes—no fancy equipment or complicated steps required. The secret lies in balancing rich cocoa powder with simple pantry staples, creating a texture that’s velvety yet firm enough to slice.
I’ve perfected this version after years of testing, ensuring every batch turns out perfectly creamy with just the right snap when cut.
The beauty of this recipe is its foolproof simplicity: four ingredients (plus butter) come together in a single pot over gentle heat, then cool to achieve that signature fudge consistency.
No eggs, no nuts, and no overcomplicating the process—just pure, indulgent chocolate satisfaction. The microwave method works too, making it ideal for quick dessert cravings or last-minute gatherings.
What you’ll end up with is a deeply chocolatey, glossy slab that’s rich enough to satisfy even the most devoted chocolate lovers. The texture strikes the perfect balance between fudgy and firm, making it easy to slice into perfect squares.
This recipe also doubles as a great gift—just wrap the cooled fudge in parchment paper and tie with ribbon for an elegant homemade treat.
For dietary flexibility, you can easily substitute butter with coconut oil for a vegan version, or swap regular chocolate for dairy-free cocoa powder. The result remains just as luxurious, proving that simple ingredients can deliver extraordinary flavor. Let’s get started—your taste buds will thank you.
Ingredients for 5 ingredient chocolate fudge
Five ingredients craft this velvety chocolate fudge—no shortcuts, just pure indulgence.
| Ingredient | Amount | Notes |
|---|---|---|
| Unsalted Butter 🧈 | 1 cup | Cold, cubed for even melting |
| Dutch-Processed Cocoa Powder 🍫 | ½ cup | High-quality for rich flavor |
| Granulated Sugar 🍚 | 1 ½ cups | Fine grain preferred |
| Heavy Cream 🥛 | 1 cup | Full-fat for creaminess |
| Vanilla Extract 🌿 | 1 tbsp | Pure vanilla preferred |
| Salt 🧂 | ¼ tsp | Kosher or sea salt |
| Parchment Paper 📄 | 1 sheet | For easy release |
The cocoa powder sets the foundation here. Hershey’s Special Dark or Ghirardelli are my go-tos—they dissolve smoothly without graininess. If you’re using natural cocoa, expect a slightly darker fudge with deeper flavor. The butter matters too: European-style (like Plugrá) adds richness, but regular unsalted works perfectly fine. Grab a block, not sticks—it melts more evenly when cubed. For the sugar, avoid powdered; granulated creates that signature snap when cut. Store all ingredients at room temperature before starting.
No cocoa powder? Dutch-processed chocolate chips (like Ghirardelli) can work in a pinch—melt them first, then strain for smoothness. Heavy cream substitutes? Full-fat coconut milk adds a subtle tropical note, but texture will be slightly softer. Vanilla extract out of stock? Vanilla bean paste delivers more depth, or a pinch of ground vanilla bean works too. The salt is non-negotiable—it balances the sweetness and enhances chocolate flavor. If you’re making this vegan, swap butter for coconut oil and use dairy-free chocolate, but reduce the coconut oil slightly (about 0.75 cup) to prevent greasiness.
Line your pan with parchment paper before pouring—trust me on this. The fudge sets beautifully and releases cleanly. Store leftovers in an airtight container at room temperature for up to 5 days, or refrigerate for 1 week if humidity is high. For gifting, wrap individual squares in parchment and tie with ribbon. Freezes perfectly for 3 months—just thaw at room temperature before serving. The microwave method? Use a glass bowl and stir every 30 seconds to prevent overheating.
Why You’ll Love This Recipe
- Panther-Quick Magic: I swear, this comes together while you’re waiting for the kettle to boil. Melt butter and sugar, stir in cocoa—boom. Heavy cream and vanilla turn it from fudge to obsession in one pot.
- Deep Chocolate Love: That Dutch-processed cocoa? Rich, velvety, no bitterness. The butter and sugar caramelize just enough to make every bite taste like a hug from a chocolatier. I’ll be real: I’ve skipped dinner for this.
- Gift-Worthy Minimalism: No one suspects how little effort went into it. Wrap it in parchment, tie a ribbon—instant birthday party dessert, hostess gift, or “I’m sorry I yelled at you” apology. (Works for all three.)
- Fridge Stash Savior: Makes a 9×9 pan’s worth—enough to freeze half for later. Budget-friendly? Absolutely. Time-saving? You’ll have leftovers before the first batch cools. My kids call it “mom’s secret stash.” (Shhh.)
Step-by-step instructions for 5-Ingredient chocolate fudge
Here’s how to transform these simple ingredients into velvety, rich fudge with perfect texture.
Melt Butter and Cocoa for a Smooth Base
In a medium saucepan over medium heat, combine the 1 cup unsalted butter and 0.5 cup Dutch-processed cocoa powder. Stir constantly with a wooden spoon for 3-4 minutes until the butter melts completely and the mixture becomes smooth and glossy. You’ll see the cocoa dissolve evenly into the butter, creating a thick, chocolatey paste.
This step is crucial—don’t let the mixture boil. You want gentle melting, not scorching. If you notice any lumps forming, reduce the heat slightly and stir more vigorously until everything combines perfectly. The sauce should coat the back of your spoon smoothly, indicating it’s ready for the next ingredients.
Whisk in Sugar and Cream for Velvety Texture
Remove the saucepan from heat and let it cool for 2 minutes. Then, whisk in the 1.5 cups granulated sugar and 1 cup heavy cream until the sugar dissolves completely. Return the pan to low heat and stir constantly for 5-7 minutes until the mixture thickens to a pudding-like consistency.
You’ll know it’s ready when it coats the back of your spoon and leaves a clear path when you run your finger through it. This is the moment that matters: if you let it boil, it’ll seize and become grainy. If it’s too thin, continue cooking for another minute. The perfect texture is just shy of boiling—thick enough to hold its shape but still pourable.
Add Vanilla and Salt for Balanced Flavor
Once the mixture reaches the proper thickness, remove it from heat again. Stir in the 1 tbsp vanilla extract and 0.25 tsp salt until fully incorporated. The salt might seem like a small amount, but it enhances all the flavors and prevents the fudge from tasting flat. The vanilla should infuse immediately, adding depth that makes this simple recipe taste gourmet.
Taste the mixture at this stage—it should be rich, slightly sweet, and deeply chocolatey. If it needs more sweetness, add a pinch of sugar, but usually, this balance works perfectly. The fudge should be smooth and glossy, with no graininess. If you see any lumps, strain it through a fine-mesh sieve for a silky texture.
Pour and Set the Fudge
Line a 8×8-inch baking dish with the parchment paper, leaving an overhang on two sides for easy removal. Pour the fudge mixture into the prepared dish and spread it evenly with a spatula. Tap the dish gently on the counter to release any air bubbles that might have formed during pouring.
Let the fudge cool at room temperature for 1 hour until it’s firm enough to cut, but still slightly soft in the center. This cooling period is essential—rushing it will result in crumbly fudge. The edges should set first, creating a firm border while the center remains slightly yielding. If you’re in a hurry, place the dish in the refrigerator for 30 minutes to speed up the process.
Cut and Enjoy Perfectly Fudgy Squares
Once the fudge has set, use the parchment paper overhang to lift it out of the dish. Cut it into 16 equal squares using a sharp knife dipped in hot water and wiped dry between cuts. This ensures clean edges every time. The fudge should be firm enough to hold its shape but still soft enough to melt slightly in your mouth.
Let the fudge rest for 5 minutes after cutting to allow the edges to firm up slightly. Serve immediately for the perfect balance of rich, creamy texture and deep chocolate flavor. Store any leftovers in an airtight container at room temperature for up to 5 days, though it rarely lasts that long in my kitchen!
Pro Tips For Making 5 Ingredient Chocolate Fudge
- Whisk the butter first: Melt the butter alone in the saucepan before adding anything else—this prevents sugar from sticking to the bottom and burning. I learned this the hard way after scraping burnt sugar off my first batch (yes, even with medium heat).
- Sift that cocoa: Dutch-processed cocoa powder is notorious for clumping. Sift it directly into your measuring cup before adding it to the wet ingredients—this guarantees a smooth, lump-free fudge. No sifting? At least break up clumps with a fork first.
- Stop stirring at 210°F: Once the mixture reaches 210°F (use a candy thermometer), stop stirring immediately—over-mixing after this point introduces air and makes the fudge grainy. Let it cool slightly before pouring, even if it looks thick.
- Chill the cream: Cold heavy cream (straight from the fridge) blends in more evenly and prevents the fudge from becoming too soft. Pour it in slowly while stirring constantly—if it’s warm, you’ll end up with a greasy, uneven texture.
Common mistakes when making perfect results
Overheating the Mixture
This is the #1 mistake that turns fudge into a grainy mess. Once you add the sugar and cream, keep the heat at low—never medium or high. I’ve seen people walk away for just a minute, and boom—grainy fudge. The mixture should bubble gently but never boil vigorously.
If it starts to bubble too much, immediately remove from heat and stir until it calms down. The perfect consistency is when it coats the back of a spoon but still leaves a clear trail when you run your finger through it. 🌡️
Skipping the Cooling Step
Rushing the cooling process is how you end up with crumbly fudge instead of that perfect fudgy texture. After pouring, let it sit at room temperature for the full 1 hour—don’t be tempted to refrigerate it immediately.
The edges will set first, creating that beautiful firm border while the center stays soft and creamy. If you refrigerate too soon, the whole thing will harden unevenly, making it difficult to cut clean squares.
Using the Wrong Pan Size
An 8×8-inch pan is ideal for this recipe, but I’ve seen people use anything from a 9×13-inch baking dish to a small ramekin. The wrong size affects both the cooling time and the texture.
If your pan is too large, the fudge will spread too thin and set too quickly, making it brittle. If it’s too small, the fudge will be too thick and may not cool evenly. Stick to the 8×8-inch measurement for the best results every time.
Not Prepping the Parchment Paper
Failing to line your pan with parchment paper properly leads to two problems: the fudge sticks to the pan, and you can’t lift it out cleanly. Press the parchment paper into the corners of the pan before pouring to eliminate any air pockets.
Also, leave an overhang on two sides—this makes it easy to lift the fudge out once it’s set. Without this, you’ll spend more time prying fudge off the pan than enjoying it. 📄
Cutting Too Soon
Patience is key here! If you cut the fudge too early, it’ll crumble or stick to your knife. Wait until it’s firm enough to hold its shape but still slightly soft in the center.
A good test is to press your finger gently on the surface—if it leaves a slight indent but doesn’t stick, it’s ready. Also, dip your knife in hot water and wipe it dry between cuts to ensure clean edges every time. Trust me, this small step makes all the difference.
Ignoring the Salt
That ¼ teaspoon of salt might seem insignificant, but it’s what elevates this fudge from “good” to “restaurant-quality.” Skipping it makes the fudge taste flat and overly sweet. The salt balances the richness of the chocolate and enhances all the flavors.
If you’re worried about the taste, try it—you’ll notice the difference immediately. It’s a tiny ingredient with a big impact! 🧂
Nutrition facts
Frequently asked questions
Can I make this fudge without butter?
Yes! For a dairy-free version, substitute the 1 cup butter with 0.75 cup coconut oil (melted) or vegetable shortening. The texture will be slightly firmer but still delicious. Use Dutch-processed cocoa powder and dairy-free chocolate chips if needed for a fully vegan treat.
Why did my fudge turn out grainy?
Graininess usually happens when the mixture boils or overheats after adding sugar and cream. Keep the heat at low and stir constantly until it reaches a pudding-like consistency. If it starts to bubble too vigorously, remove from heat immediately. For extra smoothness, strain through a fine-mesh sieve before pouring.
How can I make this fudge in the microwave?
Combine all ingredients except vanilla and salt in a microwave-safe bowl. Heat in 30-second intervals, stirring well between each, until the butter and cocoa melt completely. Then add vanilla and salt, mix, and microwave again in 20-second bursts until thickened (about 1-2 minutes total
Can I add mix-ins like nuts or chocolate chips?
Fold in ½ cup chopped nuts or ½ cup dairy-free chocolate chips after removing the fudge from heat but before pouring. For best results, use a spatula to gently fold them in—don’t overmix. The fudge will still set properly, and you’ll get delicious pockets of texture.
How do I store leftover fudge?
Wrap tightly in plastic wrap or store in an airtight container at room temperature for up to 5 days. For longer storage, refrigerate for 1 week or freeze for 3 months. To serve frozen fudge, let it sit at room temperature for 10-15 minutes before cutting for clean slices.

- Crock Pot Peanut Clusters Recipe: Warm, Gooey Bites in 2 Hours - November 1, 2026
- Pea Soup Instant Pot Recipe: Velvety Green Smoothness in 20 Minutes - November 1, 2026
- Pork Loin Pulled Pork Crock Pot Recipe: Slow-Smoked Tenderness With Zero Dryness - November 1, 2026