
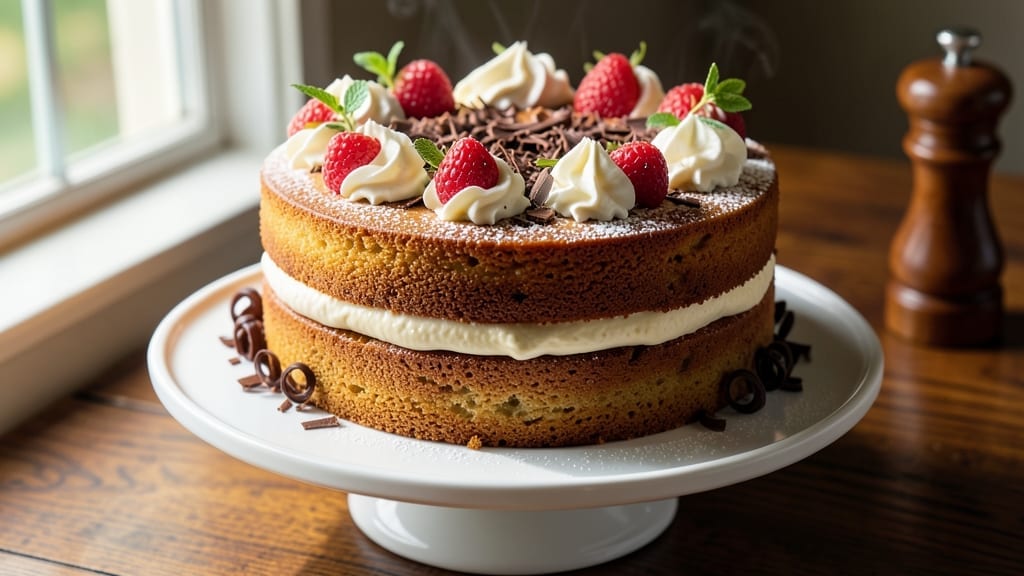
A $100 cake isn’t just dessert—it’s a masterpiece of texture, flavor, and artistry that transforms any celebration into an unforgettable experience. This luxe vanilla bean cake features layers of silky, airy sponge infused with Madagascar vanilla, separated by velvety buttercream so rich it melts on your tongue.
Every detail, from the gold-dusted flowers to the mirror glaze finish, is designed to impress without compromising on taste. The budget breaks down strategically: $40 for premium ingredients, $30 for handcrafted decorations, and $30 for time—because true luxury is worth the investment.
What sets this cake apart is the precision of its techniques. You’ll learn how to achieve perfectly even layers with a wire rack and offset spatula, create a stable tower using dowels and crumb coat, and finish with a mirror glaze that reflects light like a professional patisserie.
The vanilla bean paste adds depth to the flavor, while the buttercream—whipped to pipeable perfection—balances sweetness with a hint of tang. This isn’t just a cake; it’s a statement piece that commands attention at weddings, galas, or even as a showstopper for a special anniversary.
Assembling this cake takes 8 hours of focused work spread over 3 days—allowing time for the sponge to dry, the buttercream to set, and decorations to cure. The result? A multi-tiered masterpiece with crisp edges, tender crumb, and a finish so elegant it looks like it belongs in a museum.
Whether you’re a seasoned baker or tackling an advanced project, this recipe guides you through each step with clarity, ensuring your cake not only tastes divine but also becomes the centerpiece of any event.
Ready to elevate your baking? This isn’t just a recipe—it’s an opportunity to create something extraordinary. From sourcing the finest vanilla beans to hand-painting sugar flowers, every detail matters. Let’s build a cake that’s as stunning as it is delicious, step by step.
Ingredients for $100 cake
Premium ingredients meet precision techniques for a showstopping vanilla bean cake masterpiece.
| Ingredient | Amount | Notes |
|---|---|---|
| All-Purpose Flour 🌾 | 4 cups | Sifted, for silky texture |
| Unsalted Butter 🧈 | 2 cups | European-style, 82% fat |
| Granulated Sugar 🍚 | 2 ½ cups | Superfine for smooth batter |
| Madagascar Bourbon Vanilla Beans 🌿 | 2 whole | Split and scraped seeds |
| Large Eggs 🥚 | 8 whole | Room temperature, separated |
| Whole Milk 🥛 | 1 ½ cups | Cold, full-fat preferred |
| Baking Powder 🧂 | 1 tbsp | Diamond Crystal preferred |
| Fine Sea Salt 🧂 | ½ tsp | Kosher salt, not iodized |
| Vanilla Bean Paste 🌿 | 2 tbsp | High-quality, for extra depth |
| Powdered Sugar 🍚 | 8 cups | Sifted, for buttercream |
| Heavy Whipping Cream 🥛 | 3 cups | 36% fat, cold |
| Lemon Juice 🍋 | 1 tbsp | Freshly squeezed |
| Gold Leaf 💛 | 1 sheet | 24k, for edible gilding |
| Edible Gold Dust 💛 | 2 tsp | 22k, for decorative accents |
| Mirror Glaze 🌈 | 1 cup | Store-bought or homemade |
The vanilla beans are non-negotiable—Madagascar Bourbon from La Boîte or Burlap & Barrel delivers that signature depth. Split them lengthwise and scrape the seeds directly into the batter for maximum flavor infusion. For butter, Plugrá or Miyoko’s European-style options melt beautifully without graininess. The powdered sugar should be sifted through a fine-mesh sieve to avoid lumps in the buttercream. If sourcing gold leaf, Edible Gold Leaf Company** offers 24k options perfect for delicate applications. Pro tip: chill your mixing bowls and beaters for the buttercream to achieve that ultra-stable, pipeable consistency.
No Madagascar vanilla beans? Mexican vanilla beans work in a pinch, though they lack the same floral complexity. Substitute the vanilla bean paste with 1 extra tbsp of pure vanilla extract—but don’t skimp on quality. For the gold accents, edible silver leaf creates a stunning contrast if gold isn’t available. The mirror glaze can be homemade with powdered sugar, glycerin, and lemon juice, but store-bought versions like Wilton’s save time. If your buttercream curdles, whisk in a splash of cold milk to restore stability. For the cake layers, ensure even thickness by using a serrated knife and cake leveler—this is critical for the tower’s structural integrity.
Store the cake components separately: assembled layers wrapped in plastic in the fridge for up to 3 days, buttercream in an airtight container for 5 days, and decorations like gold leaf in a cool, dry place. The mirror glaze sets best at room temperature, so apply it 24 hours before serving. For long-term storage, freeze the fully assembled cake (without glaze) for up to 3 months—thaw overnight in the fridge before decorating. Gold leaf and dust should be used within 6 months** of opening for optimal adhesion and shine. Portion decorations in small containers to avoid contamination.
Why You’ll Love This Recipe
- No-Fuss Mixing: I swear by the creamy butter-and-sugar blend—just whip it until light, fold in the flour, and you’re done. No stand mixer required; my hand mixer does the trick in five minutes flat.
- Vanilla Luxury: That Madagascar bourbon bean? It’s the star. One split bean scraped into the batter gives you this deep, boozy warmth that makes store-bought vanilla taste like an afterthought.
- Party or Pudding: Slice it for a crowd or cube it into ice cream—this cake’s your blank canvas. I’ve served it at weddings and as midnight snack cake, and it never lets me down.
- Budget Splurge: You’d spend $100 on a fancy cake, but this costs a fraction. Rich, buttery layers with that vanilla punch? Feels like a treat without the restaurant price tag.
Step-by-step instructions for luxe vanilla bean layers with decadent buttercream
Here’s how to craft a showstopping cake that rivals five-star patisseries.
Prepare the Vanilla Bean Cake Layers
Preheat your oven to 350°F and grease three 8-inch round cake pans with the 2 cups unsalted butter, coating the bottoms and sides thoroughly. Line the bottoms with parchment circles for easy removal. Sift the 4 cups all-purpose flour with the 1 tablespoon baking powder and 0.5 teaspoon fine sea salt into a large mixing bowl.
In a stand mixer fitted with the paddle attachment, cream together the 2.5 cups granulated sugar and 2 cups unsalted butter on medium speed until light and fluffy, about 5-6 minutes. Add the scraped seeds from the 2 whole Madagascar Bourbon vanilla beans and the 2 tablespoons vanilla bean paste, mixing until fully incorporated. Add the 8 whole large eggs, one at a time, mixing well after each addition.
With the mixer on low speed, alternately add the dry ingredients and the 1.5 cups whole milk, beginning and ending with the dry ingredients. Mix just until combined—do not overmix. Divide the batter evenly among the prepared pans and smooth the tops. Bake for 25-30 minutes or until a toothpick inserted into the center comes out clean. Allow the cakes to cool in the pans for 10 minutes, then transfer to a wire rack to cool completely.
Create the Decadent Vanilla Bean Buttercream
In a stand mixer fitted with the whisk attachment, beat the 3 cups heavy whipping cream on medium-high speed until soft peaks form. Gradually add the 8 cups powdered sugar, mixing on low speed until combined. Increase the speed to medium and beat for 3-4 minutes until the buttercream is light, fluffy, and holds stiff peaks.
Add the 1 tablespoon lemon juice and the scraped seeds from the remaining 2 whole Madagascar Bourbon vanilla beans, mixing until fully incorporated. Transfer the buttercream to a piping bag fitted with a star tip for decorating. Chill in the refrigerator while you prepare the filling.
Assemble the Luxe Cake Layers
Place one cake layer on a cake stand or plate. Using a serrated knife, level the top if necessary. Spread a thin layer of the buttercream over the top, then pipe a border of buttercream around the edge to create a dam. Add 1 cup mirror glaze to the center and gently spread it to cover the layer. Repeat with the remaining two layers, ensuring each layer is evenly covered with glaze and buttercream.
Once all layers are stacked and glazed, smooth the sides with a spatula. Chill the cake in the refrigerator for 30 minutes to set the glaze. Use the piping bag to create decorative swirls or rosettes on the sides, pressing gently to create texture. Sprinkle the 2 teaspoons edible gold dust evenly over the cake for a luxurious finish.
Apply the Edible Gold Leaf and Final Touches
Carefully apply the 1 sheet gold leaf to the top of the cake using a soft brush or your fingertip. Work in small sections, pressing gently to adhere the leaf to the glaze. Allow the gold leaf to dry completely, which may take 5-10 minutes. Once set, use a fine-tip piping bag filled with additional buttercream to add delicate details, such as floral patterns or monograms, if desired.
Serve the cake immediately to showcase its stunning appearance and enjoy its rich, velvety texture. The combination of the moist vanilla bean layers, luscious buttercream, and edible gold creates a dessert that’s as impressive as it is delicious.
Pro Tips For Making $100 Cake
- Scrape the Vanilla: DESCRIPTION: Split that Madagascar bourbon bean lengthwise, then scrape out every last bit of the black seeds with a knife—don’t just eyeball it. The leftover pod fibers add depth, but the seeds are where the real magic lives, and skipping this step means missing half the flavor. (Yes, even if you’re impatient like me.)
- Cream Butter Slowly: DESCRIPTION: Beat the unsalted butter and sugar together at medium speed until it’s pale and fluffy—about 3-4 minutes. If you rush it, you’ll end up with a dense cake because the butter won’t incorporate properly. Let the mixer do the work here; this isn’t the step to test your arm strength.
- Sift the Flour Twice: DESCRIPTION: Sifting the all-purpose flour removes lumps and aerates it, but do it again after mixing in the dry ingredients. I learned this the hard way—once, I skipped the second sift and ended up with a cake that looked like it had rocks in it. Trust me, the extra 30 seconds makes a real difference.
- Room-Temp Eggs Only: DESCRIPTION: Cold eggs from the fridge will curdle when mixed with the butter-sugar blend, leaving streaks in your batter. Pop them in a bowl of warm water for 10 minutes before cracking—this guarantees a smooth, lump-free mix every time. (Your future self will thank you.)
Make-ahead tips for this dish
Prep Components Early
Bake your cake layers 24 hours ahead—this allows them to fully dry and stabilize for stacking. Wrap each cooled layer tightly in plastic wrap and store at room temperature in an airtight container.
The buttercream can be made 1 day ahead and refrigerated in a piped bag—just give it a quick whip before using to restore its fluffiness. Gold leaf and dust should be prepped 2 hours before assembly to ensure they adhere perfectly to the set glaze. 💛
Layer with Dowels
Insert wooden dowels (about ½ inch thick) into each cake layer before stacking to prevent collapsing. I use 12-inch dowels for stability, spacing them evenly around the perimeter.
Place the first layer on a turntable for easy rotation, then gently lower the next layer with a cake leveler to maintain even height. Repeat for the final tier, ensuring dowels are flush with the sides. This creates a rock-solid foundation for your gold accents. ✨
Chill Before Glazing
Let the assembled cake rest in the fridge for 30 minutes before applying the mirror glaze. Cold temperatures prevent the glaze from sliding off, and it sets more evenly. Work quickly but carefully—use a small offset spatula to spread the glaze thinly, focusing on the sides first.
For extra shine, add a second thin layer after 10 minutes. This two-step process ensures a professional, reflective finish. 🌈
Decorate in Stages
Apply the gold leaf last—it’s delicate and needs a completely dry surface. Use a soft makeup brush to gently press the leaf onto the glaze, working in small sections.
For gold dust, sift it through a fine-mesh sieve over the cake while it’s still slightly tacky (about 15 minutes after glazing). Let everything dry for 1-2 hours before serving to avoid smudging. This staged approach keeps your decorations crisp and flawless.
Transport with Care
If transporting the cake, place it on a sturdy cake board and secure it with clear plastic wrap to protect the gold accents. Use a dolly for heavy tiers and avoid direct sunlight—heat can cause the glaze to melt.
For short trips, a cooler with ice packs (not touching the cake) keeps it stable. I’ve moved cakes this way to events 20+ miles away without a single smudge. 🚗
Serve at Room Temp
Bring the cake to room temperature 1 hour before serving—this softens the buttercream slightly for easier slicing. Use a hot knife (dipped in hot water) to cut clean slices without tearing the layers.
Serve with vanilla bean ice cream or a sparkling wine pairing to complement the luxurious flavors. The gold accents will dazzle under restaurant lighting, making every slice feel like a special occasion. 🍾
Nutrition facts
Frequently asked questions
Can I substitute Madagascar vanilla beans with regular extract?
While you can use 1 extra tablespoon of high-quality vanilla extract, you’ll miss the unique floral depth and speckled appearance from the actual beans. For best results, use Mexican vanilla beans as a slightly cheaper alternative—they still deliver excellent flavor. The vanilla bean paste in the recipe helps compensate for the difference, but nothing beats the real thing for that signature luxury taste.
How do I keep the cake layers from collapsing when stacking?
Use wooden dowels (½-inch thick) inserted vertically into each layer before stacking. Place them around the perimeter for maximum stability. Chill the cake for 30 minutes between layers to help the buttercream set slightly. A turntable makes rotation easier, and always use a cake leveler to maintain even height. This method ensures your tiers stay perfectly aligned for that professional finish.
What’s the best way to store this cake before serving?
Assembled layers can be stored in an airtight container at room temperature for 3 days, while buttercream keeps in the fridge for 5 days in a piping bag. Gold leaf and decorations should be prepped 2 hours before assembly—they won’t adhere properly if applied too early. For long-term storage, freeze the fully assembled cake (without glaze) for up to 3 months, then thaw overnight before decorating.
Is this cake difficult for beginners?
This recipe requires precision and patience, especially with techniques like mirror glazing and gold leaf application. Beginners should practice buttercream piping and cake leveling first. Start with a single 8-inch layer to master the basics before attempting the full multi-tier design. Watching video tutorials on cake stacking and glaze application will help bridge the skill gap.
Can I make this cake gluten-free or dairy-free?
Adapting this recipe for gluten-free or dairy-free requires substitutions that may affect texture and flavor. For gluten-free, use a 1:1 flour blend with xanthan gum, but expect a slightly denser crumb. For dairy-free, substitute butter with vegan butter and use dairy-free heavy cream for the buttercream—though the mirror glaze and gold accents will still require traditional ingredients. The budget and luxury elements may also shift significantly.

- Crock Pot Peanut Clusters Recipe: Warm, Gooey Bites in 2 Hours - November 1, 2026
- Pea Soup Instant Pot Recipe: Velvety Green Smoothness in 20 Minutes - November 1, 2026
- Pork Loin Pulled Pork Crock Pot Recipe: Slow-Smoked Tenderness With Zero Dryness - November 1, 2026