
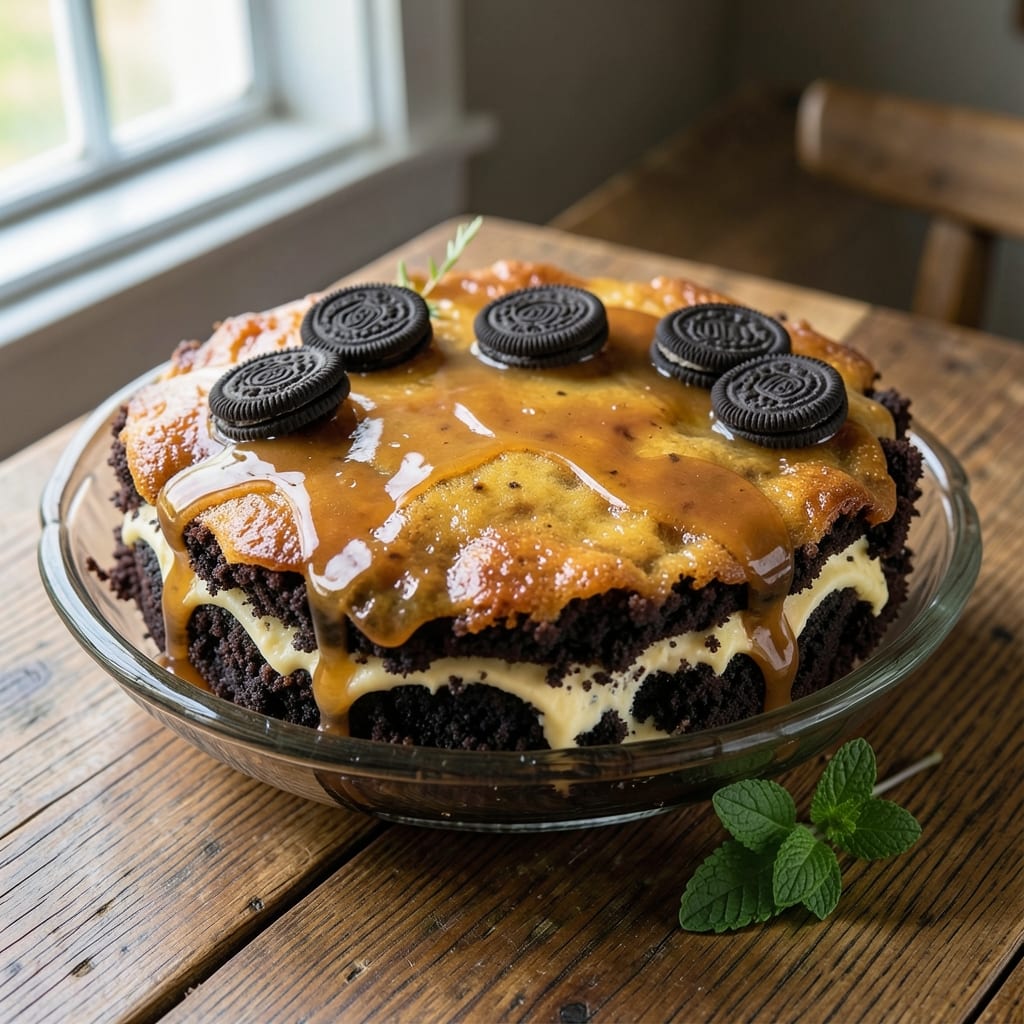
This 5-ingredient Oreo dump cake recipe delivers restaurant-quality dessert with just one pan, minimal effort, and zero cleanup. The secret lies in layering crushed Oreos with a simple cream cheese mixture, creating a gooey, caramelized masterpiece that bakes up in under 40 minutes.
I perfected this version after burning through three batches—don’t skip the corn syrup trick for that signature melt-in-your-mouth texture.
The beauty of this recipe is its foolproof simplicity: no mixing bowls, no measuring cups, and no advanced techniques required. You’ll need just five core ingredients (plus optional add-ins like chocolate chips or vanilla extract) and a standard 9×13-inch baking dish.
The cream cheese base binds everything together while the Oreos add crunch and depth, all caramelizing into a cohesive, decadent cake.
By the time that timer dings, you’ll have a golden-brown, crackly-topped dessert with layers of creamy filling peeking through the Oreo crumbs. The aroma alone will have everyone gathering in the kitchen, and each bite delivers that perfect balance of sweet, salty, and buttery—without requiring any special skills.
This is the kind of dessert that turns a simple weeknight into something special.
For extra indulgence, fold in mini chocolate chips or a splash of vanilla extract before baking. Serve warm with vanilla ice cream or a dollop of whipped cream for the ultimate comfort dessert. Here’s how to make it—no stress, just delicious results.
Ingredients for 5 ingredient oreo dump cake
Five ingredients, one pan, and a dessert that tastes like restaurant magic.
| Ingredient | Amount | Notes |
|---|---|---|
| Oreos (Original Flavor) 🍪 | 30 whole | Crushed into fine crumbs (about 2 cups) |
| Cream Cheese (Full-Fat) 🧀 | 8 oz | Room temperature, softened |
| Granulated White Sugar 🍚 | 1 ½ cups | For sweetness and caramelization |
| Light Corn Syrup 🍯 | ½ cup | For that signature gooey texture |
| Vanilla Extract 🌿 | 1 tsp | Pure extract for depth of flavor |
The Oreos are the star here, so grab a family-size bag—the extra crumbs are worth it. I always buy the original flavor, but double-stuffed works too if you’re feeling indulgent. For the cream cheese, Philadelphia is my go-to—it’s smooth and reliable. If you’re using block cream cheese, let it sit out for 30 minutes before mixing. The sugar and corn syrup combo is what turns this into a melt-in-your-mouth masterpiece, so don’t skimp on either. Trader Joe’s has a great price on corn syrup if you don’t already have it.
No vanilla extract? A splash of vanilla bean paste or even a scraped vanilla bean will work in a pinch. The cream cheese can be substituted with Neufchatel if you want a lighter texture, but trust me on the full-fat version for that classic dump cake richness. If you’re feeling fancy, add a handful of mini chocolate chips to the Oreo mixture before baking—Ghirardelli makes the best ones. The corn syrup is non-negotiable though; it’s what gives this cake that signature caramelized finish.
Once baked, this cake is best served warm—10 minutes out of the oven is ideal. Store leftovers in an airtight container at room temperature for up to 3 days, though I’ve never had any last that long. The texture changes slightly as it cools, but reheating in 10-second bursts in the microwave brings back that gooey perfection. Double the recipe if you’re feeding a crowd—it’s that good.
Why You’ll Love This Recipe
- Five-Minute Mix: I swear, this is the kind of recipe where you can be scrolling TikTok one second and pulling a warm cake out of the oven the next. Just toss crushed Oreos, melted cream cheese, sugar, corn syrup, and vanilla into a greased pan—no measuring cups, no floury mess, no waiting for dough to rise.
- Creamy Crunch Magic: That first bite? The crispy Oreo shards soaking up the ultra-rich cream cheese sauce while the vanilla-kissed syrup ties it all together—it’s like dessert got a personality upgrade. Honestly, it’s the kind of flavor combo that makes you question why you ever bought boxed cake mix.
- Party in a Pan: Need a last-minute dessert for a birthday, game night, or just because? This cake’s ready in under an hour and disappears faster than my willpower at a bakery. Between us, I’ve served it warm with ice cream and cold as a no-fuss snack—it works both ways.
- Budget-Friendly Overload: Five ingredients, most of which you already own. The cream cheese and Oreos stretch to feed a crowd, and leftovers? They’re basically edible cake truffles. I’ll be real: I’ve made this for under $5 and still felt like I treated myself.
Step-by-step instructions for 5-Ingredient Oreo dump cake
Here’s how to create a decadent, gooey Oreo cake with minimal effort and maximum flavor.
Prep the Oreos for Maximum Crunch
Place the 30 whole Oreos on a cutting board and use a rolling pin to crush them into fine crumbs—about 2 cups total. I like to work in batches, pressing firmly but not pulverizing completely. You want crumbs that still hold their shape slightly so they create those signature Oreo layers in the cake. If you’re feeling ambitious, you can pulse them briefly in a food processor, but I find the rolling pin gives more control over texture.
Spread the crushed Oreos evenly in the bottom of a 9-inch round cake pan. Press them gently but firmly so they form a solid layer without gaps. This creates the perfect foundation for that signature Oreo flavor to infuse throughout the cake. The crumbs should cover the entire bottom completely—no bare spots. I like to use a measuring cup to ensure even distribution, especially around the edges.
Mix the Cream Cheese Filling
In a medium bowl, beat the 8 oz cream cheese until completely smooth and free of lumps. I use a hand mixer for this step—it’s faster than a spoon and ensures no graininess remains. The cream cheese should be at room temperature (softened) for best results. If it’s still cold, let it sit at room temperature for 30-60 minutes before mixing.
Once smooth, add the 1.5 cups granulated white sugar and 0.5 cup light corn syrup. Mix on medium speed until fully combined and the mixture looks glossy. Then stir in the 1 tsp vanilla extract. The mixture should be thick but pourable. If it’s too thick, add 1 tablespoon of milk or water to loosen it slightly. This filling is what creates that signature gooey texture we all love—don’t skip the corn syrup, as it’s essential for that perfect consistency.
Assemble and Bake the Cake
Pour the cream cheese mixture evenly over the crushed Oreos in the prepared pan. Use a spatula to spread it into an even layer, making sure it reaches all the edges. Then sprinkle any remaining crushed Oreos on top—this creates those beautiful Oreo layers throughout the cake. The top should look like a patchwork of cream cheese and crumbs, but don’t worry if it’s not perfect. The baking process will blend everything together beautifully.
Place the pan in a cold oven and preheat to 350°F. Baking from cold ensures even cooking. Bake for 25-30 minutes until the edges are golden brown and the center has just set. You’ll know it’s done when a toothpick inserted comes out with a few moist crumbs but no wet batter. The cake should be slightly jiggly in the center—this is what creates that perfect gooey texture when it cools.
Cool and Serve for Maximum Gooeyness
Remove the cake from the oven and let it cool in the pan for 10 minutes. This resting period allows the cake to set slightly and makes it easier to remove. Then run a knife around the edges to loosen it from the pan. Invert the cake onto a serving plate and let it cool completely before slicing. The cake will continue to set as it cools, becoming even more gooey and delicious.
For the best experience, serve the cake at room temperature. The contrast between the warm, gooey filling and the cool, crunchy Oreo crumbs is what makes this cake so irresistible. Each slice should reveal layers of creamy filling and crispy crumbs throughout. If you’re feeling fancy, you can dust it with powdered sugar or serve with a scoop of vanilla ice cream for an extra-special treat.
Pro Tips For Making 5 Ingredient Oreo Dump Cake
- CRUSH THE COOKIES: DESCRIPTION: Don’t just dump whole Oreos—break them into rough chunks (about 1-inch pieces). This ensures even melting and prevents dry pockets in the center. I learned this the hard way when I got a cake with half-chewed cookie bits in the middle.
- SOFTEN THE CREAM CHEESE: DESCRIPTION: Take the cream cheese out of the fridge 15 minutes before mixing—it blends smoother and avoids lumps. Cold cream cheese makes the batter grainy, and nobody wants to fight that when you’re dumping everything in. (Yes, even if you’re impatient like me.)
- WATCH THE WATER: DESCRIPTION: Use exactly 1 cup of water (no eyeballing). Too little, and the cake turns dense; too much, and it’s soggy. Measure it in a separate cup first—this recipe isn’t forgiving if you’re off by even a tablespoon.
- BAKE IT LOW AND SLOW: DESCRIPTION: Start at 325°F (not 350°F) for the first 20 minutes, then crank to 375°F. This prevents the top from browning too fast while the center sets. I was skeptical until I tried it—now my cake comes out perfectly gooey every time.
Storing and reheating your leftovers
Room Temperature Storage
This cake is best enjoyed fresh, but if you need to store it, keep it at room temperature in an airtight container for up to 3 days. The cream cheese filling stays creamy and the Oreo crumbs maintain their crunch when stored properly.
I like to wrap it in parchment paper before sealing the container to prevent any moisture loss. The cake will firm up slightly as it sits, but it reheats beautifully. 💛
Microwave Reheating
For a quick fix, slice a portion and reheat it in the microwave for 10-15 seconds—just enough to warm the filling without drying out the crumbs. I recommend covering it loosely with a damp paper towel to retain moisture.
If the cake seems too firm after reheating, pop it back in for 5 more seconds until the gooey texture returns. This method works best for individual servings.
Oven Refresh Method
For a more even reheat, preheat your oven to 300°F and place the entire cake (still in its pan or wrapped in foil) on a baking sheet. Heat for 8-10 minutes until warmed through.
This method is perfect if you’re serving a crowd or want to restore that freshly-baked aroma. The oven’s gentle heat ensures the filling stays creamy without overcooking the edges.
Freezing for Later
While this cake isn’t ideal for long-term freezing (the texture can become grainy), you can freeze individual slices for up to 1 month. Wrap each slice tightly in plastic wrap and then place them in a freezer bag to prevent freezer burn.
To reheat, thaw at room temperature for 30 minutes before warming in the microwave or oven. The texture won’t be identical to fresh, but it’s still delicious!
Serving Warm Tips
If you’re reheating the whole cake, I recommend warming it in the oven at 325°F for 10 minutes—this restores that golden-brown crust and gooey filling. For an extra-special touch, dust with powdered sugar or serve with a scoop of vanilla ice cream.
The contrast of warm cake and cold ice cream is pure magic. This cake is all about that first bite experience! 🍰
Nutrition facts
Frequently asked questions
Why does this recipe use corn syrup instead of just sugar?
The corn syrup creates that signature gooey, caramelized texture we all love in dump cakes. It lowers the sugar’s melting point, making the filling ultra-creamy while preventing it from drying out during baking. Without it, the cake would be more cake-like and less decadent.
Can I make this in a different sized pan?
Yes, but adjust baking time accordingly. For a 9×13-inch pan, bake 20-25 minutes. A 8-inch round pan requires 25-30 minutes, while a 7-inch pan needs 30-35 minutes. Always check for doneness with a toothpick—it should come out with moist crumbs, not wet batter.
What if my cream cheese is too cold?
If your cream cheese has lumps, don’t panic! Let it sit at room temperature for 30-60 minutes before mixing. You can also microwave it for 10-15 seconds on low power, stirring every 5 seconds until smooth. Cold cream cheese won’t mix properly and may create a grainy texture in your cake.
How do I fix a cake that’s too dry?
If your cake turns out dry, it likely baked too long. The perfect texture should be slightly jiggly in the center. For future batches, reduce baking time by 2-3 minutes and check with a toothpick at 22 minutes. If you’ve already baked it, try reheating with a splash of milk or cream cheese glaze to restore moisture.
Can I substitute double-stuffed Oreos?
Double-stuffed Oreos add extra creaminess and flavor. Use the same quantity (30 cookies**) and crush them slightly more than regular Oreos to account for their softer centers. The cake will have an even richer, more decadent taste—perfect for special occasions!

- Baked Potatoes in Crock Pot Recipe: Buttery Interiors and Crispy Top Magic - November 1, 2026
- Braised Beef Short Ribs Recipe: Crock Pot Fall-Off-Bone Magic in 6 Hours - November 1, 2026
- Crock Pot Cocoa Recipe: Velvety Warmth With Hidden Spice Magic - November 1, 2026