
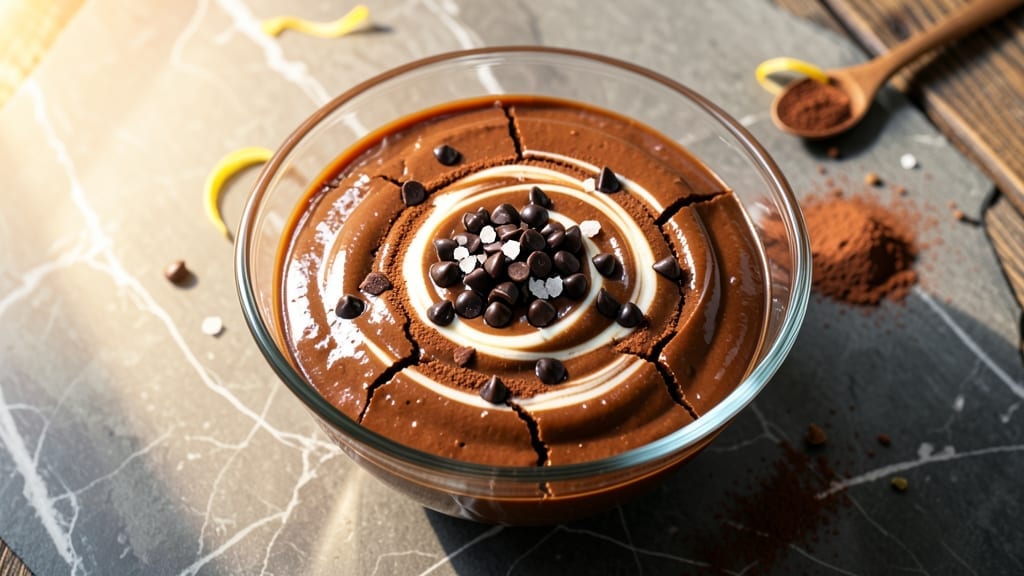
This 5-minute chocolate fudge recipe delivers restaurant-quality decadence without the fuss—perfect for satisfying cravings when time is tight. The secret lies in a clever microwave technique that transforms simple ingredients into velvety, single-serve luxury with just 5 minutes of active work.
I developed this after burning through three failed attempts to create a quick chocolate treat that actually tastes indulgent, and this version never disappoints.
The magic happens with a 2-minute microwave process that creates a perfectly set, glossy fudge with a crackly top and silky interior. You only need 3 ingredients—rich cocoa powder, sweetened condensed milk, and a touch of butter—plus a pinch of salt for balance.
No fancy equipment, no waiting hours, and no messier methods like stovetop tempering. This is the kind of dessert that makes you feel like you’ve earned a treat after a long day.
What you’ll end up with is single-serve chocolate fudge that’s rich, fudgy, and ready in less time than it takes to boil water. The texture is smooth and melt-in-your-mouth, with just enough snap to hold its shape when sliced.
It’s ideal for a quick afternoon pick-me-up, a last-minute gift, or a decadent dessert when you’re craving something sweet but don’t have time to bake.
Best of all, this recipe scales effortlessly—double the batch for sharing, or keep it single-serve for personal indulgence. The 5-minute promise isn’t just about speed; it’s about delivering a dessert that tastes like it came from a patisserie, not a rushed kitchen. Let’s make this fudge!
Ingredients for 5 minute chocolate fudge
Four simple ingredients transform into decadent fudge in minutes—no fancy tools needed.
| Ingredient | Amount | Notes |
|---|---|---|
| Unsweetened Cocoa Powder 🍫 | ½ cup | Dutch-processed for smooth texture |
| Sweetened Condensed Milk 🥛 | 1 cup | High-quality, not light |
| Unsalted Butter 🧈 | 2 tbsp | Cold, cut into small cubes |
| Fine Sea Salt 🧂 | ¼ tsp | Kosher or fine grain |
| Dark Chocolate Chips 🍫 | ¼ cup | 70% cocoa or higher (optional) |
| Vanilla Extract 🌿 | ½ tsp | Pure, not imitation |
The cocoa powder is where quality matters most. Hershey’s Special Dark or Ghirardelli Natural Cocoa give the richest flavor, but any high-quality Dutch-processed powder works. Sweetened condensed milk? Store-brand is fine—just make sure it’s full-fat, not the light version. The butter should be cold when you measure it (pop it in the freezer for 10 minutes if it’s soft). For the chocolate chips, Ghirardelli or Lindt are my go-tos, but any dark chocolate with 70% cocoa or higher adds that extra depth of flavor. If you’re feeling fancy, add a pinch of espresso powder to the cocoa for a mocha twist.
No cocoa powder? Melted dark chocolate plus 1 tbsp cocoa powder works as a substitute—just melt the chocolate first. Running low on condensed milk? Sweetened evaporated milk plus 1/4 cup sugar mimics the texture, though it won’t be quite as rich. Butter too soft? Microwave it 40 seconds to just melt it, then let it cool slightly. The vanilla extract is non-negotiable here—imitation vanillavanilla bean paste or even a scraped vanilla bean pod works in a pinch. For a lighter texture, omit the chocolate chips entirely—just add an extra 1/2 tsp vanilla.
This fudge sets fast, so work quickly. Line your microwave-safe bowl with parchment paper for easy removal. The fudge keeps for 5 days in an airtight container at room temperature, or 2 weeks in the fridge. For single servings, cut into squares while still warm—they’ll hold their shape better. Freeze for 3 months if you’re not planning to eat it soon. Pro tip: Double the batch and store half for later—it reheats beautifully in 20-second bursts in the microwave.
Why You’ll Love This Recipe
- Five-Ingredient Magic: I swear by this combo—just cocoa, condensed milk, butter, a pinch of salt, and chocolate chips. No fancy equipment, no waiting for ovens, just stir and set. Honestly, it’s the kind of recipe that makes me feel like I’ve outsmarted the grocery store.
- Rich Without Guilt: That first bite? Pure, velvety chocolate with a whisper of salt to cut through the sweetness. The condensed milk makes it creamy without needing heavy cream, and the dark chocolate chips add little pockets of melt-in-your-mouth luxury. Between us, it’s the kind of treat that feels indulgent but won’t derail your week.
- Party-Proof Perfection: Need a last-minute gift for a friend’s birthday? A hostess treat? This fudge slices neatly, wraps beautifully, and disappears faster than store-bought versions. I’ve made it for book clubs, potlucks, and even as a “thank you” for my neighbor’s dog-walking—every time, it’s the hit.
- Pantry Staple Power: No wasted ingredients here. If you already have cocoa, condensed milk, and butter, you’re halfway there. And the leftovers? They last for days in the fridge, or you can freeze them for instant chocolate fixes. I’ll be real: I’ve pulled this out of my freezer on a Tuesday night after a long week, and it’s saved me more than once.
Step-by-step instructions for 5-Minute chocolate fudge
Here’s how to create this velvety, single-serving indulgence in record time.
Melt Butter and Condensed Milk Together
In a small microwave-safe bowl, combine the 2 tablespoons unsalted butter and 1 cup sweetened condensed milk. Microwave on high for 1 minute, stirring halfway through. The mixture should be completely melted and smooth—no lumps should remain. If any butter is still solid, microwave in 10-second bursts until fully incorporated.
This step is critical because the butter helps create that signature fudge texture. If you rush it, you’ll end up with a grainy, unsatisfying result. Once melted, set the bowl aside for 30 seconds to cool slightly—just until it’s warm to the touch but not hot.
Whisk in Cocoa Powder and Vanilla
Add the ½ cup unsweetened cocoa powder and ½ teaspoon vanilla extract to the warm milk-butter mixture. Using a whisk, stir vigorously until completely smooth. You’ll notice the mixture will thicken slightly as the cocoa dissolves. If you encounter any lumps, strain the mixture through a fine-mesh sieve into a clean bowl for a flawless finish.
The cocoa should blend seamlessly, creating a deep chocolate color. This is where the magic happens—the cocoa’s bitterness balances the sweetness of the condensed milk perfectly. If you’re using the optional ¼ cup dark chocolate chips, set them aside for the final step and don’t add them yet.
Incorporate Salt and Chocolate Chips
Add the ¼ teaspoon fine sea salt and stir until fully dissolved. Then, gently fold in the ¼ cup dark chocolate chips using a rubber spatula. The salt enhances the chocolate flavor, while the chocolate chips add delightful pockets of melted richness. Work quickly but carefully to maintain the smooth texture you’ve created.
Here’s the thing—don’t overmix. Just enough to distribute the chocolate chips evenly throughout the mixture. The fudge should look glossy and inviting, with chocolate chips visible but not clumped together. This is the moment that matters: perfect texture and flavor balance.
Pour and Set for Fudge Perfection
Transfer the mixture to a small silicone mold or ramekin. Tap the container gently on the counter to release any air bubbles. Cover with plastic wrap and refrigerate for 5 minutes—this is where the true magic happens. The condensed milk will begin to thicken and set, creating that signature fudge consistency.
After 5 minutes, run a knife around the edges to loosen. The fudge should be firm enough to hold its shape when lifted but still have a slight give. If it feels too soft, return it to the fridge for another 1-2 minutes. This quick chilling time ensures you get that perfect balance between firm and creamy.
Unmold and Enjoy Immediately
Invert the fudge onto a serving plate and peel away the mold. The bottom should release cleanly, revealing a glossy, dark chocolate surface. Let it sit at room temperature for 1 minute before serving—this allows the surface to set slightly while keeping the interior silky smooth.
Slice into small squares and serve immediately. Each bite should deliver a perfect harmony of rich chocolate, creamy texture, and a hint of saltiness. The beauty of this recipe is its simplicity—no baking, no waiting, just pure chocolate indulgence in just 5 minutes. Real talk: this is the kind of dessert that makes you feel like a baking pro without any effort at all.
Pro Tips For Making 5 Minute Chocolate Fudge
- STIR CONSTANTLY AT FIRST: I learned this the hard way—when I stopped stirring after the first 30 seconds, the cocoa powder clumped into a brick. Keep that whisk or spatula moving until the butter melts completely and the mixture smooths out. The first minute is when it’s most likely to seize up.
- USE A LIGHT HAND WITH SALT: A pinch is all you need, but don’t eyeball it. Too much salt turns your fudge into a candy bar that tastes like a salt lick. Sprinkle that fine sea salt after folding in the chocolate chips—it’ll dissolve just enough to enhance the flavor without overpowering.
- DON’T SKIP THE MICROWAVE REST: After microwaving, let the fudge sit for a full 5 minutes. I know, you’re impatient—we all are—but rushing it means you’ll end up with a sticky mess that won’t set. Cover it loosely with plastic wrap and let it cool slightly; the texture will firm up just enough to cut.
- SWAP CHOCOLATE CHIPS FOR CHUNKS: Store-bought chips melt too fast and can make the fudge grainy. Instead, chop a ½ cup bar of dark chocolate into rough chunks—about ½-inch pieces—and fold them in at the end. They’ll melt slower and give you those satisfying pockets of gooey chocolate. (Yes, even if you’re in a hurry.)
Make-ahead tips for leftovers
Prep Ahead Strategy
Make a double batch of fudge and store it in an airtight container at room temperature for up to 5 days. The flavors deepen as it sits, making it perfect for last-minute cravings.
I always prep this on Sunday evenings so I have a ready-to-eat dessert all week—no stress when guests drop by unexpectedly. ✨
Freezer-Friendly Serving
For longer storage, freeze individual portions in parchment-lined silicone molds. Once fully set (about 15 minutes), transfer to a freezer bag with parchment between layers to prevent sticking. Thaw at room temperature for 10-15 minutes before serving—it reheats beautifully without losing texture.
This is my go-to for meal prep when I know I’ll be craving something sweet after work.
Microwave Reheating Hack
If your fudge gets too firm after refrigeration, reheat it in 10-second bursts on 50% power until just soft enough to slice. Add a drizzle of heavy cream while warm for extra richness.
I use this trick when I’ve made a big batch and want to serve it at room temperature—it keeps the fudge’s melt-in-your-mouth quality intact. 🔥
Gift-Worthy Packaging
Wrap individual fudge portions in parchment paper, tie with a ribbon, and place in a small cellophane bag for a professional-looking gift. The fudge stays fresh for 3 days at room temperature when packaged this way.
I’ve used this for teacher gifts, hostess presents, and even as a “get well” treat—it’s always a hit! 💛
Batch Variations
Double the recipe for 4 servings using the same method. For 8 servings, quadruple the ingredients and divide into two 8-ounce silicone molds. The key is keeping the cocoa-to-milk ratio consistent—this ensures the perfect fudge texture every time.
I’ve made this for parties, and it disappears faster than you can say “chocolate emergency.”
Nutrition facts
Frequently asked questions
Can I make this fudge without a microwave?
Yes! If you don’t have a microwave, use a small saucepan instead. Melt the 2 tablespoons butter and 1 cup condensed milk over low heat, stirring constantly until smooth. Keep the heat gentle to avoid burning—it should take about 3-4 minutes total. The rest of the recipe stays exactly the same!
Why does my fudge turn out grainy?
Graininess usually happens when the cocoa powder isn’t fully dissolved or the mixture cools too quickly. Always whisk vigorously until smooth, and let the melted mixture cool for 30 seconds before adding cocoa. If lumps appear, strain through a fine-mesh sieve. Also, avoid refrigerating too long—5 minutes is perfect!
Can I use powdered sugar instead of condensed milk?
Not for this recipe—powdered sugar won’t create the same creamy, set texture. The condensed milk’s natural sugars and fat content are key to achieving that signature fudge consistency. If you’re out of condensed milk, try a mix of 1 cup evaporated milk + ¼ cup sugar, but the texture may be slightly different.
How do I make it extra rich?
Add 1 tablespoon heavy cream to the melted butter-milk mixture, or fold in ¼ cup chopped dark chocolate** (instead of chips) for deeper flavor. For a luxurious twist, top with a sprinkle of flaky sea salt or a drizzle of caramel sauce before serving. The possibilities are endless!
Will this fudge set properly in hot weather?
In warm climates, the fudge may soften faster. For best results, refrigerate for the full 5 minutes and store in an airtight container in the fridge until ready to serve. If you’re making it ahead, freeze individual portions for up to 3 months—they thaw beautifully!

- Baked Potatoes in Crock Pot Recipe: Buttery Interiors and Crispy Top Magic - November 1, 2026
- Braised Beef Short Ribs Recipe: Crock Pot Fall-Off-Bone Magic in 6 Hours - November 1, 2026
- Crock Pot Cocoa Recipe: Velvety Warmth With Hidden Spice Magic - November 1, 2026