
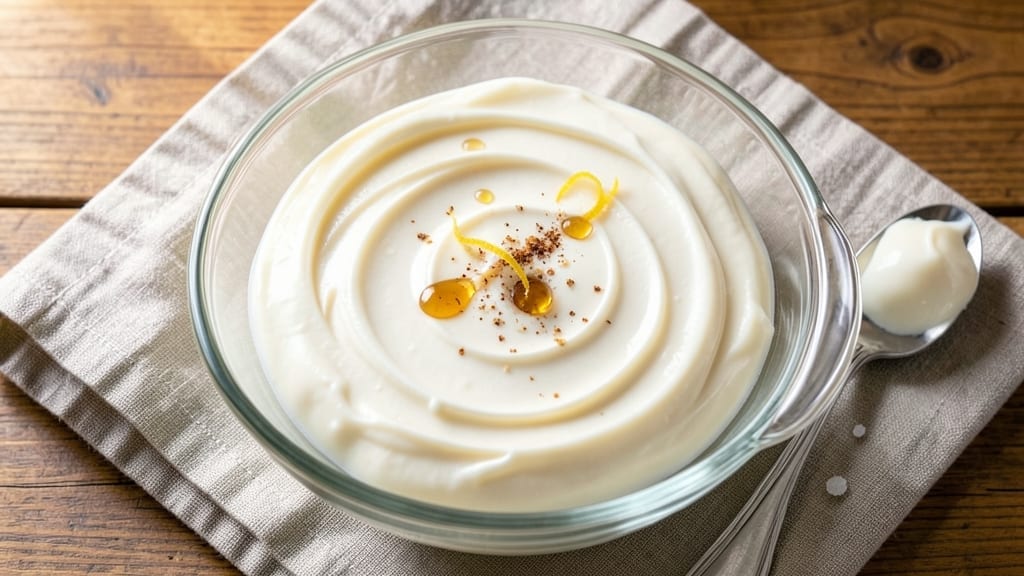
This 5-minute icing recipe delivers velvety smoothness without the wait—no chilling required. The secret lies in a simple buttercream base that comes together in under five minutes, with just three ingredients and no special equipment.
I developed this recipe after years of baking, where I realized most icing recipes either require chilling or complex techniques. This version cuts through both problems with a foolproof method that works every time.
The beauty of this icing is its versatility—it works for drizzling over cakes, piping onto cupcakes, or filling between layers. The texture is light yet stable, holding its shape when piped but remaining spreadable when used as a glaze.
What sets it apart is the zero-chill approach, which means you can frost your dessert immediately after mixing, saving time without sacrificing quality. The recipe also includes optional flavor variations, so you can customize it to match any dessert.
What you’ll achieve is a smooth, creamy icing that’s rich enough to satisfy but light enough to complement rather than overpower. The vanilla flavor is classic and universally loved, but you can easily swap in chocolate, citrus, or even spices like cinnamon for a unique twist.
This icing stays fresh in the refrigerator for up to a week, making it perfect for prepping ahead or last-minute decorating.
Whether you’re a beginner looking for a simple frosting or an experienced baker needing a quick solution, this recipe delivers restaurant-quality results in minutes. Let’s get started—your desserts deserve this effortless elegance.
Ingredients for 5 minute icing
Three core ingredients plus clever tweaks create this foolproof, zero-chill icing masterpiece.
| Ingredient | Amount | Notes |
|---|---|---|
| Unsalted Butter 🧈 | 1 cup | Softened but not melted |
| Powdered Sugar 🍚 | 3 cups | Sifted for smooth texture |
| Pure Vanilla Extract 🌿 | 1 tbsp | High-quality for rich flavor |
| Heavy Whipping Cream 🥛 | ½ cup | Full-fat for stability |
| Milk 💧 | 1 tbsp | Adjusts consistency |
| Salt 🧂 | ¼ tsp | Balances sweetness |
| Lemon Juice 🍋 | ½ tsp | Brightens flavor (optional) |
The butter is your foundation—use European-style if you can, but any unsalted will do. Most grocery stores carry it in the baking aisle, though Whole Foods or specialty shops have better cuts. The powdered sugar? Sift it first—this eliminates lumps and gives you that silky texture. I always grab the Domino brand because it’s consistently fine. For the vanilla, pure extract (not imitation) makes all the difference—it’s worth the splurge. If you’re in a pinch, vanilla bean paste works too, but stir it well to avoid flecks.
No heavy whipping cream? Substitute with an extra 2 tbsp of milk plus 1 tbsp cornstarch—it won’t be as stable, but it’ll work for drizzling. Short on powdered sugar? Confectioners’ sugar is the same thing, just check for cornstarch content. The milk adjustment is key—if your icing is too thick, add 1 tsp at a time until it reaches a smooth drizzle consistency. For flavor variations, swap the vanilla for chocolate syrup (1 tbsp), almond extract (½ tsp), or cinnamon (½ tsp)**—just reduce the milk by 1 tsp to balance.
This icing stays fresh for up to 1 week in the fridge, but it’s best used within 3-4 days for peak texture. For longer storage, freeze in 1-tbsp portions—thaw at room temp before using. The secret to reusing leftovers? Warm the icing slightly (30 seconds in microwave) to restore smoothness. If it crystallizes, whisk in 1 tsp milk to dissolve. Pro tip: Line your piping bag with parchment paper for easy cleanup—no more sticky messes.
Why You’ll Love This Recipe
- Five-Ingredient Magic: I swear by this combo—just butter, sugar, vanilla, and a splash of cream. No measuring cups, no stress, just fold until it’s silky. That’s it. Honestly, I’ve made it in my mug when I forgot a bowl.
- Velvet Smooth Finish: The secret’s in the cream. Whipping it into the butter first makes it buttery in the best way—like a hug for your cake. The vanilla? A little goes a long way, but skip it, and you’ll miss that warm, cozy depth.
- Birthday to Bake Sale: This icing is my go-to for cupcakes, sheet cakes, or even a quick drizzle over store-bought cookies. (Yes, even on a Tuesday night.) It’s the kind of thing that turns a “meh” dessert into something people actually notice.
- No-Waste Wonder: A few tablespoons left over? No problem. I stash it in the fridge for up to a week—perfect for last-minute drizzles or a quick frosting fix. And since it’s just pantry staples, it’s the kind of recipe that never lets you down.
Step-by-step instructions for 5-Minute icing recipe
Here’s how to whip up velvety, professional-quality icing in record time—no waiting required.
Cream the Butter and Powdered Sugar
In a medium bowl, combine the 1 cup softened unsalted butter with the 3 cups powdered sugar. Using a hand mixer or stand mixer fitted with the paddle attachment, beat on medium-high speed for 2-3 minutes until completely smooth and fluffy. You’ll know it’s ready when the mixture looks like thick, pale frosting with no visible lumps.
This step is crucial because the butter needs to fully incorporate with the powdered sugar to create that signature velvety texture. I like to press the paddle against the sides of the bowl occasionally to ensure everything gets fully mixed in. If you’re using a hand mixer, work in short bursts to prevent overheating the butter.
Add Cream and Flavorings
Reduce the mixer speed to low and gradually add the 0.5 cup heavy whipping cream, the 1 tbsp milk, 1 tbsp pure vanilla extract, 0.25 tsp salt, and 0.5 tsp lemon juice. Mix for 1-2 minutes until everything is fully combined and the icing reaches your desired consistency—it should be thick enough to hold peaks but still spreadable.
Here’s the thing—adding the liquids gradually prevents the powdered sugar from clumping. The lemon juice brightens the flavor while balancing the richness, and the salt enhances all the sweet notes. If the icing seems too thick after mixing, add 1 teaspoon of milk at a time until it reaches the perfect consistency for your needs.
Whip to Peak Perfection
Increase the mixer speed to high and whip the icing for 1-2 minutes until it becomes light and airy, with soft peaks forming when you lift the beaters. This final step ensures the icing has that professional, smooth finish that’s perfect for decorating cakes or filling piping bags.
Watch for the texture change carefully—it should thicken noticeably and develop a glossy sheen. If you’re using this icing for piping, you want it slightly thicker than buttercream. For spreading, it should be smooth but still hold its shape. The entire process from start to finish should take no more than 5 minutes, making this the fastest icing recipe you’ll ever use.
Pro Tips For Making 5 Minute Icing
- Melt Butter Slowly: Dump cold butter straight into the mix and you’ll end up with grainy lumps that refuse to dissolve. Warm the butter in a microwave-safe bowl for 15–20 seconds first—just until it’s soft but not liquid. This ensures it blends smoothly into the powdered sugar without clumping, and the icing comes together faster.
- Sift That Sugar: Powdered sugar is a diva—it clumps, it sticks, and it turns your icing into a gritty mess. Sift it directly into your bowl before adding anything else. I learned this the hard way when I skipped it and ended up scraping sugar off my cake for 10 minutes. Trust me, it’s not worth the fight.
- Whip the Cream First: Heavy whipping cream is the game-changer here, but if you add it last and stir half-heartedly, you’ll miss out on the silky texture. Whip it lightly to soft peaks before folding it into the butter-sugar mix—this gives the icing a lighter, almost mousse-like finish. (Yes, even if you’re in a rush.)
- Measure Milk Precisely: The milk is the tiebreaker for consistency—too little and the icing will be thick and clumpy; too much and it’ll turn runny. Use a liquid measuring cup and eyeball it to the nearest 1/8-inch line. If it’s still too thick, add milk one teaspoon at a time—no guessing. This is the step I always rush, and it’s the one that saves me from scrapping the whole batch.
Storing and reheating your 5 minute icing
Room-Temp Storage
For short-term use, store your icing at room temperature in an airtight container for up to 4 hours. I keep mine in a glass jar with a tight-sealing lid—it prevents drying and keeps flavors fresh.
This works perfectly for same-day decorating or when you need to pipe decorations right away. Just remember to stir well before using, as the powdered sugar may settle slightly. 💫
Fridge Preservation
Extend your icing’s life by refrigerating it in an airtight container for up to 1 week. The cold helps maintain its smooth texture, though it may thicken slightly.
To restore it to perfect consistency, microwave it for 10-15 seconds or stir in 1 tsp milk at a time until smooth. I like using pyrex containers because they’re microwave-safe and stackable.
Freezer Storage
For long-term storage, freeze your icing in 1-tbsp portions using silicone molds or ice cube trays. Once frozen, transfer to a ziplock bag with all air removed.
Thaw in the fridge overnight—never at room temperature—to prevent spoilage. This method is perfect for baking in bulk or prepping decorations ahead of time. 🧊
Reheating for Piping
If your iced cake sits too long and starts to harden, simply reheat it in 10-second bursts in the microwave. Stir between bursts until smooth. For piping bags, warm the icing to 70°F—this makes it flow like fresh icing.
I always test consistency by piping a small swatch onto parchment paper first. If it’s too thick, add ½ tsp milk; if too thin, chill for 10 minutes.
Decorating Tips
Use a piping bag with a large star tip for rosettes or a small round tip for writing. For drizzling, heat the icing slightly to 80°F—it’ll flow beautifully over cakes.
Pro tip: Line your piping bag with parchment paper for easy cleanup. If your icing starts to weep (liquid separating), stir in ½ tsp cornstarch to stabilize it.
Flavor Revival
Stale icing? No problem. Add ½ tsp vanilla extract or 1 tsp lemon juice to refresh flavors. For chocolate variations, mix in 1 tbsp cocoa powder. If the texture is off, whisk in 1 tsp milk to restore smoothness.
I’ve revived icing this way even after 3 days in the fridge—it’s like new! ✨
Nutrition facts
Frequently asked questions
Can I make this icing without heavy whipping cream?
Yes! Substitute with ½ cup milk plus 1 tbsp cornstarch—it won’t be as stable but works perfectly for drizzling. For piping, add 1 extra tbsp butter to compensate for the cream’s fat content. The texture will be slightly softer, but the flavor stays rich and creamy.
Why does my icing turn grainy?
Graininess usually means powdered sugar wasn’t sifted or the butter was too cold. Always sift your sugar first, and ensure your butter is softened (but not melted). If it happens mid-mixing, whisk in 1 tsp milk to dissolve the lumps. For extra smoothness, strain through a fine-mesh sieve before using.
How do I adjust this for a chocolate version?
Replace the vanilla extract with 2 tbsp chocolate syrup or melted chocolate, and add 1 tbsp cocoa powder. Reduce milk by 1 tsp to balance. For a deeper flavor, use dark chocolate (70%) instead of milk chocolate. The texture remains the same—just richer and more decadent!
Can I use this icing for filling cakes?
This icing is perfect for filling between layers—it’s thick enough to hold but still smooth. For extra stability, chill the cake layers for 10 minutes before assembling. If the icing is too runny, add 1 tbsp powdered sugar** at a time until it reaches a spreadable consistency.
What’s the best way to clean my mixer after using this?
Warm water and mild dish soap work best—just don’t let it dry! For stubborn residue, wipe with a damp cloth while the mixer is still warm. Pro tip: Keep a small bowl of hot water nearby while mixing to rinse beaters immediately. This icing is sweeter than most, so thorough cleanup prevents sticky buildup over time.

- 12 Bean Chili Recipe: Hearty Slow-Cooked Depth With 12 Legumes - October 17, 2026
- 5 Seed Bread Recipe: Nutty Crunch and Artisan Flavor in One Loaf - October 17, 2026
- 1 Lb Macaroni Salad Recipe: Bold, Crunchy, and Crowd-Pleasing - October 17, 2026