
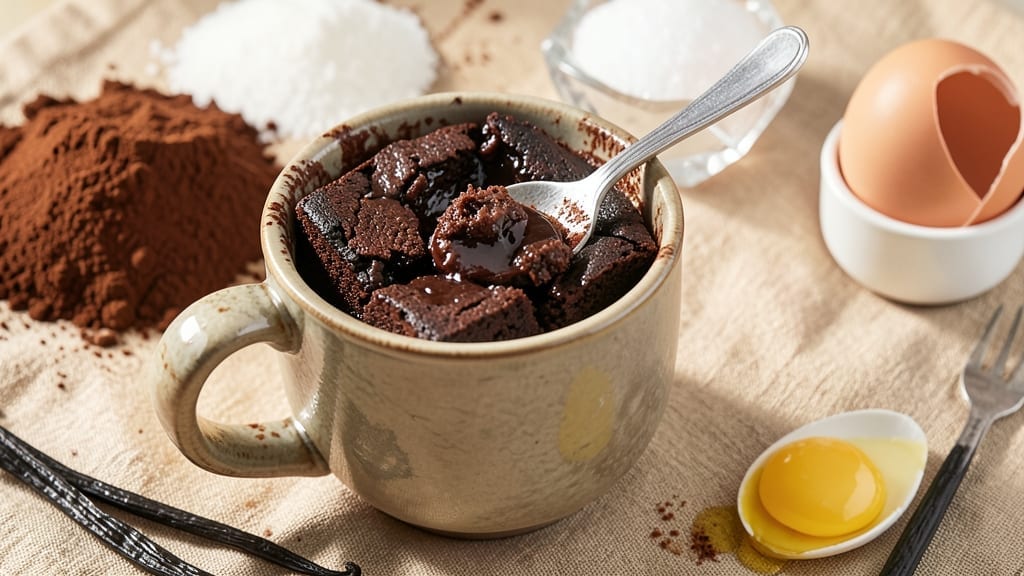
A 5-minute microwave brownie recipe that delivers fudgy, chocolatey perfection without the oven—this is the dessert solution for when you crave something sweet but don’t have time to wait. I developed this after years of testing microwave mug desserts, and this version actually tastes like it came from a bakery.
The secret? A precise balance of cocoa powder, melted butter, and a touch of vanilla that transforms simple ingredients into something rich and satisfying.
What makes this recipe work is the one-mug method, which means no extra dishes to clean and no waiting for an oven to heat up.
You’ll need just five basic ingredients—flour, cocoa powder, sugar, butter, and an egg—and the entire process takes less than five minutes from start to finish. The microwave does all the work while you mix, ensuring a perfectly set brownie with a crackly top and a gooey center.
By the time you’re done, you’ll have a warm, fudgy cocoa crunch that’s ready to eat straight from the mug, no plate required. The texture is dense and moist, with just the right amount of chocolate intensity, and the edges stay slightly crispy for that classic brownie experience.
This is the kind of dessert that proves quick cooking can still deliver restaurant-quality results.
Perfect for satisfying a sudden chocolate craving, this recipe is also great for meal prep—just double the ingredients and divide them into two mugs. The simplicity makes it ideal for beginners, but the rich flavor will impress even the most experienced bakers. Let’s get started!
Ingredients for 5 minute microwave brownie
Five simple ingredients transform into a rich, fudgy brownie in minutes—no oven needed.
| Ingredient | Amount | Notes |
|---|---|---|
| All-Purpose Flour 🌾 | ¼ cup | Sifted for light texture |
| Unsweetened Cocoa Powder 🍫 | ⅓ cup | Natural or Dutch-processed |
| Granulated Sugar 🍚 | ½ cup | White or light brown |
| Unsalted Butter 🧈 | ½ cup | Melted, not watery |
| Large Egg 🥚 | 1 whole | Room temperature preferred |
| Pure Vanilla Extract 🌿 | ½ tsp | Imitation-free for flavor |
| Salt 🧂 | ¼ tsp | Fine sea salt |
| Baking Powder 🍞 | ¼ tsp | Aluminum-free preferred |
The cocoa powder is non-negotiable here—Hershey’s Special Dark or Dutch-processed brands yield the deepest flavor. Grab a small bag from Trader Joe’s or the baking aisle at Walmart for quality without the bulk. Butter matters too: Land O’Lakes unsalted melts evenly, but any brand works if it’s not watery. The sugar can be white or light brown—Domino is my go-to for consistency. For the flour, Gold Medal all-purpose sifts perfectly, but any brand works if you sift it yourself.
No cocoa powder? Melted dark chocolate chips (subtract 2 tbsp from butter) get you close, but the texture won’t be identical. Short on butter? Coconut oil works in a pinch (same amount), but it adds a slight coconut note. Room-temperature egg? Microwave it 20 seconds if it’s cold. The vanilla extract must be pure—McCormick or Goya are reliable budget picks. Baking powder is easy to forget, but it’s what gives that crackly top. Bob’s Red Mill is my favorite for aluminum-free.
Melted butter and chocolate chips keep 3 days in the fridge, sealed tightly. Flour and cocoa powder last 6-12 months in airtight containers. For meal prep, double the recipe and divide into two mugs—microwave one now, save the other for later. These brownies reheat beautifully: 10 seconds in the microwave restores the gooey center. Store leftovers wrapped in parchment to prevent sogginess.
Why You’ll Love This Recipe
- Microwave Magic: I swear by this—no oven, no waiting, just dump-and-go. The butter melts in seconds, the egg blends in faster than I can grab a mug of coffee, and suddenly you’ve got warm, gooey brownies without sacrificing a single minute of your day.
- Rich Without Fuss: Honestly, the cocoa powder here isn’t just any cocoa—it’s that deep, bittersweet kind that makes every bite taste like a dessert you’d order at a café. The sugar caramelizes just enough from the microwave’s heat, giving it that perfect balance of sweet and intense chocolate flavor. (Yes, even on a Tuesday night.)
- Crowd-Pleaser Leftovers: Between us, these brownies reheat like a dream—microwave them for 10 seconds, and they’re warm and fudgy again. I’ve fed this to picky eaters, coworkers bringing snacks to the office, and even my kid who “doesn’t like chocolate” (he’s lying). They’re the kind of leftovers that disappear fast.
- Pocketbook Hero: This recipe costs me pennies—just flour, sugar, butter, and an egg. No specialty ingredients, no fancy equipment, and no last-minute grocery runs. It’s my go-to when I’m broke but still want to feel like I’m treating myself (or my family) to something special.
Step-by-step instructions for fudgy microwave brownies
Here’s the precise method for perfect single-serving brownies in just minutes.
Prepare Your Mixing Bowl and Melt the Butter
In a microwave-safe mug with a capacity of at least 12 ounces, combine the 0.25 cup all-purpose flour, 0.33 cup unsweetened cocoa powder, 0.5 cup granulated sugar, 0.25 teaspoon salt, and 0.25 teaspoon baking powder. Whisk these dry ingredients together until fully blended and no flour streaks remain.
In a separate small microwave-safe bowl, melt the 0.5 cup unsalted butter in 30-second intervals, stirring between each interval. You’re aiming for 120°F – the butter should be completely liquid but not hot enough to cook the egg when combined. Let it cool for 1 minute before proceeding.
Combine Wet Ingredients and Mix Thoroughly
Add the melted butter to the dry ingredients in your mug and stir vigorously with a fork for 30 seconds until the mixture becomes moist and crumbly. In a small bowl, whisk together the 1 whole large egg and 0.5 teaspoon pure vanilla extract until fully combined. This ensures the vanilla distributes evenly throughout the batter.
Pour the egg mixture into the mug with the dry ingredients and stir for 45 seconds until completely smooth. The batter should be thick but pourable. If it appears too thick, add 1 teaspoon water and mix again. The consistency is critical – too thin and your brownies will be cakey; too thick and they may not set properly.
Microwave with Perfect Timing and Technique
Place your mug in the microwave and cook on high power (100%) for exactly 5 minutes. Do not open the microwave door during cooking – the sudden temperature change can cause the brownies to sink in the middle. After 5 minutes, you’ll see the edges beginning to pull away from the mug and the center should still appear slightly underdone.
Remove the mug and let the brownies rest for 2 minutes before attempting to cut. This resting period allows the internal heat to distribute evenly and prevents cracking when you slice. The brownies should have a fudgy, moist center with slightly crisp edges. If they appear underdone, return to the microwave for 15-second intervals until set.
Cool and Serve for Maximum Enjoyment
Using a sharp knife, cut the brownies into 4 equal squares while they’re still warm. The knife should glide through cleanly – if it sticks, let them cool for an additional 30 seconds. The warm temperature makes them easier to cut and more enjoyable to eat straight from the mug.
Let the brownies cool for 3-5 minutes before serving. This brief cooling period allows the flavors to meld while maintaining their fudgy texture. Serve immediately while still warm for the ultimate texture experience – the contrast between the crisp edges and molten center is what makes these brownies exceptional.
Pro Tips For Making 5 Minute Microwave Brownie
- MELT BUTTER FIRST: Mixing cold butter into cocoa powder and sugar? You’re setting yourself up for a greasy mess. Microwave the butter for 15 seconds until just melted—it blends smoother and keeps the batter from turning into a lumpy disaster.
- SIFT THAT FLOUR: I learned this the hard way—dumping flour straight into the bowl creates pockets that make your brownies dense. Sift it in, then whisk the dry ingredients together. It’s 30 seconds of work that makes a real difference in texture.
- STOP WHEN IT LOOKS DONE: The microwave lies. Your brownies will keep cooking after you take them out—pull them when the edges are set but the center still jiggles slightly. Overcooking turns them rubbery, and nobody wants that.
- USE A RAMEN BOWL: No fancy ramekins? A buttered ramen bowl works perfectly—it’s the right size, holds heat well, and you won’t waste a dish. Line it with parchment for easy removal, and you’ve just upgraded your setup without extra effort.
Dietary considerations for this 5 minute microwave brownie
Gluten-Free Adaptation
Swap the all-purpose flour for a 1:1 gluten-free baking flour blend like Bob’s Red Mill or King Arthur. Measure carefully—these blends absorb moisture differently. I recommend adding 1 extra teaspoon of water to compensate for the drier texture. The result? A fudgy texture that still holds together beautifully. 🌾
Vegan-Friendly Version
Replace the egg with 1 tablespoon ground flaxseed mixed with 3 tablespoons water—let it sit for 5 minutes to thicken. Use vegan butter (like Earth Balance) and ensure your cocoa powder is vegan.
The texture stays rich, though slightly denser. Add ½ teaspoon apple cider vinegar to mimic the egg’s lift.
Lower-Sugar Option
Reduce sugar to ⅓ cup and add 2 tablespoons sugar-free maple syrup (like Lakanto). The brownies stay moist but with a deeper cocoa flavor. For extra sweetness, add 1 tablespoon powdered erythritol—it blends seamlessly. Taste before microwaving; adjust to preference.
Nut-Free Safety
This recipe is naturally nut-free, but double-check your cocoa powder and vanilla extract for cross-contamination warnings. If concerned, use a dedicated nut-free brand like Hershey’s Special Dark. Store ingredients in sealed containers to prevent accidental mixing with nut products.
Dairy-Free Adjustments
Replace butter with ½ cup coconut oil (melted) or ½ cup dairy-free margarine (like Earth Balance). The texture remains fudgy, though coconut oil adds a subtle tropical note. For richer flavor, stir in 1 tablespoon dairy-free chocolate chips during the final mix.
Nutrition facts
Frequently asked questions
Can I make these brownies in a regular oven instead?
Yes! Preheat your oven to 350°F and pour the batter into a greased 6-inch round pan. Bake for 12-15 minutes until the edges pull away from the pan. The texture will be slightly denser than microwave brownies but still delicious. For best results, use the same ingredient ratios.
Why did my brownies turn out cakey instead of fudgy?
Cakey texture usually means the batter was too thin or overmixed. For fudgy results, ensure your batter is thick but pourable, and stir only until combined. Also, check your cocoa powder—Dutch-processed brands yield richer, denser brownies. If using natural cocoa, add 1 extra tablespoon of sugar for balance.
How do I make these brownies extra chocolatey?
For deeper chocolate flavor, increase the cocoa powder to ⅓ cup + 2 tablespoons and reduce sugar to ⅓ cup. Add 2 tablespoons melted dark chocolate chips (60% cocoa or higher) to the batter. Stir in ½ teaspoon instant coffee granules to enhance the chocolate notes—it’s a secret pro trick!
Can I add mix-ins like nuts or chocolate chips?
Fold in ¼ cup chopped nuts (walnuts or pecans work best) or ¼ cup chocolate chips during the final mixing step. For nuts, toast them first in the microwave for 30 seconds to enhance flavor. Keep mix-ins to ¼ cup total to maintain the fudgy texture—too many will make the brownies dry.
What’s the best mug for microwave brownies?
Use a 12-ounce microwave-safe mug with a flat bottom (like a ceramic coffee mug). Avoid thin plastic mugs—they can melt or warp. The mug should fit comfortably in your microwave and have at least 2-inch tall sides to prevent overflow. A mug with a handle makes stirring easier, but avoid metal handles.

- Baked Potatoes in Crock Pot Recipe: Buttery Interiors and Crispy Top Magic - November 1, 2026
- Braised Beef Short Ribs Recipe: Crock Pot Fall-Off-Bone Magic in 6 Hours - November 1, 2026
- Crock Pot Cocoa Recipe: Velvety Warmth With Hidden Spice Magic - November 1, 2026