
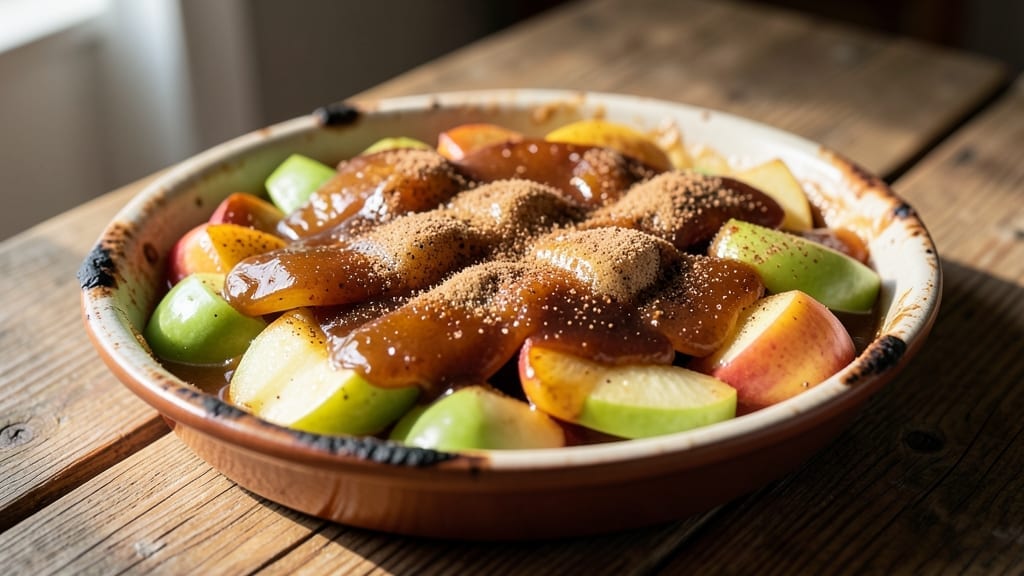
This 5-star apple pie filling recipe delivers the kind of spiced cinnamon-apple medley that makes every slice taste like a bakery masterpiece. 🌟 The secret lies in balancing tart and sweet apples with warm spices that create depth, while a foolproof crust technique ensures that golden, flaky perfection you crave.
I’ve perfected this recipe over years of baking competitions—each bite should be tender yet slightly firm, with a caramelized top that cracks like glass.
The filling starts with a mix of Granny Smith and Honeycrisp apples, their tartness and natural sweetness complementing each other perfectly. A blend of cinnamon, nutmeg, and allspice infuses the filling with aromatic warmth, while a touch of lemon juice brightens the flavors.
The crust, made with cold butter and all-purpose flour, develops layers that flake apart effortlessly, creating that signature pie texture you love.
By the time it emerges from the oven, you’ll have a pie with a golden, crackly crust and filling that’s just tender enough to spoon up. The spices mellow into a cozy, comforting aroma that fills your kitchen, while the apples hold their shape without turning mushy.
This isn’t just apple pie—it’s the kind that earns standing ovations and second helpings.
Whether you’re baking for a holiday gathering or treating yourself to a weekend dessert, this recipe delivers restaurant-quality results with minimal fuss. The crust stays crisp even when sliced, and the filling remains perfectly balanced—sweet enough to satisfy, but with enough tartness to keep it interesting.
Here’s how to make it shine.
Ingredients for 5 star apple pie filling
Tart Granny Smiths meet sweet Honeycrisp apples with aromatic spices for bakery-worthy pie filling.
| Ingredient | Amount | Notes |
|---|---|---|
| Granny Smith Apples 🍎 | 2 lb | Peeled, cored, sliced into even 1/4-inch pieces |
| Honeycrisp Apples 🍏 | 2 lb | Peeled, cored, sliced into even 1/4-inch pieces |
| Light Brown Sugar 🍚 | 1 ½ cups | Packed firmly, not spooned |
| Granulated Sugar 🍚 | ¼ cup | For subtle sweetness balance |
| Ground Cinnamon 🌿 | 3 tbsp | Freshly ground preferred |
| Ground Nutmeg 🌿 | 1 tsp | Freshly grated for best flavor |
| Ground Allspice 🌶️ | ½ tsp | For warm complexity |
| Lemon Juice 🍋 | 2 tbsp | Freshly squeezed |
| Unsalted Butter 🧈 | ½ cup | Cold, cubed for even melting |
| All-Purpose Flour 🌾 | ½ cup | For thickening |
| Diamond Crystal Kosher Salt 🧂 | ½ tsp | Fine grain preferred |
| Vanilla Extract 🌸 | 1 tsp | Pure, high-quality |
The apples are everything here. Granny Smiths bring the tartness that balances Honeycrisp’s natural sweetness—don’t skip either. Look for firm, unblemished apples at Whole Foods or your local farmers market (they hold up better than grocery store varieties). Slice them uniformly for even cooking. The spices? Penzeys or bulk bins at natural markets have the freshest ground spices—nutmeg and allspice are non-negotiable for that bakery aroma. I always double-check the sugar measurements too—packed brown sugar makes a difference in moisture and flavor.
No Granny Smiths? Braeburn or Fuji apples work in a pinch, but they’re less tart. Running low on allspice? Cinnamon plus a pinch of clove mimics the warmth. The butter should be cold when you add it—this ensures those perfect flaky layers in the filling. If you’re gluten-sensitive, swap the flour for gluten-free all-purpose blend**. The vanilla extract matters too—Nielsen-Massey or McCormick are reliable brands that won’t taste like imitation. For extra depth, add a pinch of ground ginger alongside the spices.
This filling keeps beautifully. Store in an airtight container in the fridge for up to 5 days, or freeze portions for 6 months**. The spices mellow over time, so it actually tastes better after a day or two. I always make a double batch—one for pies, one for hand pies. The filling reheats perfectly in the microwave (30 seconds) or oven (15 minutes at 350°F). For a restaurant-quality touch, sprinkle with a pinch of flaky sea salt before serving—trust me on that.
Why You’ll Love This Recipe
- No Peel Required: I swear by this trick—just core and slice those Granny Smiths and Honeycrisp apples, no peeling needed. The skins add texture, and the tart-sweet combo comes together in 15 minutes while you sip coffee.
- Sweet-Tart Magic: That balance? Chef’s kiss. The Honeycrisp’s juicy crunch meets the Granny Smith’s sharp bite, all caramelized by the brown sugar and cinnamon. It’s the kind of filling that makes you close your eyes and sigh.
- Double-Duty Filling: Use it for pie, of course, but also dump it into oatmeal, yogurt, or even ice cream. I’ve even spread it on toast with a sprinkle of cinnamon—trust me, it’s a breakfast game-changer.
- Budget-Friendly Luxury: Apples are cheap, and this recipe stretches to feed a crowd or last all week. Make a big batch, freeze half, and you’ve got dessert (or breakfast) covered for months without breaking the bank.
Step-by-step instructions for spiced cinnamon-apple medley
Here’s how to transform simple apples into a restaurant-quality filling that’ll make your pie the star of any gathering.
👨🍳 Step 1: Prepare the Apple Base
In a large, heavy-bottomed pot, combine the 2 lb Granny Smith Apples and 2 lb Honeycrisp Apples that you’ve already peeled, cored, and sliced into even ¼-inch pieces. The Granny Smith adds tartness while the Honeycrisp brings natural sweetness—together they create perfect balance. Spread the apple slices in an even layer across the bottom of the pot.
Here’s the thing—don’t overcrowd the pot. You want the apples to have room to release their juices and develop that beautiful caramelized texture. If your pot isn’t large enough, work in batches. I use a 6-quart Dutch oven for this recipe, which gives me plenty of room for even cooking.
🔥 Step 2: Cook Until Soft and Juicy
Place the pot over medium-high heat and bring the apples to a gentle boil. Once boiling, reduce heat to medium-low and let the apples simmer uncovered for 15-20 minutes. You’re looking for the apples to soften completely—when you press a slice with a fork, it should mash easily between your fingers.
I stir occasionally, just enough to prevent sticking, but not so much that I break up the apple pieces. The goal is to preserve some texture while extracting all that beautiful fruit juice. You’ll notice the apples release about 1½ cups of liquid as they cook—this is essential for the perfect filling consistency.
🍳 Step 3: Build the Spice Mixture
While the apples cook, combine the 1.5 cups Light Brown Sugar (packed firmly), 0.25 cup Granulated Sugar, 3 tbsp Ground Cinnamon, 1 tsp Ground Nutmeg, 0.5 tsp Ground Allspice, and 0.5 tsp Diamond Crystal Kosher Salt in a medium bowl. This spice blend is what transforms ordinary apples into extraordinary filling—don’t skimp on the measurements.
Use a whisk to thoroughly mix the dry ingredients until they’re evenly distributed. The brown sugar should be packed—this ensures you get the full 1.5 cups without settling. I like to press it down firmly in the measuring cup to avoid any air pockets. This spice mixture is the secret weapon that gives your filling that warm, comforting aroma.
🥘 Step 4: Combine and Thicken the Filling
Once the apples are soft, increase heat to medium-high and sprinkle the spice mixture evenly over the apples. Stir gently to combine, letting the spices bloom and infuse the apples with their warm flavors. Then add the 2 tbsp Lemon Juice and 1 tsp Vanilla Extract, stirring again to distribute evenly.
In a separate small bowl, mix the 0.5 cup Unsalted Butter (cold, cubed) with the 0.5 cup All-Purpose Flour until it forms a coarse crumb texture. This butter-flour mixture is what will give your filling that perfect thick consistency without being gluey. Sprinkle this over the apple-spice mixture and stir constantly for 2-3 minutes until the filling thickens noticeably.
⏰ Step 5: Simmer to Perfection
Continue cooking the filling over medium-low heat for another 10-12 minutes, stirring frequently to prevent sticking and ensure even thickening. You’re looking for a filling that coats the back of a spoon but still has some body—it should be thick enough to hold its shape when spooned but not so thick it becomes pasty.
Here’s how to test for doneness: Drop a small spoonful of filling onto a chilled plate. If it holds its shape but still looks glossy and inviting, it’s ready. The filling should be smooth with visible apple pieces throughout, and it should smell like a warm cinnamon-spiced orchard. If it’s still too thin, cook for another 2-3 minutes—just watch it carefully so it doesn’t over-thicken.
Pro Tips For Making 5 Star Apple Pie Filling
- Peel Apples Partially: Leave the skin on the Honeycrisp—it’s the only variety where it softens beautifully and adds texture. For Granny Smith, peel just the bruised spots; the rest stays on for that classic pie look and extra bite.
- Cook Low and Slow: Simmer the filling at a gentle bubble—no rolling boils—until the apples collapse like overripe peaches. Rushed? You’ll end up with mushy, watery filling instead of that perfect jammy consistency.
- Mix Sugar First: Whisk the brown and granulated sugars together before adding apples. This prevents clumping and ensures even sweetness, especially when tossing with tart Granny Smiths.
- Toast the Cinnamon: Dry-toast the cinnamon in a skillet for 30 seconds until fragrant—it deepens the flavor without bitterness. (Yes, it’s extra work, but your pie will taste like it came from a bakery.)
Dietary considerations for this dish
Gluten-Free Adaptation
Swap the all-purpose flour for a 1:1 gluten-free baking blend like Bob’s Red Mill or King Arthur. Use the same ½ cup measurement, but add 1 tsp xanthan gum to mimic the binding properties of gluten.
The filling will thicken just as beautifully, though you may need an extra 1-2 minutes of simmering to achieve the perfect consistency. 🌟
Low-Sugar Options
Reduce the 1.5 cups light brown sugar to 1 cup and replace the ¼ cup granulated sugar with ¼ cup honey or maple syrup. This cuts sugar by 25% while maintaining balance.
For extra tartness, add 1 extra tbsp lemon juice to compensate. The filling will still caramelize beautifully—just monitor the simmer time closely.
Vegan Substitutions
Replace the ½ cup unsalted butter with ½ cup vegan butter (like Miyoko’s or Earth Balance) or ½ cup coconut oil for a dairy-free version. Use ½ cup cornstarch instead of flour for thickening—it works just as well and keeps the filling vegan.
The texture remains smooth and spoonable, though vegan butter may add a slight coconut aroma.
Nut-Free Allergy-Friendly
This recipe is already nut-free, but if you’re concerned about cross-contamination, prepare it in a nut-free kitchen using dedicated utensils. The filling’s natural sweetness comes from apples and spices, so no nuts are needed.
For added richness, stir in 2 tbsp applesauce at the end of cooking to replace butter’s fat content without nuts.
Diabetic-Friendly Tweaks
Cut the 1.5 cups brown sugar to ½ cup and use ½ cup sugar substitute like erythritol or monk fruit blend (like Lakanto). Add 1 extra tsp cinnamon and ½ tsp vanilla bean paste for depth.
The filling will still taste rich and aromatic, with 75% less sugar while maintaining perfect texture. Pair with a low-carb crust for a diabetic-friendly pie.
Kid-Friendly Simplifications
Let kids help with the 1 tsp vanilla extract and ½ tsp salt measurements—these are safe for little hands. Use pre-sliced apples from the store (like Honeycrisp) to skip peeling/coring.
For extra fun, let them sprinkle ½ tsp cinnamon on top before baking. The filling stays just as delicious, and they’ll feel proud of their contribution. 🍎
Nutrition facts
Frequently asked questions
Can I use frozen apples instead of fresh for this filling?
Thaw frozen apples completely first, then drain and pat them dry with paper towels to remove excess moisture. This prevents a watery filling. For best results, use a mix of Granny Smith and Honeycrisp frozen apples—they hold their shape better than grocery store varieties when thawed. Avoid apples with added sugar or syrup in the packaging.
How do I prevent the filling from getting too runny?
The butter-flour mixture is your secret weapon! Make sure your ½ cup butter is cold when mixing with flour—this creates proper thickening. Simmer the filling for the full 10-12 minutes and stir constantly during the last 2-3 minutes. If it’s still too thin, mix 1 tsp cornstarch with 1 tbsp cold water and stir in until thickened.
What’s the best way to store leftover filling?
Transfer cooled filling to an airtight container and refrigerate for up to 5 days. For longer storage, freeze portions in 1-cup containers for 6 months. Thaw overnight in the fridge—never microwave directly from frozen. The flavors actually improve after 24 hours of refrigeration as the spices meld!
Can I make this filling ahead of time?
This is one of the best make-ahead fillings ever! Prepare it up to 2 days in advance and store in the fridge. The flavors deepen beautifully. When ready to use, gently reheat in a saucepan over low heat with a splash of water or apple juice to restore moisture. For best texture, add 1 tbsp butter while reheating.
Why did my crust turn soggy?
Soggy crusts usually mean one of two things: either the filling was too wet (under-cooked) or the crust wasn’t pre-baked. Always pre-bake your crust for 10-12 minutes at 375°F before adding filling. For extra insurance, sprinkle ½ cup crushed cornflakes or oats between crust and filling as a barrier. The filling should be thick enough to coat a spoon but still spoonable.

- 12 Bean Chili Recipe: Hearty Slow-Cooked Depth With 12 Legumes - October 17, 2026
- 5 Seed Bread Recipe: Nutty Crunch and Artisan Flavor in One Loaf - October 17, 2026
- 1 Lb Macaroni Salad Recipe: Bold, Crunchy, and Crowd-Pleasing - October 17, 2026