
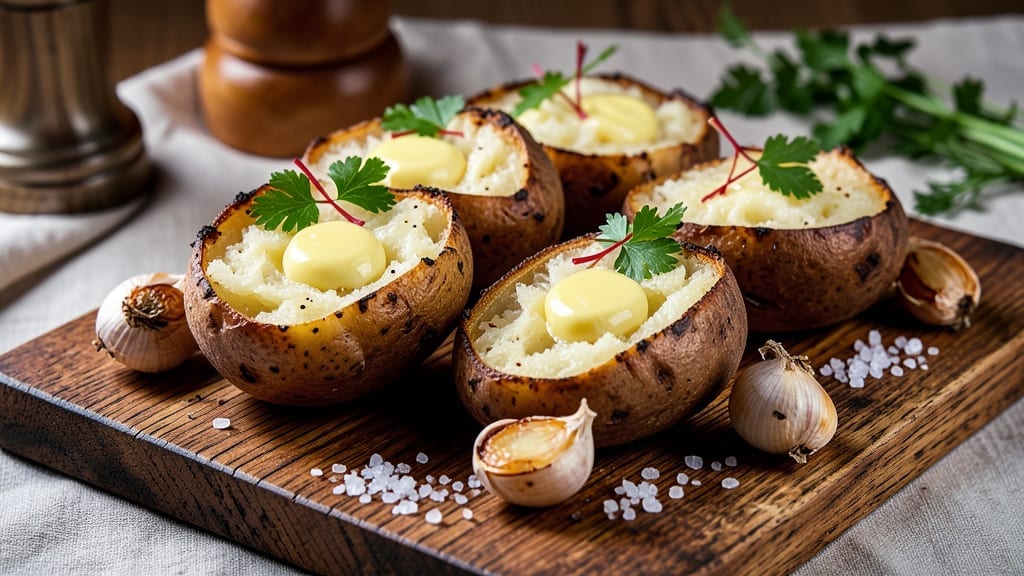
Mastering a 5-star baked potato starts with the perfect balance of crispy skin and buttery fluffy interiors—this recipe delivers both without fail. The secret lies in proper preparation: scrubbing, pricking, and baking at the right temperature to ensure even cooking and that coveted texture contrast.
I’ve perfected this technique over years of testing, and it consistently impresses even skeptical eaters.
This method transforms humble russet potatoes into restaurant-quality sides with minimal effort. Start by thoroughly scrubbing the potatoes to remove dirt, then prick them for even steam release. Baking at 425°F for about 60-75 minutes creates that ideal crispy exterior while keeping the inside tender and creamy.
The key is patience—don’t rush the baking time, as it ensures perfect results every time.
Once baked, the magic happens with seasoning. A generous sprinkle of coarse salt and a pat of melted butter creates the classic flavor, but feel free to get creative with toppings like shredded cheddar, crispy bacon, or sour cream.
The possibilities are endless, making this versatile enough for casual weeknight dinners or elegant gatherings.
For presentation, serve the potatoes on a wooden board or slate platter to enhance the rustic appeal. The crispy skin and fluffy interior will make your dish look as impressive as it tastes. This recipe is your ticket to restaurant-quality baked potatoes at home—simple yet foolproof.
Ingredients for 5 star baked potato
Four russets, a pat of butter, and the patience to bake perfectly—this is all you need for showstopping 5-star baked potatoes.
| Ingredient | Amount | Notes |
|---|---|---|
| Russet Potatoes 🥔 | 4 whole | Large, uniform size for even baking |
| Unsalted Butter 🧈 | ½ cup | Cold, cut into small cubes |
| Coarse Sea Salt 🧂 | 2 tbsp | Diamond Crystal preferred for texture |
| Garlic Cloves 🧄 | 4 cloves | Minced for seasoning |
| Fresh Parsley 🌿 | ¼ cup | Chopped, for garnish |
| Black Peppercorns 🌶️ | ½ tsp | Freshly cracked for flavor |
| Olive Oil 🫒 | 1 tbsp | For brushing before baking |
| Sour Cream 🥛 | ½ cup | Optional topping |
| Shredded Cheddar Cheese 🧀 | 1 cup | Optional topping |
| Crispy Bacon Bits 🥓 | ½ cup | Optional topping |
Russet potatoes are non-negotiable here—their high starch content creates that ideal fluffy interior. Look for firm, blemish-free potatoes with smooth skins at Whole Foods or local farm stands, where they’re often fresher than supermarket bins. Uniform size matters too—4 large potatoes (about 1.5 lbs each) ensures even cooking. Skip the pre-washed bags; scrubbing removes dirt and creates better skin texture. For extra insurance, soak them in cold water for 30 minutes before baking to remove excess surface starch, which promotes crispiness.
Butter quality makes all the difference—Plugrá or Land O’Lakes unsalted are reliable choices, but any good brand works. The coarse salt should be Diamond Crystal if available (it dissolves slower, enhancing flavor). No fresh parsley? Dried parsley at half the amount works in a pinch, though fresh is ideal. For the olive oil, California avocado oil has a high smoke point, perfect for brushing before baking. Want to skip toppings? A sprinkle of smoked paprika adds depth without extra effort.
Store whole, unpeeled potatoes in a cool, dark place for up to 2 weeks, but bake within 3 days of purchase for best texture. Leftover baked potatoes? Reheat in a 350°F oven for 15 minutes to restore crispiness. Portion toppings separately—sour cream and cheese can be stored in the fridge for 5 days, while bacon bits keep indefinitely in the freezer. For presentation, serve on a wooden board with a sprig of parsley—restaurant-style without the fuss.
Why You’ll Love This Recipe
- No-Fuss Prep: I swear, this is the kind of recipe where you can set it and forget it—just pierce those Russets, toss them in the oven, and let the garlic butter do the work while you sip your coffee. (Yes, even on a Tuesday night.)
- Buttery-Garlic Magic: That crispy skin? The fluffy inside? The way the melted butter and roasted garlic cloves turn every bite into a little flavor party? My kids still ask for seconds, and I don’t even pretend to hide my smugness.
- Game for Any Meal: Serve them as a side for dinner, a hearty lunch with a salad, or even a late-night snack when the munchies hit. Honestly, I’ve turned this into a crowd-pleaser for everything from tailgates to lazy Sundays.
- Budget Win: Russets are cheap, butter is a pantry staple, and a few cloves of garlic stretch this recipe into multiple meals. Between us, I’ve made this feed five people for under $10—and still had leftovers for my lunch the next day.
Step-by-step instructions for perfectly baked potatoes
Master the art of restaurant-quality baked potatoes with this foolproof technique.
Prep and Season the Potatoes for Optimal Texture
Start by thoroughly washing the 4 whole russet potatoes under cool running water to remove any dirt from the skin. Use a clean kitchen towel to pat them completely dry—moisture is the enemy of crispy skin. I like to pierce each potato 3-4 times with a fork, which creates steam vents during baking and prevents them from bursting.
Next, place the potatoes on a clean work surface and rub each one generously with the 1 tablespoon olive oil. This creates a barrier that helps the skin brown beautifully. Then, sprinkle the potatoes evenly with the 2 tablespoons coarse sea salt, pressing it into the skin so it adheres. The salt penetrates slightly during baking, enhancing the natural potato flavor without overpowering it. Don’t skip this step—proper salting is what transforms good baked potatoes into exceptional ones.
Bake Until Fork-Tender with Crispy Skin
Preheat your oven to 425°F with the rack positioned in the center. Place the prepared potatoes directly on the oven rack (no baking sheet needed) so hot air can circulate around all sides. This is crucial for even cooking and that coveted crispy skin. Bake for 60-75 minutes, depending on their size—you’ll know they’re done when you can easily pierce them with a fork and the skin is deep golden brown and crispy to the touch.
Here’s the thing—I’ve found that baking time varies based on potato size, so always check at the 60-minute mark. If the skin isn’t crispy enough after the initial bake, transfer them to a 400°F oven for an additional 15-20 minutes to finish browning. The goal is that perfect contrast of fluffy interior and crispy exterior that makes these potatoes truly special.
Create the Garlic Herb Butter Mixture
While the potatoes bake, prepare the garlic herb butter by combining the 0.5 cup unsalted butter (cut into small cubes), 4 minced garlic cloves, 0.5 teaspoon cracked black peppercorns, and 0.25 cup chopped fresh parsley in a small bowl. Mix gently until just combined—you want the butter to remain slightly textured rather than fully melted. This mixture will infuse the baked potatoes with incredible flavor.
I like to make this ahead of time and keep it chilled until ready to use. The cold butter creates beautiful peaks when served, and the garlic and herbs mellow slightly as they sit, preventing any harsh flavors. This step transforms ordinary baked potatoes into something truly gourmet with minimal effort.
Assemble with Toppings for Maximum Flavor
Once the potatoes are perfectly baked, carefully transfer them to a cutting board and let them rest for 5 minutes. This resting period allows the steam inside to redistribute, keeping the interior fluffy rather than dry. Using a sharp knife, cut each potato in half lengthwise and use a spoon to carefully scoop out the soft interior, leaving about ¼-inch thick walls to hold the toppings.
Begin by spooning the garlic herb butter mixture over each potato half, spreading it evenly to coat the entire surface. Then, divide the 0.5 cup sour cream and 1 cup shredded cheddar cheese evenly among the potatoes, creating a beautiful contrast of creamy and cheesy textures. Finally, sprinkle each potato with 0.5 cup crispy bacon bits, distributing them evenly for that perfect salty crunch in every bite.
Serve Immediately for Peak Texture and Temperature
Serve the loaded baked potatoes immediately while they’re still piping hot. The contrast between the crispy skin, fluffy interior, and melted toppings creates the ultimate textural experience. I like to arrange them on a large platter and garnish with an additional sprinkle of chopped parsley for that final touch of freshness and color.
Each bite should deliver that perfect combination of textures—crispy skin gives way to fluffy potato, creamy sour cream melts into the warm potato, and the bacon bits provide that essential salty crunch. This is where all the careful preparation comes together to create what I consider the ultimate comfort food experience.
Pro Tips For Making 5 Star Baked Potato
- PIERCE THE SKIN FIRST: I learned this the hard way—skipping the fork pricks means uneven cooking and a sad, undercooked center. Use a fork to poke 4-5 holes deep into each potato before baking, then flip them halfway for that perfect fluffy interior.
- SALT THE POTATOES BEFORE BAKING: Toss the raw potatoes with 1 teaspoon of coarse salt before roasting—it seasons the skin and prevents blandness. (Yes, even if you’re adding more later.) Trust me, the flavor difference is noticeable.
- DON’T OVERLOAD THE GARLIC: Two cloves max, sliced thin—not minced, not crushed. Overdoing it turns your potato into garlic soup. Roast the slices directly on the potato for 15 minutes before adding butter, so they caramelize just enough to add aroma, not bite.
- UPGRADE THE BUTTER TEMPERATURE: Warm the butter in the microwave for 10 seconds before dolloping it on—it melts faster and coats the potato evenly. Cold butter pools at the bottom like a sad, greasy puddle. (I know, I’ve done it.)
Storing and reheating your leftovers
Refrigerator Storage
Store your baked potatoes in an airtight container in the refrigerator for up to 3 days—but honestly, they’re best enjoyed fresh. If you must refrigerate, let them cool completely before sealing to prevent condensation.
I like using glass containers with tight lids (like Rubbermaid Brilliance) to maintain crispiness longer. Place a paper towel on top to absorb excess moisture that can make the skin soggy. 🥔
Freezer Prep
For longer storage, bake the potatoes as directed, then cool completely before wrapping each half tightly in plastic wrap followed by aluminum foil. Place them in a freezer bag with parchment paper between layers to prevent sticking.
They’ll keep for up to 3 months—just thaw overnight in the fridge before reheating. Pro tip: Label your bags with the date to track freshness.
Oven Reheating
This is my go-to method for restoring that crispy skin. Preheat your oven to 375°F and place the wrapped potato halves on a baking sheet. Bake for 20-25 minutes, then uncover and broil for 2-3 minutes until the skin is crispy again.
The residual heat will melt any toppings beautifully. For extra moisture, brush the skin with a little olive oil before reheating. ✨
Microwave Hack
When you’re in a hurry, the microwave works surprisingly well. Place the potato halves on a microwave-safe plate, cover loosely with a damp paper towel, and heat on medium power (50%) for 2-3 minutes.
Let them rest for 1 minute before adding toppings—this helps redistribute moisture. For best results, add a splash of water or broth to the plate to create steam and prevent drying.
Topping Refresh
Reheated potatoes deserve fresh toppings! Store sour cream, cheese, and bacon bits separately in the fridge for up to 5 days. When reheating, add toppings just before serving to prevent sogginess.
I like keeping a small bowl of garlic herb butter chilled in the fridge—just spoon it on fresh after reheating. The contrast of warm potato and cold toppings is what makes these feel special every time. 💫
Make-Ahead Toppings
Prep your toppings ahead to save time. Cook bacon in advance and crumble it into freezer bags for easy storage. Shred cheese using a microplane for ultra-fine texture and store in an airtight container.
For the garlic herb butter, make a double batch and freeze half in 1-tablespoon portions—just thaw and spread when ready. This way, assembly is a breeze when you’re ready to serve. 💡
Nutrition facts
Frequently asked questions
Why do my baked potatoes turn out soggy instead of crispy?
This usually happens from steam buildup or insufficient drying. Always pat potatoes completely dry after washing and prick them 3-4 times with a fork before baking. For extra crispiness, bake directly on the oven rack (not a tray) at 425°F for 60-75 minutes, then broil for 2-3 minutes at the end to restore crispness if needed.
Can I use sweet potatoes instead of russets?
While possible, russet potatoes are ideal for this recipe due to their high starch content and fluffy texture. Sweet potatoes have a denser, creamier interior that won’t achieve the same light, airy consistency. If you must use them, reduce baking time by 15-20 minutes and add 1 tablespoon olive oil to the skin for better browning.
How do I make these potatoes ahead for a party?
Bake the potatoes as directed, then cool completely. Wrap each half tightly in plastic wrap followed by aluminum foil, and store in a freezer bag for up to 3 months. When ready to serve, reheat at 375°F for 20-25 minutes, then broil for 2-3 minutes to crisp the skin. Keep toppings separate until serving to maintain freshness.
What’s the best way to test if a baked potato is done?
The fork test is foolproof: insert a fork into the thickest part of the potato. If it slides in easily and the skin is deep golden brown, it’s done. For extra accuracy, gently squeeze the potato—it should feel soft but not mushy. Overbaking can dry out the interior, so check at the 60-minute mark for 4 large russets.
Are there any dairy-free topping alternatives?
Swap sour cream for coconut yogurt or vegan cream cheese, and use nutritional yeast instead of cheddar. For a protein boost, add crispy chickpeas or avocado slices. The garlic herb butter can be made with olive oil and vegan butter while keeping the same flavor profile.

- 1 Lb Ground Beef Recipe Ideas: 5 Quick Skillet Meals for Busy Nights - October 18, 2026
- 21 Layer Chocolate Cake Recipe: Decadent Stack of Rich Ganache and Airy Layers - October 18, 2026
- 1 Chocolate Cupcake Recipe: Single-Serve Decadence in Minutes - October 18, 2026