
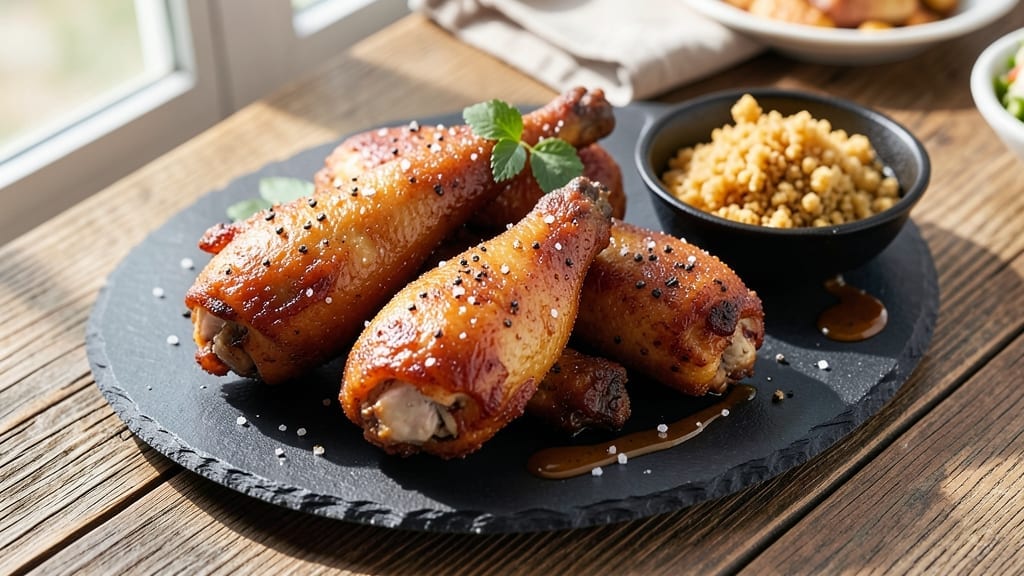
This 5-star fried chicken recipe delivers the perfect balance of crispy gold crunch and juicy tenderness that rivals your favorite restaurant—without the wait. The secret lies in a two-step buttermilk brine that keeps the meat impossibly moist while a light, airy batter creates that coveted shatteringly crisp exterior.
I developed this technique after years of trial and error, and it never fails to impress even the most critical eaters.
The process starts with brining the chicken overnight, which ensures every bite stays juicy and flavorful. Then, a simple cornstarch-infused batter creates that signature crispy texture, while frying at the exact right temperature (350°F) guarantees golden perfection without burning.
The result is chicken so good, it’ll have your guests asking for seconds—and thirds.
By the time you pull this chicken from the oil, you’ll have crispy, golden-brown pieces with a crunch that gives way to tender, succulent meat inside. The key is resting the chicken after frying to let the batter set properly, ensuring it stays crispy even after serving.
Serve with classic sides like buttermilk biscuits or a tangy dipping sauce for the full experience.
This isn’t just fried chicken—it’s a restaurant-quality masterpiece that’s easier to make at home than you’d think. Whether you’re hosting a dinner party or craving a comfort-food night in, this recipe delivers foolproof results every time. Let’s get cooking!
Ingredients for 5 star fried chicken
These 12 ingredients transform ordinary chicken into restaurant-quality crispy gold perfection.
| Ingredient | Amount | Notes |
|---|---|---|
| Chicken Thighs, Bone-In 🍗 | 2 ½ lb | Cut into 8 pieces, skin-on |
| Buttermilk 🥛 | 1 ½ cups | Full-fat for best flavor |
| All-Purpose Flour 🌾 | 2 cups | Sifted for light batter |
| Cornstarch 🌽 | ½ cup | For extra crispiness |
| Kosher Salt 🧂 | 1 ½ tbsp | Diamond Crystal preferred |
| Ground Black Pepper 🌶️ | 1 tsp | Freshly ground for flavor |
| Paprika 🌶️ | 1 tbsp | Smoked for color |
| Garlic Powder 🧄 | 1 tsp | Freshly ground preferred |
| Onion Powder 🧅 | 1 tsp | For depth of flavor |
| Vegetable Oil 🫒 | 4 cups | High smoke point, like peanut |
| Lemon Wedges 🍋 | 4 whole | For serving, optional |
| Fresh Parsley 🌿 | ¼ cup | Chopped, for garnish |
The chicken thighs are non-negotiable here—bone-in, skin-on pieces stay juicier than breasts. Look for fresh, plump thighs at the meat counter, not pre-cut packages that may have dried out. I always grab mine from Whole Foods or a trusted butcher, but the regular grocery store works too if you buy them the same day. The key is to pat them very dry before brining—any moisture on the skin will prevent that perfect crisp. For extra flavor, ask the butcher to trim the fat cap slightly, leaving just enough to render and crisp up during frying.
No buttermilk? Combine 1.5 cups milk (any kind) with 1.5 tbsp vinegar or lemon juice—let it sit 5 minutes to curdle. For the batter, cornstarch is essential—it creates that signature crispy texture. If you’re missing smoked paprika, regular paprika plus a pinch of liquid smoke works in a pinch. The spices should be fresh—if your garlic powder smells stale, toast it in a dry pan for 30 seconds to revive the flavor. For frying, peanut or vegetable oil both work, but avoid olive oil—it burns at high temps. And trust me on the lemon wedges: fresh is always better than bottled, but if you’re in a rush, bottled works fine.
Brined chicken stays fresh for 2 days in the fridge, but the batter should be made fresh day-of. If prepping ahead, store dry ingredients (flour, cornstarch, spices) in an airtight container for up to 2 weeks. Once fried, keep chicken warm in a 200°F oven on a wire rack to maintain crispiness. For leftovers, store in the fridge for 3 days—reheat in a 375°F oven for 15 minutes to restore crunch. The batter makes enough for two batches, so double up if you’re feeding a crowd.
Why You’ll Love This Recipe
- No Marinate, No Stress: The buttermilk soak does all the work—just toss the thighs in overnight (or even 4 hours if you’re in a rush) and forget about it. No stirring, no measuring, no fuss—just that perfect tender crunch when you fry.
- Crispy-Creamy Magic: That cornstarch flour mix? It’s the secret weapon—crispy as heck on the outside, juicy and buttery inside. Honestly, the first time I bit in, I nearly dropped the plate.
- Game for Any Meal: Slap it on a sandwich for lunch, pile it over mashed potatoes for dinner, or serve it with pickles and slaw for a crowd. My college-age son still asks for it when he’s “too busy” to cook—(yes, even on a Tuesday night).
Instructions for crispy gold crunch fried chicken
Here’s the method that delivers legendary texture—crispy enough to shatter, juicy enough to make you swoon.
Prep the Chicken for Maximum Crisp
Pat the 2.5 lb chicken thighs completely dry with paper towels—this is non-negotiable for crispiness. I mean really dry, especially around the bone crevices where moisture hides. The drier the skin, the better the crust forms.
Cut each thigh into 8 pieces, keeping the skin intact. Arrange them on a plate, skin-side up. Place the plate in the refrigerator uncovered for 30 minutes to chill completely. Cold chicken fries more evenly and develops a superior crust.
Marinate in Buttermilk for Juicy Perfection
Pour the 1.5 cups buttermilk into a shallow dish large enough to hold all the chicken pieces in a single layer. The buttermilk should cover about half the meat. Gently submerge each piece, skin-side up, and let it marinate in the refrigerator for at least 4 hours, ideally overnight.
This step is where the magic happens—the buttermilk tenderizes the meat while creating a protein barrier that locks in juices during frying. You’ll know it’s working when the buttermilk turns slightly cloudy and the chicken absorbs some of the liquid.
Create the Crispy Coating
In a large bowl, whisk together the 2 cups all-purpose flour, 0.5 cup cornstarch, 1.5 tbsp kosher salt, 1 tbsp paprika, 1 tsp garlic powder, 1 tsp onion powder, and 1 tsp ground black pepper. The cornstarch is key—it creates that signature shatteringly crisp texture we’re after.
Remove the chicken from the buttermilk (let any excess drip off) and dredge each piece thoroughly in the flour mixture, pressing gently to adhere the coating. For extra crunch, I double-dredge each piece—dip back in buttermilk, then back in the flour. Place on a wire rack and let rest for 10 minutes to allow the coating to firm up.
Fry to Golden Perfection
Fill a deep Dutch oven or heavy pot with 4 cups vegetable oil and heat over medium heat until it reaches 350°F—use a deep-fry thermometer to monitor. The oil should be hot enough to maintain this temperature without smoking excessively. Too hot and you’ll burn the outside before the inside cooks.
Working in batches (don’t overcrowd!), carefully lower the chicken into the oil using tongs. Fry for 12-15 minutes, turning occasionally, until the chicken reaches an internal temperature of 165°F and the skin is a deep, golden brown. The pieces should float when done—this is your visual cue.
Rest and Serve with Flavor Boosters
Transfer the fried chicken to a wire rack set over a paper towel-lined plate. Let it rest for 5 minutes—this crucial step allows the juices to redistribute and prevents them from pooling out when you cut in. The skin will stay crispy while the meat becomes even more tender.
Garnish with the 0.25 cup chopped fresh parsley and serve immediately with the 4 lemon wedges on the side. The acidity cuts through the richness while the parsley adds a fresh finish. Each bite should deliver that perfect contrast—crispy, shattering crust giving way to impossibly juicy meat.
Pro Tips For Making 5 Star Fried Chicken
- Dry the Thighs Thoroughly: Pat those bone-in thighs completely dry before buttermilk—no wet spots. I learned this the hard way when my first batch came out soggy; water and oil don’t mix, and neither do they mix well with crispy crusts. Use paper towels, not just a quick wipe, and let them air-dry for 10 minutes if you’re impatient like me.
- Marinate in Buttermilk Overnight: Skip the rush—let those thighs soak in buttermilk for at least 12 hours. The acid tenderizes the meat and the fat helps the flour cling like glue. I used to do 4 hours and wondered why my crust kept falling off. Trust the process, even if it means planning ahead.
- Fry in Two Batches: Overcrowding the oil drops the temperature fast, and that’s how you end up with greasy, unevenly cooked chicken. Use a thermometer—aim for 350°F (175°C) and keep it there. Two batches in a hot pan save you from a sad, greasy mess.
- Rest Before Dredging: Let the buttermilk-dipped thighs sit uncovered for 5 minutes after dredging. This lets the cornstarch flour mixture adhere properly instead of sliding off in clumps. I was skeptical until I tried it—now it’s non-negotiable for me.
Flavor customization for 5 star fried chicken
Spice Level Control
Adjust the heat to your taste by tweaking the paprika and black pepper amounts. For a classic Southern mild flavor, stick to the recipe’s 1 tbsp smoked paprika and 1 tsp black pepper. Want some kick?
Add ½ tsp cayenne pepper to the batter for a subtle heat, or 1 tsp chili powder for a smoky-spicy depth. I love a pinch of Penzeys’ hot honey drizzled over finished pieces for sweet heat that pairs perfectly. 🌶️
Sweet & Tangy Twist
Transform your fried chicken into a sweet-and-tangy masterpiece by adding 1 tbsp brown sugar and ½ tsp ground ginger to the flour mixture. The caramelization during frying creates a sticky, glossy crust that’s irresistible.
For extra tang, brush the fried chicken with a mix of ½ cup ketchup and 1 tbsp apple cider vinegar before serving. This works especially well with honey-glazed chicken. 🍯
Herb-Infused Variations
Swap out the basic spices for fresh, vibrant flavors. Try 1 tbsp dried thyme and 1 tsp dried rosemary for a Mediterranean twist, or 1 tbsp dried oregano and ½ tsp dried basil for an Italian-inspired profile.
For a fresh herb finish, mix 2 tbsp chopped fresh parsley with 1 tbsp chopped fresh dill into the flour mixture. The herbs add brightness that cuts through the richness beautifully. ✨
Global Fusion Flavors
Give your fried chicken an international flair with these global-inspired tweaks. For a Japanese teriyaki version, add 1 tbsp soy sauce and 1 tsp ginger to the buttermilk, then brush the fried chicken with a homemade teriyaki glaze.
For Indian-style, include 1 tsp garam masala and ½ tsp turmeric in the flour mixture and serve with a side of mint chutney. These variations turn your classic fried chicken into a world tour of flavors. 🌍
Extra-Crispy Techniques
Want that legendary shatteringly crisp texture? Try these pro tips: Add ¼ cup rice flour to your batter for an even lighter, crispier crust.
For double-fried perfection, fry the chicken once at 325°F for 8 minutes, then increase heat to 375°F for a final 3-4 minutes to set the coating.
I also recommend using a wire cooling rack instead of a plate to drain excess oil after frying—this keeps the pieces extra crispy. 💫
Dipping Sauce Pairings
Elevate your fried chicken with these customizable dipping sauces. For a classic Southern touch, mix ½ cup mayonnaise, 1 tbsp yellow mustard, 1 tbsp hot sauce, and 1 tsp honey.
For a creamy ranch twist, blend ½ cup sour cream, ¼ cup buttermilk, 1 tbsp chopped chives, and ½ tsp garlic powder. Serve with lemon wedges on the side for a zesty kick that brightens every bite. 🍋
Nutrition facts
Frequently asked questions
Why is buttermilk so important in this recipe?
The buttermilk creates a protein barrier that locks in juices during frying, preventing dryness. It also tenderizes the meat while adding subtle tanginess. For best results, use full-fat buttermilk and marinate for at least 4 hours—overnight is ideal. Never skip this step if you want that restaurant-quality juiciness!
Can I use chicken breasts instead of thighs?
Thighs are ideal because they stay juicier during frying, but you can use breasts if you prefer. For best results, pound them to ½-inch thickness and reduce frying time to 8-10 minutes. The buttermilk brine is even more critical for breasts to prevent dryness.
What’s the secret to keeping the chicken crispy after frying?
Rest the chicken on a wire rack for 5 minutes after frying—this lets the coating set properly. Never stack pieces or place them on a plate directly, as trapped steam will make them soggy. For extra crunch, fry in small batches and keep the oil at 350°F consistently.
How do I fix chicken that’s greasy instead of crispy?
Greasy chicken usually means the oil was too cool or the chicken wasn’t dry enough. Next time, pat pieces extra dry before brining and maintain 350°F oil temperature. For immediate fixes, place fried pieces on a wire rack in a 200°F oven for 5 minutes to crisp up the coating.
What’s the best way to reheat leftover fried chicken?
Never microwave—it makes the coating soggy! Instead, bake at 375°F for 10-12 minutes on a wire rack to restore crispiness. For extra crunch, broil for 1-2 minutes at the end. Store leftovers in the fridge for 3 days maximum.

- 77 Texas BBQ Taco Sauce Recipe: Smoky Chipotle Heat With Caramelized Depth - October 19, 2026
- 1930’s Chocolate Cake Recipe: Vintage Richness With Vanilla Bean Swirls - October 19, 2026
- 6 Ingredient Bread Recipe: No-Knead Wonder With Pantry Staples - October 19, 2026