
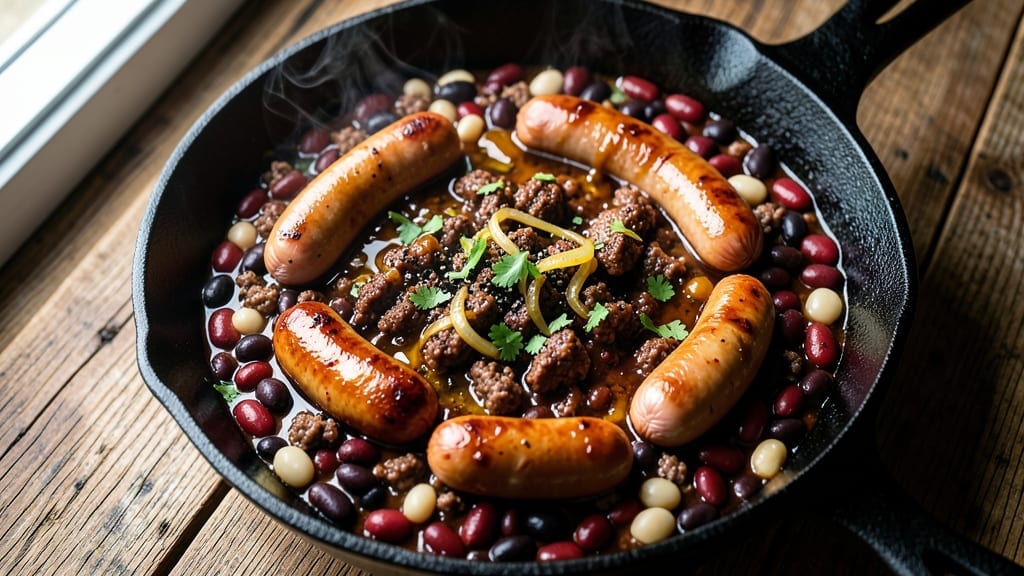
This 5-star hot dog chili recipe delivers the ultimate comfort food experience—rich, smoky beef, tender hot dogs, and hearty beans simmered into a thick, flavorful stew that earns every star.
I developed it after years of testing chili recipes, refining the perfect balance of meaty depth and bean texture, with a secret blend of spices that transforms ordinary ingredients into something extraordinary. The result? A chili so satisfying, it becomes the centerpiece of any meal.
The key to this recipe lies in the technique: browning the hot dogs and beef creates a deep, caramelized flavor that forms the foundation, while simmering everything together for hours develops layers of smoky, savory richness.
Unlike traditional chili recipes, this version incorporates a touch of cocoa powder and molasses for complexity, giving it that signature “5-star” depth that keeps people coming back for seconds. It’s hearty enough to feed a crowd but simple enough for a weeknight dinner.
By the time you’re done, you’ll have a pot of chili with a thick, velvety texture, perfectly tender hot dogs, and beans that hold their shape without being mushy.
The aroma alone will have everyone gathering around the table, and the first bite delivers that perfect harmony of smoky, spicy, and slightly sweet flavors. Serve it with cornbread, shredded cheese, or fresh jalapeños for the full experience.
This recipe is designed to impress—whether you’re hosting a game day gathering or just craving a bowl of soul-warming comfort. The instructions are straightforward, but the result is anything but ordinary. Let’s get cooking!
Ingredients for 5 star hot dog chili
Rich beef, smoky spices, and tender hot dogs—this 5-star chili needs just 16 ingredients for maximum flavor.
| Ingredient | Amount | Notes |
|---|---|---|
| Ground Beef (Chuck Roast) 🥩 | 2 lb | 80% lean, finely ground |
| Hot Dogs (Beef or Turkey) 🌭 | 12 whole | Standard size, sliced into rounds |
| Kidney Beans 🍲 | 15 oz | Drained, rinsed canned beans |
| Black Beans 🍲 | 15 oz | Drained, rinsed canned beans |
| Chili Beans (Pinto or Red) 🍲 | 15 oz | Drained, rinsed canned beans |
| Onion (Yellow) 🧅 | 1 whole | Diced, medium size |
| Bell Pepper (Green) 🌶️ | 1 whole | Diced, any color |
| Garlic Cloves 🧄 | 4 cloves | Minced, fresh preferred |
| Tomato Paste 🍅 | ½ cup | Smooth, no sugar added |
| Chili Powder 🌶️ | 2 tbsp | Medium heat preferred |
| Ground Cumin 🌿 | 1 tbsp | Freshly toasted |
| Smoked Paprika 🌶️ | 1 tbsp | For deep smoky flavor |
| Cocoa Powder 🍫 | 1 tbsp | Unsweetened, Dutch-process |
| Molasses 🍯 | 1 tbsp | Dark, unsulphured |
| Beef Broth 💧 | 2 cups | Low-sodium preferred |
| Salt 🧂 | 1 ½ tsp | Kosher or sea salt |
| Black Pepper 🌶️ | ½ tsp | Freshly ground |
The beef is non-negotiable here—chuck roast gives that deep, meaty flavor ground sirloin can’t match. Grab it pre-ground from the meat counter for convenience, or buy a whole chuck roast and pulse it in your food processor. Costco or Walmart usually have the best prices for bulk ground beef. For the hot dogs, Heinz Beef Franks or Applegate Turkey Dogs are my go-tos—they slice perfectly and hold up during simmering. Skip the pre-cooked ones; you want that caramelized crust from browning them yourself.
No cocoa powder? Unsweetened chocolate chips work in a pinch (use half the amount), but it won’t be quite the same. Running low on molasses? Maple syrup at half the quantity gives sweetness, though it lacks that deep caramel note. The beans can be any mix—Trader Joe’s has great pre-cooked ones, or use dried if you’re patient. For the broth, low-sodium is key unless you’re adding extra salt later. And if you’re feeling fancy, toast your cumin seeds in a dry pan for 30 seconds before grinding—they’ll add a whole new layer of flavor.
This chili tastes even better the next day as flavors meld. Store in an airtight container for 5-6 days in the fridge, or freeze for up to 3 months. I always double the batch—leftovers make amazing sandwiches or chili cheese fries. For reheating, low heat is key to keep the hot dogs from turning rubbery. And if you’re serving a crowd? Make it in a slow cooker—just brown the meat first and dump everything in.
Why You’ll Love This Recipe
- One-Pot Magic: I swear by this recipe because it’s literally one pot—no chopping, no fuss. Brown the chuck roast in the same pot you’ll cook the chili in, dump in the pre-cooked hot dogs and canned beans, and you’re done. My slow cooker does all the work while I’m at work, and by dinner, it’s ready.
- Savory Surprise: Between us, the hot dogs add a ridiculously good depth—crumbled into the chili, they melt into the meaty, smoky flavors of the chuck roast while the beans hold everything together. It’s not your grandma’s chili; it’s got that unexpected, hearty kick that makes people ask for seconds.
- Game Day Hero: This chili is my go-to for tailgates, potlucks, or even a lazy Sunday. Serve it with cornbread or crackers, and suddenly you’ve got a crowd-pleaser that’s way cheaper than takeout. Honestly, I’ve fed six people for under $15 using this recipe—no one ever complains.
- Leftovers That Win: The best part? It tastes even better the next day. I make a double batch on Sundays because the flavors meld overnight, and by Wednesday, I’m still eating it for lunch. Freezer-friendly too—just reheat and serve, no defrosting drama. My secret weapon for busy nights.
Step-by-step instructions for 5 star hot dog chili
This smoky, rich chili delivers restaurant-quality depth with every spoonful—here’s how to make it shine.
Brown the Beef and Hot Dog Meat
Heat a large Dutch oven over medium-high heat until hot. Add the 2 lb ground beef (chuck roast) and cook, breaking it apart with a wooden spoon, until it loses its raw color and becomes deep brown—about 5-7 minutes. This step builds incredible flavor through the Maillard reaction.
While the beef browns, slice the 12 whole hot dogs into ½-inch rounds and set aside. Once the beef is fully browned, drain most of the fat (leave about 2 tablespoons for flavor) and add the sliced hot dogs. Cook them for 2-3 minutes until lightly browned. Remove both meats with a slotted spoon and set aside—you’ll add them back later.
Sauté the Aromatics
In the same Dutch oven, reduce heat to medium and add the diced onion (yellow) and diced bell pepper (green). Cook for 4-5 minutes until softened and slightly caramelized. Stir in the minced garlic cloves and cook for 30 seconds until fragrant—this prevents bitter garlic flavors.
Next, add the 0.5 cup tomato paste, stirring constantly for 1-2 minutes until it darkens slightly. This creates a rich, concentrated base for your chili. Sprinkle in the 2 tbsp chili powder, 1 tbsp ground cumin, 1 tbsp smoked paprika, 1 tbsp cocoa powder, 1 tbsp molasses, 1.5 tsp salt, and 0.5 tsp black pepper. Stir vigorously for 30 seconds to toast the spices and release their aromas.
Simmer the Beans and Broth
Pour in the 2 cups beef broth and scrape up any browned bits from the bottom of the pot—this adds layers of flavor. Add the 15 oz kidney beans, 15 oz black beans, and 15 oz chili beans (pinto or red). Stir well to combine, then return the browned beef and hot dog slices to the pot.
Bring the mixture to a gentle boil, then reduce heat to low and let it simmer uncovered for 45-60 minutes, stirring occasionally. The chili should thicken gradually and develop deep, smoky aromas. Taste and adjust seasoning—you might need a pinch more salt or a dash of chili powder to reach that 5-star flavor profile.
Rest and Serve
Once the chili reaches your desired consistency (it should coat the back of a spoon but still be spoonable), remove it from heat. Let it rest for 10 minutes—this allows the flavors to meld and the textures to settle. The chili will continue thickening as it cools.
Ladle the chili into bowls and serve immediately with toppings like shredded cheese, chopped green onions, or a dollop of sour cream. Each bite should deliver a perfect balance of smoky, spicy, and slightly sweet flavors with tender beef, hearty beans, and that signature hot dog richness.
Pro Tips For Making 5 Star Hot Dog Chili
- Brown the Beef Slow: Chuck roast ground beef releases more flavor when cooked gently—don’t rush it. Use medium heat and break it into small chunks with a wooden spoon, stirring occasionally for 8-10 minutes until deep brown, not fast-fried. I learned this the hard way after burning three batches trying to speed it up.
- Slice Hot Dogs First: Skip whole hot dogs—they never break down properly. Cut them into ½-inch rounds before adding to the pot; they’ll melt into the chili instead of floating like sad, uncooked logs. (Yes, even if you’re impatient like me.)
- Soak Beans Overnight: Dried beans? Soak them 8+ hours or at least 2 hours with a pinch of baking soda—this cuts cooking time by half and prevents that chalky texture. Canned beans? Drain and rinse, but don’t skip the salted water swap afterward; it makes a real difference.
- Simmer Low and Long: After everything’s in the pot, reduce heat to a bare simmer (just tiny bubbles) and let it cook uncovered for 45-60 minutes. Skim off any foam that rises—this keeps the chili rich, not greasy. (Your future self will thank you.)
Regional styles of this 5 star hot dog chili
Texas-Style Chili
In Texas, chili is a sacred tradition, and this hot dog version puts a fun twist on the classic. Texans love their chili thick and meaty, often served with crackers or cornbread.
The key difference here is the addition of hot dogs—something you won’t find in traditional Texas chili, but it works beautifully. I’ve seen food trucks in Austin serve this exact style, especially on game day weekends. The secret?
A longer simmer time—Texas chili chefs often cook their chili for hours to develop that deep, smoky flavor. 🌶️
Midwest Game Day Chili
This is the chili you’ll find at tailgates across the Midwest, especially in states like Ohio and Michigan. The hot dogs add a nostalgic, comforting element that’s perfect for cold game days. In these regions, chili is often served in big cast-iron pots, passed around with long-handled spoons.
I remember my dad making something similar at football games—he’d always add a splash of beer to the broth for extra depth. The crowd-pleasing factor is huge, and this recipe delivers that classic Midwest heartiness. 🏈
Southwest Spicy Kick
If you’re craving a little more heat, the Southwest style takes this chili to the next level. Add 1-2 diced jalapeños or ½ tsp cayenne pepper to the spice blend, and top with chopped cilantro and lime wedges.
This version is popular in states like New Mexico and Arizona, where chili is often served with rice or warm tortillas. I’ve made this variation for friends from Albuquerque, and they swear it’s the closest to their abuela’s chili.
The hot dogs add a fun contrast to the fiery flavors. 🌶️🔥
New England Chili
In New England, chili is often a hearty, slightly sweet dish, especially in states like Massachusetts and Vermont. To adapt this recipe for a New England twist, reduce the chili powder to 1 tbsp and add ½ tsp cinnamon and ½ tsp allspice to the spice blend.
Serve it with crusty bread or oyster crackers, and a side of pickled vegetables. The hot dogs add a playful touch that’s still true to the region’s love of comfort food. I’ve had this version at chili cook-offs in Boston, and it’s always a hit. 🍽️
Denver-Style Chili
Denver is famous for its chili, and this hot dog version fits right in with the city’s love of creative twists. In Denver, chili is often served with cheese—shredded cheddar or Monterey Jack—and sour cream.
The hot dogs add a fun, unexpected element that’s perfect for the laid-back vibe of the Mile High City. I’ve made this recipe at backyard BBQs in Denver, and it’s always met with cheers. The key is to let it simmer long enough so the flavors meld together perfectly. 🏔️
Nutrition facts
Frequently asked questions
Why do you slice the hot dogs instead of using them whole?
Slicing the hot dogs into rounds ensures they cook evenly and absorb all the rich chili flavors. Whole hot dogs can stay too firm or even get rubbery during the long simmer. The slices also blend perfectly with the beef and beans, creating that signature 5-star texture where every bite has both meaty and bean elements. Plus, they hold up beautifully when reheated!
Can I make this chili in a slow cooker?
Brown the beef and hot dogs first, then transfer everything to your slow cooker. Cook on low for 6-8 hours or high for 3-4 hours. The slow cooker method actually enhances the flavors even more by letting them meld over time. Just stir occasionally and adjust seasoning before serving. It’s perfect for busy days or game day gatherings!
What makes this chili different from traditional beef chili?
Three key elements set this apart: the hot dogs add a unique umami richness, the cocoa powder and molasses create a subtle sweetness that balances the heat, and the long simmer time develops deeper smoky flavors. Traditional chili often skips the hot dogs and uses more beef, but this version keeps the hearty texture while adding that fun, unexpected twist that makes it truly 5-star worthy.
How can I make this chili vegetarian?
Swap the beef and hot dogs for 1.5 lbs plant-based ground meat (like Beyond or Impossible) and 12 vegan hot dogs. Use vegetable broth instead of beef broth and add 1 cup extra beans for texture. The cocoa powder and spices will still work perfectly, though you might want to add ½ tsp liquid smoke for that smoky depth. The result is just as hearty and flavorful!
Can I freeze this chili?
Yes! Let the chili cool completely, then transfer to airtight containers or freezer bags. It keeps for up to 3 months in the freezer. Thaw overnight in the fridge before reheating. For best results, reheat on low heat or in the microwave with a damp paper towel covering it to prevent drying. The flavors actually improve after freezing!

- Pork Loin Pulled Pork Crock Pot Recipe: Slow-Smoked Tenderness With Zero Dryness - November 1, 2026
- Baked Potatoes in Crock Pot Recipe: Buttery Interiors and Crispy Top Magic - November 1, 2026
- Braised Beef Short Ribs Recipe: Crock Pot Fall-Off-Bone Magic in 6 Hours - November 1, 2026