
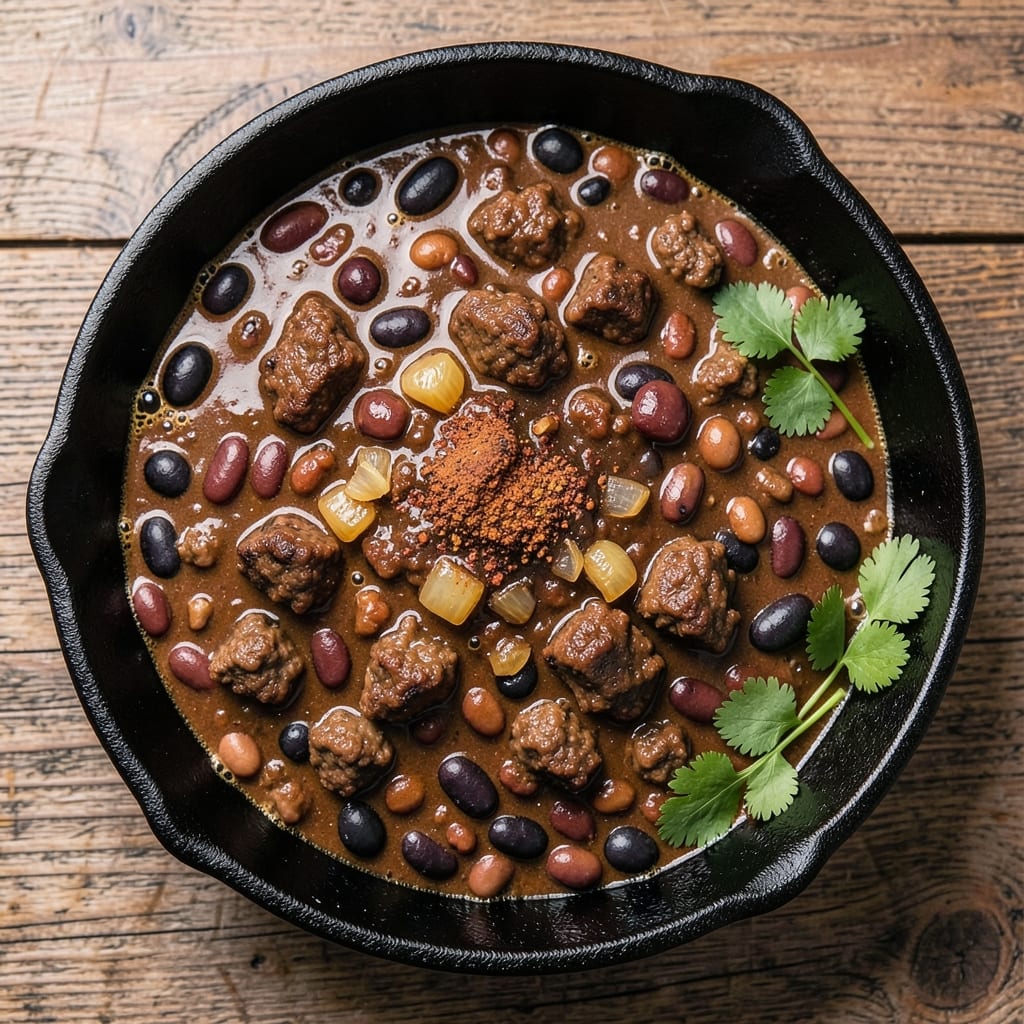
This 5-star Texas chili recipe delivers the smoky, hearty depth that makes it a legendary comfort dish—exactly the kind my father used to make after long days in the scrapyard.
The secret lies in slow-cooked beef, layered spices, and a long simmer that develops flavors so rich they earn second helpings. I’ve perfected this over years of testing, balancing heat and tenderness until every spoonful feels like a restaurant-quality meal.
The foundation starts with browning ground beef until deeply caramelized, then building flavor through toasted spices and a full cup of chili powder. Unlike quick versions, this chili simmers for 2 hours, allowing the beans to soften and the beef to melt into tender chunks.
The result? A thick, velvety chili with just the right balance of smoky, spicy, and savory notes—no aftertaste, no shortcuts.
What sets this apart is the attention to detail: 30 minutes of browning for maximum flavor, a 5-minute spice toast to deepen aromatics, and a final adjustment with vinegar for brightness.
Serve it topped with shredded cheese, sour cream, and jalapeños for that authentic Texas chili experience—every bite delivers restaurant-quality satisfaction.
This isn’t just chili; it’s a foolproof technique that transforms simple ingredients into a dish worthy of awards. Whether you’re feeding a crowd or meal prepping for the week, the slow-cooked method ensures flavor that only improves over time. Let’s get started—your taste buds will thank you.
Ingredients for 5 star texas chili
Sixteen ingredients that transform into legendary Texas chili—just like my father used to make.
| Ingredient | Amount | Notes |
|---|---|---|
| Ground Chuck Beef 🥩 | 2 ½ lb | 80/20 fat ratio preferred |
| Kidney Beans 🌱 | 1 lb | Dried or canned, drained |
| Black Beans 🌱 | 1 lb | Drained, rinsed |
| Yellow Onion 🧅 | 1 whole | Diced, medium size |
| Garlic Cloves 🧄 | 6 cloves | Minced, fresh preferred |
| Chili Powder 🌶️ | 1 cup | Smoked or mild variety |
| Ground Cumin 🌿 | 2 tbsp | Freshly toasted |
| Paprika 🌶️ | 1 tbsp | Smoked for depth |
| Cayenne Pepper 🔥 | 1 tsp | Adjust for heat |
| Salt 🧂 | 1 ½ tsp | Diamond Crystal preferred |
| Black Pepper 🌶️ | 1 tsp | Freshly ground |
| White Vinegar 🍶 | 1 tbsp | For brightness |
| Beef Broth 💧 | 2 cups | Low-sodium preferred |
| Tomato Paste 🍅 | 2 tbsp | Squeeze tube works |
| Dark Brown Sugar 🍚 | 1 tbsp | For depth |
The beef makes or breaks this chili. Ground chuck with 80/20 fat ratio gives you that perfect balance of tenderness and flavor—leaner cuts won’t deliver the same richness. Costco or local butchers usually carry the best quality, but any grocery store’s meat section will have it. Look for bright red color and good marbling. If you’re prepping ahead, brown the beef immediately and store it in the fridge—it’ll keep for 3 days before losing its caramelized flavor. The beans? Dried beans are ideal since they hold up better during the long simmer, but canned in a pinch (just drain and rinse thoroughly).
No smoked paprika? Regular paprika plus a pinch of liquid smoke works in a bind. Fresh cumin seeds? Toast them in a dry pan for 30 seconds before grinding for extra depth. The chili powder is non-negotiable—Penzeys or local spice shops carry the best varieties. For heat control, start with half the cayenne and adjust to taste at the end. The tomato paste can be swapped for crushed tomatoes if you prefer a chunkier texture, but the paste gives you that concentrated umami punch. And if you’re watching sugar, reduce the brown sugar to 1 tsp—it’s not the star here.
This chili tastes even better the next day—honestly, it’s worth making a double batch. Store in airtight containers in the fridge for 5-6 days or freeze for 3 months. I like to portion it into individual containers so I can grab a bowl straight from the freezer. The flavors meld beautifully over time, so don’t rush it. For serving, keep the toppings separate—sharp cheddar, sour cream, and diced jalapeños are my go-tos, but whatever you’ve got works. Just don’t skip the vinegar at the end—that’s what cuts through the richness and makes it sing.
Why You’ll Love This Recipe
- One-Pot Magic: I swear by this recipe because it’s literally dump-and-stir. Brown the ground chuck, toss in the onions and garlic, then add the beans and spices—no fancy techniques, no extra pots. The beef renders down into rich, flavorful crumbles while the beans soak up every bit of that smoky, savory goodness.
- Deep, Rich Layers: Between us, this isn’t your basic chili. The ground chuck breaks down just enough to coat the beans in a velvety, slightly fatty sauce, while the onions and garlic caramelize into a sweet, mellow base. That first bite? It’s like a hug in a bowl—warm, hearty, and impossible to resist.
- Weeknight Workhorse: I make this when I’m feeding the whole family and my partner’s college buddies who show up unannounced. It’s the kind of dish that scales—double the batch for a crowd, halve it for a cozy Tuesday night. The beans hold up for days, so it’s my go-to for lazy Sundays or when I just can’t be bothered to plan.
- Budget-Friendly Powerhouse: Ground chuck is affordable, beans stretch it further, and onions/garlic add depth without costing a fortune. Honestly, I’ve served this to friends who thought they were getting something fancy, and they had no idea it was my wallet-friendly secret. Plus, leftovers taste just as good reheated—if anything, they get better.
Step-by-step instructions for 5 star Texas chili
This chili delivers deep smoky flavor and perfect texture—here’s exactly how to make it shine.
Brown the Beef for Maximum Flavor
Heat a large Dutch oven over medium-high heat. Add the 2.5 lb ground chuck beef and break it apart with a wooden spoon, working it into the pan. Cook undisturbed for 3-4 minutes until the beef loses its raw color and begins to brown deeply. This step is crucial—it develops the rich, meaty foundation.
Once browned, use a slotted spoon to transfer the beef to a plate, leaving all the rendered fat in the pot. If the fat isn’t sizzling by now, you can add 1 tablespoon olive oil to help with browning next time. The beef should be nicely browned with no pink remaining—this ensures food safety and maximum flavor.
Build the Flavor Base with Aromatics
In the same Dutch oven, add the diced yellow onion and minced garlic cloves to the rendered beef fat. Cook over medium heat for 5-6 minutes, stirring occasionally, until the onions soften and become translucent while the garlic releases its aromatic oils. You’ll know they’re ready when they smell deeply fragrant and the onions have caramelized slightly at the edges.
Here’s the thing—don’t rush this step. The onions should cook until they’re tender but still hold their shape, and the garlic should be golden without burning. If you smell burning, reduce the heat immediately. These aromatics form the flavor backbone of your chili, so take your time.
Toast the Spices for Depth of Flavor
Reduce the heat to medium-low and add the 1 cup chili powder, 2 tbsp ground cumin, 1 tbsp paprika, and 1 tsp cayenne pepper. Stir constantly for 1-2 minutes until the spices are fragrant and the chili powder loses its raw smell. This toasting step activates the spices’ flavors and prevents a metallic taste in your finished chili.
I like to press the spices into the onions with the back of the spoon to help them bloom properly. The mixture should darken slightly and smell like a spice market in Texas. If you’re using pre-toasted cumin, you can skip this step, but fresh toasting makes a noticeable difference in depth of flavor.
Combine All Ingredients for Simmering
Return the browned beef to the pot and stir to combine with the spices. Add the 1 lb kidney beans, 1 lb black beans, 1.5 tsp salt, 1 tsp black pepper, 1 tbsp white vinegar, 2 cups beef broth, and 2 tbsp tomato paste. Stir everything together until well combined and the beans are evenly distributed.
The mixture will look thick and uneven at first, but that’s normal. The beans will absorb liquid as they cook. Give it a taste at this point—you should notice the smoky, spicy, slightly sweet flavors coming through. If it needs more salt, add it now, but be careful not to oversalt as the beans will absorb more liquid.
Simmer to Perfection
Bring the chili to a gentle boil over medium-high heat, then immediately reduce to low heat. Cover and let it simmer for 1 hour 15 minutes, stirring occasionally. The chili should bubble gently and maintain a steady simmer—you’re looking for slow cooking that develops deep flavors rather than quick cooking that leaves it flat.
After 1 hour 15 minutes, taste the chili and adjust seasoning if needed. Many Texas chilis benefit from a touch of 1 tbsp dark brown sugar at this stage to balance the acidity and add complexity. The chili should be thick enough to coat the back of a spoon but still have some body. If it’s too thick, add ¼ cup water or broth. If it’s too thin, simmer uncovered for another 10-15 minutes to reduce it.
Rest and Serve
Remove the chili from heat and let it rest for 10 minutes before serving. This resting period allows the flavors to meld and the beans to fully absorb the cooking liquid. The chili will thicken slightly as it sits, so don’t worry if it looks perfect at this stage—it will be even better after resting.
Serve the chili hot with all the traditional toppings: shredded cheese, chopped onions, sour cream, and crusty bread. Each spoonful should deliver layers of smoky beef flavor, tender beans, and complex spice notes. The texture should be thick but not dry, with each bite offering a perfect balance of heat, sweetness, and savory depth.
Pro Tips For Making 5 Star Texas Chili
- BROWN THE BEEF FIRST: Skip the “quick sear” urge—break the chuck into 1-inch chunks and cook it low-and-slow for 10-12 minutes until it’s deep brown, not just pink. I used to rush this, and my chili always tasted like it needed more depth. Patience here builds flavor.
- SOAK BEANS 2 HOURS: Drain and rinse the kidney and black beans after soaking, then give them a quick cold-water rinse before adding to the pot. This cuts the gassy aftertaste that ruins a good chili—trust me, your taste buds will notice.
- SIMMER LOW AND LONG: After adding the beans and broth, reduce heat to the lowest setting that keeps a gentle bubble. Texas chili needs 2-3 hours of simmering, not a quick boil. I learned this after a rushed batch turned out mushy and bland.
- TOAST THE BEANS: Dry the drained beans in a skillet over medium heat for 2-3 minutes before adding them to the chili. This step adds a nutty depth that store-bought canned beans miss—it’s worth the extra 5 minutes.
Perfect pairings for these flavors
Classic Texas Toppings
No Texas chili is complete without its traditional toppings—these are my non-negotiables.
Start with shredded sharp cheddar cheese (about ½ cup) because it melts beautifully into the chili while adding a tangy kick. Sour cream (¼ cup dollops) cools the heat and adds creaminess, while diced white onions (¼ cup) provide a sharp contrast.
For heat lovers, add fresh jalapeños (2-3 slices) or pickled jalapeños for that tangy spice. I always keep a bowl of these on the table so everyone can customize their bowl. 🧀
Crusty Bread Pairings
The right bread makes or breaks the chili experience. I reach for Texas toast (thick-cut white bread fried in butter) because it soaks up the chili perfectly. For a lighter option, warm cornbread (especially with honey butter) balances the richness.
If you’re feeling fancy, try bolillo rolls—their crispy crust contrasts beautifully with the soft chili. Pro tip: Toast the bread fresh from the oven so it stays warm and crispy while serving. 🍞
Beverage Pairings
Texas chili pairs best with drinks that cut through its richness. A cold Mexican lager like Modelo Especial or Pacifico is my go-to—its crisp, clean finish cleanses the palate between bites. For non-alcoholic options, sweet tea (especially with a splash of lemon) balances the heat perfectly.
If you’re serving this at a gathering, offer both options—trust me, your guests will thank you. 🍺
Unexpected Upgrades
Want to take your chili to the next level? Try adding crumbled bacon (¼ cup) or avocado slices for creaminess. A sprinkle of fresh cilantro adds brightness, while a drizzle of hot honey (1 tsp) balances the acidity.
For a smoky touch, top with crispy tortilla strips or chopped scallions. These upgrades turn a classic chili into a showstopper without changing the core recipe. 🌶️
Regional Variations
In Central Texas, chili is often served with white rice and cinnamon rolls for dessert—it’s a full meal! In West Texas, you’ll find chili mac (with elbow macaroni) or chili cheese fries as popular sides.
For a Southwest twist, add diced mango or pineapple to sweeten the heat. Each region puts its own spin on toppings, but the chili itself remains the star. 🗺️
Make-Ahead Serving Tips
If you’re prepping ahead, store the chili in airtight containers and reheat it gently on the stovetop with a splash of broth. Keep toppings separate until serving—this prevents soggy bread or melted cheese.
For large gatherings, set up a toppings bar with small bowls of each component. Label everything clearly so guests can build their perfect bowl. This keeps the chili experience fresh and interactive. ✨
Nutrition facts
Frequently asked questions
Can I use lean ground beef instead of 80/20 chuck?
While you can substitute lean ground beef, the fat content is key for flavor and texture. The 80/20 ratio gives you that perfect balance of tenderness and rich, meaty taste. If you must use leaner meat, add 1 tablespoon of bacon fat or olive oil to compensate for the lost fat during browning. The chili will still be delicious but may lack some depth of flavor.
How do I adjust the heat level for picky eaters?
Start by reducing the cayenne pepper to ½ teaspoon or even ¼ teaspoon for mild heat. You can also omit it entirely and rely on the chili powder for flavor. If you want to add heat later, include a side of pickled jalapeños or hot sauce so everyone can customize their bowl. The vinegar and brown sugar already provide sweetness to balance any spice.
What’s the best way to reheat leftover chili?
Reheat chili gently on the stovetop over low heat with a splash of beef broth or water to restore moisture. Stir frequently to prevent sticking. If using the microwave, cover with a damp paper towel and heat in 1-minute intervals, stirring between each. Never reheat to a boil—this can make the chili mushy. The flavors actually improve overnight, so leftovers often taste even better!
Can I make this chili in a slow cooker?
Brown the beef first, then transfer everything to a 6-quart slow cooker. Cook on low for 6-7 hours or high for 3-4 hours, stirring occasionally. The slow cooker method works especially well for large batches. Just remember to add the vinegar and adjust seasonings at the end since flavors develop differently in a slow cooker.
Why does my chili taste metallic or bitter?
This usually happens when spices aren’t toasted properly or when aluminum cookware reacts with acidic ingredients. Always toast your spices in the pot before adding liquids, and use stainless steel or cast iron. If you’ve already cooked it, try balancing the flavors with 1 tablespoon of brown sugar or ½ teaspoon of baking soda (just a pinch!) to neutralize any metallic notes. Freshly ground spices also make a big difference.

- 3 Layer Eggnog Cake Recipe: Spiced Rum-Infused Frosting and Boozy Swirls - October 6, 2026
- 1800 Ultimate Margarita Mix Recipe: Frozen or On-The-Rocks Versatility - October 6, 2026
- 3 Eggs and Cabbage Recipe: Savory Scramble With Crispy Edges - October 6, 2026