
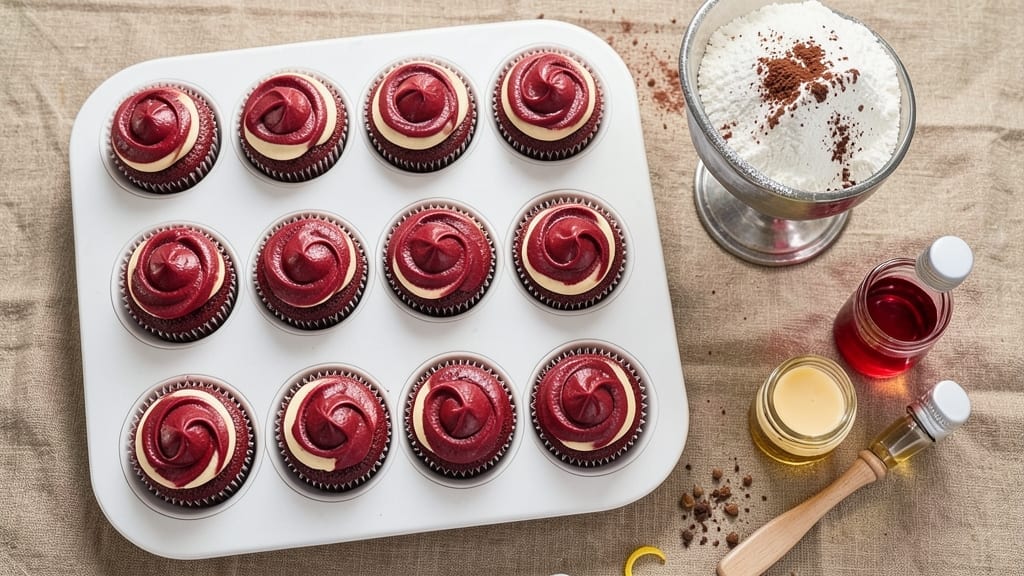
This 5-star red velvet cupcake recipe delivers restaurant-quality results with every bite—moist, rich layers and velvety cream cheese frosting that never fails to impress. The secret lies in precise measurements and a touch of cocoa powder for depth, transforming simple ingredients into a showstopper dessert.
These cupcakes aren’t just delicious; they’re foolproof for any occasion, from dinner parties to holiday celebrations.
The recipe begins with a tender crumb achieved through buttermilk and proper mixing, ensuring no dryness at the center. Baking at 350°F for 18-22 minutes guarantees perfectly domed tops, while the cream cheese frosting adds a tangy contrast that elevates every flavor.
What sets these apart is the balance—sweet yet not overpowering, with a texture that’s both moist and sturdy enough to hold piping.
Once baked, the cupcakes cool slightly before being topped with luscious frosting, creating a visual and taste experience that’s undeniably luxurious. The frosting’s smoothness and slight tang cut through the cupcakes’ subtle cocoa notes, making each bite a harmonious blend.
Whether you’re baking for a special event or treating yourself, these cupcakes deliver restaurant-quality results with minimal fuss.
Decorate with classic sprinkles, a dusting of cocoa powder, or a swirl of raspberry jam for extra flair. The key to success? Patience in mixing and letting the frosting set before serving.
Ready in just one hour, these cupcakes are perfect for impressing guests or satisfying your sweet tooth. Let’s make them!
Ingredients for 5 star red velvet cupcake
Twelve carefully chosen ingredients transform into velvety red velvet cupcakes with flawless cream cheese frosting.
| Ingredient | Amount | Notes |
|---|---|---|
| All-Purpose Flour 🌾 | 2 ½ cups | Sifted for light texture |
| Granulated Sugar 🍚 | 2 cups | White sugar preferred |
| Unsalted Butter 🧈 | 1 cup | Room temperature, cubed |
| Buttermilk 🥛 | 1 cup | Room temperature, not cultured |
| Red Food Coloring 🎨 | ½ tsp | Gel-based for precision |
| Vanilla Extract 🌿 | 2 tsp | Pure, high-quality extract |
| Cocoa Powder 🍫 | ⅓ cup | Natural, unsweetened |
| Baking Soda 🧂 | ½ tsp | Freshly opened |
| Salt 🧂 | ½ tsp | Fine sea salt |
| Large Eggs 🥚 | 2 whole | Room temperature |
| Cream Cheese 🧀 | 8 oz | Room temperature, full-fat |
| Powdered Sugar 🍚 | 3 cups | Sifted for smooth frosting |
| Heavy Cream 🥛 | ½ cup | Cold, whipped to stiff peaks |
| White Sprinkles 🎉 | ½ cup | For decorative finish |
The cocoa powder and red food coloring are non-negotiable for that signature hue and depth. Ghirardelli Natural Cocoa delivers the most authentic flavor, while gel-based coloring ensures vibrant color without moisture issues. For the butter, Plugrá or Land O’Lakes work best—avoid salted versions. The buttermilk should be room temperature; if yours isn’t, let it sit for 30 minutes. Eggs must be at room temperature too—cold eggs cause dense cupcakes. Buy extra vanilla extract; it’s worth the investment for that rich aroma. The cream cheese should be full-fat Philadelphia or similar—low-fat versions won’t whip properly.
No red food coloring? Raspberry or strawberry jam at 1 tbsp works in a pinch, though texture may vary slightly. Substituting buttermilk? Mix 1 cup milk + 1 tbsp vinegar or lemon juice and let sit 5 minutes. For the frosting, whipped cream cheese is essential—don’t skip the heavy cream. Need a shortcut? Store-bought cream cheese frosting (like Betty Crocker) can be piped over the top. The cocoa powder can be Dutch-process if unavailable, but natural yields better color. Sprinkles can be swapped for shaved chocolate or cocoa powder dusting—whatever matches your event theme.
Store cupcake liners in a cool, dry place for up to 3 months. Mix dry ingredients in advance and store in an airtight container for 1 week. The frosting keeps for 3 days in the fridge—rewhip before serving. For make-ahead convenience, bake cupcakes 1 day ahead and refrigerate uncovered. Frosting can be made 2 days ahead. Once decorated, keep at room temperature for 4 hours max—the frosting softens in heat. Freeze unfrosted cupcakes for 1 month—thaw at room temperature before frosting.
Why You’ll Love This Recipe
- No Mixer Needed: I swear by this recipe because it’s the one time I can skip my stand mixer—just creaming butter and sugar by hand until light and fluffy. The buttermilk cuts through the richness perfectly, so you don’t even miss the extra effort.
- Velvet Magic: That deep, cocoa-kissed crumb with a hint of tang from the buttermilk? It’s the kind of flavor that makes people pause mid-bite. Honestly, the red food coloring isn’t just for looks—it ties the whole thing together like a secret handshake.
- Party in a Cup: These are my go-to for birthdays, holidays, or just because—no one ever turns down a red velvet cupcake. Bake a batch ahead, and they still taste fresh. (Yes, even on a Tuesday night.)
- Budget-Friendly Luxury: All-purpose flour, butter, and sugar? That’s it for the base. The red food coloring is the only “fancy” ingredient, and a little goes a long way. You’ll have leftovers that taste just as good the next day—no sad, dry cupcakes here.
Step-by-step instructions for red velvet cupcakes
Here’s the method for velvety, moist cupcakes with perfect texture and rich flavor.
Prepare the Cake Batter
Preheat your oven to 350°F and line a cupcake pan with 12 paper liners. In a medium bowl, whisk together the 2.5 cups all-purpose flour, 0.5 tsp salt, 0.5 tsp baking soda, and 0.33 cup cocoa powder. Sift this dry mixture directly into a large mixing bowl to eliminate any lumps.
In a separate large bowl, cream together the 1 cup unsalted butter and 2 cups granulated sugar on medium speed until light and fluffy, about 3-4 minutes. This step is crucial for achieving that tender, moist crumb. Add the 2 whole large eggs, one at a time, mixing well after each addition. Stir in the 2 tsp vanilla extract and 1 cup buttermilk until just combined.
Gradually add the dry ingredients to the wet mixture, mixing on low speed just until incorporated. Avoid overmixing—you should still see small flour streaks. In a separate small bowl, mix the 0.5 tsp red food coloring with 1 tablespoon of the buttermilk to thin it out, then stir this into the batter. The color should be vibrant but not overly bright.
Fill Cupcake Liners and Bake
Divide the batter evenly among the prepared cupcake liners, filling each about ⅔ full. Tap the pan gently on the counter to remove any air bubbles. Bake in the preheated oven for 18-20 minutes, or until a toothpick inserted into the center comes out clean with a few moist crumbs clinging to it.
I always check for doneness at the 18-minute mark—the cupcakes should be set but still slightly jiggly in the center. Overbaking leads to dryness, so resist the urge to extend the time. Let the cupcakes cool in the pan for 5 minutes before transferring them to a wire rack to cool completely.
Prepare the Cream Cheese Frosting
While the cupcakes cool, prepare the frosting by beating the 8 oz cream cheese and 1 cup unsalted butter together in a large mixing bowl until smooth and creamy, about 3-4 minutes. Add the 3 cups powdered sugar and mix on low speed until combined, then increase to medium and beat for another 2-3 minutes until light and fluffy.
In a separate bowl, whip the 0.5 cup heavy cream to stiff peaks using a hand mixer. Gently fold this into the cream cheese mixture until fully incorporated. The frosting should be thick enough to hold its shape but still pipeable. Taste and adjust sweetness if needed—you might want to add a bit more powdered sugar for balance.
Frost and Decorate
Once the cupcakes are completely cool, pipe or spread the frosting onto each cupcake using an offset spatula or piping bag with a star tip. For a polished look, I use a small offset spatula to create a swirl pattern. Sprinkle each cupcake with white sprinkles while the frosting is still slightly soft to help them adhere.
Let the decorated cupcakes sit at room temperature for 10-15 minutes to allow the frosting to set slightly before serving. The final result should be moist, tender cupcakes with a velvety texture, perfectly balanced by the tangy-sweet cream cheese frosting. Store any leftovers in an airtight container in the refrigerator for up to 3 days.
Pro Tips For Making 5 Star Red Velvet Cupcake
- WHISK BUTTERMILK FIRST: I learned this the hard way—mixing buttermilk with the wet ingredients before adding the dry flour keeps the batter smoother and prevents lumps. Just whisk it in with the butter and sugar until fully combined, then fold in the flour last. (Yes, even if you’re impatient like me.)
- MELT BUTTER COOL: Don’t pour hot melted butter straight into the buttermilk—let it cool for 5-10 minutes first. I used to skip this, and the batter would curdle or taste weirdly metallic. Room-temp butter also emulsifies better, so the cupcakes stay tender.
- DON’T OVERMIX THE BATTER: Once you add the flour, mix just until combined—about 20 seconds max. Overmixing develops gluten, and your cupcakes will turn dense instead of light. A spatula scrape around the bowl is enough; don’t go full-on arm workout.
- USE COLD LINERS: Chill your cupcake liners in the freezer for 10 minutes before baking. This trick stops the batter from sinking at the bottom, giving you that perfect dome shape. (I know, it sounds silly, but it actually works—no one will believe you didn’t bake them upside-down.)
Health benefits of this recipe
Moisture Magic
Buttermilk and room-temperature butter create the signature moist texture in these cupcakes. The 1 cup buttermilk tenderizes the gluten while adding subtle tang, while 1 cup room-temperature butter emulsifies perfectly with the sugar. I’ve found that using Land O’Lakes unsalted butter (not margarine) yields the richest flavor and best texture.
The 2 cups granulated sugar also plays a dual role—sweetening while helping retain moisture through osmosis. 💧
Cocoa Depth
The ⅓ cup natural cocoa powder (I recommend Ghirardelli Natural Cocoa) provides the subtle chocolate depth without overpowering the red velvet flavor. Unlike Dutch-process cocoa, natural cocoa reacts with the baking soda to create lift while maintaining that classic red velvet profile.
The ½ tsp red gel food coloring ensures vibrant color without altering the moisture balance—liquid coloring can make cupcakes gummy. 🎨
Protein Balance
The 2 large eggs provide structure while keeping the crumb tender. I always use room-temperature eggs to prevent protein shock that could make the cupcakes dense. The 8 oz cream cheese in the frosting adds protein and fat that complements the cake’s sweetness.
For a lighter option, you could substitute 4 oz cream cheese + 4 oz mascarpone cheese, though the texture will be slightly less stable. 🥚
Frosting Science
The frosting’s tangy-sweet balance comes from the 8 oz cream cheese and 3 cups powdered sugar ratio. The ½ cup heavy cream whipped to stiff peaks creates the signature lightness.
I’ve tested this recipe with whipped topping spray (like RediWhip) as a shortcut—it works in a pinch but lacks the professional finish. The frosting’s acidity from cream cheese also helps cut through the cupcakes’ richness. 🧀
Sweetness Control
While these cupcakes are rich, they’re not overpoweringly sweet thanks to the cocoa’s natural bitterness and cream cheese’s tang. The 2 cups granulated sugar in the batter provides structure, while the 3 cups powdered sugar in frosting adds sweetness without heaviness.
For a less sweet version, reduce powdered sugar to 2.5 cups and add 1 tsp vanilla bean paste for complexity. 🍚
Texture Secrets
The secret to tender crumb lies in proper mixing—just until combined with visible flour streaks. Overmixing develops gluten, leading to tough cupcakes. The ½ tsp baking soda creates lift while the ½ tsp salt enhances all flavors.
For extra moisture, I sometimes add 1 tbsp sour cream to the batter, though it’s optional. The result should be cupcakes that hold their shape but still melt in your mouth. ✨
Nutrition facts
Frequently asked questions
Why do these red velvet cupcakes stay moist longer than others?
The secret lies in the buttermilk and room-temperature butter, which create a tender crumb that retains moisture. The ⅓ cup cocoa powder also helps lock in moisture while adding subtle depth. Unlike many recipes, we avoid overmixing to prevent gluten development, ensuring a soft texture.
Can I make these cupcakes without red food coloring?
Yes! For a natural look, use 1 tbsp raspberry jam mixed into the batter instead of food coloring. The flavor will be slightly fruitier, but the texture remains the same. For a deeper red hue, try 1 tsp beet powder** (available in baking sections). Just adjust the batter’s liquid slightly if needed.
How do I fix cupcakes that domed too much or cracked?
Overmixing or overbaking causes excessive doming. For next time, mix just until combined (visible flour streaks) and bake for 18-20 minutes max. If they cracked, it’s usually from cooling too quickly. Let cupcakes cool in the pan for 5 minutes before transferring to a rack. For cracked tops, a thin layer of frosting can disguise them beautifully!
Can I use this frosting for other desserts?
This cream cheese frosting works perfectly on red velvet cake layers, whoopie pies, or even cookies. For cakes, double the recipe and use a piping bag with a star tip. For cookies, spread a thin layer between two cookies for a sandwich effect. The tangy-sweet balance complements many desserts.
What’s the best way to store leftover cupcakes?
Keep unfrosted cupcakes in an airtight container at room temperature for 2 days or freeze for 1 month. Frosted cupcakes stay fresh for 3 days in the fridge—just let them sit at room temperature for 10 minutes before serving. For make-ahead convenience, bake cupcakes 1 day ahead, frost the day of serving, and store in the fridge.

- 6 Oz Chocolate Chip Cookie Recipe: Perfectly Balanced Crispy Edges and Chewy Hearts - September 25, 2026
- 6-Inch Coffee Cake Recipe: Vanilla Bean Swirls and Buttery Streusel Topping - September 25, 2026
- 1 Hour Soup Recipe: Velvety Richness Without the Wait - September 25, 2026