
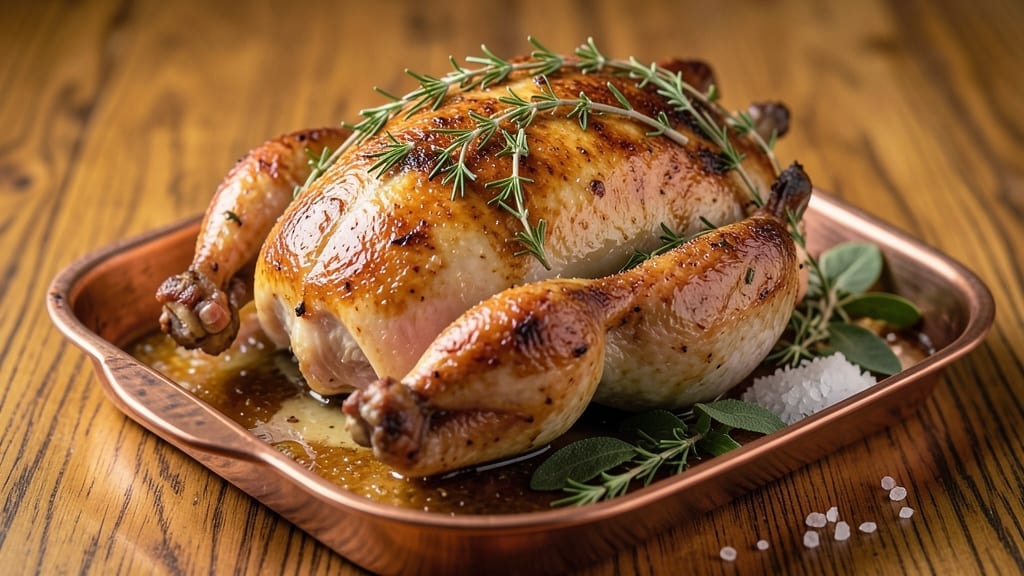
Mastering a 5-star roasted turkey isn’t about luck—it’s about precision, and this recipe delivers both. After years of perfecting the technique, I’ve cracked the code for juicy pink centers and golden, crispy skin that impresses even the most critical guests.
The secret lies in a dry brine method that transforms tough turkey into melt-in-your-mouth perfection, paired with a foolproof roasting technique that guarantees consistent results every time.
What sets this recipe apart is the attention to detail that professional chefs swear by: a high-heat start to render fat and build flavor, followed by a slow finish to ensure even cooking. No guesswork—just a thermometer and a timer to track the perfect internal temperature.
The dry brine (salted overnight) ensures moisture retention, while a simple butter and herb rub creates that iconic golden crust without overpowering the natural turkey flavor.
By the time your turkey emerges from the oven, you’ll have a centerpiece that looks and tastes like it belongs on a five-star menu—crispy skin that shatters at the touch, tender meat that falls apart with the slightest pressure, and aromas that fill your home with holiday magic.
The resting period is just as critical, allowing juices to redistribute for that perfectly moist bite** in every slice.
This isn’t just a recipe; it’s a system. Whether you’re hosting Thanksgiving for 20 or a quiet Sunday dinner for four, the principles remain the same.
The same techniques that transform a basic turkey into a restaurant-worthy centerpiece will become your new standard. Let’s get started—your guests won’t believe it’s homemade.
Ingredients for 5 star roasted turkey
Twelve ingredients, one showstopping centerpiece—this is how you elevate turkey night to five-star status.
| Ingredient | Amount | Notes |
|---|---|---|
| Fresh Whole Turkey 🦃 | 12 lb | 12-14 lb, fresh, not frozen |
| Kosher Salt 🧂 | ½ cup | Diamond Crystal preferred, coarse grain |
| Unsalted Butter 🧈 | ½ cup | Cold, cubed, high-fat content |
| Fresh Thyme 🌿 | 1 tbsp | Leaves only, finely chopped |
| Fresh Rosemary 🌿 | 1 tbsp | Needles only, finely chopped |
| Fresh Sage 🌿 | 1 tbsp | Leaves only, finely chopped |
| Black Peppercorns 🌶️ | 1 tbsp | Freshly cracked, coarse grind |
| Garlic Cloves 🧄 | 4 cloves | Minced, for butter rub |
| Fresh Parsley 🌿 | ¼ cup | Chopped, for garnish |
| Olive Oil 🫒 | 2 tbsp | For basting, high smoke point |
| Measuring Thermometer 🌡️ | 1 whole | Instant-read, 0-300°F range |
| Aluminum Foil 📄 | 1 sheet | Heavy-duty, for tenting |
The turkey is the star, so don’t cut corners here. Look for a fresh bird with good marbling and vibrant color—avoid any with grayish skin or an ammonia smell. A 12-14 lb turkey feeds 12 comfortably, but size up if you’re feeding big appetites. Most grocery stores carry high-quality turkeys, but for the absolute best, check with local butchers or specialty markets. The key is freshness: if it’s been sitting in the case too long, the flavor suffers. If you’re prepping ahead, store the turkey uncovered in the fridge for 24 hours before roasting to dry-brine it properly—this makes all the difference for crispy skin.
No fresh herbs? Dried will work at half the amount, but fresh is ideal for that bright, aromatic punch. The butter should be cold and cubed—don’t melt it ahead of time, or the rub won’t crisp properly. Running short on time? Skip the dry brine, but salt the turkey generously 4 hours ahead instead. The olive oil is non-negotiable for basting—avoid butter here, as it burns easily. For the peppercorns, a mortar and pestle gives the best coarse grind, but a spice grinder works in a pinch. And if you’re feeling fancy, add a pinch of smoked paprika to the butter rub for extra depth.
This turkey reheats beautifully—just cover loosely with foil and warm in a 325°F oven for 30 minutes. The leftovers keep for 3-4 days in the fridge, but honestly, they’ll be gone before then. For storage, wrap the carcass tightly in foil and freeze for up to 6 months if you’re planning ahead. The bones make incredible stock: just simmer with veggies for 2-3 hours. And here’s a pro tip—save the giblets! They’re perfect for stuffing or making gravy. Every part of this turkey deserves to shine.
Why You’ll Love This Recipe
- I swear by this method: just salt the turkey outside the fridge 24 hours ahead, then stuff it with butter, thyme, and rosemary right before roasting. No basting, no fuss—just set it and forget it.
- No-Fuss Prep: I swear by this method: just salt the turkey outside the fridge 24 hours ahead, then stuff it with butter, thyme, and rosemary right before roasting. No basting, no fuss—just set it and forget it.
- Herb-Packed Magic: That crispy golden skin? All thanks to the butter and rosemary basting while it roasts. The thyme adds this earthy depth that makes every bite taste like a Sunday dinner, even on a weeknight.
- Leftovers That Shine: Between us, the best part is how the turkey stays juicy for days. Shred it for sandwiches, dice it into salads, or slice it for wraps—it’s the ultimate meal prep hero that never gets boring.
Step-by-step instructions for a restaurant-worthy roasted turkey
Here’s how to transform a simple bird into a showstopping centerpiece.
Prep the Turkey for Maximum Flavor and Crisp
Start by removing the turkey from the fridge and letting it sit at room temperature for 30 minutes. This ensures even cooking. Pat the turkey completely dry inside and out with paper towels—this is non-negotiable for crispy skin. I mean really dry; any moisture left on the skin will steam instead of crisp.
Next, create a dry brine by rubbing the cavity and outside of the turkey with the 0.5 cup kosher salt and 1 tbsp black peppercorns. Work the salt into the skin, especially on the breast and thighs where it matters most. This dry brine will penetrate the meat, keeping it juicy while creating that perfect golden crust. Place the turkey breast-side up on a rack in a roasting pan and refrigerate uncovered for 12-24 hours.
Make the Herb Butter Rub and Prep the Oven
In a bowl, combine the 0.5 cup unsalted butter (cold, cubed), 4 cloves minced garlic, 1 tbsp chopped fresh thyme, 1 tbsp chopped fresh rosemary, and 1 tbsp chopped fresh sage. Mix until the herbs are evenly distributed throughout the butter. This aromatic compound butter will infuse the turkey with layers of flavor while protecting the skin from drying out.
Preheat your oven to 425°F with a rack positioned in the lower third. The high initial heat is crucial for developing that crispy skin. While the oven heats, remove the turkey from the fridge and let it sit for another 15 minutes to take the chill off. This prevents shock when it hits the hot oven.
Roast with Precision for Perfect Doneness
Place the turkey in the preheated oven and immediately baste with the 2 tbsp olive oil using a pastry brush. Roast for 45 minutes at 425°F to render fat and crisp the skin. After 45 minutes, reduce the oven temperature to 325°F and continue roasting.
Here’s where the measuring thermometer becomes your best friend. Insert it into the thickest part of the thigh (not touching bone) and check the temperature every 30 minutes. The turkey is done when it reaches 165°F in the thigh and 160°F in the breast. This typically takes 2.5-3.5 hours total, depending on the bird’s size and your oven’s accuracy.
Rest and Garnish for Showstopping Presentation
Once the turkey reaches the target temperature, remove it from the oven and transfer to a cutting board. Tent loosely with the aluminum foil and let it rest for at least 30 minutes—this crucial step allows the juices to redistribute throughout the meat. I know it’s tempting to carve immediately, but skipping this will result in dry, stringy meat.
After resting, remove the foil and garnish with the 0.25 cup chopped fresh parsley. The parsley adds a pop of color and freshness that makes the turkey look like it came from a five-star restaurant. Carve the turkey against the grain for maximum tenderness, and serve immediately with the pan drippings reduced into a glossy gravy.
Pro Tips For Making 5 Star Roasted Turkey
- USE A MEAT THERMOMETER: Skip guessing—your turkey’s done when the thickest part of the thigh (not touching bone) hits 165°F. I used to pull mine at 170°F and ended up with dry meat. The thermometer is your only reliable friend here.
- SALT THE DAY BEFORE: Sprinkle kosher salt inside and out 24 hours ahead—it seasons deeper and keeps the meat juicier. I learned this the hard way after salting right before roasting and getting uneven flavor. Trust the wait.
- BUTTER THE SKIN WELL: Slather that unsalted butter under the skin and on top—don’t skimp. The fat renders down for crisp skin and moisture. I once skipped the inside butter and got a turkey that looked golden but tasted dry.
- REST IT COVERED: After roasting, tent loosely with foil and let it sit 30-45 minutes. The meat reabsorbs juices while you’re still setting the table. I know, I know—it’s tempting to carve early—but your turkey will thank you.
Pro cooking tips for 5 star roasted turkey
Dry Brine Mastery
The dry brine is where the magic happens—salting the turkey 12-24 hours before roasting ensures maximum flavor penetration and juiciness. I use Diamond Crystal kosher salt because its coarse texture works better than table salt for creating that perfect crust.
The key is to pat the turkey completely dry before salting, then refrigerate uncovered. This might sound counterintuitive, but the uncovered surface allows moisture to evaporate, creating an even better crisp. Trust me, this step alone transforms a good turkey into a great one. 🧂
Two-Stage Roasting
Most home cooks make the mistake of roasting turkey at one temperature the whole time, but professionals know the two-stage method is critical. Start at 425°F for 45 minutes to render fat and crisp the skin, then drop to 325°F for even cooking.
This high-heat start mimics restaurant techniques and gives you that coveted golden-brown crust. I use an instant-read thermometer to monitor internal temps precisely—165°F in the thigh and 160°F in the breast are your targets. 🌡️
Herb Butter Infusion
The herb butter rub isn’t just for flavor—it also helps protect the skin from drying out. I mix cold cubed butter with fresh herbs because cold butter melts slowly during roasting, creating steam that keeps the meat moist.
The garlic, thyme, rosemary, and sage combo gives a sophisticated aroma without overpowering the turkey’s natural taste. Spread this generously under the skin and on the surface before roasting. This is the secret to that restaurant-quality aroma that fills your kitchen. 🌿
Resting Like a Pro
Skipping the rest is the fastest way to ruin your turkey. After removing it from the oven, tent it loosely with foil and let it rest for at least 30 minutes—this allows juices to redistribute, preventing dry meat.
I know it’s tempting to carve immediately, but patience pays off. The longer you wait (up to 45 minutes for large turkeys), the more tender and flavorful each slice will be. This is where many home cooks fail, but it’s the difference between good and five-star. ⏰
Basting Technique
Basting isn’t just for show—it’s a science. Use olive oil (not butter) for basting because it has a higher smoke point and won’t burn. I baste every 20 minutes during the high-heat stage, using a pastry brush to spread the oil evenly.
This creates a protective layer that promotes crispiness while keeping the meat moist. The key is to baste the skin, not the meat—this helps develop that perfect golden crust. Don’t skip this step if you want that restaurant-quality finish. 🫒
Equipment Essentials
You don’t need fancy gadgets, but a few tools make all the difference. A measuring thermometer is non-negotiable—ThermoWorks Smoke is my go-to for accuracy. A roasting rack elevates the turkey for even air circulation, and heavy-duty aluminum foil is perfect for tenting during resting.
I also recommend a pastry brush for even basting and a sharp carving knife for clean slices. These tools might seem basic, but they’re what separate home cooks from pros. 🔥
Nutrition facts
Frequently asked questions
How long should I dry brine my turkey for?
The dry brine is key for juicy meat and crispy skin. For best results, salt your turkey 12-24 hours before roasting. This gives the salt time to penetrate deeply while creating that perfect crust. If you’re short on time, salt it 4 hours ahead instead—just be sure to pat it completely dry first.
Can I use a frozen turkey for this recipe?
Fresh turkey is ideal, but if you must use frozen, thaw it properly in the fridge (24 hours per 4-5 lbs) before dry brining. Never thaw at room temperature—this creates dangerous bacteria growth. For a 12-14 lb turkey, plan 3-4 days for complete thawing. The dry brine process won’t work well on partially thawed birds.
Why does my turkey breast dry out even with all these tips?
Breast meat dries out when overcooked or when juices escape during carving. To prevent this: Don’t overstuff the cavity (it traps steam), use the two-stage roast (high heat first, then lower), and rest for 30+ minutes before carving. Also, carve against the grain and slice thinly—this helps retain moisture. If your breast still dries out, try butterflying the turkey for more even cooking.
What’s the best way to reheat leftover turkey?
For crispy, juicy leftovers, wrap slices tightly in foil and reheat in a 325°F oven for 20-30 minutes. For gravy, reduce pan drippings on the stove until thickened. Never microwave turkey—it makes the meat rubbery. Pro tip: Reheat turkey with a splash of broth or white wine to keep it moist. Leftovers keep 3-4 days in the fridge or 6 months frozen.
Can I roast a smaller turkey using this method?
This recipe scales perfectly. For a 8-10 lb turkey, reduce roasting time by 30-45 minutes (watch your thermometer). The same techniques apply—just adjust for size. A smaller bird will cook faster, so check temps every 20 minutes after the initial 45 minutes at 425°F. The herb butter and dry brine work equally well on smaller birds.

- Pea Soup Instant Pot Recipe: Velvety Green Smoothness in 20 Minutes - November 1, 2026
- Pork Loin Pulled Pork Crock Pot Recipe: Slow-Smoked Tenderness With Zero Dryness - November 1, 2026
- Baked Potatoes in Crock Pot Recipe: Buttery Interiors and Crispy Top Magic - November 1, 2026