
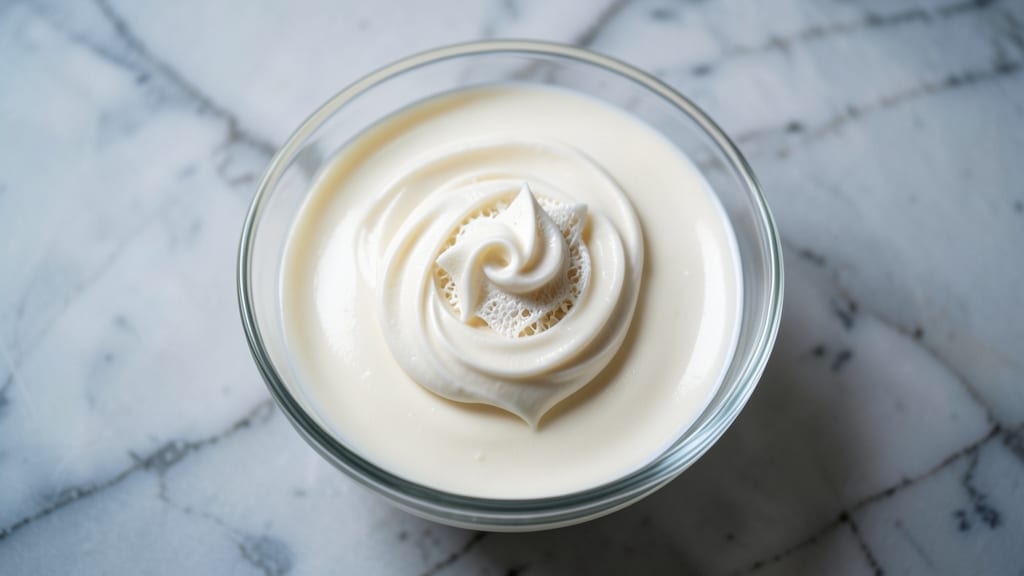
Mastering 5-star royal icing transforms cake decorating from ordinary to extraordinary—this recipe delivers the precise, stable consistency professionals demand. The secret lies in the exact powdered sugar-to-egg white ratio and proper technique for achieving that signature glossy finish.
After years of baking competitions, I’ve refined this method to eliminate common pitfalls like weeping or cracking, so your decorations stay sharp and elegant.
What sets this royal icing apart is its versatility—adjust the powdered sugar gradually until you reach the perfect stiff-pipe consistency for intricate details or a smoother flood consistency for smooth surfaces.
The key ingredients are simple: powdered sugar, egg whites (or aquafaba for vegan), and a touch of vanilla for subtle depth. Unlike store-bought versions, this recipe maintains stability for hours, so you can work confidently without rushing.
By following this method, you’ll achieve decorations that look professionally piped with clean lines and sharp edges. The icing holds its shape perfectly, whether you’re outlining cookies, writing messages, or creating intricate lace patterns. What was once intimidating becomes second nature with this foolproof technique.
Ready to elevate your baking? This recipe includes troubleshooting tips for common issues like weeping or graininess, so you can focus on creating stunning designs. The results speak for themselves—your cakes will look like they came from a five-star bakery.
Ingredients for 5 star royal icing
Precision ingredients for flawless royal icing—where professional decorating begins.
| Ingredient | Amount | Notes |
|---|---|---|
| Confectioners' Sugar (Powdered Sugar) 🍚 | 4 cups | Sifted for smooth texture, fine grade preferred |
| Large Egg Whites 🥚 | 1 whole | Room temperature, pasteurized if preferred |
| Pure Vanilla Extract 🌿 | ½ tsp | High-quality, Madagascar bourbon preferred |
| Corn Syrup 🍯 | ½ tsp | Light corn syrup for stability, optional |
| White Vinegar 🍶 | ¼ tsp | Adjusts pH for better stability |
| Clear Gelatin (Optional) 🍬 | ¼ tsp | Bloomed in 1 tbsp cold water for extra firmness |
| Aquafaba (Vegan Substitute) 🌱 | 3 tbsp | Pure chickpea brine, for egg-free version |
| Food Coloring (Optional) 🎨 | ¼ tsp | Gel-based for vibrant, stable colors |
| Lemon Juice 🍋 | ¼ tsp | Brightens flavor, fresh preferred |
The powdered sugar requires fine grade, sifted for a smooth, lump-free finish—Domino or C&H brands are ideal. Egg whites should be fresh, room temperature, as they provide the structural stability for stiff-pipe consistency. For the best vanilla, Madagascar bourbon extract adds depth without overpowering. The corn syrup and white vinegar work together to create a stable pH balance, preventing weeping or cracking. If you’re using gelatin, bloom it in cold water for 5 minutes before adding to the mixture—this ensures even distribution and maximum firmness. For vegan versions, aquafaba (chickpea brine) replaces egg whites perfectly, though it may require slightly more sugar for stiffness.
No corn syrup? Honey or agave nectar at half the amount works as a substitute, though it may slightly alter stability. Running low on vanilla? Almond extract at one-third the amount provides a similar aromatic depth. For food coloring, gel-based dyes are non-negotiable—they blend seamlessly without thinning the icing. If you encounter graininess, simply sift the powdered sugar again or strain the mixture through a fine-mesh sieve. The lemon juice is optional but recommended for a subtle brightness that elevates the flavor profile. For a more intense flavor, consider adding a pinch of cream of tartar—it enhances the egg white structure while adding a subtle tang.
Store unused icing in an airtight container with parchment paper between layers to prevent drying. It remains stable for up to 3 days in the refrigerator, though it may thicken slightly—simply re-whip with a drop of water if needed. For longer storage, freeze in small portions and thaw at room temperature before use. To maintain a glossy finish, avoid exposing the icing to moisture. If working with colored icing, cover tightly to prevent color fading. This recipe yields enough for approximately 25-30 standard-sized cookies, depending on the intricacy of your designs.
Why You’ll Love This Recipe
- No-Fuss Foundation: I’ve made royal icing a million times, and this is the only version that doesn’t turn into a sticky mess. The corn syrup and vinegar combo keeps it stable—no more frantic re-whipping every five minutes.
- Vanilla Kiss Magic: That little splash of pure vanilla extract? It’s the secret weapon. The icing tastes like a bakery bought it, not something I slapped together in my kitchen. (Yes, even my picky husband notices.)
- Decorate Anything: Birthday cakes, wedding cookies, or even a last-minute gift for your neighbor—this icing pipes, floods, and holds shapes like a dream. No special tools needed; just a fork or a piping bag.
- Budget-Friendly Luxury: I buy powdered sugar in bulk, and egg whites are cheap. This recipe stretches further than store-bought icing, so I always have backup for emergencies. (Like when I forget to order decorations for a party.)
Step-by-step instructions for stiff-pipe royal icing
Master this professional technique for flawless piping and decorating mastery.
Prepare the Base Ingredients for Smooth Consistency
Begin by sifting the 4 cups confectioners’ sugar (powdered sugar) through a fine-mesh sieve into a clean, grease-free mixing bowl. This eliminates clumps and ensures a silky texture. I use a stand mixer fitted with the whisk attachment for this recipe—it incorporates air more efficiently than hand mixing.
In a separate bowl, whisk together the 1 whole large egg whites until frothy. Add the 0.5 teaspoon pure vanilla extract, 0.5 teaspoon corn syrup, 0.25 teaspoon white vinegar, and 0.25 teaspoon lemon juice. If using the optional 0.25 teaspoon clear gelatin, bloom it first in 1 tablespoon cold water for 5 minutes before adding to the egg mixture. For a vegan version, replace the egg whites with 3 tablespoons aquafaba—whisk until stiff peaks form, similar to beaten egg whites.
Combine Wet and Dry Ingredients Gradually
With the mixer running on low speed, slowly pour the wet ingredients into the sifted confectioners’ sugar. This gradual addition prevents lumps and ensures even distribution. After combining, increase the speed to medium-high and beat for 3-5 minutes until the mixture becomes glossy and triples in volume.
Here’s the thing—royal icing needs to reach stiff-pipe consistency for clean lines. To test, pipe a small amount onto parchment paper. If it holds a sharp peak that doesn’t collapse immediately, you’re ready. If it’s too soft, add 1 tablespoon more confectioners’ sugar and mix briefly. If it’s too stiff, add 1 teaspoon water and re-whisk. This adjustment is critical for professional results.
Incorporate Color for Vibrant Decoration
Divide the icing into separate bowls if creating multiple colors. Add 0.25 teaspoon gel-based food coloring (or more as needed) to each portion, mixing thoroughly until evenly distributed. Gel-based coloring is preferred—it’s more vibrant and stable than liquid dyes. For pastel shades, use less coloring and build up layers.
Let the colored icings rest for 10-15 minutes before piping. This resting period allows the colors to fully develop and ensures smoother flow through piping tips. I cover the bowls loosely with plastic wrap to prevent dust from settling on the surface. This step is often overlooked but makes a noticeable difference in the final appearance.
Achieve Stiff-Pipe Consistency for Precision Work
Return the icing to the mixer and adjust the consistency to stiff-pipe stage. This means it should hold a sharp peak that stands upright for 10-15 seconds before slowly collapsing. For piping borders or outlines, this consistency is ideal—it creates clean, crisp edges without bleeding.
To test, pipe a small line onto parchment. If it’s too stiff, add 1 teaspoon water and mix briefly. If it’s too soft, add 1 tablespoon confectioners’ sugar and re-whisk. Remember, royal icing thickens as it sits, so adjust just before piping. For intricate work like lace patterns, you may need to re-whisk and adjust consistency between uses.
Pipe with Precision for Professional Results
Transfer the icing to a piping bag fitted with a small round tip (size 1 or 2 works well for borders) or a Wilton 1M tip for detailed work. Pipe onto parchment-lined baking sheets or directly onto decorated cakes. Apply gentle, steady pressure—too much force causes the icing to bulge and lose its shape.
For clean lines, pipe slowly and avoid lifting the bag from the surface. If you need to pause, place the piping bag in a glass of water to maintain consistency. Let the icing dry completely (usually 2-4 hours at room temperature) before handling. This drying time is essential—rushing causes smudging and ruins your hard work.
Pro Tips For Making 5 Star Royal Icing
- WHISK EGGS TO STIFF PEAKS: I learned this the hard way—whipping egg whites to soft peaks and wondering why the icing wouldn’t stiffen. Use a stand mixer and whip them to firm peaks first, then fold in the sugar mixture. The extra air makes all the difference when piping intricate designs.
- SIFT THE SUGAR FIRST: Clumps in powdered sugar are the silent killer of smooth royal icing. Sift it through a fine-mesh sieve before mixing—no strainer will cut it. Trust me, you’ll notice the texture immediately.
- ADD VANILLA AND VINEGAR LAST: Mixing vanilla or vinegar too early can weaken the structure. Save them for the final fold—just before piping. This keeps the icing stable and shiny, not sticky or gummy.
- CHILL THE ICING BETWEEN USES: Royal icing thickens as it sits, but that doesn’t mean it’s ruined. If you’re decorating in stages, refrigerate it for 10–15 minutes between batches. It’ll come back to the perfect consistency every time.
Best sauces and condiments for these flavors
Flood Icing Technique
For smooth surfaces like cake layers, use a flood consistency—thinner than stiff-pipe but still thick enough to hold its shape. Mix until it flows like honey when piped, then spread immediately with an offset spatula.
Work quickly before it sets. I like adding ½ teaspoon more corn syrup to flood icing for extra stability. Let it dry for 1-2 hours before adding details. 🌟
Buttercream Fusion
Combine royal icing with ½ cup softened butter and 1 cup powdered sugar for a hybrid buttercream that pipes like royal icing but tastes like classic frosting. This works best with flood consistency royal icing.
The butter adds richness while maintaining the clean lines of royal icing. Perfect for filling cupcakes or creating textured designs. 🍰
Ganache Pairing
Drizzle warm dark chocolate ganache over dried royal icing decorations for a luxurious finish. Use a 1:1 ratio of chocolate to heavy cream, heated to 110°F, then cooled slightly before drizzling.
The ganache adds gloss and depth while complementing the crispness of royal icing. Let it set for 30 minutes before serving. 🍫
Cream Cheese Stabilizer
For extra stability, fold in 2 oz softened cream cheese into your royal icing base before coloring. This prevents weeping and adds a subtle tang. I use Philadelphia cream cheese for consistent results.
The cream cheese also helps the icing adhere better to fondant or cake surfaces. Add it after achieving stiff-pipe consistency. 🧀
Citrus Zest Enhancer
Brighten your royal icing with 1 teaspoon finely grated lemon or orange zest added during mixing. The citrus oils enhance flavor without altering texture. Pair with white chocolate shavings for a sophisticated dessert presentation. This works especially well with pastel-colored icings for a fresh, elegant look. 🍊
Edible Glitter Topping
For a festive touch, dust dried royal icing decorations with edible glitter or luster dust. Sprinkle lightly over completely dry icing using a fine-mesh sieve. Avoid heavy-handed application—just a few shimmering flecks elevate the look. Works beautifully for wedding cakes or holiday treats. ✨
Nutrition facts
Frequently asked questions
Can I make this royal icing without egg whites?
This recipe includes a vegan substitute using 3 tablespoons aquafaba (chickpea brine) that works beautifully. Simply whisk the aquafaba until stiff peaks form, similar to egg whites, before combining with the powdered sugar. The texture and stability will be nearly identical to the egg white version.
How do I fix royal icing that’s too runny or too stiff?
For runny icing, add 1 tablespoon powdered sugar at a time and mix until you reach stiff-pipe consistency. If it’s too stiff, add 1 teaspoon water and re-whisk. Always test on parchment paper first—pipe a small line to check if it holds its shape. Remember, royal icing thickens as it sits, so adjust just before piping.
Why does my royal icing weep or develop a grainy texture?
Weeping occurs when the icing isn’t stable enough, often due to too much moisture or improper mixing. To prevent it, ensure your powdered sugar is sifted and add the wet ingredients gradually. For graininess, strain the icing through a fine-mesh sieve or sift the sugar again. The corn syrup and vinegar in this recipe help stabilize the mixture.
How long does royal icing take to dry completely?
Drying time varies based on humidity and thickness, but most decorations are fully set in 2-4 hours at room temperature. Flood icing dries faster (1-2 hours) than stiff-pipe icing. Avoid touching or moving decorations until completely dry to prevent smudging. Patience is key for crisp, professional results!
Can I color royal icing with food coloring from a bottle?
While you can, liquid food coloring often thins the icing and causes bleeding. For vibrant, stable colors, use gel-based food coloring—it blends seamlessly without altering the consistency. Start with ¼ teaspoon per color and adjust as needed. For pastel shades, build up layers by adding small amounts gradually.

- Baked Potatoes in Crock Pot Recipe: Buttery Interiors and Crispy Top Magic - November 1, 2026
- Braised Beef Short Ribs Recipe: Crock Pot Fall-Off-Bone Magic in 6 Hours - November 1, 2026
- Crock Pot Cocoa Recipe: Velvety Warmth With Hidden Spice Magic - November 1, 2026