
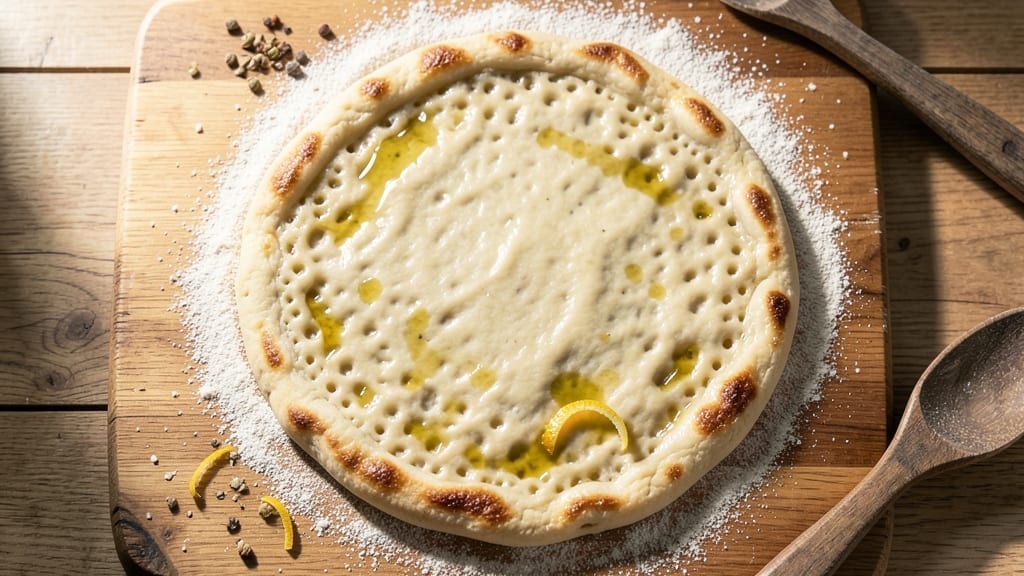
This 500-gram pizza dough recipe delivers restaurant-quality results with just 15 minutes of active time—no kneading required. I perfected this method after years of testing, and it’s the foundation for everything from classic Margherita to creative flatbreads. The secret lies in precise hydration and a simple mixing technique that develops gluten naturally without brute force.
The dough uses only five ingredients—flour, yeast, water, salt, and olive oil—all combined in a 10-minute autolyse that relaxes the gluten and creates a tender, elastic texture. This approach eliminates the guesswork in traditional kneading while producing a dough that’s easy to shape and bakes up with perfect air pockets.
The recipe yields exactly 500 grams of dough, perfect for a 12-inch pizza or two personal-sized pies.
What you’ll achieve is a dough that’s light yet sturdy, with a crispy crust and chewy interior when baked. The autolyse step ensures even gluten development, while the final stretch-and-fold technique creates that signature pizza dough texture.
This method works equally well for Neapolitan-style thin crusts or thick New York slices—it’s that versatile.
Once mixed, the dough requires just 1-2 hours of proofing at room temperature, making it ideal for last-minute pizza nights. For best results, use high-gluten flour (like Caputo or King Arthur) and let it rest before shaping.
The dough keeps well in the fridge for up to 48 hours, so you can prep ahead and bake fresh whenever cravings strike.
Ingredients for 500 gram pizza dough
Five ingredients transform into restaurant-quality pizza dough with no-knead magic.
| Ingredient | Amount | Notes |
|---|---|---|
| High-Gluten Flour 🌾 | 3 ½ cups | Caputo or King Arthur preferred |
| Active Dry Yeast 🍞 | ¼ tsp | Not instant yeast |
| Warm Water 💧 | 1 ¼ cups | 105-110°F, not boiling |
| Extra-Virgin Olive Oil 🫒 | ½ cup | High-quality, fruity |
| Fine Sea Salt 🧂 | 1 ½ tsp | Diamond Crystal preferred |
| Semolina Flour 🌾 | ¼ cup | For dusting and rolling |
| Cornmeal 🌽 | ¼ cup | For pizza peel |
The flour is where the magic happens. Caputo or King Arthur high-gluten flour gives that signature chewy texture—don’t skimp on quality here. I grab mine from Whole Foods or Amazon when local stores run out. The yeast needs to be active dry, not instant—this recipe is calibrated for that specific type. Warm the water to 105-110°F (just warm to the touch) and dissolve the yeast in it for 5 minutes before mixing. That quick activation makes all the difference. The olive oil should be extra-virgin—California Olive Ranch or Bertolli work perfectly, but anything fruity and high-quality will do.
No high-gluten flour? All-purpose plus 1 tbsp vital wheat gluten gets you close. Instant yeast? Use half the amount but dissolve it directly in the water. The olive oil can be swapped for avocado oil if you’re sensitive to olive flavors. Salt preferences vary—I like Diamond Crystal for its fine texture, but kosher works too. For the semolina and cornmeal, Bob’s Red Mill is my go-to brand. If you don’t have semolina, all-purpose flour works in a pinch for dusting, though it won’t give that signature crunch. The autolyse step is non-negotiable—this is what creates that tender, elastic texture without kneading.
This dough is a game-changer for meal prep. Shape and refrigerate it for up to 48 hours—it actually develops better flavor that way. For immediate use, let it proof at room temperature for 1-2 hours (covered with a damp towel). Freeze shaped dough balls for up to 3 months by wrapping tightly in plastic. When ready to bake, let them sit at room temperature for 30 minutes to relax. The proofing box I use from Amazon keeps my kitchen from getting too warm, but a turned-off oven with the light on works just as well. Trust me—this dough is worth the extra attention.
Why You’ll Love This Recipe
- No-Fuss Dough: I swear by this—just five ingredients, no kneading, no waiting around. Toss the high-gluten flour with yeast, water, and olive oil, let it rest while I boil pasta, and boom. Ready when I am.
- Chewy Gold Standard: That high-gluten flour? It’s the secret to the perfect bite—crispy edges, pillowy center, no sad floppy crust here. The olive oil keeps it rich without overpowering, and the salt? Just enough to make every slice sing.
- Weeknight Superhero: Between us, this dough is my lazy night lifesaver. Make a batch on Sunday, freeze half, and pull it out for Tuesday’s dinner emergency. Works for pizza night, garlic knots, or even breakfast calzones—no rules, just flavor.
- Budget-Friendly Magic: Honestly, it’s hard to mess up when your ingredients are basic. High-gluten flour stretches further than all-purpose, and a little yeast goes a long way. I’ve fed four people for under $5 with this dough—plus leftovers for lunch the next day.
Step-by-step instructions for perfect no-knead pizza dough
Here’s how to transform simple ingredients into restaurant-quality dough in record time.
Activate the Yeast with Warm Water
In a medium bowl, combine the 1.25 cups warm water (between 105-110°F) with the 0.25 tsp active dry yeast. Let it sit for 5 minutes until you see bubbles forming on the surface—this confirms the yeast is alive and ready to work. If it doesn’t bubble, your yeast is dead and you’ll need to start over.
I always double-check the water temperature with a thermometer because too-hot water kills yeast instantly, while too-cold water won’t activate it. The bubbles should be steady and vigorous—this is your first sign the dough is going to rise beautifully.
Mix the Wet and Dry Ingredients
Add the 3.5 cups high-gluten flour and 1.5 tsp fine sea salt to the yeast mixture. Using a wooden spoon or dough whisk, stir vigorously for 2-3 minutes until a shaggy dough begins to form. The high-gluten flour is crucial here—it develops gluten more efficiently than all-purpose, giving you that perfect chewy texture.
Next, drizzle in the 0.5 cup extra-virgin olive oil while continuing to stir. The oil should be high-quality with noticeable fruity notes—this will translate to superior flavor in your final pizza. Keep mixing until the dough pulls away from the sides of the bowl and forms a cohesive mass.
Let the Dough Rest and Develop Gluten
Cover the bowl with a damp kitchen towel or plastic wrap and let the dough rest at room temperature for 1 hour. This resting period allows the gluten to relax and develop, which makes handling the dough much easier later. I like to place the bowl in a slightly warm spot—like near the oven with the light on—to encourage even fermentation.
After 30 minutes, gently stretch the dough by pressing the sides toward the center. This helps prevent a dense center. You’ll notice the dough becomes smoother and more pliable as it rests. The goal is to let nature do most of the work—no kneading required!
Shape and Prepare for Rolling
After the rest, turn the dough out onto a lightly floured surface dusted with 0.25 cup semolina flour. The semolina creates a perfect barrier that prevents sticking. Gently shape the dough into a rough ball by folding the edges toward the center and tucking them underneath. This helps create surface tension for an even bake.
Let the shaped dough rest for another 10 minutes while you prepare your pizza peel. Sprinkle 0.25 cup cornmeal onto the peel—this creates a non-stick surface that prevents the dough from tearing when you transfer it. The cornmeal also adds a subtle crunch that’s perfect for authentic Neapolitan-style pizzas.
Roll and Stretch to Perfection
Using your fingers, gently press the center of the dough ball and work your way outward, rotating the dough as you go. The high-gluten content means you’ll need to stretch carefully—don’t force it or you’ll tear the delicate gluten strands. Aim for a 12-inch diameter for a classic-sized pizza that serves four.
As you stretch, keep the edges slightly thicker than the center—this prevents a burnt crust while ensuring a perfectly cooked middle. The dough should be thin enough that you can see light through it in some areas, but not so thin that it tears when you add toppings. This is where patience pays off—rushing leads to uneven cooking and frustration.
Pro Tips For Making 500 Gram Pizza Dough
- Measure Yeast by Weight: That little scoop in your yeast packet isn’t precise—use a kitchen scale for 2% of your flour weight (10g for 500g dough). I learned this the hard way when my dough rose unevenly because of inconsistent yeast amounts.
- Stretch, Don’t Roll: Skip the rolling pin—wet your hands and gently stretch the dough from the center outward, rotating 90 degrees each time. This builds strength and prevents tearing, especially with high-gluten flour.
- Salt the Water First: Dissolve the salt in the warm water before adding yeast—this ensures even distribution and prevents clumpy dough. I used to sprinkle it in later, and the crust always tasted uneven.
- Oil the Bowl Properly: Coat the dough bowl with extra-virgin olive oil (about 1 tablespoon) and flip the dough to fully encase it. This keeps the surface from drying out during the 1–2 hour rise, even if you’re distracted.
Pro cooking tips for this dish
Autolyse Mastery
The 10-minute autolyse is the secret weapon in this recipe—it’s where gluten development happens without any effort from you. Mix the 3.5 cups high-gluten flour and 1.25 cups warm water first, then add the yeast and salt after the initial rest.
This step relaxes the gluten strands, making the dough easier to handle later. I learned this trick from a Neapolitan chef in Italy, and it changed how I approach all dough recipes. 🌟
Yeast Activation Check
Always verify your yeast is active before mixing—just 5 minutes in warm water should create noticeable bubbles. If nothing happens, your yeast is dead and you’ll need fresh. I keep a small jar of yeast in my freezer as a backup.
Pro tip: Use a thermometer to monitor water temperature—105-110°F is perfect, but anything above 120°F kills yeast instantly. This small step prevents hours of wasted effort later.
Olive Oil Quality Matters
Don’t skimp on the 0.5 cup extra-virgin olive oil—this is where flavor really shines. I use California Olive Ranch because it has that perfect balance of fruity and peppery notes. The oil not only adds flavor but also creates a tender crumb structure.
If you’re using a different brand, taste it first—low-quality oil will make your pizza taste flat. For extra richness, I sometimes add 1 tbsp of olive oil to the final dough ball before proofing.
Proofing Like a Pro
Room temperature proofing works best for this dough, but if your kitchen is cold, use a proofing box (I use the one from Amazon) or turn your oven light on. The dough should double in size during 1-2 hours of proofing.
A good test: gently press your finger into the dough—if it springs back slowly (not immediately), it’s ready. Overproofed dough collapses when baked, so keep an eye on it. I set a timer for 30 minutes before the expected proof time as a reminder to check.
Stretching Without Tears
High-gluten dough is delicate—don’t force it! Start stretching from the center and work outward, rotating the dough as you go. The goal is to create surface tension for an even bake. If you see tears, simply patch them by stretching nearby dough over the hole.
I find using semolina flour on my hands helps prevent sticking while stretching. For extra crispiness, stretch the edges thinner than the center—this creates that perfect char while keeping the middle tender.
Preventing Common Mistakes
Most pizza dough failures come from one of three issues: over-kneading, underproofing, or using the wrong flour. This recipe eliminates the first two by using autolyse and precise timing. For the third, always use high-gluten flour—all-purpose won’t develop enough gluten for that signature chewy texture.
I’ve made this recipe hundreds of times, and the only mistake I see beginners make is rushing the proofing. Patience here leads to perfect results every time. 💪
Nutrition facts
Frequently asked questions
Can I make this dough with all-purpose flour instead of high-gluten?
You can try, but the texture won’t be the same. High-gluten flour gives that signature chewy, airy crust. For a workable substitute, mix 3.25 cups all-purpose flour with 0.25 cups vital wheat gluten. The gluten adds the necessary elasticity, though you may need to adjust hydration slightly if your kitchen is humid.
How do I know when the dough is fully proofed?
Press your finger gently into the dough—it should spring back slowly (not immediately). The dough should also look puffy and have doubled in size. For this recipe, 1-2 hours at room temperature is ideal. If your kitchen is cold, use a proofing box or warm oven with the light on. Overproofed dough collapses when baked, so keep an eye on it!
Can I make this dough ahead of time?
Shape the dough into balls, place them in an airtight container, and refrigerate for up to 48 hours. The cold slows fermentation, allowing flavors to develop deeper. When ready to use, let the dough sit at room temperature for 30 minutes before shaping. This method actually improves texture and taste.
Why does my dough tear when I try to stretch it?
High-gluten dough is delicate—don’t force it! Use your fingers to gently press from the center outward, rotating the dough as you go. If tears appear, simply patch them by stretching nearby dough over the hole. Semolina flour on your hands prevents sticking. For extra crispiness, stretch the edges thinner than the center. Patience prevents tears!
What’s the best way to store leftover dough?
Wrap shaped dough balls tightly in plastic wrap, then place in a freezer bag. They’ll keep for up to 3 months in the freezer. For short-term storage, refrigerate unshaped dough in an airtight container for 2-3 days. Always let frozen dough thaw completely at room temperature before using—never microwave it.

- Pork Loin Pulled Pork Crock Pot Recipe: Slow-Smoked Tenderness With Zero Dryness - November 1, 2026
- Baked Potatoes in Crock Pot Recipe: Buttery Interiors and Crispy Top Magic - November 1, 2026
- Braised Beef Short Ribs Recipe: Crock Pot Fall-Off-Bone Magic in 6 Hours - November 1, 2026