
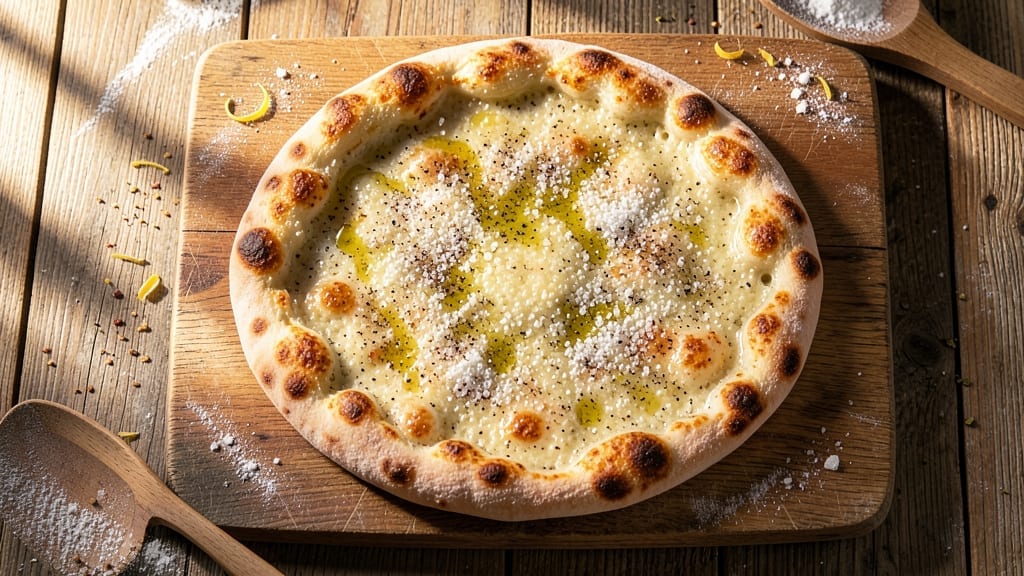
Mastering a 12-inch pizza crust with chewy centers and crispy edges is simpler than you think—no kneading required. This recipe delivers professional-quality results using a foolproof no-knead method that develops flavor overnight. The secret lies in proper hydration and slow fermentation, which creates that signature airy texture without the effort.
What sets this crust apart is its balance: tender, pillowy centers that hold toppings perfectly while crispy edges provide structure. The dough rests in the refrigerator for 24 hours, allowing gluten to relax naturally—no punishing kneading or overworked muscles.
This method also eliminates the guesswork of proofing times, making it ideal for busy home cooks. By the time you slide that dough onto your preheated pizza stone, you’ll have a golden-brown crust with those coveted bubbles and a satisfying snap.
The edges will be perfectly crisp, while the center remains soft enough to melt into your favorite toppings. This is the kind of crust that transforms a simple dinner into a restaurant-worthy experience. Whether you’re making classic New York-style slices or deep-dish pizza, this crust adapts beautifully.
Pair it with your favorite sauce, cheese, and toppings for a pizza night that feels like a celebration. Let’s get started on that perfect crust!
Ingredients for 12 inch pizza crust
These simple, high-impact ingredients create the perfect 12-inch pizza crust with crispy edges and chewy center.
| Ingredient | Amount | Notes |
|---|---|---|
| All-Purpose Flour 🌾 | 3 ½ cups | High-protein preferred for chewiness |
| Extra-Virgin Olive Oil 🫒 | ½ cup | For dough hydration and richness |
| Granulated Sugar 🍚 | 1 tbsp | Enhances browning and flavor |
| Active Dry Yeast 🍞 | ¾ tsp | Ensure it's fresh for proper rise |
| Diamond Crystal Kosher Salt 🧂 | 1 ½ tsp | Fine grain for even distribution |
| Warm Water 💧 | 1 ¼ cups | 110°F for optimal yeast activation |
| Cornmeal 🌽 | ¼ cup | For dusting pizza peel |
| Semolina Flour 🌾 | ¼ cup | Optional for extra crispy edges |
| Garlic Powder 🧄 | ½ tsp | Optional for enhanced flavor |
| Dried Oregano 🌿 | ½ tsp | Optional for Italian-inspired taste |
| Olive Oil Spray 🫒 | 1 spray | For greasing bowl and peel |
The flour is non-negotiable here—King Arthur or Caputo Tipo 00 if you want to splurge, but King Arthur all-purpose works perfectly fine. I always grab mine from Whole Foods or Amazon for consistency. The yeast needs to be fresh (check the expiration date!)—if it’s been sitting in your pantry for months, toss it. For the olive oil, California Olive Ranch or Bertolli are my go-tos—they’ve got that fruity punch that translates beautifully into the dough. The sugar might seem like a small amount, but it’s key for that perfect golden-brown crust. Don’t skip it!
No high-protein flour? Add 1 tbsp vital wheat gluten per cup of all-purpose flour for that professional chew. Running low on olive oil? Avocado oil works just as well—it’s got a higher smoke point. The garlic powder and oregano are totally optional, but if you’re making a classic Margherita, they add that authentic Italian touch. For the yeast, if you’re in a pinch, instant yeast can be used at the same amount. Just make sure your water is warm (not hot!)—yeast dies in boiling water. And if you’re worried about the dough sticking, semolina flour is your BFF—it’s got that perfect gritty texture that prevents sticking.
This dough is all about patience—24 hours in the fridge is non-negotiable for that perfect texture. Store it in an airtight container with a damp towel on top to keep it from drying out. Once shaped, it’ll keep in the fridge for another 24 hours if you need to prep ahead. For the cornmeal, I keep a big bag on hand—Bob’s Red Mill is my go-to brand. It’s cheap, lasts forever, and prevents sticking like magic. And if you’re making multiple pizzas, double the recipe—it’s worth the extra effort for that restaurant-quality crust.
Why You’ll Love This Recipe
- No-Knead Magic: This dough comes together in five minutes—just mix, let it rise, and boom. No standing at the counter, no overworking your arms, just a simple flour, yeast, and olive oil combo that does all the heavy lifting for you.
- Crispy-Chewy Gold: That perfect edge-to-center ratio? The sugar and olive oil create a caramelized crust with a tender middle, while the kosher salt makes every bite pop. Honestly, it’s the kind of texture that makes you pause mid-slice.
- Party in a Pan: Double the dough, halve the effort—this recipe easily stretches for two 12-inch pizzas or one giant feast. Freeze half for lazy nights, or use it to impress guests without slaving away. (Yes, even on a Tuesday night.)
- Pocketbook Hero: Five ingredients, zero fancy shortcuts—this crust costs pennies per serving. The olive oil adds richness without breaking the bank, and leftovers reheat like a dream. My wallet and my family’s stomachs thank me every time.
Step-by-step instructions for a perfect 12-Inch pizza crust
Here’s how to create a dough that delivers that coveted chewy center and crispy edges without a single knead.
Mix the Dough with Wet and Dry Ingredients
In a large mixing bowl, combine the 3.5 cups all-purpose flour, 1 tbsp granulated sugar, 1.5 tsp diamond crystal kosher salt, 0.5 tsp garlic powder, and 0.5 tsp dried oregano. I use a whisk for this step to aerate the flour and ensure even distribution of the dry ingredients.
In a separate small bowl, dissolve the 0.75 tsp active dry yeast in the 1.25 cups warm water (around 110°F). Let it sit for 5 minutes until it becomes frothy—this confirms your yeast is active. If it doesn’t foam, your yeast may be dead, and you’ll need to start over. Once it’s bubbly, add the 0.5 cup extra-virgin olive oil to the yeast mixture and stir well.
Make a well in the center of your dry ingredients and pour in the yeast mixture. Using a wooden spoon or your hands, gently mix everything until a shaggy dough forms. Avoid overmixing at this stage—you’re not trying to develop gluten yet. The dough should look rough and slightly sticky, with some dry flour spots still visible.
Let the Dough Rest and Hydrate
Cover the bowl with a damp kitchen towel or plastic wrap and let the dough rest at room temperature for 1 hour. This initial rest allows the flour to fully hydrate and the gluten to begin developing naturally. You’ll notice the dough will look slightly puffed and more cohesive after this time—this is exactly what we want.
After the rest, the dough should be soft and pliable but still slightly sticky. If it feels too dry, add 1 teaspoon of warm water at a time until it reaches the right consistency. If it’s too sticky, sprinkle in 1 tablespoon of flour and mix gently. The goal is a dough that’s soft but not wet, with just enough tackiness to handle without sticking to your hands.
Shape and Proof the Dough
Lightly flour a clean work surface and turn out the dough. Gently press it down with your fingertips to form a rough rectangle about 12 inches by 8 inches. Fold the long sides inward toward the center, then fold the top and bottom edges over the filled center to create a loose packet. This folding technique helps develop gluten without kneading.
Place the folded dough seam-side down in a lightly oiled bowl (use the olive oil spray), cover it again, and let it proof at room temperature for 1 to 1.5 hours. You’ll know it’s ready when the dough has nearly doubled in size and feels springy when pressed gently with your fingertip. The edges should pull away slightly from the bowl, and you should see small bubbles forming on the surface.
Prep for Baking and Stretch the Dough
Preheat your oven to 475°F with a pizza stone or baking sheet inside for at least 30 minutes. This ensures your crust gets that perfect crisp at the edges while maintaining a chewy center. While the oven heats, lightly dust a clean work surface with 0.25 cup cornmeal—this prevents sticking and adds a nice texture.
Remove the dough from the bowl and gently press it into a 12-inch circle on the cornmeal-dusted surface. I like to use my fingertips to press outward from the center, rotating the dough as I go. The edges should be slightly thicker than the center—this creates that beautiful crispy edge while keeping the middle chewy. If you’re using the 0.25 cup semolina flour, sprinkle it lightly over the surface now for extra crispiness.
Bake to Golden Perfection
Carefully transfer the shaped dough to your preheated pizza stone or baking sheet. Bake for 8 to 10 minutes until the edges are deep golden brown and the surface looks dry. You’ll see the edges puff up slightly and develop a beautiful crisp texture. The center should still feel slightly soft to the touch—this is where the chewiness comes from.
Remove the crust from the oven and let it cool for 2 minutes before adding your sauce and toppings. This brief rest prevents the hot crust from burning when you add cold toppings. For that authentic flavor, sprinkle with a pinch of diamond crystal kosher salt and dried oregano before adding toppings. The crust is now ready to hold all your favorite pizza ingredients without sogginess.
Pro Tips For Making 12 Inch Pizza Crust
- Measure Salt Precisely: Diamond Crystal kosher salt is fluffy—don’t eyeball it. Use a kitchen scale for the 2 teaspoons called for, or pack it tightly into a measuring spoon. I learned this the hard way when my crust turned bland because I scooped it loosely.
- Dissolve Sugar First: Mix the granulated sugar into the warm water before adding yeast—this prevents clumping and helps the yeast activate faster. Stir until fully dissolved, then add the yeast last. Sounds minor, but it makes a real difference in how quickly your dough rises.
- Stretch, Don’t Roll: Skip the rolling pin for a 12-inch crust—it creates uneven thickness. Instead, press the dough from the center outward with your fingertips, rotating the pan as you go. This gives you that classic thin-and-thick edge without tearing.
- Oil the Bowl: Lightly coat the mixing bowl with extra-virgin olive oil before adding the dough. A drizzle on the outside too prevents sticking when you flip it later. I used to skip this and always ended up with dough glued to the bowl—now I don’t.
Pro cooking tips for 12 inch pizza crust
Temperature Precision
Your oven’s temperature is non-negotiable for perfect pizza crust. I always preheat to 475°F for 30+ minutes with the pizza stone or baking sheet inside. Use an oven thermometer—I recommend the Thermoworks Oven Thermometer—because home ovens often run 25-50°F hotter than they display.
The stone needs to be scorching before adding dough to create that instant crisp. 🌡️
Dough Handling Tricks
For the stretch, I find the “finger press and rotate” method works best. Start from the center and press outward in slow, even motions, rotating the dough 180 degrees every few presses. This prevents tearing while creating that perfect 12-inch circle.
If your dough resists, let it rest another 10 minutes—it should stretch with gentle pressure, not force. A damp towel helps prevent sticking during shaping.
Proofing Like a Pro
Never skip the 24-hour cold proof in the fridge—this is what transforms good dough into restaurant-quality crust. After your initial room-temperature proof, transfer the shaped dough to an airtight container and refrigerate. The cold slows fermentation, allowing gluten to relax and develop flavor.
When ready to bake, let it sit at room temperature for 1-2 hours first to activate the yeast properly. This step eliminates the guesswork of proofing times.
Stretching Without Tears
If your dough tears during stretching, don’t panic—just gently press the edges back together. For extra insurance, I keep a small bowl of flour nearby to dust as needed. The key is patience: stretch slowly and avoid pulling upward.
Think “press and rotate” rather than “yank and stretch.” A well-proofed dough should stretch easily to 12 inches without resistance. If it fights back, your dough needs more time to relax.
Baking Surface Secrets
Cornmeal isn’t just for texture—it creates a barrier that prevents sticking while adding subtle sweetness. For maximum crispiness, I sprinkle semolina flour** lightly over the stretched dough before baking. The high protein content in semolina helps create that perfect crisp edge.
And always use a pizza peel dusted with cornmeal for easy transfer—no more dough sticking to your tools! 🍞
Edge Perfection Hacks
Want those restaurant-quality edges? After stretching, use your fingers to create a slight ridge around the perimeter by pressing inward. This creates a thicker edge that crisps beautifully. For extra drama, I sometimes brush the edges with a tiny bit of olive oil before baking—this enhances browning and adds richness.
Just be careful not to overdo it, or your edges will get greasy instead of crispy.
Nutrition facts
Frequently asked questions
Can I make this 12-inch crust recipe without a pizza stone?
Use a preheated baking sheet or even a cast iron skillet for excellent results. The key is to get your oven as hot as possible (475°F) and preheat the baking surface for at least 30 minutes. A parchment-lined sheet works too—just bake for 1-2 extra minutes to compensate for the lower heat transfer.
Why does my dough need 24 hours in the fridge?
The 24-hour cold proof is what creates that professional texture and flavor. Cold slows fermentation, allowing gluten to relax and develop slowly for a chewier center and crispier edges. It also enhances flavor by letting the dough rest and develop depth. If short on time, you can do a 4-hour cold proof, but the texture won’t be as impressive.
How do I fix dough that’s too sticky?
If your dough feels too wet, sprinkle in 1 tablespoon of flour at a time while mixing gently. Work it in just until the dough becomes manageable—don’t overdo it, or you’ll lose that perfect chewy texture. For extra insurance, chill the dough for 15-20 minutes before shaping to firm it up. A damp towel helps prevent sticking during handling.
Can I make this crust gluten-free?
Yes, but you’ll need a 1:1 gluten-free flour blend designed for pizza dough (like King Arthur or Cup4Cup). Replace the all-purpose flour with 3.5 cups of the blend and add 1 tablespoon of xanthan gum if your blend doesn’t include it. Expect a slightly denser texture—gluten-free crusts won’t be as chewy but will still be delicious. Bake for 10-12 minutes to prevent burning.
What’s the best way to store leftover dough?
Wrap the shaped dough tightly in plastic wrap, then place it in an airtight container. It’ll keep in the fridge for up to 48 hours or in the freezer for 3 months. To use frozen dough, thaw it in the fridge overnight before baking. For best results, let it sit at room temperature for 1-2 hours after thawing to activate the yeast properly.
