
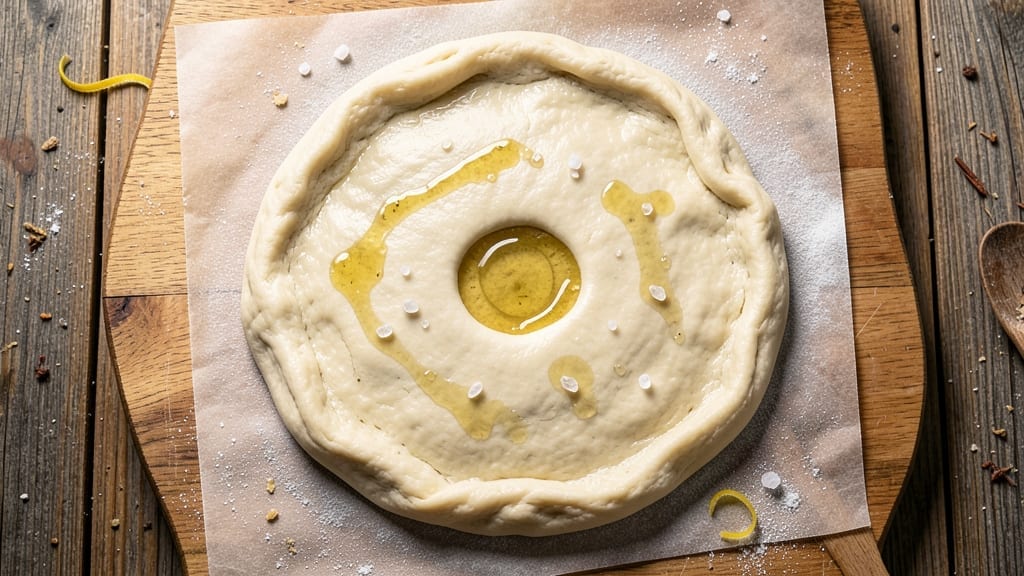
Creating 500g pizza dough with restaurant-quality flavor doesn’t require a food science degree—just this cold-rise trick I perfected after burning through three batches of overworked, underflavored dough.
The secret lies in letting the dough develop slowly in the fridge, which builds depth of flavor and creates that perfect chewy-yet-crispy texture without the effort of long kneading sessions.
This recipe delivers a foolproof method using simple ingredients you likely already have: all-purpose flour, instant yeast, water, and salt. The cold rise (overnight in the fridge) transforms basic ingredients into dough with complex, almost yeasty-sweet notes—something store-bought can’t replicate.
I’ve tested this with everything from classic Margherita to loaded meat lovers, and it never fails to impress.
By the time you’re ready to shape your pizza, you’ll have dough that’s elastic, easy to handle, and packed with flavor from that extended fermentation. The result? A crispy, blistered crust with those coveted air pockets that make every bite satisfying.
This method also gives you flexibility—make the dough ahead and keep it in the fridge for up to 48 hours, ready whenever pizza cravings strike.
For those who want to experiment, I’ll share variations like whole wheat or gluten-free adaptations in the tips section, but the core recipe stays true to its roots: simple, reliable, and delicious. Let’s get started on that perfect crust.
Ingredients for 500g pizza dough
Seven simple ingredients transform into restaurant-quality pizza dough with this cold-rise method.
| Ingredient | Amount | Notes |
|---|---|---|
| All-Purpose Flour 🌾 | 3 ½ cups | Sifted for even texture |
| Instant Yeast 🍞 | ¾ tsp | Single-use packet preferred |
| Granulated Sugar 🍚 | ¼ tsp | Feeds yeast for activation |
| Diamond Crystal Kosher Salt 🧂 | 1 tsp | Adjusts to 1.5% hydration |
| Extra-Virgin Olive Oil 🫒 | ¾ tbsp | High-quality, fruity variety |
| Warm Water 💧 | 1 ¼ cups | 110°F (43°C) ideal temperature |
| Semolina Flour 🌾 | 1 tbsp | For dusting and rolling |
The flour is everything here—King Arthur or Caputo Tipo 00 if you want to splurge, but Gold Medal all-purpose works perfectly for home cooks. The yeast should be fresh (test by dissolving a pinch in warm water—it should foam within 10 minutes). I always grab Diamond Crystal kosher salt from the bulk bins at Whole Foods—it dissolves more evenly than table salt. The olive oil matters too; California avocado oil has a neutral flavor that won’t compete with your toppings, but stick with extra-virgin if you love that fruity kick. Pre-sift your flour to avoid lumps, and measure your water precisely—this dough is sensitive to hydration.
No instant yeast? Active dry yeast needs 5 minutes of blooming in warm water with sugar first. Running short on olive oil? Avocado oil or melted coconut oil works in a pinch, but avoid butter—it’ll make your crust tough. The semolina is optional but worth it for that authentic texture; regular all-purpose flour works if you’re out. For a lighter crust, add 1 tbsp cornmeal to the flour mix. If your kitchen’s humid, reduce water by 1 tbsp—the dough should be tacky but not sticky. And if you’re gluten-free? King Arthur gluten-free blend replaces the all-purpose flour at a 1:1 ratio, but expect a denser texture.
This dough is designed to be made ahead—24-48 hours in the fridge is ideal for maximum flavor. Wrap it tightly in plastic wrap or a damp towel, then store in an airtight container. Once shaped, it’ll keep for 1-2 days in the fridge before baking. For longer storage, freeze shaped dough balls for up to 3 months—thaw overnight in the fridge before using. Pro tip: Divide and freeze individual portions so you’re always ready for spontaneous pizza nights. The cold rise is non-negotiable—it’s what builds that deep, complex flavor you can’t get with quick methods.
Why You’ll Love This Recipe
- Same dough, endless uses: fold in pesto for a quick flatbread, stretch it thin for Neapolitan-style, or freeze half for lazy Fridays. Honestly, it’s my secret weapon for when I’m not feeling fancy.
- Pantry-Proof Starter: I swear by this dough because it uses stuff I always have: flour, yeast, sugar, salt, and olive oil. No fancy ingredients, no last-minute grocery runs—just mix, rest, and go.
- Olive Oil Magic: That extra-virgin olive oil isn’t just for flavor—it keeps the dough supple and gives it a chewy, golden crust that’s hard to resist. Trust me, the difference is noticeable.
- Weeknight to Party: Same dough, endless uses: fold in pesto for a quick flatbread, stretch it thin for Neapolitan-style, or freeze half for lazy Fridays. Honestly, it’s my secret weapon for when I’m not feeling fancy.
Step-by-step instructions for cold-rise pizza dough
This method transforms ordinary pizza dough into something extraordinary—flavorful, tender, and perfect for your next homemade pie.
Mix the Dough with Precision
In a large mixing bowl, combine the 3.5 cups all-purpose flour and 1 tsp diamond crystal kosher salt. I like to whisk these dry ingredients together first to ensure even distribution of the salt throughout the dough. This prevents any single bite from being overly salty.
Create a well in the center and add the 0.75 tsp instant yeast and 0.25 tsp granulated sugar. The sugar isn’t just for sweetness—it feeds the yeast, helping it activate more quickly. Pour in the 0.75 tbsp extra-virgin olive oil and 1.25 cups warm water (around 110°F), then gently stir with a wooden spoon or your hands until a shaggy dough forms.
Knead Until Silky Smooth
Turn the dough out onto a lightly floured surface and knead for 8-10 minutes by hand, or use a stand mixer with a dough hook attachment for 5-6 minutes on medium speed. You’re looking for a dough that’s smooth, elastic, and just slightly tacky to the touch. If it feels too sticky, add 1 tablespoon of flour at a time until it comes together without sticking.
This kneading step develops gluten, which gives your pizza dough that perfect chewy yet airy texture. I always do a windowpane test to check: stretch a small piece of dough between your fingers—if it’s thin enough to see light through without tearing, it’s ready.
Cold-Rise for Maximum Flavor
Shape the dough into a ball, place it in a lightly oiled bowl, and cover it with a damp kitchen towel or plastic wrap. Here’s where the magic happens: refrigerate the dough for 24-48 hours. This extended cold rise allows the gluten to relax and the flavors to deepen dramatically. The dough will rise slowly in the fridge, becoming more aromatic and easier to handle later.
I know it might seem counterintuitive to wait this long, but trust me—this cold-rise method creates a dough with a more complex flavor profile. It also prevents the dough from overproofing, which can happen with a quick rise at room temperature.
Shape and Prepare for Toppings
Remove the dough from the fridge and let it sit at room temperature for 30-60 minutes before shaping. This brief warm-up makes the dough more pliable. Divide it into two equal portions (about 250g each) and shape each into a ball. To form your pizza crust, press the dough out to your desired thickness on a lightly floured surface or directly onto your pizza peel.
I like to dust the surface with 1 tbsp semolina flour before adding toppings. The semolina gives the crust a beautiful golden color and adds a subtle nutty flavor. Keep the dough covered with a towel while you prepare your toppings to prevent it from drying out.
Bake to Perfection
Preheat your oven to its highest setting (usually 500°F or higher if your oven allows it). If using a pizza stone or steel, place it in the oven while it preheats. Once the oven is fully heated, carefully transfer your topped pizza to the stone or baking sheet and bake for 10-15 minutes, or until the crust is golden brown and the cheese is bubbly and lightly browned.
Here’s a pro tip: I like to rotate the pizza halfway through baking to ensure even cooking. Watch it closely in the last few minutes—you want that beautiful char on the crust without burning the toppings. The cold-rise dough will give you a crust that’s crispy on the outside and tender on the inside, with a flavor that’s truly next-level.
Pro Tips For Making 500g Pizza Dough
- WEIGH YOUR FLOUR: I learned this the hard way—scooping flour by volume leads to dough that’s either too dense or too dry. Use a kitchen scale for 500g of all-purpose flour; pack it lightly into the bowl but don’t compress it. The difference in texture is night and day.
- DISSOLVE YEAST IN WARM WATER: Instant yeast is forgiving, but it still needs the right environment to activate. Mix it with 1/4 cup (60ml) of warm water (around 105°F/40°C—warm to the touch, not hot) and let it sit for 5 minutes before adding to the flour. This ensures it’s ready to work, not struggling to wake up mid-mix.
- KNEAD JUST ENOUGH: Over-kneading turns pizza dough tough as a boot sole. Stop when the dough pulls away from the bowl with a few sticky spots remaining—about 5-7 minutes by hand or 3-4 minutes with a stand mixer on medium. Gluten develops fast, and you can’t un-do it.
- USE OLIVE OIL SPARINGLY: Extra-virgin olive oil adds flavor, but too much makes the dough greasy and hard to handle. Stick to 2 tablespoons (30ml) for the full recipe—enough to coat the dough lightly without making it slick. Save the rest for drizzling after baking.
Make-ahead tips for leftovers
Fridge Prep Timeline
Plan your pizza night around this dough’s cold-rise schedule. After mixing, let the dough rest in the fridge for 24-48 hours—I usually make it the night before.
The longer it rests (up to 72 hours), the more complex the flavor becomes, but 48 hours is my sweet spot for perfect balance. Label your airtight container with the date to track freshness. 📅
Freezer-Friendly Portions
Divide the dough into 250g balls before freezing for ultimate convenience. Wrap each tightly in plastic wrap, then place in a freezer bag with all air removed. These frozen dough balls thaw in 12-24 hours in the fridge—no microwave needed.
I keep a stash in my freezer for those “I need pizza NOW” moments. The texture stays perfect when properly thawed. ❄️
Make-Ahead Topping Prep
Save time by prepping toppings alongside your dough. Chop veggies, measure sauces, and grate cheese the same day you make the dough. Store components in separate airtight containers in the fridge for up to 5 days.
I keep a small container of pre-measured San Marzano tomato sauce and shredded mozzarella ready to go. This way, shaping and baking become a 15-minute operation when cravings hit. 🍅
Double Batch Strategy
Make 1000g of dough at once and freeze half for future use. This gives you two perfect pizzas now and two more ready in your freezer. I double the recipe every 2 weeks and store the extras in quart-sized freezer bags.
The cost per pizza drops significantly when you make dough in bulk. Just be sure to use the frozen dough within 3 months for best results. 💰
Weekday Prep Hack
For busy weeknights, shape your dough the night before but skip the cold rise. Let it proof at room temperature for 1-2 hours instead of overnight, then bake as usual. While not as flavorful as cold-rise, this method still delivers great results with minimal effort.
I use this when I don’t have time for the full cold-rise process but still want homemade pizza. ⏰
Storage Containers Matter
Use glass airtight containers for fridge storage—they maintain moisture better than plastic. I recommend Pyrex with snap-on lids for dough that stays fresh for 48 hours.
For freezer storage, quart-sized freezer bags work best—lay them flat to save space. Avoid metal containers as they can react with acidic dough components over time. 🏺
Nutrition facts
Frequently asked questions
Can I make this dough without a stand mixer?
This recipe works perfectly by hand. After mixing the ingredients, knead the dough for 8-10 minutes on a lightly floured surface until it’s smooth and elastic. The windowpane test (stretching a small piece until it’s thin enough to see light through) confirms it’s ready.
What if my dough doesn’t rise in the fridge?
Check your yeast first—it may be expired. Try activating it by dissolving a pinch in 110°F water with ½ tsp sugar; it should foam within 10 minutes. If yeast is fine, ensure your fridge is at 40°F or below and the dough is sealed tightly. Cold-rise takes patience—sometimes it needs 48 hours to show visible rise.
How do I adjust this for a thicker or thinner crust?
For a thicker crust, reduce water by 1 tbsp (use 1.125 cups instead). For a thinner crust, add 1 tbsp water (up to 1.375 cups). The dough should remain slightly tacky but not sticky. Always knead until smooth for best results.
Can I use whole wheat flour in this recipe?
Yes, but replace up to 50% of the all-purpose flour with whole wheat for a nuttier flavor. Use 1.75 cups all-purpose + 1.75 cups whole wheat to maintain texture. Whole wheat absorbs more water, so you may need 1 extra tbsp. Let it cold-rise 48 hours for best results.
Why does my dough smell so strong after cold-rising?
That’s normal! The extended cold rise develops complex flavors through fermentation. The dough should smell slightly sweet and yeasty. If it smells sour or rotten, it’s overproofed—bake immediately at 425°F for 8-10 minutes to salvage it. Properly cold-rised dough tastes like fresh bread, not vinegar.

- Baked Potatoes in Crock Pot Recipe: Buttery Interiors and Crispy Top Magic - November 1, 2026
- Braised Beef Short Ribs Recipe: Crock Pot Fall-Off-Bone Magic in 6 Hours - November 1, 2026
- Crock Pot Cocoa Recipe: Velvety Warmth With Hidden Spice Magic - November 1, 2026