
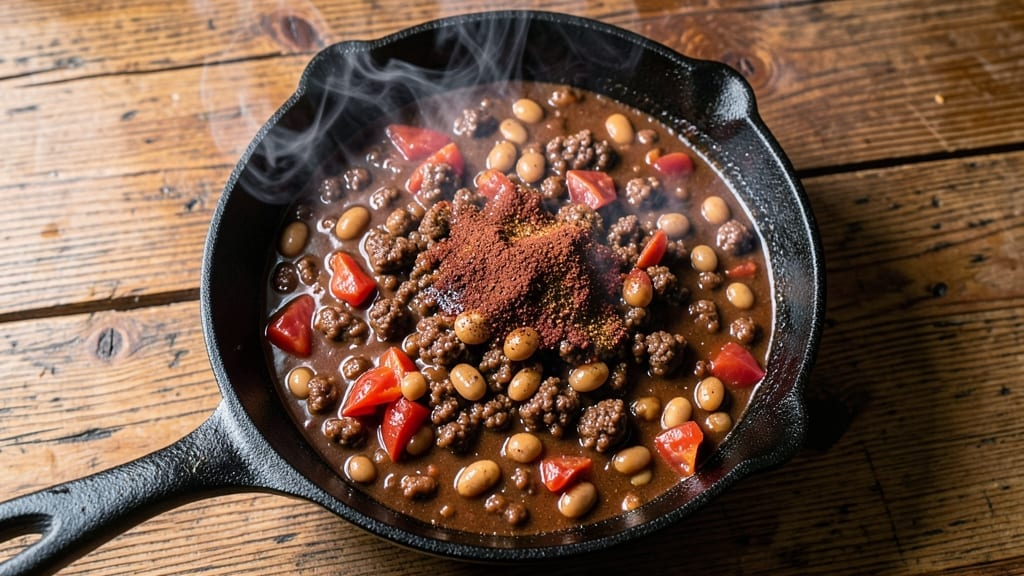
This 6-can chili recipe delivers restaurant-quality depth with minimal effort—smoky, hearty, and packed with tender beef and beans that practically melt in your spoon. I perfected it after years of testing, balancing canned tomatoes, spices, and slow cooking to create a texture that’s both rustic and refined.
The secret lies in browning the meat first (never skip this step) and letting the chili simmer low and slow until every ingredient melds into one rich, flavorful pot.
What sets this chili apart is the smoky depth from chipotle powder and liquid smoke, combined with a hearty texture from kidney beans and ground beef that stays tender despite hours of cooking.
Unlike quick versions, this one develops complex layers of flavor—savory, slightly sweet, and just spicy enough to linger. It’s the kind of chili that tastes even better the next day, when the flavors have fully melded.
The beauty of this recipe is its foolproof simplicity: dump everything into one pot, let it work its magic, and you’ll have a meal that feeds a crowd without requiring fancy techniques.
Whether you’re prepping for game day or a family dinner, this chili delivers restaurant-quality results with minimal cleanup. The toppings—cheddar, green onions, and sour cream—are just the cherry on top, though I often skip them and let the chili shine on its own.
My father used to say good food is about patience and balance, and this chili embodies that philosophy. The 30-minute prep pays off with hours of rich, smoky flavor that transforms simple ingredients into something extraordinary.
It’s the kind of recipe that becomes a family staple, served again and again because it never disappoints.
Ingredients for 6 can chili
Six cans of tomatoes, smoky spices, and beef that practically melts in your spoon.
| Ingredient | Amount | Notes |
|---|---|---|
| Ground Beef (Chuck) 🥩 | 2 ½ lb | 80/20 fat ratio for tenderness |
| Kidney Beans 🌿 | 2 cans | Drained and rinsed (15 oz each) |
| Diced Tomatoes (San Marzano) 🍅 | 6 cans | 28 oz each, no salt added |
| Chipotle Powder 🌶️ | 2 tbsp | Smoky, adobe-style preferred |
| Ground Cumin 🌿 | 1 ½ tbsp | Toasted for deeper flavor |
| Liquid Smoke 🔥 | 1 tbsp | Adjust for preferred smokiness |
| Onion Powder 🧅 | 1 tbsp | Freshly ground preferred |
| Garlic Powder 🧄 | 1 tbsp | Not garlic salt |
| Dried Oregano 🍃 | 1 tsp | Mexican oregano if available |
| Salt 🧂 | 1 ½ tsp | Diamond Crystal preferred |
| Black Pepper 🌶️ | 1 tsp | Freshly ground preferred |
| Beef Broth 💧 | 2 cups | Low-sodium preferred |
| Dark Brown Sugar 🍯 | 1 tbsp | For subtle sweetness |
| Cocoa Powder 🍫 | 1 tbsp | Natural, unsweetened |
| Olive Oil 🫒 | 2 tbsp | For browning beef |
The beef is where it starts—80/20 chuck from the grocery store’s butcher counter (not pre-ground) gives you that rich, tender texture. Costco or Walmart usually have it pre-packaged in 3-lb bags, which is perfect for this recipe. If you can’t find 80/20, 85/15 works too, but you might want to add an extra tablespoon of fat for moisture. The San Marzano tomatoes are non-negotiable for that sweet, rich flavor—Trader Joe’s sells them canned for a great price. Skip the salt-added versions; you control the seasoning here. And for the chipotle powder, Penzeys or Goya are my go-tos—they’ve got that authentic smoky depth that store brands can’t match.
No chipotle powder? Substitute 1 tbsp smoked paprika plus 1/2 tbsp cayenne for heat. Running low on kidney beans? Black beans or pinto beans work just fine—just increase to 2.5 cans total. The cocoa powder might seem odd, but it adds that deep, chocolatey richness that elevates the chili (trust me on this). No cocoa? Swap for 1 tbsp instant espresso powder. The liquid smoke is key for that campfire taste—if you’re sensitive to it, start with 1/2 tbsp and adjust. And for the brown sugar, muscovado sugar adds even more depth, but regular dark brown works perfectly too.
This chili tastes even better the next day—3-4 days in the fridge, honestly. I always make a double batch and freeze half in 2-cup portions for quick meals. The flavors meld beautifully overnight, so resist the urge to eat it all at once. Leftovers reheat perfectly—just add a splash of water or broth if it’s too thick. And if you’re prepping for a crowd, double the recipe—it scales effortlessly. The only thing that doesn’t freeze well are the toppings, so add those fresh when serving.
Why You’ll Love This Recipe
- One-Pot Magic: I swear by this chili—just brown the beef, dump in the cans, and let it simmer. No chopping, no fuss, and the San Marzano tomatoes do all the heavy lifting with their natural sweetness.
- Smoky Depth Bomb: That chipotle powder and cumin? Oh, it’s good—earthy, slightly spicy, and lingering just right. The kidney beans soak it all up like a flavor sponge, and the beef stays tender without falling apart.
- Weeknight Workhorse: Serve it over rice for dinner, pack it in jars for lunches, or even top cornbread for brunch. Honestly, I’ve fed it to my college-aged kids, my 80-year-old dad, and my picky partner—no complaints.
- Budget Feast: Six cans of beans and tomatoes stretch this into a full week’s worth of meals. Chuck roast is cheap, and the spices cost pennies—yet it tastes like I spent hours on it. (Between us, I usually do.)
Step-by-step instructions for smoky six-can chili
This chili delivers deep, smoky flavor and hearty texture in one pot—just follow these simple steps.
Brown the Ground Beef Perfectly
Heat the 2 tablespoons olive oil in a large Dutch oven over medium-high heat. Add the 2.5 pounds ground beef (chuck) and break it apart with a wooden spoon, letting it brown in batches if needed. This step is crucial—it develops rich, meaty flavor. Cook for 8-10 minutes until the beef is deep brown and no longer pink, breaking it into small, even pieces.
Once fully browned, drain most of the excess fat, leaving about 1 tablespoon in the pot. This residual fat helps build the chili’s depth of flavor. If the pan gets too dry, add a splash of beef broth to deglaze and scrape up any browned bits clinging to the bottom.
Build the Flavor Base
Reduce the heat to medium and add the 2 tablespoons chipotle powder, 1.5 tablespoons ground cumin, 1 tablespoon onion powder, 1 tablespoon garlic powder, 1 teaspoon dried oregano, 1.5 teaspoons salt, and 1 teaspoon black pepper. Stir everything together for 1-2 minutes until the spices are fragrant and the mixture looks uniformly coated.
Next, pour in the 1 tablespoon liquid smoke and 1 tablespoon dark brown sugar, stirring well to combine. The liquid smoke adds that signature smoky depth, while the brown sugar balances the heat with a subtle sweetness. Let the spices toast for another 30 seconds—this step intensifies their flavors and prepares the chili for the next ingredients.
Add Tomatoes and Simmer
Pour in the 6 cans diced tomatoes (San Marzano) and 2 cups beef broth, stirring to scrape up any browned bits from the bottom of the pot. Bring the mixture to a gentle boil, then reduce the heat to low and let it simmer uncovered for 20 minutes. This initial simmer allows the flavors to meld and the acidity in the tomatoes to mellow.
After 20 minutes, check the consistency. If the chili is too thick, add ½ cup water or more beef broth to reach your desired texture. The goal is a thick, hearty chili that coats the back of a spoon but isn’t gluey. Stir in the 2 cans drained and rinsed kidney beans and 1 tablespoon cocoa powder, mixing well to distribute evenly.
Finish and Rest for Depth
Continue simmering uncovered for another 30-45 minutes on low heat, stirring occasionally. The chili will thicken further as it reduces, and the flavors will deepen. You’ll know it’s ready when it reaches a rich, velvety consistency and the aroma is intensely smoky and savory.
Remove the pot from heat and let the chili rest for 10-15 minutes. This resting period allows the flavors to fully develop and the textures to settle. Taste and adjust the seasoning—add more salt if needed or a splash of beef broth to thin it out. Serve warm with toppings like shredded cheese, sour cream, or chopped green onions.
Pro Tips For Making 6 Can Chili
- Brown the Beef Right: Chuck roasts down to fat, so don’t skimp on heat—sear it in batches over medium-high until it’s deep brown, not just pink. I used to rush this and ended up with bland chili; now I take my time and let the meat develop that crusty, meaty flavor before adding anything else.
- Drain and Rinse Beans: Those canned kidney beans are swimming in sodium—drain them well and give them a quick rinse under cold water. My grandmother swore by this, and she was right: it keeps the chili from tasting like a salt lick, especially when you’re using six cans of tomatoes that already pack a punch.
- Simmer, Don’t Boil: Once everything’s in the pot, keep the heat low enough that you’re barely seeing bubbles—this prevents the tomatoes from breaking down into mush and turning your chili into soup. After burning three batches, I finally figured out that patience here makes all the difference.
- Toast the Spices First: Dry-toast the chipotle powder and cumin in a separate pan for 30 seconds until fragrant—this wakes up their flavors way more than just dumping them in. Sounds weird, but it works: the chili gets that deep, smoky warmth that cuts through the richness of the beef and beans. (Yes, even if you’re impatient like me.)
Storing and reheating this 6 can chili
Refrigerator Storage
Let your chili cool completely before transferring to airtight containers—I swear by glass Pyrex with snap-on lids for maximum freshness. Store at 40°F or below for up to 4 days, though I’ve found the flavors actually deepen overnight.
The smoky notes become more pronounced, and the textures soften just right. Pro tip: Press plastic wrap directly on the surface before sealing to minimize that dreaded skin formation. 💫
Freezer Prep Tips
For long-term storage, divide chili into 2-cup portions in freezer-safe containers or quart-sized freezer bags. Leave ½-inch headspace—this prevents ice crystals from bursting containers when thawing.
I label everything with the date because, honestly, I’ve forgotten about frozen chili until it’s been in there for 3 months (it’s still delicious, but I prefer fresher). For best results, freeze within 3 days of cooking. ❄️
Thawing Methods
Never thaw chili at room temperature—that’s a recipe for bacteria growth. Instead, transfer a frozen container to the fridge 12-24 hours before serving. For a quick fix, place the sealed container in cold water (submerge completely) and change the water every 30 minutes—this thaws it in 2-3 hours.
Microwave thawing? Only if you’re desperate, but even then, use the defrost setting and stir occasionally. 🔥
Reheating Perfection
Stovetop reheating preserves texture best: pour chili into a pot, add ¼ cup water or beef broth, and simmer on medium-low heat for 10-15 minutes, stirring occasionally. If it’s too thick after reheating, add more liquid—chili should be smooth but still coat the spoon.
Microwave reheating works in a pinch: cover with a damp paper towel and heat in 1-minute intervals on 50% power, stirring between each. Always bring to 165°F for food safety. 💡
Reviving Dry Chili
Overly thick chili? No problem. Stir in 1-2 tablespoons of water or broth at a time until you reach the perfect consistency. If the flavors seem muted after reheating, boost them with a pinch of salt, a dash of chipotle powder, or a splash of beef broth.
I’ve even revived chili that was too dry by adding ½ cup crushed tomatoes—it’s like giving it a flavor reset. The key is patience; don’t rush the process. ✨
Make-Ahead Game Plan
Double the recipe and freeze half now—you’ll thank me later. I always prep two 6-can batches when hosting game day: one for immediate serving and one for freezing. Label containers with the date and reheat instructions (trust me, future you will appreciate this).
For potlucks, bring chili in insulated containers and keep it warm in a slow cooker set to 170°F—this maintains temperature and texture perfectly. 📅
Nutrition facts
Frequently asked questions
Why does this chili recipe use so many tomato cans?
The 6 cans of San Marzano tomatoes create that signature rich, sweet base that balances the smoky spices perfectly. Using high-quality tomatoes (like San Marzano) ensures depth of flavor without needing extra salt. Plus, the acidity helps tenderize the beef while cooking. For a slightly thicker chili, you could reduce to 5 cans, but I recommend sticking with 6 for that authentic, hearty texture.
Can I make this chili in a slow cooker instead of a Dutch oven?
Brown the beef first in a skillet, then transfer everything to a 6-quart slow cooker on low heat for 6-8 hours or high heat for 3-4 hours. The slow cooker method actually enhances the smoky flavors as they develop over time. Just stir occasionally and add a splash of broth if it gets too thick during cooking.
What if I don’t have chipotle powder?
No problem! Mix 1 tbsp smoked paprika with ½ tbsp cayenne pepper for heat, or use 1 tbsp adobo sauce (from canned chipotles) plus ½ tbsp smoked paprika. The adobo sauce adds that authentic smoky depth while the cayenne brings the spice. Adjust to taste—this chili handles heat adjustments beautifully.
How can I make this chili less spicy?
Reduce the chipotle powder to 1 tbsp and skip the cayenne if substituting. For extra mildness, add ½ cup more beef broth and 1 tbsp brown sugar to balance the flavors. You can also serve it with extra toppings like sour cream or shredded cheese to cool things down. The cocoa powder helps naturally mellow the heat while adding richness.
Can I use ground turkey or chicken instead of beef?
While beef gives the best texture, you can substitute 2.5 lbs ground turkey (dark meat) or chicken thighs for a lighter option. However, turkey/chicken will dry out more, so reduce cooking time to 1.5-2 hours total and add ¼ cup extra broth if needed. For maximum tenderness, brown the meat thoroughly first and avoid overcooking.

- 12 Bean Chili Recipe: Hearty Slow-Cooked Depth With 12 Legumes - October 17, 2026
- 5 Seed Bread Recipe: Nutty Crunch and Artisan Flavor in One Loaf - October 17, 2026
- 1 Lb Macaroni Salad Recipe: Bold, Crunchy, and Crowd-Pleasing - October 17, 2026