
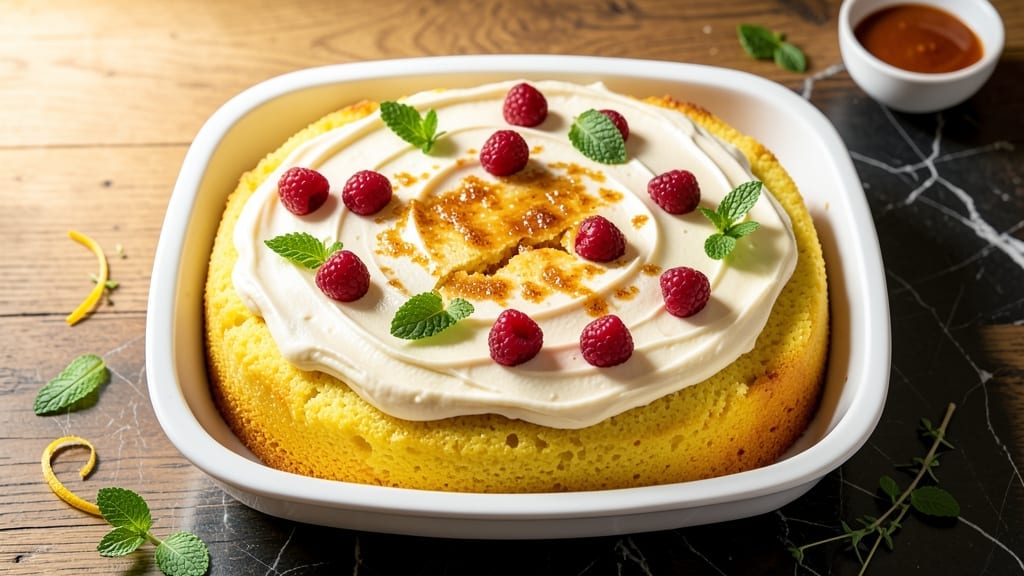
This 9×13 yellow cake recipe delivers the perfect balance of tender crumb and rich moisture—every slice stays perfectly moist for days. The secret lies in precise ingredient ratios and a gentle baking approach that prevents dryness, a common issue with sheet cakes. I’ve perfected this version after years of baking tests, ensuring it’s foolproof for both beginners and seasoned bakers alike.
The recipe uses a classic yellow cake formula with butter and vegetable oil for ultimate tenderness, while baking powder provides just the right lift. Baking at 350°F for 25-35 minutes (depending on your oven) gives a golden top with a perfectly set center.
The toothpick test is your guide—pull it out clean, and you’re ready to frost or serve.
What makes this recipe stand out is its versatility—serve it plain with a dusting of powdered sugar, layer it with cream cheese frosting, or slice it warm with a scoop of vanilla ice cream.
The cake’s moisture ensures it stays delicious even after being cut, making it ideal for gatherings or special occasions.
For extra flair, brush the warm cake with a simple glaze made from powdered sugar and milk, or top it with fresh berries for a pop of color. Whether you’re making a birthday cake or a simple dessert for coffee, this recipe delivers consistent, restaurant-quality results every time.
Ingredients for 9 x 13 yellow cake
Butter, oil, and precise ratios make this cake perfectly moist every time.
| Ingredient | Amount | Notes |
|---|---|---|
| All-Purpose Flour 🌾 | 2 ½ cups | Sifted for even texture |
| Granulated Sugar 🍚 | 1 ½ cups | White or light brown |
| Unsalted Butter 🧈 | 1 cup | Room temperature, full-fat |
| Vegetable Oil 🫒 | ½ cup | Light or neutral flavor |
| Large Eggs 🥚 | 3 whole | Room temperature, separated |
| Milk 🥛 | 1 cup | Room temperature, any kind |
| Vanilla Extract 🌿 | 2 tsp | Pure, high-quality |
| Baking Powder 🧂 | 2 tsp | Freshly tested |
| Salt 🧂 | ½ tsp | Fine sea salt |
| Powdered Sugar 🍚 | 1 cup | For glaze, sifted |
| Milk 🥛 | 2 tbsp | For glaze, same as above |
| Fresh Blueberries 🫐 | 1 ½ cups | Optional, for filling |
The butter and oil combo is key here—unsalted butter adds richness while vegetable oil keeps the crumb tender. Grab Land O’Lakes butter or any brand with good marbling. The flour? King Arthur or Bob’s Red Mill sifted is non-negotiable for that light texture. Eggs should be at room temperature (pop ’em in warm water for 5 minutes if they’re cold). I always double-check my baking powder’s freshness—Aluminum-free, double-acting is best. For the sugar, white gives a classic look, but light brown adds subtle depth if you’re feeling adventurous.
No vanilla extract? Vanilla bean paste works too—just use the same amount. Short on milk? Evaporated milk or even water in a pinch (though texture might differ slightly). The blueberries are optional but worth it—they add moisture and a pop of color. If you skip them, lemon juice or strawberries work as fillings. For the glaze, powdered sugar is your friend—Domino or Confectioners Sugar from the baking aisle keeps it smooth. The toothpick test is your guide—if it comes out clean, your cake’s ready.
This cake stays moist for 4-5 days if wrapped tightly in plastic. For extra shelf life, freeze slices between layers of parchment—up to 3 months. I always make a double batch and freeze half for birthdays that sneak up on me. The glaze sets quickly, so work fast if you’re adding berries on top. And pro tip: brush warm cake with a little milk before glaze for extra shine.
Why You’ll Love This Recipe
- No Mixer Needed: I swear by this recipe when my stand mixer’s on vacation—just a big bowl and a wooden spoon get the job done. The butter and oil combo makes it buttery without being greasy, and the eggs bind it so smoothly, even my clumsy folding attempts work.
- Sweet Spot: That perfect balance of sugar and flour? It’s not too dry, not too dense—just moist enough to slice cleanly. Honestly, the vanilla extract (if you add it) makes it taste like a bakery’s secret, but the basic version is still a crowd-pleaser.
- Leftover Hero: Slice it the day after baking, and it’s still tender—great for breakfast sandwiches or dessert. I’ll be real: my kids ask for it more than store-bought cake, and it keeps for days wrapped in foil. No sad, stale crumbs here.
- Budget Bakery: Butter and eggs might sound fancy, but you’re using half the butter of other recipes, and the oil keeps costs down. For a 9×13 pan, it feeds a crowd without breaking the bank—plus, the leftovers stretch my grocery money further. Win.
Step-by-step instructions for 9×13 yellow cake
Here’s how to bake a perfectly moist 9×13 yellow cake with layers that stay tall and fluffy.
Prepare Your Pans and Mix Dry Ingredients
Preheat your oven to 350°F. Grease two 9×13-inch baking pans thoroughly with vegetable oil, then line the bottoms with parchment paper for easy removal. In a medium bowl, whisk together the 2.5 cups all-purpose flour, 2 tsp baking powder, and 0.5 tsp salt. Sift the mixture directly into a large mixing bowl to aerate it—this prevents dense cake layers.
I always sift the dry ingredients first because it lightens the texture. If you skip this step, your cake might turn out dense instead of airy. Set the dry mixture aside while you prepare the wet ingredients.
Cream Butter and Sugar Until Light and Fluffy
In the large bowl with the dry ingredients, add the 1 cup unsalted butter (softened to room temperature) and 1.5 cups granulated sugar. Using an electric mixer on medium speed, beat for 3-5 minutes until the mixture is pale and fluffy. You’ll know it’s ready when it nearly doubles in volume and leaves a trail when the beaters lift.
This creaming process incorporates air into the batter, which creates those beautiful, tender layers. If you rush this step, your cake will be compact and heavy. Here’s the thing—don’t be tempted to add the eggs yet. We’ll build the batter gradually for maximum moisture.
Add Eggs, Milk, and Vanilla for Ultimate Moisture
Add the 3 whole large eggs, one at a time, mixing well after each addition. Then stir in the 1 cup milk and 2 tsp vanilla extract. Mix on low speed just until combined—you don’t want to develop too much gluten. Scrape down the sides of the bowl with a spatula to ensure all ingredients are incorporated.
The combination of milk and eggs creates that signature moist texture. I always use room-temperature ingredients because they blend more smoothly and create a lighter batter. If your eggs are cold, the batter might curdle when you add them.
Fold in Dry Ingredients and Blueberries (Optional)
Gradually add the dry ingredients to the wet mixture, mixing on low speed just until combined. Be careful not to overmix—stop as soon as the flour disappears. If using, gently fold in the 1.5 cups fresh blueberries by hand with a rubber spatula to avoid crushing them.
For an even distribution, I like to divide the batter between the two prepared pans and sprinkle half the blueberries in each pan. If you’re not using blueberries, skip this step entirely. The batter should be thick but pourable—if it’s too stiff, you might need to add an extra tablespoon of milk.
Bake Until Golden and Springy
Divide the batter evenly between the two pans. Bake for 25-30 minutes or until a toothpick inserted in the center comes out clean. The cakes should be golden brown and spring back when gently pressed in the center.
Don’t overbake—this is the #1 reason cakes turn out dry. As soon as the toothpick test passes, remove the cakes from the oven and let them cool in the pans for 10 minutes. Then transfer them to a wire rack to cool completely before assembling.
Prepare the Glaze and Assemble Layers
While the cakes cool, prepare the glaze by whisking together the 1 cup powdered sugar and 2 tbsp milk until smooth. Once the cakes are completely cool, place one cake on a serving plate and spread half the glaze over the top. Add the second cake on top and spread the remaining glaze over the entire surface.
For extra height, you can stack the cakes with a layer of blueberry compote or whipped cream in between. The glaze should be thick enough to hold the layers together but still spreadable. If it’s too thick, add a splash more milk to thin it out.
Pro Tips For Making 9 X 13 Yellow Cake
- Grease the Pan Right: Use 2 tablespoons vegetable oil plus a buttered parchment paper—this combo prevents sticking better than butter alone. I learned this after pulling a cake that still had flour clinging to the edges like it was auditioning for a baking fail reel.
- Whisk Eggs Until Ribbon Stage: Beat the eggs until they form a slow ribbon when the whisk is lifted—about 30 seconds past when they look fully combined. Overbeating? No, this ensures a tender crumb, not a rubbery one. (Yes, even if you’re impatient like me.)
- Skip the Overmixing: Fold in the flour just until combined—lumps are fine, but don’t turn the batter into a wall. I used to treat it like a science experiment, and the cake ended up dense. Less mixing = lighter texture.
- Test Doneness with a Toothpick: Insert a toothpick into the center—it should come out with moist crumbs, not wet batter or dry flour. If unsure, let it bake another 3-5 minutes. (Your oven’s hot spots are liars.)
Essential equipment for this recipe
Must-Have Mixing Tools
An electric mixer with a paddle attachment is non-negotiable for this recipe—I swear by my KitchenAid Artisan Series for its power and durability. The paddle creates the perfect fluffy texture without overmixing.
For smaller batches, a hand mixer works fine, but don’t rush the butter-sugar creaming step. If you’re budget-conscious, the Cuisinart SM-50BC is a great mid-range option that delivers professional results. 💡
Precision Baking Pans
Invest in two high-quality 9×13-inch baking pans—I recommend Wilton Professional Pans with non-stick coating for easy release. If you don’t have non-stick, use lightly greased aluminum pans lined with parchment paper to prevent sticking.
Avoid dark-colored pans—they can cause uneven baking. Pro tip: Place the pans on the middle rack of your oven for even heat distribution. 🌡️
Essential Measuring Tools
Accurate measurements are everything in baking. Use a digital kitchen scale for flour and sugar (I love the OXO Good Grips model) to avoid packing issues. For liquids, a clear glass measuring cup with markings is essential—I use Pyrex for its precision.
A microplane comes in handy for zesting citrus if you add it, and a fine-mesh sieve ensures your dry ingredients are perfectly aerated. 🍚
Cooling and Assembly Gear
A wire cooling rack is a game-changer for even cooling—never let your cakes sit on the pan. I keep a large stainless steel rack from Chicago Metallic in my kitchen. For assembly, a sharp offset spatula helps spread glaze smoothly, and a serrated knife makes clean cuts.
If you’re stacking layers, a small offset spatula works best for spreading fillings like blueberry compote. 🍰
Optional Extras for Flavor
For the blueberry filling, a small saucepan and wooden spoon are perfect for making quick compote. If you’re adding fresh berries as garnish, a small bowl and tongs keep them intact.
A pastry brush comes in handy for brushing warm cake with milk before glazing—it adds that restaurant-quality shine. 🌿
Nutrition facts
Frequently asked questions
Can I make this yellow cake in a single 9×13 pan instead of two?
Yes! Simply divide the batter evenly between the two pans and bake them one at a time in the same oven. The baking time will be slightly longer—about 30-35 minutes—since you’re only using one pan. Just rotate the pan halfway through for even baking.
Why did my cake turn out dense instead of moist?
Dense cake usually happens from overmixing or underbaking. Make sure to mix the batter just until combined (no streaks of flour) and bake until a toothpick comes out clean. Also, ensure your butter and eggs are at room temperature—cold ingredients can weigh down the batter.
How do I make this cake extra moist for serving later?
For maximum moisture, brush the warm cake with simple syrup (equal parts sugar and water, heated until dissolved) before glazing. Wrap the cooled cake tightly in plastic wrap and store at room temperature for 2-3 days or refrigerate for 4-5 days. Freeze slices between parchment for up to 3 months.
Can I substitute butter with oil for this recipe?
You can, but the texture will differ slightly. For best results, use 1 cup melted butter cooled to room temperature instead of the full cup of butter. The oil provides moisture, but butter adds richness and flavor. If you’re avoiding dairy, the recipe already includes ½ cup oil for that tenderness.
What are the best frosting options for this cake?
This cake pairs beautifully with cream cheese frosting, vanilla buttercream, or even a light whipped cream. For a quick option, try a glaze made with ½ cup powdered sugar + 2 tbsp milk + 1 tsp vanilla. For extra flavor, add a layer of blueberry compote between cake layers before frosting.

- 12 Bean Chili Recipe: Hearty Slow-Cooked Depth With 12 Legumes - October 17, 2026
- 5 Seed Bread Recipe: Nutty Crunch and Artisan Flavor in One Loaf - October 17, 2026
- 1 Lb Macaroni Salad Recipe: Bold, Crunchy, and Crowd-Pleasing - October 17, 2026