
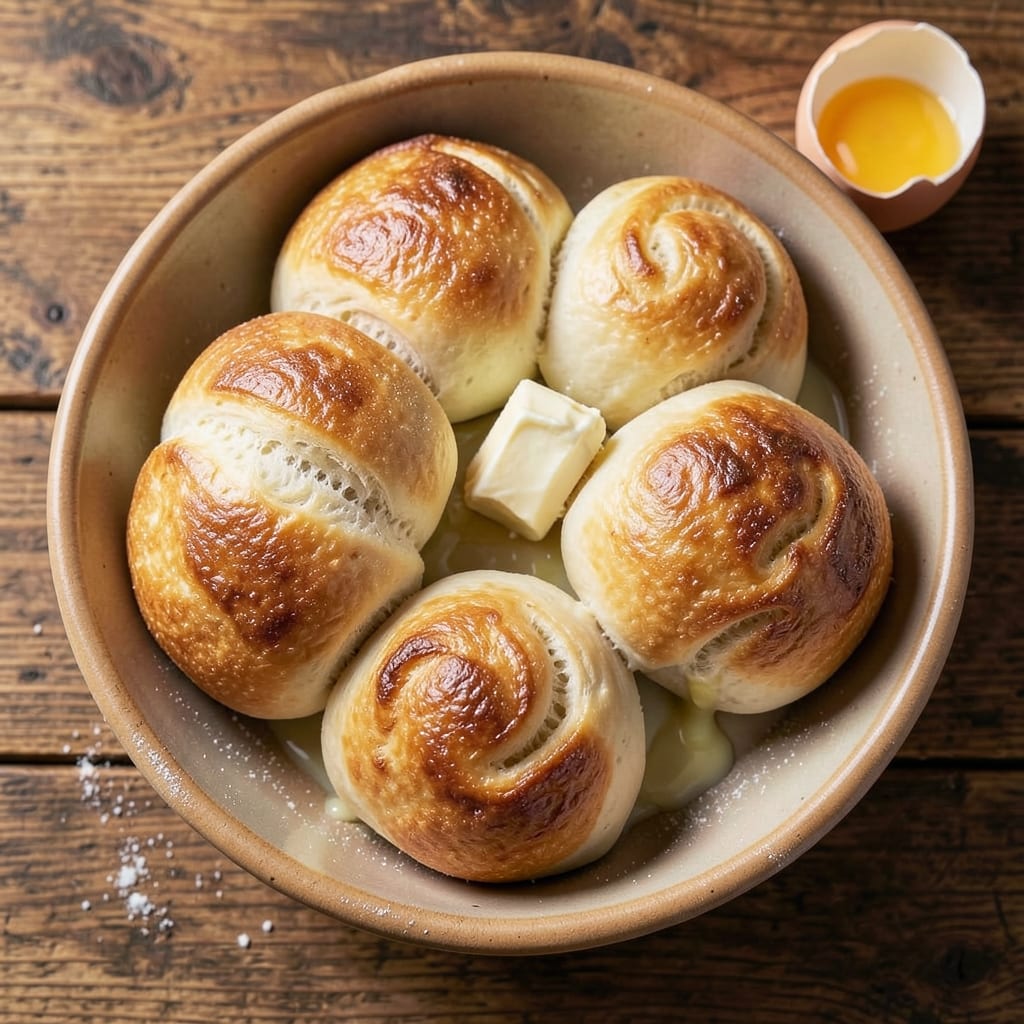
Making six perfect dinner rolls with a buttery golden crust and fluffy interior is the secret to elevating any meal from ordinary to extraordinary. The key lies in precise dough handling—kneading just enough to develop gluten without overworking it—and letting the rolls proof until they nearly double in size.
I’ve perfected this recipe after years of testing, and the results are rolls that stay soft for hours while delivering that satisfying crunch when sliced.
The process begins with a simple dough made from just five ingredients, but the technique makes all the difference. Warm milk activates the yeast perfectly, while the butter creates pockets of steam during baking that give those signature airy layers.
What sets these rolls apart is the 30-minute proofing time at room temperature before the final rise in a warm oven—this ensures even baking and that signature golden crust without burning.
By the time they emerge from the oven, you’ll have rolls with a crispy, buttery exterior that shatters slightly when cut and a tender, pillowy interior that melts in your mouth.
The aroma alone will have everyone at the table anticipating dinner. These rolls are perfect for soaking up gravy, pairing with soups, or simply serving warm with butter.
One of the best parts? They keep well for 2-3 days at room temperature or can be frozen for up to a month. Whether you’re hosting a dinner party or just want to impress with homemade bread, this recipe delivers restaurant-quality results with minimal effort.
Let’s get started on making your table look—and taste—like a five-star restaurant.
Ingredients for 6 dinner rolls
Five simple ingredients transform into six golden, fluffy rolls that’ll make your dinner table shine.
| Ingredient | Amount | Notes |
|---|---|---|
| All-Purpose Flour 🌾 | 3 ½ cups | White flour, spooned and leveled |
| Instant Yeast 🍞 | 1 tsp | Active dry works too |
| Granulated Sugar 🍚 | 1 tbsp | White sugar preferred |
| Unsalted Butter 🧈 | ½ cup | Cold, cubed for texture |
| Warm Whole Milk 🥛 | ¾ cup | 110°F, not boiling |
| Large Egg 🥚 | 1 whole | Room temperature |
| Diamond Crystal Kosher Salt 🧂 | ½ tsp | Adjust to taste |
| All-Purpose Flour (for dusting) 🌾 | ¼ cup | Extra for shaping |
| Egg Wash 🥚 | 1 whole | Beaten with 1 tsp water |
| Coarse Sugar (for topping) 🍚 | 1 tbsp | Optional for crust |
The flour is everything here—King Arthur or Gold Medal are my go-tos for that perfect texture. That butter? Use European-style if you can find it—it’s softer and gives a richer flavor. The milk needs to be warm (110°F), not hot—yeast hates heat. I always grab the large eggs from the store; they’re more consistent for baking. And that yeast? Fresh is best, but if yours is old, toss it in warm water with a pinch of sugar—if it bubbles, it’s good to go.
No instant yeast? Active dry works too, just let it proof 5 minutes longer. Butter too soft? Pop it in the fridge for 10 minutes to firm up. The dough should be tacky but not sticky—add a splash more milk if needed. For the egg wash, I like to add a pinch of salt for extra flavor. And that coarse sugar topping? Skip it if you’re watching sugar, but it’s worth the extra minute for that caramelized crust.
These rolls stay fresh for 2-3 days at room temperature, wrapped in a clean towel. Freeze them shaped but unproofed—just thaw and proof when ready to bake. Double the recipe if you’re feeding a crowd; they freeze beautifully. Pro tip: brush with extra melted butter after baking for that restaurant-style finish.
Why You’ll Love This Recipe
- No-Knead Magic: I swear by this—just mix, wait, shape, and bake. The yeast does all the heavy lifting while I sip my coffee, and those pillowy rolls? Ready in under an hour with zero fuss.
- Buttery Soft Payoff: That warm milk and cold butter combo? It’s the secret to rolls so tender they practically melt in your mouth. Honestly, the first time I tried it, I nearly licked the bowl.
- Weeknight & Holiday Hero: Make a batch on Sunday, freeze them, and pull them out for Tuesday dinners or Thanksgiving leftovers. They reheat like they just came out of the oven—no one will guess they’ve been waiting.
- Budget-Friendly Staple: Six rolls for pennies? With flour, yeast, and butter already in my pantry, this costs me less than takeout—and feeds my family twice as well. My wallet thanks me every time.
Step-by-step instructions for fluffy dinner rolls
Here’s how to make dinner rolls so light and buttery they’ll disappear faster than you can say “rolls for dinner.”
Mix the Dough for Maximum Fluff
In a large bowl, whisk together the 3.5 cups all-purpose flour, 1 tsp instant yeast, 1 tbsp granulated sugar, and 0.5 tsp diamond crystal kosher salt. This dry mix is your foundation—make sure the yeast is evenly distributed so it activates properly later.
Add the 0.5 cup cold unsalted butter (cut into small cubes) and use a pastry cutter or your fingers to work it into the flour until you see pea-sized butter pieces throughout. This cold butter is what creates those irresistible flaky layers later. Then pour in the 0.75 cup warm whole milk (around 110°F) and mix until a shaggy dough forms.
Create a well in the center and add the 1 whole large egg. Using a wooden spoon, gradually incorporate the egg into the dough until it comes together. The dough will be sticky—don’t panic. This is normal with this recipe. Once combined, turn it out onto a lightly floured surface and knead gently for about 2 minutes until smooth and elastic. You’re not trying to develop gluten here—just enough to bring it together.
Let the Dough Rise Until Puffy
Place the dough in a lightly greased bowl, cover it with a clean kitchen towel, and let it rise in a warm place for about 1 hour. You’ll know it’s ready when the dough has doubled in size and looks light and airy. I like to put my oven on its lowest setting with a bowl of hot water inside to create a warm, moist environment—this helps the yeast work its magic faster.
If your kitchen is particularly cold, you might need to give it a little extra time. The dough should spring back slowly when you press it gently with your finger—that’s your sign it’s ready for the next step. Don’t rush this part; proper rising is what gives these rolls their signature fluffiness.
Shape and Second Rise for Perfect Texture
Punch down the risen dough to release any air bubbles, then divide it into 6 equal pieces. I like to use a kitchen scale for this to ensure each roll gets the same amount of dough. Roll each piece into a smooth ball, then place them on a parchment-lined baking sheet about 1 inch apart. They’ll expand as they rise, so don’t crowd them.
Cover the baking sheet with another towel and let the rolls rise for another 30-45 minutes until they’ve puffed up noticeably. The edges should look slightly rounded and the tops should have risen about halfway up the sides. This second rise is crucial—it’s what gives them that light, airy texture we’re after.
Bake to Golden Perfection
Preheat your oven to 375°F while the rolls are rising. Once they’re puffy and ready, brush them with the egg wash (1 whole egg beaten with 1 tsp water) for that beautiful golden finish. Sprinkle the tops with 1 tbsp coarse sugar if you’re using it for that extra-crispy crust.
Bake for 15-18 minutes until the rolls are deep golden brown all over and sound hollow when tapped on the bottom. The aroma filling your kitchen at this point is worth every minute of waiting. For maximum freshness, serve them warm straight from the oven—these rolls are best enjoyed while they’re still tender and steaming.
Pro Tips For Making 6 Dinner Rolls
- Test Yeast First: Mix the warm milk with yeast and a pinch of sugar in a small bowl—if it doesn’t foam within 5 minutes, your yeast is dead. Trust me, I’ve wasted dough waiting for bubbles that never came.
- Soften Butter Properly: Cut the cold butter into tiny cubes and let it sit at room temperature for 20-30 minutes—just until it’s soft enough to press with a finger, not melt. Over-soft butter makes rolls greasy, and nobody wants that.
- Knead Until Smooth: Stop when the dough passes the “windowpane test”—stretch a small piece, and if it’s translucent and thin like a balloon skin, you’re done. Over-kneading ruins the texture, and under-kneading means dense rolls.
- Shape Rolls Fast: Roll the dough into balls immediately after kneading while it’s still stretchy—don’t let it sit. If you pause, the gluten tightens, and shaping becomes a struggle. Speed matters here.
Serving suggestions for leftovers
Gravy Soakers
These rolls are made for gravy—thick, rich beef or mushroom gravy soaks right in, creating a perfect balance of buttery bread and savory sauce. I like to serve them with my homemade pan gravy made from browned flour, beef drippings, and a splash of beef broth.
For extra decadence, add a sprinkle of fresh parsley after serving. 🥄
Soup Sidekicks
Pair these rolls with hearty soups like creamy potato leek or classic chicken noodle. The rolls act as a warm, comforting companion that contrasts beautifully with the broth.
I often serve them with a side of garlic butter for dipping—just melt 2 tbsp butter with 1 minced garlic clove and a pinch of salt. The garlic flavor complements the rolls perfectly.
Breakfast Upgrade
Don’t limit these rolls to dinner! Serve them warm with scrambled eggs, crispy bacon, and a dollop of maple syrup for a weekend brunch that feels special. The buttery crust adds a satisfying crunch to soft eggs, while the fluffy interior soaks up any runny yolks.
For a sweet touch, brush the baked rolls with honey butter before serving.
Party Platter Staple
For gatherings, arrange the rolls on a wooden board with warm honey butter in a small bowl and crumbled sausage scattered around. The combination of savory and sweet makes this a crowd-pleaser.
I like to add a few fresh rosemary sprigs for a touch of elegance that pairs perfectly with the buttery rolls.
Sandwich Base
Use these rolls as a base for gourmet sandwiches like pulled pork or grilled chicken. The fluffy interior holds up to juicy fillings while the crispy crust adds texture.
Toast the rolls lightly before assembling to keep them warm and crispy. For extra flavor, brush the tops with garlic-infused olive oil before toasting.
Storage-Friendly Serving
Keep baked rolls fresh for serving later by storing them in an airtight container lined with a clean kitchen towel. Reheat in a 350°F oven for 5-7 minutes to restore their warmth and crispiness.
For a quick refresh, brush with melted butter and sprinkle with flaky sea salt before serving. This works wonders for leftovers! 💫
Nutrition facts
Frequently asked questions
Can I make these dinner rolls without butter?
Yes, you can substitute butter with 2 tablespoons melted coconut oil or 2 tablespoons vegetable shortening for a similar texture. Just keep in mind the flavor will be slightly different—butter gives that rich, buttery taste these rolls are known for. If you’re avoiding dairy, the coconut oil option works best for a neutral flavor.
Why did my rolls turn out dense instead of fluffy?
Dense rolls usually happen when the dough is overworked or didn’t rise long enough. Make sure you’re only kneading for about 2 minutes—you’re not trying to develop gluten like you would with bread. Also, check your yeast is fresh (it should bubble when mixed with warm water and sugar) and that your kitchen is warm enough (75°F+ is ideal). A warm oven with a bowl of hot water creates the perfect proofing environment.
How do I keep these rolls soft for more than a day?
Store them in an airtight container lined with a clean kitchen towel to prevent drying out. For extra freshness, brush the tops with melted butter before storing. Reheat in a 350°F oven for 5-7 minutes to restore their warmth and softness. If they cool completely, you can also microwave them for 10-15 seconds with a damp paper towel over them to revive the moisture.
Can I make these rolls in a bread machine?
Use the dough cycle with 3.5 cups flour, 1 tsp yeast, 1 tbsp sugar, 0.5 tsp salt, 0.5 cup cold butter, 0.75 cup warm milk, and 1 egg. The machine will handle the kneading and first rise for you. After it completes, shape the dough into rolls, let them rise for 30 minutes, then bake as directed. The texture will be slightly different but still delicious!
What’s the best way to reheat leftover rolls?
For the best results, reheat in a 350°F oven for 5-7 minutes with a splash of water in the pan to create steam. This restores the crispy crust while keeping the interior soft. If you’re short on time, wrap them in a damp paper towel and microwave for 10-15 seconds. For a quick upgrade, brush with melted butter and sprinkle with flaky salt after reheating for that fresh-from-oven taste.

- Baked Potatoes in Crock Pot Recipe: Buttery Interiors and Crispy Top Magic - November 1, 2026
- Braised Beef Short Ribs Recipe: Crock Pot Fall-Off-Bone Magic in 6 Hours - November 1, 2026
- Crock Pot Cocoa Recipe: Velvety Warmth With Hidden Spice Magic - November 1, 2026