
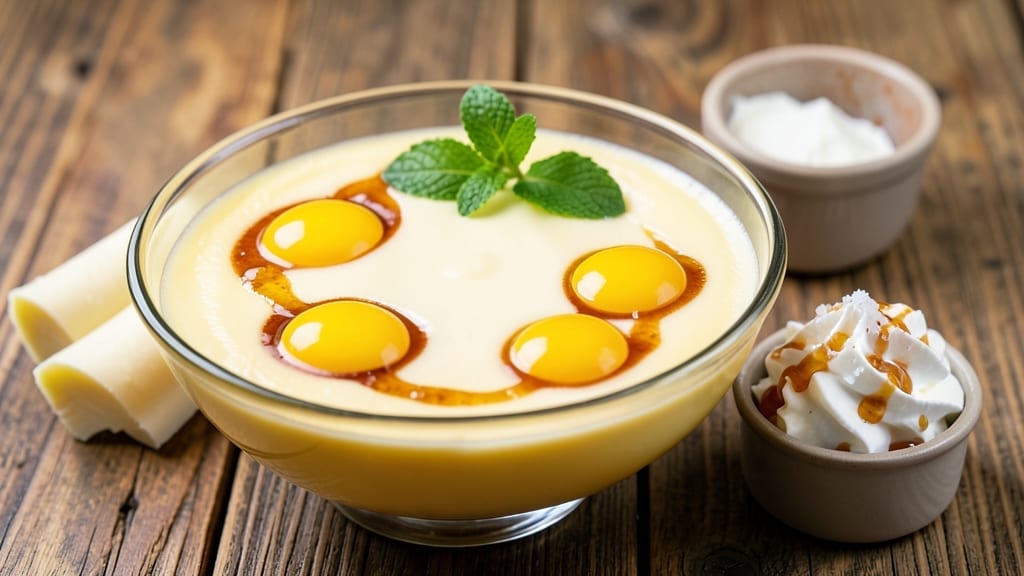
Mastering a 6-egg yolk custard with silky smooth texture and zero curdling is the secret to restaurant-quality desserts like crème brûlée or flan. The key lies in precise tempering—slowly incorporating the yolks into warm milk to prevent scrambling while building rich, velvety depth.
I’ve perfected this technique over years of testing, and it delivers a custard so luscious it practically melts in your mouth with every spoonful.
This recipe uses a classic bain-marie method (water bath) to ensure even cooking without risking overheating, which guarantees that signature creamy consistency. The slow, gentle heat allows the custard to thicken gradually, creating a texture that’s both firm enough to hold shape and tender enough to dissolve on your tongue.
No special equipment is needed—just a double boiler or a heatproof dish in a roasting pan.
What sets this custard apart is its foolproof approach to avoiding common pitfalls like graininess or curdling. By whisking constantly during tempering and straining the final mixture, you eliminate any risk of lumps while preserving that luxurious mouthfeel.
The result? A dessert filling so rich and smooth it transforms basic pastry shells into something extraordinary.
Once baked to perfection, this custard can be served as-is for a simple yet elegant dessert, topped with caramelized sugar for crème brûlée, or poured into individual ramekins for individual servings. The possibilities are endless, but the technique remains the same—precision and patience pay off in every bite.
Ingredients for 6 egg yolk custard
Six simple ingredients transform into velvety custard—no curdling, just pure silkiness.
| Ingredient | Amount | Notes |
|---|---|---|
| Large Egg Yolks 🥚 | 6 whole | Fresh, room temperature preferred |
| Whole Milk 🥛 | 3 cups | Full-fat for richest texture |
| Granulated Sugar 🍚 | 1 cup | Superfine preferred for smoothness |
| Vanilla Extract 🌿 | 1 tbsp | Pure, high-quality preferred |
| Unsalted Butter 🧈 | 4 tbsp | Cold, cut into small pieces |
| Salt 🧂 | ¼ tsp | Fine sea salt preferred |
| Cornstarch 🌾 | 1 tbsp | For extra stability (optional) |
| Lemon Zest 🍋 | 1 tsp | Fresh, finely grated |
The yolks are non-negotiable—fresh, room-temperature yolks emulsify better and prevent graininess. Grab them from the middle of the egg carton (oldest first) and let them sit out for 10 minutes before using. Whole milk matters here too—full-fat gives that luxurious mouthfeel, while reduced-fat versions risk separation. For the sugar, superfine dissolves faster (no graininess), but regular granulated works if you pulse it in a food processor first. The butter? Cold, cubed pieces melt slowly during tempering, creating pockets of richness without breaking the emulsion.
No vanilla extract? Vanilla bean paste or even vanilla sugar works in a pinch—just adjust the sugar amount. Short on cornstarch? Skip it entirely—this recipe is already foolproof without it. The lemon zest might seem optional, but it brightens the custard and balances the richness. If you’re making this for a crème brûlée, double the zest. For extra insurance against curdling, whisk the yolks and sugar until they’re pale and ribbon-like before adding the milk. And if you’re nervous about tempering, heat the milk to 160°F (71°C) max—any hotter and you risk scrambling.
This custard keeps beautifully—3-4 days in the fridge, fully chilled, in an airtight container. For longer storage, freeze in ramekins or silicone molds for up to 3 months. Thaw overnight in the fridge before serving. Pro tip: if the custard sets too firmly after chilling, give it a quick 30-second microwave zap to soften before serving. And if you’re making multiple ramekins, preheat them in the oven alongside the water bath—they’ll heat more evenly.
Why You’ll Love This Recipe
- No Whisk Arm Fatigue: I’ll be honest—this custard only needs a few minutes of whisking over a double boiler, and the yolks blend into silkiness without turning into scrambled eggs. That first spoonful? Worth every second.
- Velvet-Smooth Payoff: The butter and sugar melt right into the warm milk, creating this rich, almost liquid texture that coats your spoon. Add a splash of vanilla, and suddenly you’ve got dessert-level comfort in a bowl.
- Weeknight Magic: Between us, I’ve used this custard for breakfast (poured over toast), dessert (chilled with berries), or even as a sauce for pancakes. Six yolks stretch far—perfect when I’m feeding myself or a crowd on short notice.
- Pantry Staple Power: You’re already using eggs, milk, and sugar—this recipe costs pennies and turns them into something luxurious. Leftovers? Just reheat gently or stash them in the fridge for days. Minimal effort, maximum reward.
Step-by-step instructions for 6-Egg yolk custard
Here’s how to make velvety custard that never curdles—just follow these precise steps.
🍳 Step 1: Temper the Egg Yolks with Milk
Place the 6 whole large egg yolks in a medium heatproof bowl. In a separate saucepan, gently warm the 3 cups whole milk over medium-low heat until it reaches 160°F—just before it starts to simmer. This temperature is critical; it’s hot enough to cook the custard properly but not so hot it scrambles the eggs.
With the milk still warm, slowly pour about ½ cup of the hot milk into the yolks while whisking vigorously. This gradual introduction, called tempering, prevents the eggs from curdling when exposed to heat. Once the mixture is smooth, continue whisking and slowly add the remaining milk in a thin stream, ensuring the temperature difference doesn’t shock the eggs.
🍳 Step 2: Whisk in Sugar, Vanilla, and Stabilizers
Transfer the tempered mixture back to the saucepan and return it to the stove over low heat. Add the 1 cup granulated sugar, 1 tablespoon vanilla extract, 1 teaspoon lemon zest, 0.25 teaspoon salt, and 1 tablespoon cornstarch. The cornstarch acts as a stabilizer, giving your custard a thicker, silkier texture without curdling. Whisk constantly to dissolve the sugar completely and prevent any graininess.
Here’s the thing—cornstarch is optional, but I always use it. It creates a smoother finish and prevents that dreaded curdled texture. If you skip it, your custard will still work, but it might be slightly thinner. Keep whisking until everything is fully incorporated and the mixture is smooth and homogeneous.
🔥 Step 3: Cook on Low Heat Until Thickened
Continue cooking the custard over low heat, stirring constantly with a wooden spoon or silicone spatula. This step is all about patience—you want to maintain a gentle simmer without letting it boil. After about 5-7 minutes, the custard will begin to thicken noticeably. To test for doneness, dip a clean spoon into the mixture and run your finger through it—if it leaves a clean line, your custard is ready.
If the custard starts to bubble or looks like it’s about to boil, immediately reduce the heat to the lowest setting. Overcooking is the fastest way to curdle custard, so keep a close eye on it. The moment it reaches a pudding-like consistency, remove it from the heat. The residual heat will continue to cook it slightly, so don’t wait until it’s fully set.
🥘 Step 4: Incorporate Butter for Richness
Remove the saucepan from the heat and immediately stir in the 4 tablespoons cold unsalted butter, cut into small pieces. The butter should melt into the custard, creating a luxurious, velvety texture. If you add it too early, the butter might separate instead of emulsifying properly. Work quickly but thoroughly to ensure each spoonful of custard is enriched.
Here’s a pro tip: If the custard starts to thicken too much while you’re working, you can thin it slightly with a splash of warm milk. But ideally, it should be thick enough to coat the back of a spoon but still pour smoothly. Once fully incorporated, transfer the custard to a heatproof bowl or ramekins, cover with plastic wrap (pressed directly onto the surface to prevent a skin from forming), and let it cool to room temperature.
⏰ Step 5: Chill for Maximum Silky Texture
Place the custard in the refrigerator for at least 4 hours, or preferably overnight. This chilling step is non-negotiable—it allows the flavors to meld and the texture to set properly. When you’re ready to serve, give the custard a gentle stir to ensure it’s smooth and consistent. If you notice any separation, simply whisk it back together until it’s uniform.
Serve the custard chilled, either as a standalone dessert or layered with fresh fruit, whipped cream, or a sprinkle of toasted nuts. The result should be a silky, luxurious custard with a perfect balance of sweetness and tang from the lemon zest. If you followed these steps carefully, you won’t encounter any curdling—just pure, creamy perfection.
Pro Tips For Making 6 Egg Yolk Custard
- Whisk Until Ribbon Stage: You’re not just whisking—you’re testing for that thick, glossy ribbon when the whisk trail holds for a second. Skip this, and your custard will either curdle or taste raw. I learned this the hard way when my first batch separated like a sad salad.
- Strain the Milk: Whole milk straight from the fridge has tiny particles that turn custard grainy. Heat it to 185°F (85°C) and strain it through a fine-mesh sieve—yes, even if it looks clean. This isn’t about aesthetics; it’s about texture. Trust me, your future self will notice the difference.
- Don’t Rush the Tempering: Pouring hot milk into cold yolks too fast? You’re asking for scrambled eggs. Slowly drizzle the milk into the yolks while whisking constantly—think of it like a slow dance, not a sprint. After burning three batches, I finally figured out that patience here means a silky finish.
- Use Room-Temp Butter: Cold butter cubes? They’ll sit like rocks in your custard. Let that unsalted butter soften to the touch before folding it in—just press a finger into it, and it should leave a slight dent. Sounds weird, but it works: your custard will be luscious, not clumpy.
Troubleshooting perfect results
Curdling Prevention
Your custard will curdle if the eggs hit hot milk too quickly. Always temper by whisking ½ cup warm milk (160°F) into the yolks first, then slowly add the rest.
I’ve seen home cooks skip this step and end up with scrambled eggs—don’t be that person! If you accidentally curdle, strain the mixture through a fine-mesh sieve to salvage it. 🥚
Grainy Texture Fix
Graininess happens when sugar doesn’t dissolve fully. Whisk the sugar into the warm milk mixture until completely dissolved before combining with yolks. For extra smoothness, pulse granulated sugar in a food processor first. If you notice grains after chilling, simply whisk the custard vigorously to break them up.
Undercooked or Runny Custard
If your custard isn’t setting properly, it likely didn’t cook long enough. Test doneness by coating the back of a spoon—it should leave a clean line. For extra insurance, cook 2-3 minutes longer than you think needed.
If it’s still too thin after chilling, reheat gently over low heat, stirring constantly until thickened.
Overcooked or Scrambled
Overcooking is the #1 cause of scrambled custard. Remove it from heat the moment it reaches a pudding-like consistency—residual heat will finish cooking it. If it starts to bubble, immediately lower the heat.
For a second chance, strain the mixture through cheesecloth to remove any cooked egg bits, then whisk in 1 tbsp cold milk to restore creaminess.
Skin Formation
That rubbery skin on top happens when custard cools uncovered. Press plastic wrap directly onto the surface while chilling to prevent this. If a skin forms, whisk it out before serving—or better yet, use a fine-mesh sieve to strain it smooth.
For future batches, always cover tightly with plastic wrap touching the custard’s surface. ✨
Weak Flavor Development
If your custard tastes bland, it likely didn’t chill long enough. The flavors meld during the 4+ hour refrigeration. For deeper flavor, infuse the milk with vanilla bean or cinnamon sticks while warming. I also recommend adding 1 tsp lemon juice alongside the zest—it brightens the sweetness without overpowering.
Nutrition facts
Frequently asked questions
Can I substitute whole milk with a dairy-free alternative?
While traditional custard relies on whole milk for richness, you can use full-fat coconut milk or oat milk with 2% fat content for a dairy-free version. However, expect a slightly different texture—coconut milk adds a subtle sweetness, while oat milk may yield a creamier but less stable custard. Always temper the eggs carefully and add 1 extra tbsp cornstarch to help with thickening.
How do I adjust this recipe for a gluten-free crust?
This custard works beautifully with gluten-free pastry crusts like almond flour or gluten-free shortbread. Just ensure your crust is pre-baked to prevent sogginess—most gluten-free bases absorb moisture differently. For extra insurance, add a thin layer of jam or fruit compote between the crust and custard to create a moisture barrier.
Why does my custard sometimes separate after chilling?
Separation usually happens from either overcooking or rapid temperature changes. If this occurs, whisk the custard vigorously to re-emulsify, then strain through a fine-mesh sieve. For prevention: 1) Remove from heat at the first sign of thickening (not when fully set), and 2) Chill gradually in the fridge (don’t use ice baths). A splash of warm milk can also help restore smoothness if needed.
Can I make this custard ahead of time?
This custard actually improves with time. Prepare it up to 3 days ahead and store in an airtight container in the fridge. For longer storage, freeze in ramekins or silicone molds for up to 3 months. Thaw overnight in the fridge—never at room temperature—and give it a quick whisk before serving to restore silky texture.
What’s the best way to reheat chilled custard?
For serving warm, place chilled custard in a heatproof bowl and gently warm over a double boiler or in the microwave at 50% power for 20-30 second intervals, stirring between each. Never boil—just heat until it reaches 120°F (49°C). For extra creaminess, whisk in 1 tbsp cold butter after reheating. This method preserves the silky texture while making it serveable warm.

- 77 Texas BBQ Taco Sauce Recipe: Smoky Chipotle Heat With Caramelized Depth - October 19, 2026
- 1930’s Chocolate Cake Recipe: Vintage Richness With Vanilla Bean Swirls - October 19, 2026
- 6 Ingredient Bread Recipe: No-Knead Wonder With Pantry Staples - October 19, 2026