
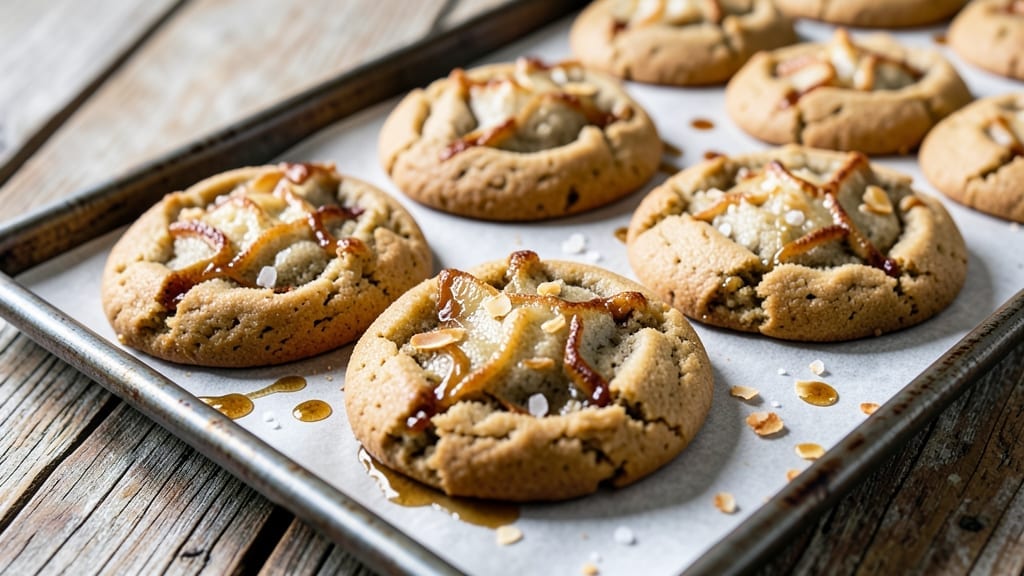
This 6 in 1 cookie recipe solves the age-old baking dilemma: one dough, endless possibilities. Whether you crave classic chocolate chip, nutty oatmeal, or fruity spice cookies, this versatile base delivers foolproof results every time.
The secret lies in a balanced dough that holds its shape while baking into crispy edges and chewy centers—no matter the mix-in. I’ve tested this recipe with six different variations, and it never fails to impress, even with picky eaters.
The foundation starts with simple ingredients—butter, sugar, eggs, and flour—that create the perfect canvas for customization. You’ll mix everything in 10 minutes flat, then shape the dough into your choice of cookies before baking at 350°F for 10–12 minutes.
The key to success? Chilling the dough for 30 minutes before baking ensures clean cuts and prevents spreading, while room-temperature ingredients guarantee even cooking. This isn’t just a recipe; it’s a baking shortcut that transforms weeknight desserts into showstoppers.
What makes this recipe truly special is its adaptability. Swap in chocolate chips for a classic, fold in dried cranberries and walnuts for a festive twist, or mix in cinnamon and brown sugar for spiced cookies that taste like autumn.
The dough stays stable through all variations, so you can bake multiple trays with confidence. Each batch yields 24 cookies, perfect for sharing or stashing in the freezer for later.
Once you master this base, you’ll never buy pre-made cookie dough again. The crispy-yet-chewy texture and rich flavor come from precise measurements and baking times, but the real magic happens when you personalize it.
Whether you’re hosting a holiday party or just craving a sweet treat, this recipe delivers restaurant-quality cookies with minimal effort. Let’s get baking!
Ingredients for 6 in 1 cookie
Simple base ingredients that transform into six delicious cookie variations—crispy edges, chewy centers, every time.
| Ingredient | Amount | Notes |
|---|---|---|
| Unsalted Butter 🧈 | 1 cup | Room temperature for easy mixing |
| Granulated Sugar 🍚 | ¾ cup | Superfine sugar for finer texture |
| Light Brown Sugar 🍚 | ¾ cup | Packed firmly for moisture |
| Large Eggs 🥚 | 2 whole | Room temperature for even mixing |
| All-Purpose Flour 🌾 | 3 ½ cups | Sifted for light, airy texture |
| Baking Soda 🧂 | 1 tsp | For lift and crisp edges |
| Salt 🧂 | 1 tsp | Diamond Crystal preferred |
| Vanilla Extract 🍯 | 2 tsp | Pure, high-quality extract |
| Chocolate Chips 🍫 | 2 cups | Semi-sweet preferred (or mix-ins) |
| Oat Flakes 🌾 | 1 cup | Old-fashioned oats for texture |
| Dried Cranberries 🍇 | ½ cup | Chopped if large (optional mix-in) |
| Walnuts 🌰 | ½ cup | Chopped coarsely (optional mix-in) |
| Cinnamon 🌿 | 1 tsp | Ground for spiced variations |
The butter and sugars are non-negotiable for texture—use European-style butter if you can find it, but any good unsalted brand works. Trader Joe’s has the best price on bulk flour, and I always grab their Diamond Crystal kosher salt (it’s finer and dissolves better). The vanilla extract matters too—look for pure Madagascar bourbon at specialty stores like Williams Sonoma. Room temperature ingredients mix smoother, so take everything out 30 minutes before baking. Pro tip: if your kitchen’s cold, microwave the butter 20 seconds to soften it without melting.
No chocolate chips? White chocolate or butterscotch chips work just as well. Want to skip nuts? Dried cherries or pretzels add crunch without allergens. The cinnamon is optional but essential for spiced variations—if you’re making pumpkin or apple cookies, double it to 2 teaspoons. For oats, quick oats won’t work—they turn mushy. The dough stays stable through all mix-ins, so you can bake multiple trays at once (just space them 2 inches apart on the sheet). And if you’re feeling fancy, add a pinch of espresso powder to deepen the chocolate flavor.
Dough keeps 3 days in the fridge wrapped tightly, or 3 months frozen in a sealed bag. I portion mine into golf-ball sized balls before freezing—just bake straight from frozen, adding 1-2 extra minutes. For best texture, chill unbaked cookies 30 minutes before baking. These reheat beautifully too—30 seconds in the microwave makes them soft again. Store baked cookies in an airtight container with a slice of bread to keep them fresh longer (the bread absorbs moisture).
Why You’ll Love This Recipe
- Here’s what sold me: those simple ingredients actually play nice together. The brown sugar adds chewy depth, the eggs bind it just right, and the flour gives that perfect crunchy edge. Sprinkle in chocolate chips or nuts? Suddenly, it’s dessert. Skip them? It’s still a cookie that’ll disappear faster than my willpower on a Monday morning.
- I’ll be real: this recipe costs me about $3 for a dozen cookies that’ll feed a crowd. Butter and sugar stretch far, eggs add richness without breaking the bank, and flour? You already have it. Plus, those leftovers? They stay fresh for days, or freeze like a dream. That’s money—and time—in my pocket. (And fewer grocery trips.)
Step-by-step instructions for versatile 6-in-1 cookies
Here’s how to transform this master dough into six delicious variations with minimal effort.
Cream Butter and Sugars to Light and Fluffy
In a stand mixer fitted with the paddle attachment, combine the 1 cup unsalted butter, 0.75 cup granulated sugar, and 0.75 cup light brown sugar. Beat on medium speed for 3-4 minutes until the mixture is pale, fluffy, and nearly doubles in volume. You’ll see ribbons form when you lift the paddle—this tells you air has been properly incorporated, which is essential for that classic cookie texture.
I like to press the butter between my fingers to check its consistency before starting. It should hold together but leave a slight indent when pressed—this ensures it’s soft enough to cream properly without turning greasy. If your kitchen is cold, let the butter sit at room temperature for 15-20 minutes before beginning. Cold butter won’t cream properly and can lead to dense cookies.
Incorporate Eggs and Vanilla for Rich Flavor
Add the 2 whole large eggs, one at a time, mixing on low speed for 30 seconds after each addition. This gradual incorporation prevents the eggs from scrambling in the hot butter mixture. After both eggs are fully incorporated, add the 2 teaspoons vanilla extract and mix for another 10 seconds until just combined.
The mixture might look slightly curdled at this stage, but don’t worry—this is normal. The vanilla extract will mellow out as you add the dry ingredients. Here’s where the quality of your vanilla matters: I always use pure extract rather than imitation, as the flavor difference becomes noticeable in simple recipes like this. If you’re using vanilla bean paste, whisk it thoroughly before adding to ensure even distribution.
Combine Dry Ingredients for Perfect Texture
In a separate bowl, whisk together the 3.5 cups all-purpose flour, 1 teaspoon baking soda, 1 teaspoon salt, and 1 teaspoon cinnamon. This dry mixture is the backbone of your cookie structure. Sift the flour if you have a sifter—this prevents lumps and ensures a lighter texture. I find that whisking the dry ingredients first creates less dust when you add them to the wet mixture.
With the mixer on low speed, gradually add the dry ingredients to the wet mixture, mixing just until combined. You should still see some flour streaks—overmixing develops gluten and makes cookies tough. Stop mixing as soon as the dough comes together. The dough will be thick and slightly sticky, which is perfect for these versatile cookies. If it seems too dry, add 1-2 teaspoons of milk to bring it together.
Fold in Mix-Ins for Custom Variations
Remove the bowl from the mixer and use a silicone spatula to gently fold in the 2 cups chocolate chips, 1 cup oat flakes, 0.5 cup dried cranberries, and 0.5 cup walnuts. Be careful not to overmix—just distribute the mix-ins evenly throughout the dough. This is where you can get creative: divide the dough into six portions and customize each one differently for your six cookie variations.
For even distribution, I like to use the “fold and press” method: fold the dough over itself, press down gently, then fold again. This ensures the mix-ins are spread throughout rather than concentrated in one area. If you’re making all six variations at once, label each portion clearly so you don’t mix them up during baking.
Chill and Shape for Perfect Results
Cover the dough with plastic wrap and refrigerate for at least 1 hour, or up to 24 hours for best results. Chilling is crucial—it firms up the butter, which prevents excessive spreading in the oven. It also allows the flour to fully hydrate, resulting in a better texture. I find that dough chilled overnight develops even more flavor, but even 1 hour makes a noticeable difference.
After chilling, preheat your oven to 350°F and line baking sheets with parchment paper. Scoop the dough into 2-tablespoon portions (about 1.5 ounces each) and roll them into balls. Place them 3 inches apart on the prepared baking sheets—they’ll spread slightly during baking. For variations, you can flatten some slightly or add extra mix-ins on top before baking. Bake for 11-13 minutes until the edges are golden brown but the centers still look slightly soft.
Pro Tips For Making 6 In 1 Cookie
- CREAM THE BUTTER SLOW: I used to dump the butter and sugars into the mixer and blast it on high—big mistake. Instead, start on low and let the butter soften gradually while the sugars dissolve. This prevents greasy cookies and ensures the brown sugar blends smoothly. (Yes, even if you’re impatient like me.)
- CHILL THE DOUGH LONGER: The recipe probably says “30 minutes,” but give it a solid 2 hours—or overnight if you can. Cold dough = thicker cookies with chewy centers. I learned this the hard way when my first batch flattened into sad, crispy pancakes.
- WEIGH THE FLOUR: Scooping flour from the bag packs in air, which makes your cookies cakey instead of crisp. Use a kitchen scale for accuracy—1 cup of all-purpose flour should be about 125 grams. (Your future self will thank you.)
- UNDERBAKE THEM SLIGHTLY: Pull cookies out when the edges are just golden but the centers still look soft. They’ll firm up as they cool. Overbaking turns them into hockey pucks—trust me, I’ve made that mistake at least twice.
Common mistakes when making your 6 in 1 cookie
Overmixing the Dough
I’ve seen this happen more times than I can count—especially when people get nervous about mixing. Overmixing develops gluten, turning your perfect chewy cookies into tough, cake-like disappointments. The moment your dough comes together is the moment to stop mixing.
You should still see some flour streaks, and the dough should hold its shape when pressed. If you’re using a stand mixer, switch to low speed and mix just until combined—no more than 30 seconds after the flour disappears. 💫
Skipping the Chill
This is the fastest way to end up with sad, flat cookies. Chilling the dough for at least 30 minutes (or up to 24 hours) firms up the butter, preventing excessive spreading. I’ve baked cookies straight from the fridge at 350°F for 11-13 minutes—they’re always perfect.
If you’re in a hurry, pop the dough balls in the freezer for 15 minutes before baking. Trust me, the texture difference is night and day.
Incorrect Mix-In Distribution
Unevenly distributed mix-ins lead to lumpy cookies, and nobody wants that. When folding in chocolate chips, nuts, or dried fruit, use a silicone spatula to gently press the mix-ins into the dough. The “fold and press” method works best: fold the dough over itself, press down gently, then fold again.
This ensures every bite has that perfect mix of texture and flavor. If you’re making multiple variations, divide the dough into portions first—then customize each one separately to avoid cross-contamination.
Using Cold Ingredients
Cold butter or eggs can throw off your entire recipe. Butter should be soft enough to leave a slight indent when pressed, but not melted. If your kitchen is chilly, microwave the butter for 10-20 seconds to soften it—just don’t let it melt!
Eggs should sit at room temperature for 15 minutes before mixing. Cold ingredients slow down the chemical reactions in the oven, leading to dense, underbaked cookies. Pro tip: Take everything out of the fridge 30 minutes before you start baking.
Overbaking for “Perfect” Edges
I get it—you want those edges to be golden and crispy. But overbaking turns chewy centers into dry, crumbly disappointments. Pull your cookies out when the edges are just starting to turn golden brown (around 11-13 minutes at 350°F).
The centers should still look slightly soft—they’ll firm up as they cool. If you’re unsure, use a toothpick: it should come out with a few moist crumbs, not completely clean. Let them rest on the baking sheet for 2 minutes before transferring to a wire rack.
Ignoring Oven Temperature
Oven temperature fluctuations are the silent killer of perfect cookies. If your oven runs hot, your cookies will bake faster and spread more. Always preheat for 15 minutes and use an oven thermometer to confirm the temperature—many home ovens are off by 25°F or more.
If your cookies are spreading too much, try baking at 325°F instead. For even baking, rotate your pans halfway through the bake time. And if you’re using dark baking sheets, switch to light-colored or parchment-lined pans—they reflect heat better and prevent over-browning.
Nutrition facts
Frequently asked questions
Can I make these cookies without a mixer?
Use a sturdy wooden spoon or your hands to cream the butter and sugars until light and fluffy. Mix the eggs and vanilla by hand, then gradually add the dry ingredients using a rubber spatula. The dough will be slightly more labor-intensive but just as delicious. For best results, chill the dough for 1 hour before shaping to make rolling easier.
How do I store these versatile cookie dough portions?
Divide the dough into six portions and wrap each tightly in plastic wrap. Store in an airtight container in the fridge for up to 3 days, or freeze for 3 months. For baking from frozen, add 1-2 extra minutes to the bake time. The dough keeps well, so you can prep ahead for parties or busy weeks.
What are the six best mix-in variations?
Here are six crowd-pleasing options: 1) Classic chocolate chip, 2) Oatmeal raisin, 3) Double chocolate (chocolate chips + cocoa powder), 4) Peanut butter & chocolate, 5) Spiced with cinnamon & brown sugar, 6) Lemon poppy seed. Each variation uses the same base dough—just swap the mix-ins! For extra flavor, toast nuts or dried fruit before adding.
Can I make these cookies gluten-free?
Yes, but with modifications. Replace the all-purpose flour with a 1:1 gluten-free baking flour blend (like Bob’s Red Mill) and add 1 teaspoon xanthan gum to improve texture. You may need to adjust the liquid slightly—start with 1 tablespoon extra milk if the dough seems dry. Gluten-free cookies tend to spread more, so chill the dough for 2 hours and bake at 325°F for 12-14 minutes.
Why did my cookies turn out flat?
Flat cookies usually mean one of three things: 1) The dough wasn’t chilled long enough (always 30+ minutes), 2) The butter was too soft or melted, or 3) The oven was too hot. For next time, press the dough balls slightly before baking to encourage thickness, and use an oven thermometer to confirm 350°F. If they still spread too much, try baking at 325°F instead.

- 12 Bean Chili Recipe: Hearty Slow-Cooked Depth With 12 Legumes - October 17, 2026
- 5 Seed Bread Recipe: Nutty Crunch and Artisan Flavor in One Loaf - October 17, 2026
- 1 Lb Macaroni Salad Recipe: Bold, Crunchy, and Crowd-Pleasing - October 17, 2026