
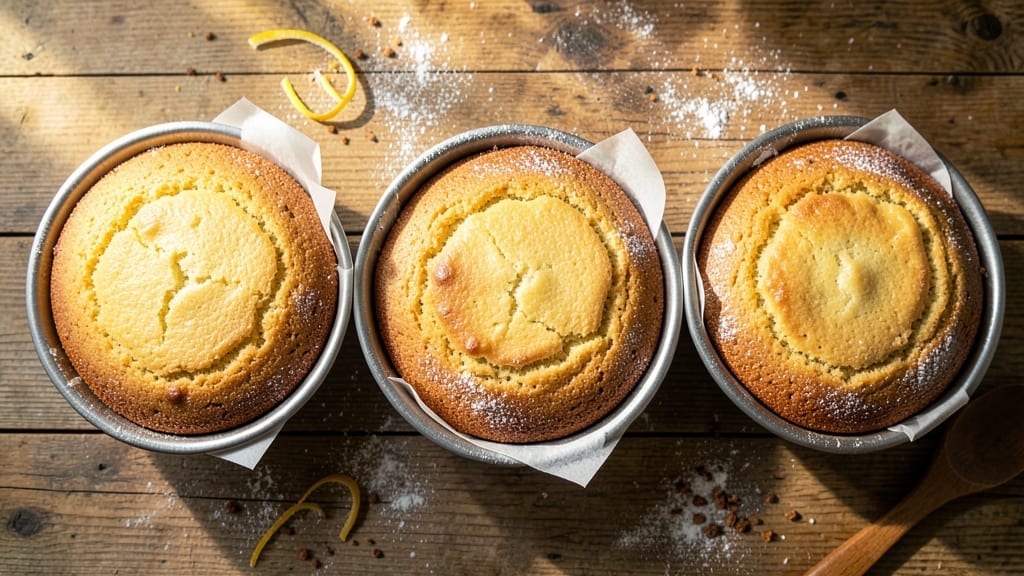
A 6-inch cake pan transforms simple vanilla cake batter into triple-layered magic—perfect for elegant desserts without the fuss of large pans. This recipe delivers moist, tender layers that stack beautifully, whether you’re baking for two or creating mini bundt cakes.
The secret lies in precise baking times and a foolproof vanilla batter that stays light and airy. What sets this recipe apart is its versatility—use it for individual servings, layered cakes, or even cupcakes.
Baking at 350°F ensures even cooking, while a simple buttercream or ganache ties the layers together. The result? A dessert that looks restaurant-worthy but comes together in under an hour. Each layer emerges with a golden dome, tender crumb, and subtle vanilla aroma that fills your kitchen.
The triple-layer technique creates height without bulk, making it ideal for special occasions or intimate gatherings. No special equipment needed—just a 6-inch pan and patience for perfect results. Master this method, and you’ll never buy store-bought cakes again. The key to success is patience during baking and careful layering.
Ready to bake? Let’s get started!
Ingredients for 6 in cake pan
Precision ingredients for triple-layered vanilla cake perfection in a 6-inch pan.
| Ingredient | Amount | Notes |
|---|---|---|
| All-Purpose Flour 🌾 | 2 ½ cups | Sifted for light texture |
| Granulated Sugar 🍚 | 2 cups | Superfine preferred for smoothness |
| Unsalted Butter 🧈 | 1 ½ cups | Room temperature for creaming |
| Large Eggs 🥚 | 4 whole | Room temperature for even baking |
| Pure Vanilla Extract 🌿 | 2 tsp | High-quality Madagascar preferred |
| Baking Powder 🧂 | 2 tsp | Freshly opened for leavening |
| Salt 🧂 | ½ tsp | Fine sea salt preferred |
| Milk 🥛 | 1 cup | Whole milk for richness |
| Vanilla Bean Seeds 🌿 | 1 whole | Scraped from 1 vanilla bean |
| Powdered Sugar 🍚 | 3 cups | For buttercream filling |
| Heavy Whipping Cream 🥛 | 1 cup | Cold for stable buttercream |
| Unsalted Butter 🧈 | ½ cup | Cold for buttercream |
| Vanilla Extract 🌿 | 1 tsp | For buttercream flavor |
| Powdered Sugar 🍚 | 1 cup | For dusting layers |
The flour quality matters most here—King Arthur or Gold Medal brands yield the lightest texture. Butter at room temperature is non-negotiable; cold butter creates dense layers. For vanilla, Madagascar beans from Penzeys deliver superior depth. Pre-sift your dry ingredients to eliminate lumps, and measure flour by weight if possible for consistency. The 6-inch pan should be well-greased with butter and lined with parchment circles cut to fit—this prevents cracking during layering.
No vanilla bean? Double the extract but add a pinch of almond extract for complexity. Substitute whole milk with evaporated milk for extra richness. For a lighter crumb, replace 1/4 cup of flour with cornstarch. The buttercream can be made ahead—simply whip the cold ingredients when ready to assemble. European-style butter (like Plugrá) yields a smoother finish. If you prefer ganache, swap powdered sugar for dark chocolate chips and heavy cream, then chill before assembling.
Store cake layers wrapped in plastic at room temperature for up to 2 days before assembling. The completed cake keeps 3 days refrigerated, but best enjoyed fresh. For longer storage, freeze fully assembled cake (without frosting) for 1 month3 days—rewhip before use. Always dust layers with powdered sugar between assembly to prevent sticking, and use a serrated knife for clean cuts.
Why You’ll Love This Recipe
- One-Pan Magic: I swear by this trick—six treats baked at once, no extra pans to scrub. Just mix the butter, sugar, and eggs until light, fold in the flour and vanilla, and pour into that cake pan. The oven does all the work while I sip my coffee.
- Vanilla Butter Bliss: That first bite? Pure comfort. The rich butter and sugar create a tender crumb, while the vanilla extract ties it all together with warmth. It’s the kind of flavor that makes you reach for a second piece—no guilt, just satisfaction.
- Weeknight Wonder: Between us, this is my secret weapon for busy evenings. Bake it for breakfast muffins, dinner rolls, or even a quick dessert. The same simple batter adapts to whatever I’m craving, and the kids never question what’s for dinner.
- Budget-Friendly Baking: Five basic ingredients stretch to feed a crowd without breaking the bank. Eggs and butter add richness, but the flour and sugar make it affordable. Plus, leftovers? They disappear faster than I can say “second helping.”
Step-by-step instructions for triple-layered vanilla cake
Precision and patience create this elegant cake—follow these steps to achieve flawless layers every time.
Prepare the Cake Batter for Perfect Texture
Preheat your oven to 350°F and grease three 6-inch round cake pans generously with butter, then dust with flour. Line the bottoms with parchment circles for easy removal. In a medium bowl, whisk together the 2.5 cups all-purpose flour, 2 tsp baking powder, and 0.5 tsp salt. Sift this dry mixture directly into a large mixing bowl to aerate it—this prevents dense layers.
In a separate large bowl, beat the 1.5 cups unsalted butter and 2 cups granulated sugar on medium speed with a mixer until light and fluffy, about 3-4 minutes. Add the 4 whole eggs, one at a time, mixing well after each addition. Scrape down the sides of the bowl to ensure even incorporation. Stir in the 2 tsp pure vanilla extract and the seeds scraped from 1 whole vanilla bean.
With the mixer on low speed, gradually add the dry ingredients to the wet, alternating with the 1 cup milk in three additions. Begin and end with the dry mixture to ensure proper blending. The batter should be smooth and slightly thick—this consistency guarantees tender crumb. Divide the batter evenly among the prepared pans, filling each about two-thirds full.
Bake Layers with Even Heat Distribution
Place the filled cake pans in the preheated oven, positioning them on the middle rack. Bake for 25-30 minutes, or until a toothpick inserted into the center comes out clean. Rotate the pans halfway through baking to ensure even browning. The cakes should spring back gently when pressed in the center—a visual cue they’re properly baked.
I recommend checking for doneness at the 25-minute mark as ovens vary. Overbaking dries out the layers, while underbaking leaves them gummy. Once done, remove the pans from the oven and let the cakes cool in their pans for 10 minutes. Then transfer them to a wire rack to cool completely before frosting. This gradual cooling prevents cracking.
Create Stable Buttercream for Decoration
While the cakes cool, prepare the buttercream by beating the 0.5 cup cold unsalted butter until smooth. Gradually add the 3 cups powdered sugar and 1 cup heavy whipping cream, mixing on medium speed until light and fluffy. Add the 1 tsp vanilla extract and beat for another 2-3 minutes until the mixture holds stiff peaks when tested with a spatula.
The buttercream should be thick enough to hold its shape but still pipeable. If it’s too soft, chill the bowl for 10 minutes and rebeat. For extra stability, I sometimes add 1 tsp cornstarch mixed with 1 tsp water to the sugar before beating—this creates a smoother, more professional finish. Keep the buttercream at room temperature until ready to use.
Assemble and Frost with Precision
Once the cakes are completely cool, level the tops if necessary using a serrated knife. Place the first layer on a cake stand or plate, then spread a thin layer of buttercream—about ¼ inch thick—on top. This “crumb coat” prevents filling from leaking through the cake layers.
Add the second layer, then repeat with another thin buttercream layer. Finally, place the third layer on top. Chill the assembled cake in the refrigerator for 15 minutes to firm up the buttercream before applying the final frosting. Spread a smooth layer of buttercream over the entire cake, then use a bench scraper to create clean, straight edges.
For decoration, dust the top and sides with the remaining 1 cup powdered sugar using a fine-mesh sieve. This creates an elegant, snowy finish that complements the vanilla flavor. Let the cake sit at room temperature for 30 minutes before slicing to allow the frosting to set properly.
Pro Tips For Making 6 In Cake Pan
- Preheat Pan First: That 6-inch pan is tiny—don’t waste time waiting for the oven. Place it upside-down in a cold oven, then turn it on to 350°F. By the time you mix your batter, it’ll be screaming hot and ready to go. I learned this the hard way after pulling a barely warm pan from the oven and wondering why my cake took forever to set.
- Whisk Eggs Cold: Pull your eggs straight from the fridge and whisk them with the sugar before adding the butter. Cold eggs emulsify better, and you’ll get a smoother batter without that greasy separation. Trust me, your cake’s texture will thank you—especially in a small pan where every bit of structure matters.
- Skip the Overmixing: Once you add the flour, stop mixing the second it’s just combined. Overworking the batter introduces too much gluten, and your cake will turn out dense instead of light. Two or three strokes with a spatula—no more. I used to think I needed to “get it all in there,” but that’s how you end up with a brick.
- Test with a Toothpick (But Not the Center): Stick that toothpick in the outer edge of the cake, not the middle—it’s thinner and dries faster. If it comes out clean, your cake’s done. If not, give it 2–3 more minutes. I burned my first batch by eyeballing it, and now I check the sides first. Works every time.
Dietary considerations for 6 in cake pan
Gluten-Free Adaptation
Replace the 2.5 cups all-purpose flour with 2 cups gluten-free 1:1 baking flour (like Bob’s Red Mill or King Arthur) plus 0.5 cup cornstarch. Add 1 extra tsp xanthan gum to mimic gluten’s structure.
For best results, whisk dry ingredients thoroughly to eliminate lumps. The texture will be slightly denser but still tender when baked at 350°F for 28-32 minutes—check with a toothpick. 🌾
Dairy-Free Options
Swap unsalted butter for Earth Balance vegan butter (use same amounts) and replace whole milk with unsweetened almond milk or oat milk. For the buttercream, use coconut cream (chilled overnight) instead of heavy cream and vegan butter.
The cake will maintain moisture but may have a slightly denser crumb. Chill layers 10 minutes longer before assembling to prevent sticking. 🥛
Nut-Free Considerations
Check your powdered sugar and vanilla extract for nut processing warnings. Use certified nut-free brands like Domino sugar and McCormick vanilla. For extra safety, prepare the cake in a dedicated nut-free kitchen area.
The vanilla bean seeds can be omitted if concerned about cross-contamination, though they add depth. Always verify all ingredients (including baking powder) for nut-free labels. 🌿
Sugar-Free Modifications
Replace 2 cups granulated sugar with 1.5 cups monk fruit sweetener (like Lakanto) plus 0.5 cup erythritolsugar-free vanilla extract (like Torani) and reduce powdered sugar in buttercream to 2 cups, adding 1 tsp xanthan gum for stability.
The cake will be less sweet but still moist—bake 2-3 minutes longer as sugar-free batters dry faster. 🍚
Egg-Free Substitutions
Replace 4 eggs with 4 tbsp ground flaxseed mixed with 10 tbsp water (let sit 5 minutes to thicken). For richer texture, add 2 tbsp unsweetened applesauce to the batter. The cake may be slightly denser but holds together well.
Whisk flax mixture thoroughly to avoid lumps. Bake as directed but check for doneness at 25 minutes—egg-free cakes often bake faster. 🥚
Nutrition facts
Frequently asked questions
Can I use a 6-inch pan for cupcakes instead of cake layers?
A 6-inch round pan can make 6-8 perfect mini cupcakes—just fill the pan about ⅔ full with batter and bake at 350°F for 15-18 minutes. Use a toothpick to check doneness, and let them cool completely before adding frosting. For even baking, rotate the pan halfway through.
Why does my cake stick to the pan even with parchment?
This usually happens if the pan isn’t properly greased or the parchment isn’t snug. First, ensure your pan is well-coated with butter and dusted with flour. Cut parchment circles 1 inch larger than the pan and press them firmly into the bottom. For extra insurance, use a silicon baking mat under the parchment. Always let cakes cool 10 minutes in the pan before removing.
How do I make this recipe into a bundt cake?
Use the same batter but pour it into a 6-cup bundt pan greased with butter and dusted with flour. Bake at 325°F for 45-50 minutes (cover loosely with foil if browning too fast). Let it cool completely before removing—bundt cakes need time to set. The center should spring back when gently pressed.
Can I bake just one layer at a time?
Yes! If you only have one 6-inch pan, bake each layer separately—just reduce the oven temperature to 325°F and increase baking time by 2-3 minutes per layer. This prevents overbrowning while the other pans are waiting. For best results, let each layer cool completely before frosting.
What’s the secret to perfectly even layers?
Level each cake layer with a serrated knife before assembling, and use a cake turntable (or a plate) to rotate while frosting. Chill the cake 15 minutes between layers to prevent collapsing. For extra stability, brush each layer with simple syrup before adding frosting. This keeps the cake moist and prevents crumbs from leaking through.

- 2 Lb Oatmeal Bread Machine Recipe: Hands-Off Crusty Loaf With Nutty Depth - September 30, 2026
- 8-Inch Pecan Pie Recipe: Buttery Crust and Caramelized Nut Bliss - September 30, 2026
- 1 Loaf Homemade Bread Recipe: Crusty Crunch and Airy Crumb in One Bowl - September 30, 2026