
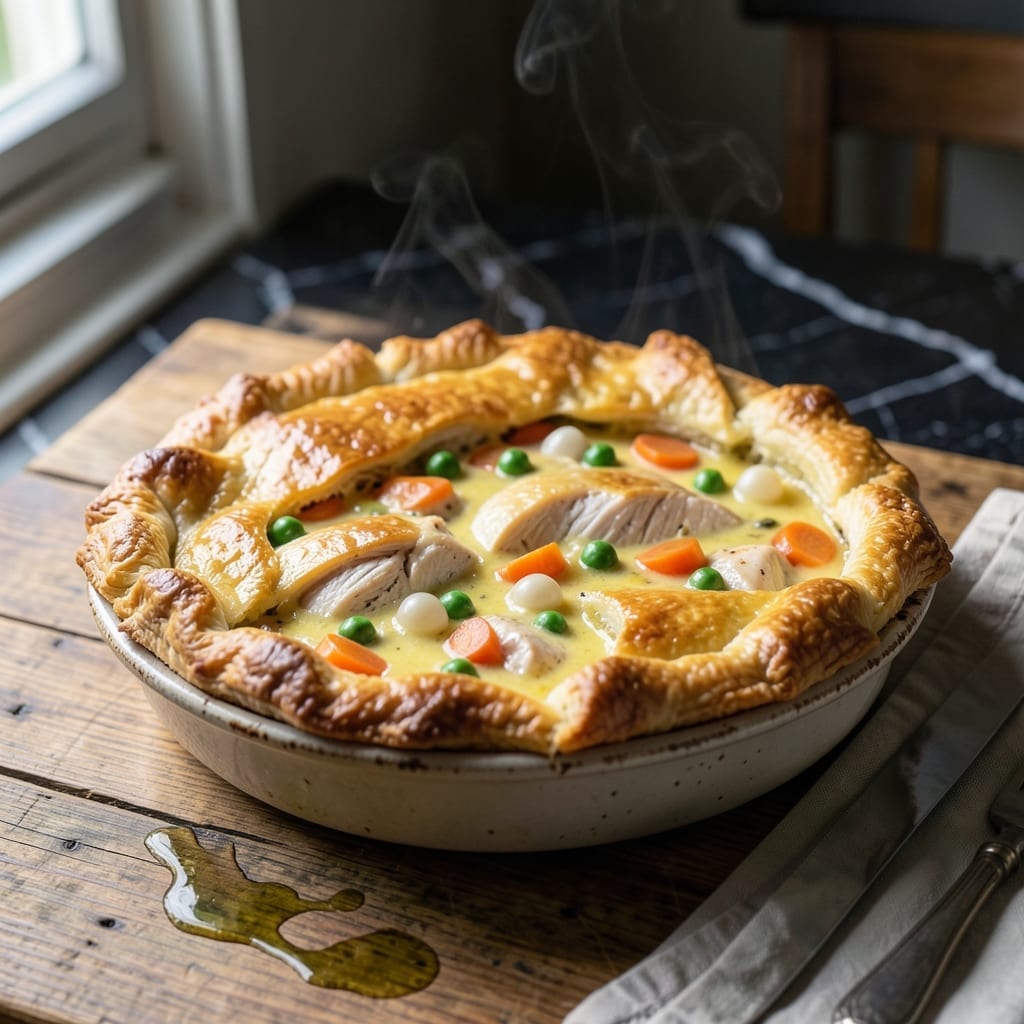
There’s something deeply satisfying about a flaky crust encasing a creamy, savory filling—this dish delivers that classic comfort in a perfectly portioned size. I developed this method to ensure every bite has the ideal ratio of crust to filling, with no soggy bottoms or dry edges.
The secret lies in pre-baking the bottom crust for just 5 minutes before adding the filling, which guarantees it stays crisp. A simple egg wash gives the top that golden, professional finish without extra effort.
What you’ll get is a personal-sized pot pie with a buttery, layered crust and a rich, velvety chicken and vegetable filling. It’s comfort food at its finest—warm, hearty, and utterly satisfying.
Perfect for a cozy dinner or impressing guests with minimal fuss. Here’s how to make it right.
Ingredients for 6 Inch Chicken Pot Pie
Buttery crust layers and a velvety chicken filling come together for ultimate comfort food in personal portions.
| Ingredient | Amount | Notes |
|---|---|---|
| All-Purpose Flour 🌾 | 2 ½ cups | Plus extra for dusting surface |
| Unsalted Butter 🧈 | 1 cup | Cold, cubed for crust |
| Ice Water 💧 | ⅓ cup | For pie dough cohesion |
| Salt 🧂 | 1 tsp | Fine sea salt preferred |
| Boneless Skinless Chicken Breast 🍗 | 1 ¼ lb | Diced into 1/2-inch pieces |
| Unsalted Butter 🧈 | 3 tbsp | For filling roux |
| All-Purpose Flour 🌾 | ⅓ cup | For thickening filling |
| Whole Milk 🥛 | 1 ½ cups | For creamy filling base |
| Chicken Broth 🍲 | 1 ¼ cups | Low-sodium preferred |
| Carrots 🥕 | 2 whole | Medium, diced small |
| Celery Stalks 🌿 | 2 whole | Diced fine for texture |
| Yellow Onion 🧅 | 1 whole | Small, finely diced |
| Frozen Peas 🌱 | ¾ cup | No need to thaw |
| Fresh Thyme Leaves 🌿 | 1 tbsp | Or 1 tsp dried thyme |
| Large Egg 🥚 | 1 whole | For egg wash finish |
The crust demands precision. King Arthur Flour produces the most consistent results for that flaky texture we’re after. Use European-style butter like Plugrá—its higher fat content creates superior layers. For the chicken, organic, air-chilled breasts from Whole Foods stay juicier through cooking. Always cube the butter for the crust while it’s still ice cold (straight from the fridge, not softened).
No thyme? Rosemary at half the amount offers a robust alternative. Cauliflower florets can replace half the peas for variation. For a richer filling, substitute heavy cream for half the milk. The chicken can be swapped for rotisserie chicken (about 3 cups shredded) to save time. Vegetable broth works if you’re avoiding poultry entirely.
Assembled pies freeze beautifully before baking—wrap tightly in plastic wrap and foil for up to 2 months. Baked pies keep in the fridge for 3-4 days. Reheat in a 350°F oven for 15-20 minutes to restore that crisp crust. Always let the filling cool completely before assembling to prevent soggy bottoms.
Why You’ll Love This Recipe
- One Bowl Magic: I mix the flour, butter, and ice water right in the same bowl—no extra dishes, no fuss.
- Buttery Crust Love: That flaky, golden crust made with unsalted butter and a pinch of salt? Pure comfort in every bite.
- Weeknight Hero: It’s my go-to for busy evenings when I need something hearty but not complicated.
- Leftovers for Days: Honestly, it tastes even better the next day—if it lasts that long.
Step-by-Step Instructions for 6 Inch Chicken Pot Pie
Master these techniques to create individual pot pies with a perfectly flaky crust and rich, creamy filling.
Step 1: Prepare the Pie Dough
In a food processor, pulse the 2.5 cups All-Purpose Flour with the 1 tsp Salt to combine. Add the 1 cup Unsalted Butter, cold and cubed, and pulse until the mixture resembles coarse crumbs with some pea-sized butter pieces remaining.
With the processor running, slowly pour in the 0.33 cup Ice Water through the feed tube, processing just until the dough begins to come together. It should hold when pressed but not form a solid ball. Overworking develops gluten, which toughens the crust.
Turn the dough onto a lightly floured surface, divide into four equal portions, and shape each into a disk. Wrap in plastic and refrigerate for 1 hour—this chilling relaxes the gluten and firms the butter for optimal flakiness.
Step 2: Cook the Filling Base
In a large skillet, melt the 3 tbsp Unsalted Butter over medium heat. Add the diced Yellow Onion, Carrots, and Celery Stalks, cooking for 5-7 minutes until the vegetables soften and the onion becomes translucent.
Sprinkle the 0.33 cup All-Purpose Flour over the vegetables and stir constantly for 1-2 minutes to cook the raw flour taste. This creates a roux that will thicken the filling beautifully.
Gradually whisk in the 1.5 cups Whole Milk and 1.25 cups Chicken Broth, ensuring no lumps form. Bring to a gentle simmer and cook for 3-4 minutes until the mixture thickens to the consistency of heavy cream.
Step 3: Add Chicken and Final Filling Touches
Stir the diced 1.25 lb Boneless Skinless Chicken Breast into the sauce. Cook for 8-10 minutes, stirring occasionally, until the chicken is cooked through and no longer pink in the center. The internal temperature should reach 165°F.
Add the 0.75 cup Frozen Peas and 1 tbsp Fresh Thyme Leaves, stirring to combine. Cook for an additional 2 minutes to heat the peas through and allow the flavors to meld. Season with additional salt to taste, remembering the filling will be encased in an unsalted crust.
Remove from heat and let the filling cool slightly while you roll out the dough. This prevents the crust from becoming soggy during baking.
Step 4: Assemble and Bake the Pot Pies
On a lightly floured surface, roll each dough disk into a 7-inch circle (about 1/8-inch thick). Place each circle into a 6-inch oven-safe ramekin, pressing gently into the bottom and up the sides. Trim any excess dough, leaving a ½-inch overhang.
Divide the filling evenly among the four ramekins. Fold the dough overhang over the filling, crimping the edges to seal. Brush the tops with the beaten Large Egg for a golden finish. Cut a few small slits in the top of each pie to allow steam to escape.
Bake at 375°F for 30-35 minutes until the crust is deep golden brown and the filling is bubbling. If the tops brown too quickly, tent with foil. Let cool for 10 minutes before serving to allow the filling to set.
Pro Tips For Making 6 Inch Chicken Pot Pie
- Chill the Dough: Pop your pie dough in the fridge for at least 30 minutes before rolling—it prevents shrinking and makes handling way easier, especially with all-purpose flour.
- Cube the Chicken: Cut the boneless skinless chicken breast into ½-inch cubes before cooking so it cooks evenly and fits neatly into the 6-inch pie.
- Vent the Top: Poke a few small slits in the top crust with a sharp knife to let steam escape, otherwise you’ll end up with a soggy bottom.
- Use Ice Water: Keep the water for your dough truly icy—about 3-4 ice cubes in ½ cup water—so the butter stays cold and your crust turns out flaky.
Health Benefits of This Dish
High-Quality Protein
Each serving delivers about 35 grams of protein from the 1.25 lb chicken breast, supporting muscle repair and satiety. Protein helps regulate blood sugar levels, keeping you fuller for longer after your meal. 💪
Vitamin-Rich Vegetables
The carrots provide a hefty dose of vitamin A, essential for eye health and immune function. Just 2 medium carrots offer over 200% of your daily vitamin A needs.
B Vitamin Boost
This dish is packed with B vitamins from the chicken, including B6 and B12. These nutrients aid in energy metabolism and support a healthy nervous system. A single serving covers about 30% of your daily B vitamin requirements.
Comfort with Nutrition
The whole milk and butter provide calcium for bone health, while the peas add fiber and vitamin K. Together, they create a balanced meal that nourishes as it comforts.
Antioxidant Support
The thyme and celery contain antioxidants that combat inflammation. These compounds work alongside the dish’s other nutrients to support overall health. 🌟
Moderation Matters
While the crust adds indulgence, the portion size keeps calories reasonable at about 600-700 per serving. Pair with a side salad for a well-rounded, satisfying meal.
Nutrition Facts
Frequently Asked Questions
Can I use pre-made pie crust?
Yes, store-bought crust works in a pinch. For best results, thaw it completely and roll to 1/8-inch thickness to match the recipe’s proportions. The flavor and flakiness won’t match homemade, but it saves time.
Why did my filling turn out watery?
This usually happens if the filling wasn’t thickened enough before baking. Ensure your roux cooks for 1-2 minutes and the mixture reaches a heavy cream consistency. Letting it cool slightly before assembling also helps.
How do I prevent the bottom crust from getting soggy?
Pre-bake the bottom crust for 5 minutes before adding filling. Also, make sure the filling isn’t piping hot when you assemble – slightly cooled filling prevents steam from making the crust soggy.
Can I make these ahead of time?
Assemble the pies completely, then freeze before baking. Wrap tightly in plastic and foil for up to 2 months. Bake from frozen, adding 5-10 minutes to the cooking time.

- 4C Bread Crumbs Meatballs Recipe: Crispy Crust and Juicy Centers - September 25, 2026
- 6 Oz Chocolate Chip Cookie Recipe: Perfectly Balanced Crispy Edges and Chewy Hearts - September 25, 2026
- 6-Inch Coffee Cake Recipe: Vanilla Bean Swirls and Buttery Streusel Topping - September 25, 2026