
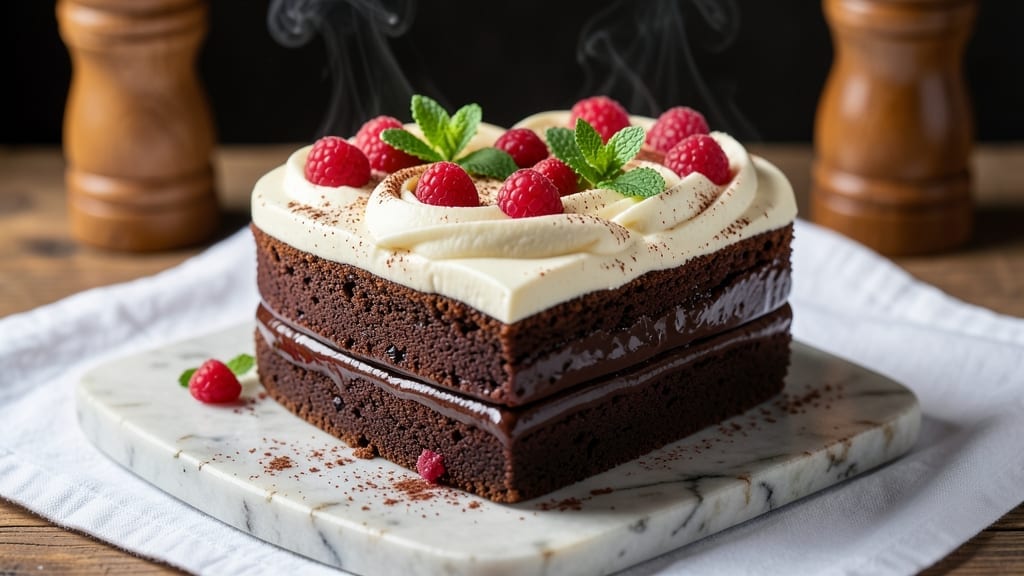
This 6-inch heart cake recipe delivers velvety chocolate layers and buttercream bliss in a shape that’s perfect for Valentine’s Day or romantic surprises. Professional bakers and home cooks alike will appreciate the foolproof technique—moist cake, smooth frosting, and a heart shape that’s easier to achieve than you’d think.
The key lies in using a heart-shaped pan or mold, ensuring even baking, and layering with precision for that restaurant-worthy finish.
What sets this recipe apart is the rich chocolate cake that stays tender and moist, thanks to a simple but effective combination of cocoa powder, buttermilk, and a touch of coffee for depth.
The buttercream isn’t just sweet—it’s velvety and pipeable, with a slight tang from vanilla bean that elevates every bite. Whether you’re baking for a celebration or treating yourself, this cake promises to impress without requiring advanced skills.
The heart shape transforms this into something special, and with the right tools (or a little creativity), you’ll achieve a perfectly symmetrical result every time. Bake at 350°F for 25-30 minutes per layer, then let the cake cool completely before assembling.
The frosting technique is straightforward but critical—spread evenly, chill briefly, and pipe decorative borders for that polished look.
Serve with fresh berries, a sprinkle of powdered sugar, or a romantic drizzle of chocolate ganache. This cake isn’t just delicious—it’s a showstopper that feels like a labor of love. Ready to bake? Let’s get started with the ingredients and step-by-step instructions that make this heart cake a breeze.
Ingredients for 6 inch heart cake
Rich cocoa, velvety buttercream, and precise layering create this showstopping heart-shaped cake.
| Ingredient | Amount | Notes |
|---|---|---|
| Unsalted Butter 🧈 | 1 cup | Cold, cut into 1-inch cubes |
| Granulated Sugar 🍚 | 2 cups | Superfine preferred for smoothness |
| Dutch-Processed Cocoa Powder 🍫 | ¾ cup | High-quality for rich flavor |
| All-Purpose Flour 🌾 | 2 cups | Sifted for even texture |
| Baking Powder 🍞 | 2 tsp | Freshly measured for lift |
| Salt 🧂 | ½ tsp | Diamond Crystal preferred |
| Instant Espresso Powder ☕ | 1 tsp | Enhances chocolate depth |
| Buttermilk 🥛 | 1 ½ cups | Room temperature for best results |
| Pure Vanilla Extract 🌿 | 2 tsp | High-quality Madagascar preferred |
| Large Eggs 🥚 | 2 whole | Room temperature, separated |
| Heavy Whipping Cream 🥛 | 1 cup | Full-fat for best stability |
| Powdered Sugar 🍚 | 4 cups | Sifted for smooth buttercream |
| Vanilla Bean Paste 🌿 | 1 tbsp | For enhanced vanilla flavor |
| Heart-Shaped Cake Pan 💖 | 2 whole | 6-inch size, non-stick preferred |
The cocoa powder and butter are non-negotiable for that signature chocolate depth. Valrhona or Ghirardelli brands deliver unmatched quality, but Hershey’s Special Dark works well for budget-friendly baking. For the butter, Plugrá or Land O’Lakes are reliable choices—just ensure it’s unsalted and cold when creaming. The buttermilk should be room temperature; if yours is cold, let it sit for 30 minutes before using. The heart-shaped pan is critical—Wilton or Nordic Ware are top-tier options, but a silicone heart mold works too if you’re baking free-form. Always grease the pan thoroughly with butter and dust with flour for easy release.
No buttermilk? Mix 1.5 tablespoons lemon juice or vinegar with 1.5 cups milk and let sit for 5 minutes. Substituting cocoa powder? Natural unsweetened cocoa works in a 1:1 ratio, but Dutch-processed delivers that signature smoothness. For the buttercream, European-style butter like Miyoko’s creates a lighter, more stable frosting. Short on powdered sugar? Sift granulated sugar through a fine-mesh sieve for a close substitute. The vanilla bean paste adds complexity—if unavailable, double the vanilla extract. For a lighter cake, fold in 1 teaspoon whipped egg whites after combining wet and dry ingredients.
Store cake layers wrapped in plastic wrap at room temperature for up to 2 days—this prevents drying. The buttercream keeps for 5 days refrigerated in an airtight container, though it’s best used within 3 days for optimal texture. To reheat, microwave frosting in 20-second bursts until smooth. For long-term storage, freeze layers for up to 3 months—thaw at room temperature before assembling. The heart shape holds up beautifully when chilled for 1 hour before serving, especially in cooler weather. Garnish with fresh berries or edible gold leaf for a romantic touch.
Why You’ll Love This Recipe
- No Mixer Needed: I swear by my stand mixer, but this cake? Just a big bowl and a sturdy spoon—no fuss. The butter and sugar cream in minutes with a wooden spoon, and the cocoa powder dissolves like a dream. (Yes, even when I’m in a hurry.)
- Rich Without Bitterness: That Dutch-processed cocoa powder is the secret weapon—deep chocolate flavor without the grit or aftertaste. The butter keeps it velvety, and the baking powder gives it a light lift so every bite feels indulgent, not heavy.
- Occasion-Proof Tiny Cake: Six inches might sound small, but it’s perfect for date night, a cozy coffee break, or even a last-minute gift. Split it into squares, and suddenly you’ve got elegant dessert portions that feel special without the stress of a whole sheet pan.
- Budget-Friendly Luxury: Butter and sugar are pantry staples, and a little cocoa goes a long way. This cake costs next to nothing to make but tastes like you spent hours perfecting it. Honestly? My wallet and taste buds both win.
Step-by-step instructions for 6-Inch heart cake
Precision and patience create the perfect velvety chocolate layers and silky buttercream.
Prepare the Chocolate Cake Batter
Preheat your oven to 350°F and grease the two heart-shaped cake pans thoroughly with unsalted butter, then dust with flour. In a stand mixer fitted with the paddle attachment, cream together the 1 cup unsalted butter and 2 cups granulated sugar on medium speed for 3-4 minutes until light and fluffy. This step is crucial—it incorporates air that will make your cake tender.
Reduce the mixer speed to low and add the 2 whole large eggs one at a time, mixing just until each is fully incorporated. Scrape down the sides of the bowl as needed. In a separate bowl, whisk together the 2 cups all-purpose flour, 2 teaspoons baking powder, 0.5 teaspoon salt, 0.75 cup Dutch-processed cocoa powder, and 1 teaspoon instant espresso powder. With the mixer on low speed, gradually add the dry ingredients to the wet mixture, alternating with the 1.5 cups buttermilk in 3 additions, beginning and ending with the flour mixture.
Add Vanilla and Divide the Batter
Mix in the 2 teaspoons pure vanilla extract until fully combined. The batter should be thick but pourable. Divide the batter evenly between the two prepared heart-shaped cake pans, filling each about two-thirds full. Tap the pans gently on the counter to release any air bubbles trapped in the batter.
Bake for 25-30 minutes or until a toothpick inserted into the center comes out clean. I check for doneness at the 25-minute mark—the cake should spring back slightly when pressed gently in the center. Rotate the pans halfway through baking for even browning. Let the cakes cool in the pans for 10 minutes before transferring them to a wire rack to cool completely.
Prepare the Buttercream Filling
While the cakes cool, prepare the buttercream by beating the 1 cup heavy whipping cream in a chilled mixing bowl until soft peaks form. In a separate bowl, beat the 1 cup unsalted butter (softened but not melted) until smooth. Gradually add the 4 cups powdered sugar and 1 tablespoon vanilla bean paste to the butter, mixing on low speed to avoid a sugar storm.
Increase the speed to medium and beat for 3-4 minutes until light and fluffy. Gently fold in the whipped cream until fully incorporated. The buttercream should be smooth, thick, and hold its shape when piped. If it’s too thick, add a few drops of heavy cream to loosen it to your desired consistency.
Assemble the Heart Cake
Once the cakes are completely cool, place one heart-shaped cake on a serving plate. Spread a generous layer of buttercream evenly over the top, leaving a small border around the edges. Place the second cake on top, pressing down gently to create a clean seam. Chill the assembled cake in the refrigerator for 30 minutes to set the buttercream.
Before serving, dust the top of the cake with a light layer of powdered sugar using a fine-mesh sieve for an elegant finish. Cut into wedges with a sharp knife, wiping the blade between slices to ensure clean cuts. Serve immediately for the best texture and flavor—this cake is best enjoyed fresh from the fridge.
Pro Tips For Making 6 Inch Heart Cake
- Whip Butter & Sugar: DESCRIPTION:
- Sift That Cocoa: DESCRIPTION:
- Check Oven Temp Early: DESCRIPTION:
- Grease Hearts Twice: DESCRIPTION:
Serving suggestions for this 6 inch heart cake
Romantic Presentation
Serve your heart cake on a wooden cake stand or marble slab for an elegant display that highlights its shape. I love placing it on a black slate board for contrast, especially when paired with fresh raspberries or strawberries arranged around the base.
Add a gold leaf accent along the edges for extra luxury—it catches the light beautifully. 💖
Garnish Ideas
Dust the top with powdered sugar using a fine-mesh sieve for a snowy finish. For a pop of color, pipe white chocolate rosettes around the edges or sprinkle edible glitter for a festive touch.
Fresh mint leaves add a fragrant contrast to the rich chocolate. Keep garnishes minimal to let the cake shine.
Pairing Suggestions
Serve with a cup of hot chocolate topped with whipped cream for a cozy pairing. For coffee lovers, a strong espresso or lavender latte complements the cake’s depth. A sparkling rosé wine works beautifully for a celebratory occasion—its acidity cuts through the richness. 🍷
Serving Size Tips
This cake serves 4-6 people as a single layer, but if you’re feeding a crowd, consider baking two cakes and stacking them with extra buttercream. For individual servings, cut into 8 equal wedges using a sharp serrated knife—wipe the blade between slices to keep cuts clean.
Store leftovers in an airtight container at room temperature for up to 2 days.
Seasonal Adaptations
In summer, add a berry compote drizzle or citrus zest to brighten the flavors. For winter, infuse the buttercream with cinnamon or orange extract and top with candied pecans.
A warm spiced cider makes a perfect seasonal pairing. The heart shape works year-round, but these tweaks keep it feeling fresh. ✨
Make-Ahead Strategy
Bake the cake layers 1 day ahead and store them wrapped in plastic wrap at room temperature. Assemble the cake 4 hours before serving to let the buttercream set properly. If prepping further ahead, freeze the unfrosted layers for up to 3 months—thaw at room temperature before assembling.
The buttercream can be made 2 days ahead and refrigerated in an airtight container.
Nutrition facts
Frequently asked questions
Can I use a round pan instead of a heart-shaped one?
Yes, but you’ll lose the signature heart shape! For a creative twist, bake in a round pan and use a heart-shaped cookie cutter to trim the top layer after baking. The cake will still taste delicious—just not as visually romantic. If you want the heart shape without special pans, try a silicone heart mold over a round cake layer.
Why did my cake crack or sink in the middle?
This usually happens from overmixing the batter or opening the oven too soon. Mix just until combined (no streaks of flour), and bake until a toothpick comes out clean. Avoid peeking at the cake while baking—every time you open the oven, you risk losing heat and causing the center to sink. Let it cool in the pan for 10 minutes before removing.
How do I make this cake gluten-free?
Replace the all-purpose flour with a 1:1 gluten-free baking flour blend (like Bob’s Red Mill) and add 1 teaspoon xanthan gum to improve texture. Use the same measurements, but expect a slightly denser crumb. For best results, let the batter rest for 10 minutes before baking to hydrate the flour blend properly.
Can I decorate this cake without buttercream?
Try a simple chocolate ganache drizzle or a dusting of powdered sugar for a minimalist look. For extra flair, pipe white chocolate swirls around the edges or add fresh berries. The heart shape works beautifully with any decoration—just keep it simple to highlight the cake’s natural elegance.
What’s the best way to transport this cake?
Assemble the cake 4 hours ahead and wrap it tightly in plastic wrap. Place it in a sturdy cake carrier box with a layer of foam on the bottom to prevent shifting. For short trips, transport it upright in the box—this keeps the layers intact. If traveling long distances, freeze the unfrosted layers and reassemble after thawing.

- 12 Bean Chili Recipe: Hearty Slow-Cooked Depth With 12 Legumes - October 17, 2026
- 5 Seed Bread Recipe: Nutty Crunch and Artisan Flavor in One Loaf - October 17, 2026
- 1 Lb Macaroni Salad Recipe: Bold, Crunchy, and Crowd-Pleasing - October 17, 2026