
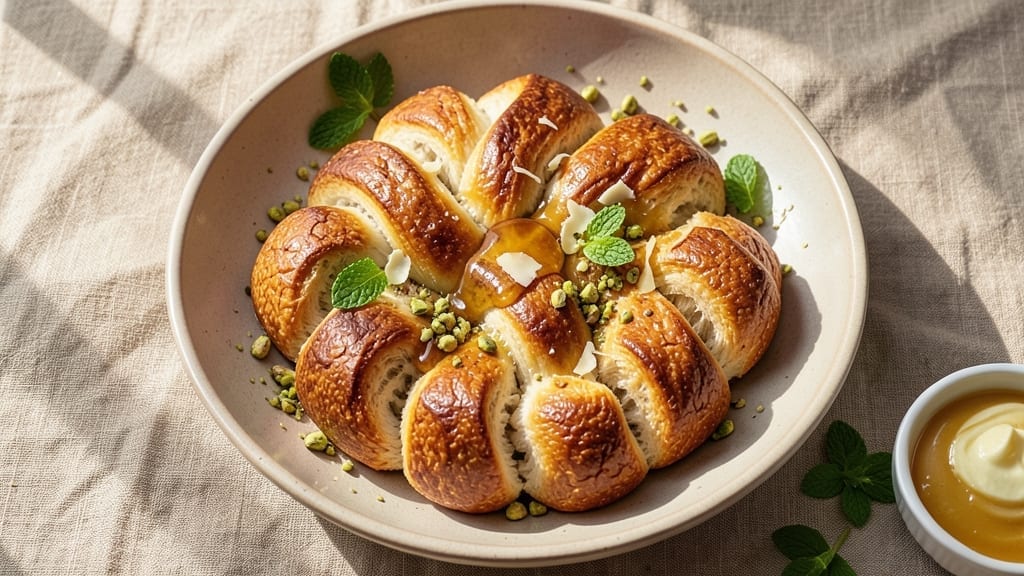
An 8 plait bread recipe that delivers a showstopping golden crust and tender, fluffy interior is what transforms ordinary meals into special occasions. This braided masterpiece requires precision in dough preparation and careful shaping—key elements that ensure every strand holds its form while baking.
The secret lies in a well-proportioned dough that balances structure and softness, creating a loaf with crisp edges and a delicate crumb. What sets this recipe apart is the technique for achieving that perfect golden crust without over-baking the interior.
A simple egg wash and strategic baking times create the ideal contrast—crunchy exterior, pillowy center. The braiding process itself is simpler than it looks, with step-by-step guidance to ensure even, symmetrical plaits that stay intact through baking.
By the time your oven timer goes off, you’ll have a loaf that looks as impressive as it tastes—warm, fragrant, and ready to be sliced into perfect, evenly braided portions. The aroma alone will have everyone gathered around the table waiting for their share.
This bread pairs beautifully with soups, stews, or even as a standalone treat with butter. For those who love baking but want foolproof results, this recipe delivers. The dough comes together quickly, and the shaping process is intuitive once you understand the rhythm.
Whether you’re a beginner or an experienced baker, the techniques here ensure success every time. Let’s get started on creating your braided masterpiece.
Ingredients for 8 plait bread
The foundation of your golden-crusted 8 plait bread starts with these precise ingredients.
| Ingredient | Amount | Notes |
|---|---|---|
| All-Purpose Flour 🌾 | 5 cups | Plus 1 tbsp for dusting |
| Active Dry Yeast 🍞 | ¼ oz | Or 2 1/4 tsp (1 package) |
| Granulated Sugar 🍚 | ½ cup | For yeast activation |
| Unsalted Butter 🧈 | ½ cup | Cold, cubed (room temp) |
| Large Eggs 🥚 | 2 whole | Room temperature |
| Whole Milk 🥛 | ½ cup | Warm (110°F) |
| Salt 🧂 | 1 ½ tsp | Diamond Crystal preferred |
| Vegetable Oil 🫒 | 2 tbsp | For dough softness |
| Egg Yolk 🥚 | 1 whole | For egg wash |
| Water 💧 | ¼ cup | For egg wash |
| Sesame Seeds 🌰 | 2 tbsp | For topping (optional) |
The flour is non-negotiable here—King Arthur or Gold Medal deliver consistent results. Look for yeast labeled ‘active dry’ (not instant) in the baking aisle. King Arthur also sells a pre-measured yeast packet that simplifies things. Butter should be cold but not frozen; press a cube between fingers—it should dent slightly but hold shape. Land O’Lakes unsalted is my go-to for consistent fat content. For the milk, warm it to 110°F (like a hot tub, not boiling) to activate the yeast properly. Sesame seeds? Trader Joe’s sells them in small jars that stay fresh for months.
No active dry yeast? Instant yeast at half the amount works, but timing changes slightly. Substituting butter with vegetable shortening keeps the dough workable but sacrifices flavor. Eggs too expensive? Egg substitute at 1:1 ratio maintains structure, though texture may differ slightly. For the milk, powdered milk mixed with water (1:1) is fine in a pinch. The sesame seeds can be swapped for poppy seeds or everything bagel seasoning if you’re feeling adventurous. Just ensure your flour-to-liquid ratio stays precise—this bread relies on proper hydration for that perfect crumb.
Store your dry ingredients (flour, yeast, sugar, salt) in airtight containers away from light for up to 6 months. Cold butter keeps for 3 months in the fridge, while eggs last 3 weeks unrefrigerated in their carton. The sesame seeds stay fresh for 1 year in the pantry. For the dough itself, it’s best used within 24 hours of shaping, though you can refrigerate shaped loaves overnight for easier morning baking. Freeze unshaped dough balls for up to 3 months—thaw overnight in the fridge before braiding.
Why You’ll Love This Recipe
- No-Knead Magic: I swear by this dough—just mix, let it rise, and shape. No stand mixer, no elbow grease, just a bowl and patience (the good kind).
- Buttery Sweet Payoff: That soft, pillowy center with a golden crust? It’s all thanks to the butter and sugar working together. Honestly, the first bite makes you want to forget you’re on a diet.
- Weeknight Hero: Whether it’s breakfast with jam or dinner with soup, this bread disappears fast. I make a batch on Sundays and freeze the extras—no more sad, stale loaves.
- Budget-Friendly Staple: Five basic ingredients stretch to feed four for under $5. Plus, the yeast activates fast, so you’re not waiting around. My wallet and I both love it.
Step-by-step instructions for braided beauty with golden crust and soft heart
Mastering the art of 8 plait bread starts with precise technique and patience.
Activate the Yeast for Maximum Rise
In a small bowl, combine the 0.25 oz active dry yeast, 0.5 cup granulated sugar, and 0.5 cup warm whole milk (110°F). Let it sit for 5-10 minutes until foamy. This step ensures your yeast is active and ready to transform the dough. If it doesn’t foam, your yeast may be dead—start fresh with a new packet.
While waiting, whisk together the 2 whole large eggs and 1.5 tsp salt in a separate bowl. This pre-mix keeps your workspace organized and prevents cross-contamination. The eggs add structure while the salt enhances flavor and controls yeast activity.
Mix and Knead the Dough to Perfection
In a stand mixer fitted with the dough hook attachment, combine the 5 cups all-purpose flour and 2 tbsp vegetable oil. Mix on low speed until the flour is evenly distributed. With the mixer running on medium speed, gradually add the yeast mixture, eggs, and salt.
Knead the dough for 8-10 minutes until it becomes smooth and elastic, pulling away from the sides of the bowl. You’ll know it’s ready when it forms a “windowpane” when stretched thin—press your thumb into the dough and watch for it to spring back slowly. This develops gluten, which gives the bread its signature chewy texture and structure for those elegant braids.
First Rise and Prepare for Braiding
Shape the dough into a ball, place it in a lightly oiled bowl, and cover with a damp towel. Let it rise in a warm place for 1-1.5 hours or until doubled in size. The dough should feel light and springy when pressed gently with one finger. This first rise develops flavor and allows the gluten to relax for easier shaping.
While the dough rises, prepare your workspace by lightly dusting a clean surface with 1 tbsp flour (from your ingredients). This prevents sticking when you divide and shape the dough. Preheat your oven to 375°F and line a baking sheet with parchment paper.
Divide, Shape, and Braid the Dough
Punch down the risen dough to release air, then divide it into 8 equal pieces. Roll each piece into a 12-inch rope about 1 inch thick. Here’s where precision matters: arrange the 8 ropes parallel to each other, then carefully braid them together from left to right, alternating over and under to create an even pattern.
Once braided, place the loaf seam-side down on the prepared baking sheet. This ensures an even rise and prevents the braid from unraveling. Cover loosely with a towel and let it rise for another 30-45 minutes until puffy. The braid should look full and slightly rounded—this indicates it’s ready for baking.
Bake to Golden Perfection
Create an egg wash by whisking together the 1 whole egg yolk and 0.25 cup water. Brush this generously over the risen braid, then sprinkle evenly with the 2 tbsp sesame seeds for that signature crunch and flavor. Bake in the preheated oven for 25-30 minutes until the crust is deep golden brown and sounds hollow when tapped on the bottom.
For the final touch, transfer the bread to a wire rack to cool completely. The contrast of a crispy, golden crust with a soft, fluffy interior is what makes this bread truly special. Serve warm with butter or jam for the perfect balance of textures and flavors.
Pro Tips For Making 8 Plait Bread
- SCALE YEAST ACCURATELY: Use a kitchen scale for the yeast—1 packet (2¼ tsp) is not always 7 grams. Weigh it instead of eyeballing, or your bread might rise too fast or too slow, especially in humid kitchens. I learned this the hard way when a batch collapsed mid-proof.
- SOFTEN BUTTER PROPERLY: Cold butter makes tough plaits. Press the unsalted butter between two sheets of parchment, then microwave in 10-second bursts until just pliable—like room temp but not greasy. Over-softened butter spreads instead of shaping, and you’ll regret it when the dough sticks to your hands.
- PROOF IN A WARM DRAFT: Place your dough near a slightly open oven door (with the oven off) or in a turned-off oven with a bowl of hot water on the bottom rack. This mimics a warm, humid environment without overproofing—critical for those tall, airy plaits. Skip the oven? Use a proofing box or a warm corner of your kitchen, but not direct sunlight.
- BRUSH EGGS LAST MINUTE: Whisk the egg with a splash of water (1 tbsp) right before baking—this makes the wash glossy and golden without making the dough sticky. If you prep it too early, the egg can curdle or dry out, leaving your bread dull. (Yes, even if you’re impatient like me.)
Pro cooking tips for 8 plait bread
Dough Temperature Control
Your dough’s success hinges on maintaining the right temperature throughout mixing and kneading. Aim for a dough temperature between 75-80°F—too cold, and it won’t rise properly; too warm, and the yeast will overactivate. I use a digital instant-read thermometer to check the dough after kneading.
If it’s below 75°F, let it sit at room temperature for 10-15 minutes before shaping. For extra precision, chill the dough slightly in the fridge for 20 minutes if your kitchen feels too warm. 🌡️
Braiding Like a Pro
The key to symmetrical plaits lies in even tension and consistent rope thickness. Roll each of the 8 ropes to exactly 12 inches long and 1 inch thick—use a ruler to check. Before braiding, lightly flour your workspace to prevent sticking.
Start braiding from the left side, alternating over/under to create a tight, even pattern. If a rope slips, gently tug it back into place—don’t force it. For a cleaner look, trim any uneven ends after braiding with kitchen shears. ✨
Egg Wash Secrets
The egg wash isn’t just for shine—it’s what creates that deep golden crust. Whisk the egg yolk and water until fully emulsified for maximum coverage. For extra richness, add 1 tsp honey to the wash. Brush it on just before baking (not too early, or it’ll dry out).
For a glossier finish, use a pastry brush with soft bristles. Pro tip: Save the leftover egg wash for croissants or danishes—it’s just as versatile! 🍳
Oven Preheating Hack
Never skip preheating! Set your oven to 375°F and let it preheat for at least 30 minutes—this ensures even heat distribution. For a crispier crust, place a small baking sheet on the lower rack during preheating to create steam.
Once your braid is in the oven, rotate the pan halfway through baking (after 15 minutes) for even browning. If your oven runs hot, reduce the temperature to 350°F and bake for 35-40 minutes. 🔥
Testing for Doneness
Your bread is done when the crust is deep golden brown and it sounds hollow when tapped on the bottom. For extra certainty, use a thermometer—the internal temperature should reach 190-200°F. If the top browns too quickly, tent the loaf with aluminum foil after 15 minutes.
Let it cool on a wire rack for at least 30 minutes before slicing—this prevents a gummy crumb. Trust me, the wait is worth it for that perfect texture! ⏰
Troubleshooting Common Issues
Problem: Braids unravel during baking? Fix: Ensure each rope is tightly rolled and the braid is securely tucked at the ends. Problem: Dough doesn’t rise? Fix: Check your yeast—it should foam within 5-10 minutes. If not, start over with fresh yeast. Problem: Crust too pale? Fix: Brush with extra egg wash and broil for 1-2 minutes at the end. Problem: Dense texture? Fix: Knead for the full 8-10 minutes to develop gluten properly. 💡
Nutrition facts
Frequently asked questions
Can I make this 8 plait bread with fewer strands?
The recipe works beautifully with 4 or 6 plaits instead of 8. Simply adjust the dough into equal pieces for your desired number of strands. For example, divide into 4 pieces for a simpler braid, or 6 for a more intricate look while keeping the same shaping technique.
How do I store leftover 8 plait bread?
Wrap cooled bread tightly in plastic wrap or place in an airtight container to preserve freshness. It stays good at room temperature for 2-3 days. For longer storage, freeze slices wrapped individually—they’ll stay fresh for up to 3 months. Reheat slices in a 350°F oven for 5-10 minutes to restore crispiness.
Why did my braided bread collapse after baking?
This usually happens when the dough wasn’t kneaded enough (gluten development) or the braid wasn’t secure. Make sure to knead for the full 8-10 minutes and tightly tuck the ends of each strand before baking. For extra support, place the braid on a parchment-lined baking sheet and let it rise uncovered for the final proof.
Can I add herbs or cheese to this dough?
Yes! For a flavor twist, try adding 1 tbsp dried herbs (like rosemary or thyme) or ½ cup shredded cheese (cheddar or parmesan) to the dough. Fold them in during the final kneading stage. Keep in mind these additions may slightly alter the texture—start with small amounts. For cheese, use a lower-moisture variety to avoid making the dough too sticky.
How do I make this bread gluten-free?
For a gluten-free version, substitute the all-purpose flour with a 1:1 gluten-free baking flour blend (like Bob’s Red Mill). You may need to add ½ tsp xanthan gum and increase the water by 1-2 tbsp for proper hydration. Keep in mind the texture will be slightly different—gluten-free bread tends to be denser. Also reduce the kneading time to 5-6 minutes to avoid overworking the dough.

- 12 Bean Chili Recipe: Hearty Slow-Cooked Depth With 12 Legumes - October 17, 2026
- 5 Seed Bread Recipe: Nutty Crunch and Artisan Flavor in One Loaf - October 17, 2026
- 1 Lb Macaroni Salad Recipe: Bold, Crunchy, and Crowd-Pleasing - October 17, 2026