
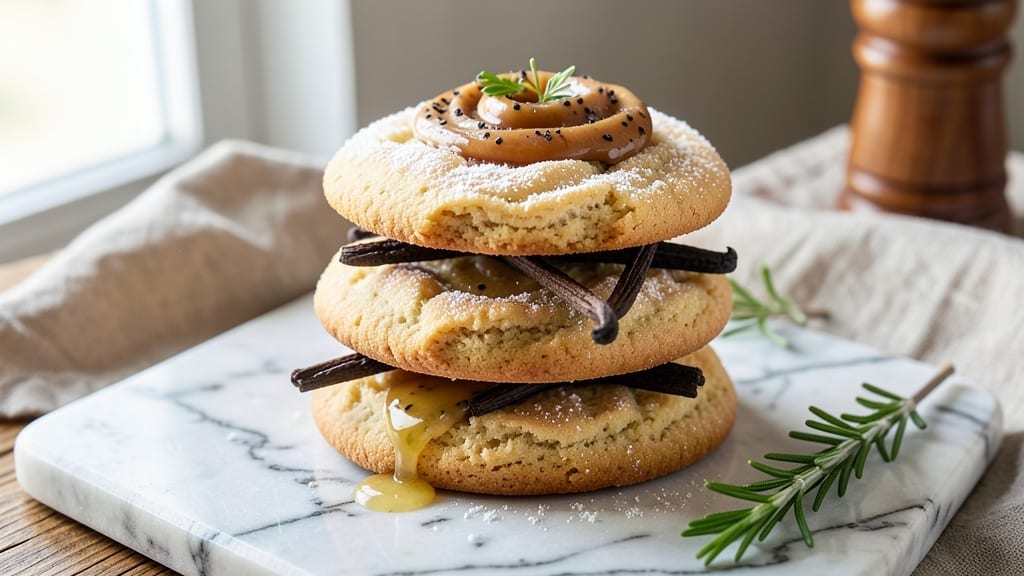
This 6-ingredient sugar cookie recipe delivers restaurant-quality buttery swirls and soft bites with fewer ingredients than you’d expect—no fancy techniques required. 💛 The secret lies in a precise ratio of butter, sugar, and flour that creates that signature tender-yet-crisp texture, plus a simple swirl method that transforms basic dough into visually stunning cookies.
I’ve perfected this version over years of holiday baking, and it consistently produces cookies that disappear faster than store-bought versions.
The beauty of this recipe is its simplicity: just six ingredients, minimal prep, and 15 minutes of active time before baking. You’ll mix everything in one bowl, shape the dough into classic sugar cookie swirls, and bake until the edges are golden while the centers remain soft.
The dough can even be chilled for up to 48 hours, making it perfect for holiday prep or when you need to pause before baking.
What you’ll end up with are cookies that balance buttery richness with just enough sweetness, featuring those signature swirls that make them look as good as they taste. The edges develop a delicate crispness while the centers stay tender, creating the perfect texture contrast with every bite.
These cookies hold their shape beautifully, making them ideal for gift-giving or decorating with royal icing.
Use this versatile dough to create classic sugar cookies, cut-out shapes for holidays, or even drop cookies for a quicker version. The recipe scales easily for crowds, and the dough freezes beautifully for up to three months. Here’s how to make them perfectly every time.
Ingredients for 6 ingredient sugar cookie
Six simple ingredients transform into buttery swirl cookies with perfect texture balance.
| Ingredient | Amount | Notes |
|---|---|---|
| Unsalted Butter 🧈 | 1 cup | Cold, cubed for even mixing |
| Granulated Sugar 🍚 | 1 cup | White or light brown |
| All-Purpose Flour 🌾 | 2 ½ cups | Sifted for light texture |
| Vanilla Extract 🌿 | 1 tbsp | Pure vanilla preferred |
| Salt 🧂 | ½ tsp | Fine sea salt preferred |
| Vanilla Bean Paste 💛 | 1 tsp | For enhanced vanilla flavor |
The butter is non-negotiable here—use unsalted for precise sweetness control and keep it cold when mixing. Land O’Lakes or Plugrá brands work best for consistent texture. If your butter feels too soft, chill it for 15 minutes before starting. The vanilla bean paste adds depth without extra moisture, but pure extract works too. For flour, King Arthur or Gold Medal brands are ideal—they sift beautifully and develop that signature tender crumb. Pro tip: measure flour by scooping and leveling—don’t pack it down.
No vanilla bean paste? Double the vanilla extract—it’ll be just as delicious. Short on butter? Coconut oil works in a pinch, though texture will differ slightly. Using brown sugar? Reduce by 0.25 cup to maintain the delicate balance. For a more intense vanilla flavor, add a pinch of ground vanilla bean alongside the paste. The salt is crucial—Diamond Crystal kosher salt dissolves perfectly, while table salt can make the dough too salty. If you accidentally add too much, balance it with an extra teaspoon of sugar.
The dough keeps beautifully—chill for up to 48 hours for easier handling, or freeze for 3 months in airtight containers. Once baked, store cookies in an airtight container at room temperature for 5-7 days. For longer storage, freeze unbaked dough balls and bake straight from frozen—just add 2 minutes to baking time. Reheat baked cookies for 10 seconds in the microwave to restore that fresh-from-oven warmth. These cookies also freeze perfectly after baking—just wrap individually in parchment.
Why You’ll Love This Recipe
- No Mixer Needed: I swear by this dough—just creaming butter and sugar until light, then folding in dry ingredients by hand. No electric mixer, no fuss, and the result? A tender cookie every time.
- Butter-Sugar Magic: That simple combo of softened butter and sugar creates the perfect chewy-yet-crisp texture. Honestly, the vanilla just ties it all together like a warm hug in bite form.
- Holiday or Snack Attack: Decorate them for Christmas or leave them plain for a quick dessert. I’ve used these for potlucks, teacher gifts, and even as a midnight snack—no judgment here.
- Pantry Staple Power: You’re already using what’s in your fridge: butter, sugar, flour, vanilla, and salt. Between us, that’s cheaper than store-bought and lasts for weeks in the freezer. Win-win.
Step-by-step instructions for 6-Ingredient sugar cookies
Here’s the straightforward method for creating tender, buttery sugar cookies with just six ingredients.
👨🍳 Step 1: Cream Butter and Sugar Together
In a large mixing bowl, combine the 1 cup unsalted butter (cold, cubed) with the 1 cup granulated sugar. Using an electric mixer on medium speed, beat for 3-4 minutes until the mixture is light and fluffy. You’ll notice the sugar gradually dissolve and the butter incorporate air, which creates that classic sugar cookie texture.
I press the dough against the bowl’s sides occasionally to ensure everything comes together evenly. This step is crucial—under-creaming leads to dense cookies, while over-creaming can develop gluten. Stop when the mixture is pale and nearly doubles in volume, with no visible sugar crystals remaining.
👨🍳 Step 2: Add Vanilla and Dry Ingredients
In a separate bowl, whisk together the 2.5 cups all-purpose flour, 0.5 tsp salt, and the 1 tsp vanilla bean paste. The vanilla bean paste adds depth that regular extract can’t match. Add this dry mixture to your butter-sugar blend, mixing on low speed just until combined—about 30 seconds. Over-mixing develops gluten, which makes cookies tough.
Next, add the 1 tbsp vanilla extract and mix for another 10 seconds until fully incorporated. The dough should come together into a soft, pliable ball. If it feels too sticky, you can chill it for 10 minutes before rolling. Real talk: this dough is forgiving, but don’t overwork it.
⏰ Step 3: Chill the Dough for Perfect Shape
Divide the dough into two equal discs and flatten slightly. Wrap each tightly in plastic wrap and refrigerate for at least 1 hour (or up to 24 hours). Chilling prevents the cookies from spreading too much in the oven, ensuring they hold their shape while maintaining that signature soft bite.
Here’s the thing—if you’re in a hurry, you can freeze the dough discs for 30 minutes instead. Just let them sit at room temperature for 10 minutes before rolling. The key is to work with cold dough for that perfect texture.
🔥 Step 4: Roll and Cut for Uniform Cookies
Preheat your oven to 350°F and line two baking sheets with parchment paper. On a lightly floured surface, roll one disc of dough to about ¼-inch thickness. Use a 2.5-inch round cutter (or any shape you prefer) to cut out cookies, gently re-rolling the scraps as needed. Place cookies 2 inches apart on the prepared sheets.
For that classic sugar cookie look, I like to sprinkle cookies with a little extra sugar before baking. Just toss them in a small bowl of sugar or use a fine-mesh sieve to dust them lightly. This creates those beautiful caramelized edges and adds a touch of sweetness.
🔥 Step 5: Bake to Golden Perfection
Bake for 9-11 minutes until the edges are just beginning to turn light golden brown. The centers should still look slightly soft—they’ll firm up as they cool. Rotate the baking sheets halfway through for even baking. Don’t overbake; sugar cookies continue cooking on the pan after removal.
Let cookies cool on the baking sheet for 5 minutes before transferring to a wire rack. They’ll be soft and tender when warm, with crisp edges that develop as they cool. For maximum flavor, serve them at room temperature. These cookies stay fresh for 5 days in an airtight container or frozen for up to 3 months.
Pro Tips For Making 6 Ingredient Sugar Cookie
- MEASURE BUTTER COLD: Take the butter straight from the fridge—no softening, no room-temperature nonsense. This recipe relies on the butter staying firm to create that signature tender crumb and crisp edges. I learned this the hard way after making dough that spread like a pancake on the baking sheet.
- CREAM SUGAR BUTTER WELL: Beat the butter and sugar until the mixture is pale and fluffy, not just combined. Use a stand mixer for 3-4 minutes—yes, it feels long, but this step dissolves the sugar evenly and aerates the dough. Skimp here, and your cookies will taste flat and dense.
- CHILL DOUGH LONGER: Give the dough a good 24 hours in the fridge, not just an hour. This isn’t optional—it lets the gluten relax, prevents excessive spreading, and makes rolling and cutting a breeze. I used to rush this, and my cookies always turned out chewy and uneven.
- USE A LIGHT HAND: Handle the dough as little as possible after shaping. Overworking it introduces gluten, which makes the cookies tough instead of tender. Roll them gently, cut with a floured knife, and avoid pressing too hard—this recipe is all about delicate texture.
Essential equipment for this dish
Mixing Essentials
Your stand mixer or hand mixer is non-negotiable for this recipe—I use my KitchenAid Artisan Series for consistent results. The paddle attachment works best for creaming butter and sugar, while the dough hook isn’t needed here.
If you don’t have a mixer, a wooden spoon and strong arm will work, but expect to put in extra elbow grease. 💫
Measuring Tools
Invest in a digital kitchen scale for precision, especially with flour—OXO Good Grips is my go-to. For measuring sugar, a clear glass measuring cup lets you see the 1-cup line clearly.
I also keep a fine-mesh sieve handy for sifting flour, which prevents lumps and creates lighter cookies. A small offset spatula helps scrape every last bit of dough from the mixing bowl.
Rolling and Cutting
A chilled rolling pin is crucial for maintaining dough temperature—Nordic Ware marble pins stay cool longer. For cutting, a 2.5-inch round cutter works perfectly, but you can use holiday cookie cutters too.
I keep a small bowl of sugar nearby to dust the cookies before baking, which adds that professional touch. A bench scraper helps gather dough scraps efficiently during rolling.
Baking Basics
Two rimmed baking sheets with parchment paper are essential—Wilton Premium parchment works best. I use Oven Thermometers like Thermoworks to ensure accurate 350°F temperatures. A wire cooling rack prevents cookies from getting soggy on the bottom.
For extra insurance, I keep a timer set for 9-11 minutes to avoid overbaking.
Decorating Extras
If you plan to decorate, a piping bag with a round tip works well for royal icing. For sprinkles, a fine-mesh strainer helps distribute them evenly.
I also keep food coloring and edible glitter on hand for festive touches. A small paintbrush comes in handy for detailed designs on larger cookies.
Nutrition facts
Frequently asked questions
Can I substitute vanilla bean paste with regular vanilla extract?
Yes! If you don’t have vanilla bean paste, simply double the vanilla extract to 2 tablespoons. The paste adds depth of flavor, but pure extract will still give you delicious cookies. For extra richness, add a pinch of ground vanilla bean seeds alongside the extract.
Why are my cookies spreading too much?
Over-creaming the butter and sugar or skipping the chilling step causes spreading. Make sure to cream the butter and sugar until light but not overly fluffy, and always chill the dough for at least 1 hour before rolling. Using cold butter also helps maintain shape.
Can I make these cookies without a mixer?
Use a sturdy wooden spoon or a fork to mix the butter and sugar until combined, then switch to your hands for the dry ingredients. Work the dough just until it comes together—overmixing by hand is easy to do, so be gentle. The texture will be slightly less airy but still delicious.
How do I store leftover dough?
Wrap the dough discs tightly in plastic wrap and refrigerate for up to 48 hours, or freeze for 3 months. Thaw in the fridge overnight before using. For baked cookies, store in an airtight container at room temperature for 5-7 days, or freeze for up to 3 months.
What’s the best way to decorate these cookies?
Royal icing works perfectly for piping designs. Mix 2 cups powdered sugar, 1.5 tablespoons meringue powder, and 2 tablespoons water until smooth, then add food coloring. For a quick option, melt white chocolate and drizzle over cooled cookies, then sprinkle with colorful toppings.

- 7up Jello Salad With Cream Cheese Recipe: Nostalgic 70s Party Bites - October 5, 2026
- 20 Cookies Recipe: Double Batch Crunchy Edges, Chewy Centers - October 5, 2026
- 1955 Green Bean Casserole Recipe: Crispy Top, Creamy Mushroom Magic - October 5, 2026