
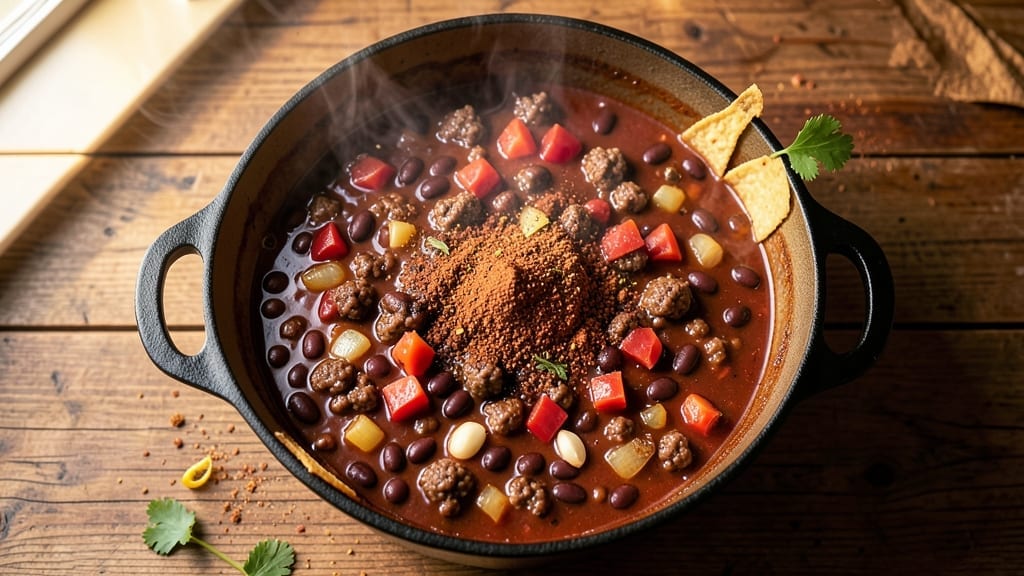
This 6-qt chili recipe delivers the hearty, spice-kissed comfort of a Texas-style bean-heavy chili that feeds a crowd with minimal fuss.
After years of perfecting the balance between smoky meat, tender beans, and deep spice layers, I’ve developed a method that transforms simple ingredients into a pot so rich it’ll have everyone asking for seconds.
The secret lies in slow-simmered flavors that develop over hours, where the beans soften just enough to soak up all that savory broth while the spices meld into a complex, warming harmony.
What sets this recipe apart is its foolproof structure—browning the meat thoroughly for deep flavor, then letting the chili simmer low and slow to tenderize everything perfectly.
With just 15 minutes of active prep and 4-6 hours of hands-off cooking, this is the kind of dish that rewards patience with restaurant-quality results.
The 6-quart yield makes it ideal for gatherings, game days, or meal prep, where every spoonful delivers that perfect mix of smoky, spicy, and slightly sweet notes that define great chili.
By the time you’re ladling it into bowls, you’ll have a chili that’s rich yet balanced—not too heavy, not too thin, with beans that hold their shape while still contributing to the heartiness.
The spices are layered but never overpowering, and the meat stays tender despite the long cook time. This isn’t just another chili recipe; it’s the one that becomes your go-to for feeding a crowd or storing leftovers for days. Here’s how to make it.
For those who love customization, you can easily adapt this base recipe into a vegetarian version by swapping meat for extra beans and mushrooms, or turn it into a slow-cooker chili by adjusting the liquid and cook time.
The beauty of this recipe is its flexibility—whether you’re a seasoned cook or a beginner, the steps are straightforward, and the results are always impressive. Let’s get started.
Ingredients for 6 qt chili
Sixteen ingredients. One pot. Six quarts of Texas-style chili that feeds a crowd with deep, layered flavor.
| Ingredient | Amount | Notes |
|---|---|---|
| Ground Beef (Chuck) 🥩 | 3 lb | 80% lean, pre-cubed for even cooking |
| Yellow Onion 🧅 | 3 whole | Medium size, finely chopped |
| Garlic Cloves 🧄 | 6 cloves | Fresh, minced for aromatic depth |
| Kidney Beans (Dry) 🌾 | 1 ½ cups | Soaked overnight or canned (drained) |
| Black Beans (Dry) 🌾 | 1 ½ cups | Soaked overnight or canned (drained) |
| Chili Powder 🌶️ | ¼ cup | Smoked variety for authentic flavor |
| Ground Cumin 🌿 | 2 tbsp | Toasted for enhanced aroma |
| Paprika 🌶️ | 1 tbsp | Sweet or smoked, for color and depth |
| Cayenne Pepper 🔥 | 1 tsp | Adjust for heat preference |
| Salt 🧂 | 2 tsp | Diamond Crystal preferred (less sodium) |
| Black Pepper 🌶️ | 1 tsp | Freshly ground for best flavor |
| Beef Broth 💧 | 4 cups | Low-sodium, homemade or quality store-bought |
| Tomato Paste 🍅 | ½ cup | Canned, for concentrated flavor |
| Dark Brown Sugar 🍚 | 2 tbsp | Balances acidity and enhances depth |
| Apple Cider Vinegar 🍎 | 1 tbsp | Brightens flavors, optional but recommended |
The beef is non-negotiable here—chuck roast gives you that melt-in-your-mouth texture that separates great chili from good. Costco or Walmart usually have it pre-cubed, which saves time. If you’re buying a whole roast, look for good marbling and cube it yourself. The beans? Dry is best—soak them overnight for perfect texture, but canned works in a pinch. For spices, Penzeys or bulk bins at Whole Foods have the freshest ground cumin and paprika, but don’t stress if you’ve got the basics at home. The key is toasting the spices in a dry pan for 30 seconds before adding them to the pot—trust me on this.
No chuck roast? Ground sirloin or a mix of beef and pork works, but chuck’s fat content is what makes this chili rich. Short on dried beans? Double the canned beans and add extra broth. The tomato paste can be swapped for crushed tomatoes (2 cups), but paste gives you that concentrated umami punch. Running low on vinegar? Lemon juice at the same amount works just fine. For heat, reduce the cayenne or swap in chipotle powder instead. The brown sugar might seem odd, but it’s what balances the acidity and adds that subtle caramelized depth—don’t skip it.
This chili tastes even better the next day as flavors meld, so make it ahead if you can. Keeps for 5-6 days in the fridge, freezes beautifully for up to 3 months. I portion mine into quart-sized freezer bags for easy serving later. The beans will soften further when reheated, so if you prefer them firmer, add a splash of broth when warming. For serving, I like to top with sour cream, shredded cheese, and fresh cilantro—but that’s optional, of course.
Why You’ll Love This Recipe
- One-Pot Magic: Honestly, the chuck beef browns so fast in that big pot—no skillet juggling, no extra pans. Just dump, stir, and let the onions caramelize while you chop garlic (or, let’s be real, grab the jarred minced if you’re in a rush).
- Deep Umami Bomb: That slow simmer with dried beans? The kidney and black beans soak up the beef juices until they’re tender and bursting—crispy edges on the beans, rich meaty flavor in every bite. (Yes, even on a Tuesday night.)
- Leftovers That Beg: Between us, this chili tastes better the next day—all that beef fat renders down, the flavors meld. I freeze half for lazy Mondays, and my coworkers bring Tupperware when they hear I’m making it.
- Budget Feeds Five: Six quarts means six servings, and chuck beef stretches across meals like a champ. Dried beans? Cheaper than canned, and they hold up for days. My wallet and my family thank me every time.
Step-by-step instructions for hearty 6-Quart chili
This method delivers deep, complex flavor with tender beef and perfectly cooked beans every time.
Brown the Ground Beef Thoroughly
Heat a large Dutch oven over medium-high heat until hot. Add the 3 lb ground beef (chuck) in batches, breaking it apart with a wooden spoon as it cooks. Don’t overcrowd the pot—work in 2 batches if needed to ensure proper browning.
Cook until the beef is deep brown and no longer pink, about 8-10 minutes. This step is critical for developing rich, meaty flavor. Use a slotted spoon to transfer the cooked beef to a plate, leaving all the rendered fat in the pot. The fat will serve as your cooking medium for the aromatics.
Sauté Onions and Garlic for Aromatic Depth
In the same Dutch oven, reduce heat to medium and add the 3 whole yellow onions, chopped into small pieces. Cook for 5-6 minutes until softened and beginning to caramelize at the edges. Add the 6 cloves garlic cloves, minced, and cook for another 30 seconds until fragrant.
Here’s the thing—don’t walk away during this step. The onions should develop a golden hue and the garlic should sizzle audibly. This aromatic foundation forms the flavor backbone of your chili. If the onions start to stick, add 1 tablespoon of the beef fat to help release them.
Build the Spice Base and Simmer
Add the 0.25 cup chili powder, 2 tbsp ground cumin, 1 tbsp paprika, 1 tsp cayenne pepper, 2 tsp salt, and 1 tsp black pepper to the pot. Stir vigorously for 1 minute to toast the spices and release their essential oils. This step deepens the chili’s complexity and removes any raw spice flavors.
Return the browned beef to the pot and stir to combine. Add the 4 cups beef broth, 0.5 cup tomato paste, 2 tbsp dark brown sugar, and 1 tbsp apple cider vinegar. Bring the mixture to a gentle boil, then reduce heat to low and let it simmer uncovered for 30 minutes, stirring occasionally. This initial simmer allows all the flavors to meld together.
Add Beans and Complete the Cook
If using dry beans, add the 1.5 cups kidney beans (dry) and 1.5 cups black beans (dry) at this point. If using canned beans, drain and rinse them first, then add them to the pot. Stir well to combine with the chili mixture.
Return the chili to a gentle simmer and cook uncovered for 1.5 to 2 hours, stirring occasionally. The beans are done when they’re tender but still hold their shape—you should be able to pierce them easily with a fork. If the chili becomes too thick, add ½ cup water or broth to reach your desired consistency. The chili should have a thick, stew-like texture but still be spoonable.
Rest and Adjust Seasoning
Once the beans are tender and the chili has reached your preferred consistency, remove the pot from heat. Let the chili rest for 15-20 minutes before serving. This resting period allows the flavors to fully develop and the liquid to redistribute throughout the chili.
Taste and adjust seasoning if needed. You might need to add more salt, cayenne for heat, or even a splash of vinegar to brighten the flavors. Serve the chili hot, garnished with additional chopped onions, cilantro, or a dollop of sour cream if desired. Each spoonful should deliver rich, complex flavors with a perfect balance of spice, sweetness, and umami.
Pro Tips For Making 6 Qt Chili
- Brown the Beef Thoroughly: Chuck roast turns tough when it stays pink—don’t rush this. Break it into small chunks first, then cook over medium-high heat until every piece is deep brown, not just gray. I learned this the hard way after serving chili with undercooked bits that tasted like shoe leather.
- Soak Beans Overnight: Dry beans expand a lot—skip soaking, and your 6-quart pot will overflow or turn mushy. Cover kidney and black beans in water (4 cups per pound) the night before, then drain. This also cuts cooking time by 45 minutes, and the texture stays firm.
- Simmer Slow and Low: High heat now = rubbery beans and a thin chili later. Once everything’s in the pot, reduce to a bare simmer (tiny bubbles, occasional skimming) for at least 2 hours. I used to walk away after 45 minutes, but patience pays off—flavor deepens, and the beans get tender without falling apart.
- Toast the Spices First: Bloom your chili powder, cumin, and paprika in the pot with a splash of oil for 30 seconds before adding liquids. This wakes up their flavors—no more tasting like dust. (Yes, even if your recipe doesn’t say to.) The aroma alone tells you it’s working.
Creative variations of these flavors
Texas-Style Chili
This is the classic version you’ll find at chili cook-offs, with a bean-heavy approach that makes it hearty and filling. The key is using kidney and black beans (1.5 cups each) for texture contrast, and relying on smoked chili powder and toasted cumin for that authentic Texas flavor profile.
I like to add a touch of apple cider vinegar at the end to brighten the deep, smoky notes. Serve it with cornbread and a side of pickled jalapeños for the full experience. 🌶️
Slow-Cooker Adaptation
For hands-off cooking, transfer all ingredients to a 6-quart slow cooker after browning the beef and sautéing the onions. Cook on low for 7-8 hours or high for 4-5 hours, stirring once halfway through. The slow cooker keeps the beans tender without overcooking them, and the flavors meld beautifully.
This method is perfect for game day or when you’ve got other things on your mind—just set it and forget it. ⏰
Vegetarian Version
Swap the beef for 1 lb extra-firm tofu (crumbled and pan-fried) or 2 cups lentils (cooked separately). Use mushrooms (8 oz, diced) for umami depth, and add 1 cup corn for sweetness.
Boost the spices with 1 tsp smoked paprika and ½ tsp liquid smoke to mimic the meaty flavor. This version is just as satisfying and perfect for plant-based eaters. 🌱
White Chili Twist
Turn this into a white chili by omitting the tomato paste and adding 4 cups chicken broth instead of beef. Use chicken or turkey (3 lb ground) and swap the spices for 1 tbsp ground coriander, 1 tsp dried oregano, and ½ tsp turmeric for color.
Add 2 cups white beans (cannellini or great northern) and finish with a splash of lemon juice for brightness. Garnish with cilantro and avocado slices for a fresh, creamy contrast. 🥑
Spicy Chipotle Kick
For a smoky, fiery chili, replace the cayenne with 2-3 chipotle peppers in adobo sauce (minced). Add them with the spices and simmer for an extra 15 minutes to let the smokiness infuse. Balance the heat with a pinch more brown sugar and a squeeze of lime juice before serving.
This version is perfect for those who love bold, smoky heat without the raw spice burn. 🔥
Game Day Crowd-Pleaser
Double the recipe for a 12-quart batch (just scale all ingredients proportionally) and cook it in two Dutch ovens. Serve it in a chafing dish with shredded cheese, sour cream, and chopped green onions on the side.
Add crushed tortilla chips to the top for crunch, and set out hot sauce and extra lime wedges for customization. This is the ultimate tailgate chili that’ll keep everyone coming back for more. 🏈
Nutrition facts
Frequently asked questions
How long does this 6-quart chili keep in the fridge?
This hearty chili stays fresh for 5-6 days when stored in an airtight container in the refrigerator. The flavors actually improve after the first day as everything melds together. For longer storage, portion into quart-sized freezer bags and freeze for up to 3 months—perfect for meal prep!
Can I use canned beans instead of dry?
Use 2 (15 oz) cans each of kidney and black beans (drained and rinsed) to replace the dry beans. For best texture, add them during the final 1 hour of cooking so they don’t get mushy. Canned beans save time but dry beans develop better flavor when cooked from scratch.
What’s the best way to reheat leftover chili?
Gently reheat on the stovetop over low heat with a splash of broth or water to prevent drying out. For microwave reheating, cover with a damp paper towel and heat in 1-minute intervals, stirring between each. The slow method preserves texture better—avoid boiling or the beans will turn mushy!
How do I adjust the heat level?
For milder chili, reduce the cayenne to ½ tsp or swap for ½ tsp smoked paprika. For extra heat, add 1-2 chipotle peppers in adobo sauce (minced) with the spices. Always taste before serving—you can add more heat, but you can’t remove it once it’s in!
Can I make this in a slow cooker instead?
Yes! After browning the beef and sautéing onions, transfer everything to a 6-quart slow cooker. Cook on low for 7-8 hours or high for 4-5 hours, stirring once halfway. The slow cooker method keeps the beans tender while developing deep flavor—ideal for game day when you want hands-off cooking.

- 77 Texas BBQ Taco Sauce Recipe: Smoky Chipotle Heat With Caramelized Depth - October 19, 2026
- 1930’s Chocolate Cake Recipe: Vintage Richness With Vanilla Bean Swirls - October 19, 2026
- 6 Ingredient Bread Recipe: No-Knead Wonder With Pantry Staples - October 19, 2026