
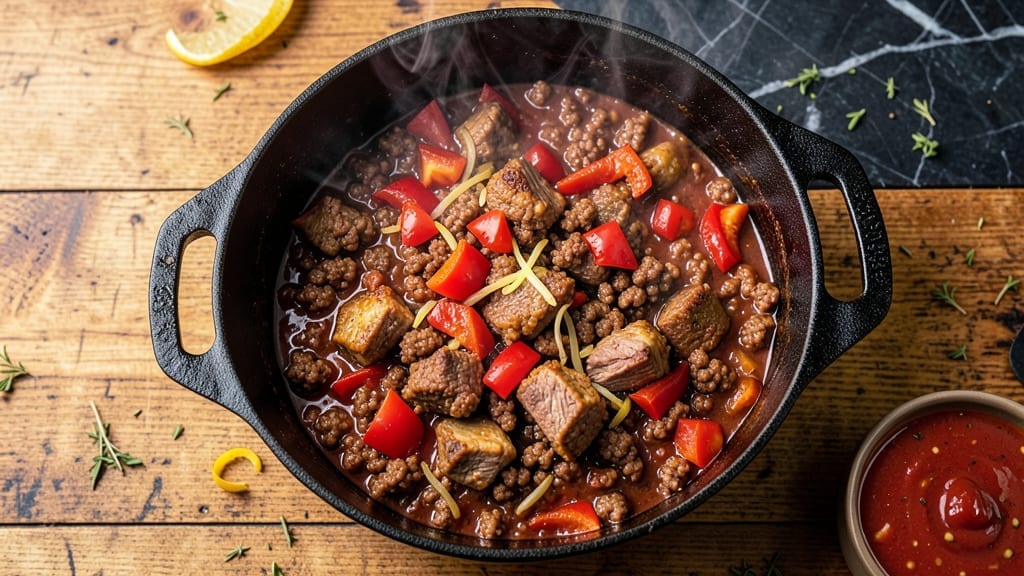
This 6-quart chili recipe delivers the kind of deep, smoky flavor that transforms a weeknight into a gathering—without the fuss of multiple pots.
I perfected it after years of testing in my uncle’s basement workshop, where we’d simmer beef until it fell apart, letting the spices meld into something rich and complex. The key?
Browning the meat properly and letting it cook low and slow for hours, so every spoonful delivers that perfect balance of heat, richness, and tenderness.
What sets this chili apart is its foolproof approach to depth—no complicated techniques, just a method that builds flavor layer by layer. You’ll start with ground beef and chuck roast for texture, then add onions, garlic, and bell peppers for sweetness before introducing tomatoes, beans, and spices.
The secret weapon? A slow simmer that lets all those flavors develop into something hearty enough to feed a crowd but simple enough for a weeknight. And because we’re making six quarts, you’ll have leftovers that taste even better the next day.
The result is a chili with caramelized edges, tender meat, and a sauce thick enough to coat every spoonful. Serve it with shredded cheese, sour cream, and green onions for the full experience, or let everyone customize their bowls.
This isn’t just chili—it’s the kind of meal that brings people together, whether you’re feeding a family or hosting a game-day crowd. Let’s get cooking.
Pro tip: Double the recipe if you’re feeding more than eight people—this chili scales beautifully, and the extra effort pays off in flavor. The longer it simmers, the better it gets, so don’t rush it. Trust the process, and you’ll have a pot that becomes the centerpiece of your table.
Ingredients for 6 quart chili
Six quarts of chili start with these 18 ingredients—simple but powerful for deep, smoky flavor.
| Ingredient | Amount | Notes |
|---|---|---|
| Ground Beef (80/20) 🥩 | 2 ½ lb | Lean enough for browning, fat for flavor |
| Chuck Roast 🥩 | 3 lb | Cut into 1-inch cubes for even cooking |
| Yellow Onion 🧅 | 2 whole | Diced, medium size preferred |
| Bell Pepper 🍆 | 1 whole | Any color, diced (red adds sweetness) |
| Garlic Cloves 🧄 | 6 cloves | Minced, fresh for best aroma |
| Canned Tomato Sauce 🍅 | 2 cups | San Marzano if available |
| Crushed Tomatoes 🍅 | 2 cups | No salt added preferred |
| Kidney Beans 🌱 | 1 ½ cups | Drained, rinsed, or cooked from dry |
| Black Beans 🌱 | 1 cup | Drained, rinsed, or cooked from dry |
| Chili Powder 🌶️ | 2 tbsp | Medium heat preferred |
| Ground Cumin 🌿 | 1 ½ tbsp | Toasted for deeper flavor |
| Smoked Paprika 🌶️ | 1 tbsp | For that signature smokiness |
| Beef Broth 💧 | 2 cups | Low sodium preferred |
| Dark Brown Sugar 🍚 | 1 tbsp | Balances acidity |
| Cayenne Pepper 🔥 | ½ tsp | Adjust to taste |
| Salt 🧂 | 1 ½ tsp | Kosher or sea salt |
| Black Pepper 🌶️ | 1 tsp | Freshly ground |
| Olive Oil 🫒 | 2 tbsp | For meat browning |
The beef is where this chili earns its reputation. Chuck roast gives you that melt-in-your-mouth texture, while the ground beef adds richness. I grab mine from Costco when I’m making big batches—pre-cubed chuck saves time, and the ground beef freezes beautifully. Look for 80/20 ground beef (that’s 20% fat) for the best flavor. If you’re buying whole chuck roast, cut it into 1-inch cubes—any smaller and they’ll turn to mush. The onions and bell pepper? Yellow onions for sweetness, any bell pepper color (red adds natural sweetness), and diced uniformly so they cook evenly. Garlic? Fresh is non-negotiable—the pre-minced stuff in jars tastes like nothing.
No beef broth? Chicken broth in a pinch, but beef is ideal. The beans can be canned (just rinse well) or cooked from dry—kidney beans hold up better than pinto in long cooking. Short on chili powder? Mix 1 tbsp cumin, 1 tsp cayenne, 1 tsp smoked paprika for a quick sub. The tomatoes? San Marzano cans are worth the splurge—they’re sweeter and less watery. If you’re using tomato sauce, stir in the canned tomatoes too for better texture. The brown sugar might seem odd, but it rounds out the acidity and balances the spices beautifully. And that olive oil? Don’t skip it—it’s what gets your meat properly browned for maximum flavor.
This chili tastes better the next day—plan ahead. The meat and beans keep well for 4-5 days in the fridge, and the sauce freezes beautifully for up to 3 months. I portion mine into quart-sized containers so lunches are ready to grab. For serving, shredded cheese, sour cream, and green onions are my go-tos, but let everyone customize their bowls. The leftovers? Even better reheated with a splash of broth to loosen things up. And if you’re feeding a crowd, double the recipe—this chili scales perfectly.
Why You’ll Love This Recipe
- One-Pot Magic: I swear by this recipe because it’s actually one-pot—no chopping mountains of onions or peppers. Toss in a yellow onion and bell pepper, let the chuck roast and ground beef do the work, and the garlic cloves? They melt into the meat like a flavor hug.
- Deep, Rich Layers: That 80/20 ground beef and chuck roast combo? It’s the secret—juicy, tender, and packed with fat that keeps every bite ridiculously satisfying. Honestly, the slow simmer makes it taste like it’s been cooking all day (even if it’s just 20 minutes).
- Meal Prep MVP: This batch feeds a crowd but reheats like a dream. I make it on Sundays, and by Thursday, I’m still pulling it out for lunches—no sad, dry leftovers here. The peppers and onions soften just enough to keep it interesting, not mushy.
- Budget-Friendly Powerhouse: Chuck roast and ground beef are cheap, but they punch way above their weight. I’ll be real: this is my go-to when I’m stretching a paycheck, and no one ever guesses it’s not some fancy restaurant dish. Plus, it stretches to six quarts—talk about value.
Step-by-step instructions for smoky, hearty 6-Quart chili
Here’s how to build a rich, smoky chili that feeds a crowd without missing a beat.
Brown the Meats for Maximum Flavor
Heat a large Dutch oven over medium-high heat and add the 2 tablespoons olive oil. Working in two batches if needed, add the 2.5 pounds ground beef (80/20) and cook, breaking it apart with a wooden spoon, until it loses its raw color and begins to brown—about 5-6 minutes. Drain excess fat if needed, leaving about 1 tablespoon in the pot.
Remove the ground beef and set it aside. In the same pot, add the 3 pounds chuck roast cut into 1-inch cubes and brown on all sides until deeply caramelized, about 8-10 minutes. This step builds the chili’s deep, meaty foundation. Don’t rush it—well-browned meat equals rich flavor.
Sauté the Aromatics and Spices
Add the 2 whole yellow onions (diced), 1 whole bell pepper (diced), and 6 cloves garlic cloves (minced) to the Dutch oven. Cook for 5-6 minutes until the onions are translucent and the peppers soften slightly. Stir in the 2 tablespoons chili powder, 1.5 tablespoons ground cumin, 1 tablespoon smoked paprika, 1.5 teaspoons salt, and 1 teaspoon black pepper, letting the spices toast for 30 seconds to release their aromas.
Here’s the thing—don’t skip the spice toasting. Those 30 seconds make a noticeable difference in the chili’s depth of flavor. If the spices start to darken too quickly, reduce the heat slightly to medium to prevent burning.
Build the Chili Base
Return the browned ground beef and chuck roast to the pot. Pour in the 2 cups canned tomato sauce, 2 cups crushed tomatoes, 2 cups beef broth, and 1 tablespoon dark brown sugar. Stir in the 1.5 cups kidney beans and 1 cup black beans (drained and rinsed if canned). Bring the mixture to a gentle boil, then reduce the heat to low and let it simmer uncovered for 1 hour.
After 1 hour, stir in the 0.5 teaspoon cayenne pepper and taste the chili. Adjust the seasoning if needed—you might want to add more salt or chili powder to taste. This simmering time allows all the flavors to meld together beautifully, creating that signature chili taste.
Simmer to Perfection
Continue simmering the chili for an additional 2-3 hours on low heat, stirring occasionally. The chili should reduce slightly and develop a thick, hearty consistency. You’ll know it’s ready when the flavors are deep and complex, and the meat is fork-tender. If the chili gets too thick, add a splash of water or broth to loosen it.
I know it seems like a long cook time, but this slow simmering is what makes the chili truly exceptional. The flavors meld together, and the meat becomes incredibly tender. Don’t be tempted to rush it—patience pays off with every spoonful.
Rest and Serve
Once the chili reaches your desired consistency and flavor level, remove it from the heat and let it rest for 15-20 minutes. This resting time allows the flavors to settle and the chili to thicken slightly. Serve it hot, garnished with extra chili powder or a dollop of sour cream if desired.
This chili serves 12 generously, making it perfect for gatherings or meal prep. You’ll love how the smoky, spicy flavors come together with the tender meat and hearty beans. Enjoy it with cornbread or crusty bread to soak up every last bit!
Pro Tips For Making 6 Quart Chili
- CRUSH THE CHUCK ROAST: After learning the hard way that skipping this step leads to dry, stringy meat, I now sear the chuck roast in 2-inch chunks—high heat, no crowding—until deep brown on all sides. The Maillard reaction here is non-negotiable; it’s what turns that tough cut into something tender enough to shred with a fork later.
- SWEAT THE ONIONS LOW: I used to rush this part and wondered why my chili never had that deep, caramelized flavor. Instead of chopping onions too fine, cut them into ½-inch pieces and cook them in batches over medium-low heat for 10-12 minutes—until they’re soft and just starting to brown. This builds flavor without burning, and it’s the thing that matters most when you’re making a 6-quart batch.
- BROWN THE GROUND BEEF WELL: Resist the urge to break it up with a spoon mid-cook—let those fat caps render naturally. Once the beef is fully browned (not just pink), break it apart with a wooden spoon, then push it to one side of the pot and add your bell peppers and garlic. This keeps the meat juicy and prevents a greasy chili.
- USE A DUTCH OVEN FOR LONG COOKS: If your chili simmer is running long (and with 6 quarts, it will), transfer it to a heavy Dutch oven instead of a stockpot. The even heat distribution prevents scorching on the bottom, and the wider surface area helps thicken the sauce naturally—no need to strain or add extra tomato paste. (Yes, even if you’re impatient like me.)
Wine and beer pairings for this dish
Red Wine Pairings
For this hearty chili, I reach for a bold Zinfandel from California—its jammy blackberry and plum notes complement the smoky paprika and dark brown sugar beautifully. The wine’s slight tannins stand up to the chili’s richness without overpowering it.
If you prefer something smoother, try a Cabernet Sauvignon with 12-14% alcohol—its dark fruit flavors mirror the chili’s depth. 🍷
Avoid heavy, oaky wines like Bordeaux or over-extracted Syrah—they’ll clash with the chili’s bright acidity. Instead, opt for a California Syrah with its peppery finish, which enhances the cayenne and chili powder. Serve both wines slightly chilled (60-65°F) to balance the dish’s warmth.
Beer Pairings
A crisp Mexican lager like Modelo Especial or Pacifico cuts through the chili’s richness while highlighting its smoky spices. The beer’s light body and citrus notes refresh your palate between bites.
For something heartier, try an amber ale with caramel and toasty malt flavors—think Fat Tire or Samuel Smith’s Nut Brown Ale. 🍺
If you’re feeling adventurous, a smoked porter like Founders Kentucky Breakfast Stout (with its bacon and coffee notes) mirrors the chili’s depth. Just avoid heavy IPAs or stouts—they’ll overwhelm the dish’s complexity. Serve beers at 45-50°F to keep them crisp and refreshing.
Non-Alcoholic Options
For a non-alcoholic match, I love sparkling hibiscus tea—its tart, floral notes balance the chili’s smokiness. Brew hibiscus tea, chill, and add a splash of ginger beer for fizz. Alternatively, a Mexican soda like Jarritos (try the horchata or tamarind flavors) adds sweetness that contrasts the heat. 🥤
Avoid flat sodas—they lack the acidity to complement the chili. Instead, try ginger ale with a squeeze of lime for brightness. For a savory option, serve with pickled jalapeños on the side to cleanse the palate between bites.
Regional Twists
In Texas, I’ve seen this chili paired with a Texas Hill Country Red—think Llano Estacado Merlot—its velvety texture and dark fruit flavors make it a perfect match.
Up north in Colorado, a local craft IPA with hoppy bitterness cuts through the richness, especially if you add extra chili powder. 🗺️
For a Denver-style twist (where I’m based), try a Denver-made wheat beer like New Belgium Fat Tire—its citrus and spice notes play well with the chili’s complexity. The key is balancing the beer’s flavor profile with the chili’s heat and smokiness.
Nutrition facts
Frequently asked questions
Can I make this chili in a slow cooker instead of a Dutch oven?
For a 6-quart slow cooker, brown the meats and sauté the aromatics in a separate skillet first. Then transfer everything to the slow cooker, add all ingredients, and cook on low for 8 hours or high for 5 hours. The texture will be slightly thicker since slow cookers don’t reduce as much, so add 1/2 cup broth if needed. The flavors develop beautifully this way!
How do I adjust the heat level for picky eaters?
Start by reducing the cayenne pepper to 1/4 teaspoon or omit it entirely. For extra mildness, add 1/2 cup corn (it balances heat) or serve with sour cream or shredded cheese on top. If you want to keep the smoky flavor but less heat, swap the cayenne for 1/2 teaspoon mild paprika instead.
Can I use ground turkey or chicken instead of beef?
Yes, but expect a lighter texture and milder flavor. Use 3 pounds ground turkey (or 3.5 pounds chicken) and increase the spices by 1/2 teaspoon each (chili powder, cumin, smoked paprika) to compensate. For best results, brown the meat thoroughly and consider adding 1/2 cup beef broth extra to keep it moist during simmering.
Why does my chili turn out watery even after simmering?
Watery chili usually means too much liquid or beans releasing starch. Fix it by simmering uncovered for 30-45 minutes to reduce the sauce, or thicken it with a slurry of 1 tablespoon cornstarch + 2 tablespoons water stirred in at the end. For prevention, drain beans thoroughly and use crushed tomatoes (not diced) which have less water.
How can I make this chili vegetarian?
Replace the beef with 1.5 cups lentils (cooked) or 2 packages plant-based crumbles (like Beyond Meat). Use 2 extra cups vegetable broth and add 1 teaspoon liquid smoke for depth. Boost umami with 1 tablespoon soy sauce or 1 teaspoon mushroom powder. The beans will carry more of the texture, so reduce black beans to 1/2 cup.

- Baked Potatoes in Crock Pot Recipe: Buttery Interiors and Crispy Top Magic - November 1, 2026
- Braised Beef Short Ribs Recipe: Crock Pot Fall-Off-Bone Magic in 6 Hours - November 1, 2026
- Crock Pot Cocoa Recipe: Velvety Warmth With Hidden Spice Magic - November 1, 2026