
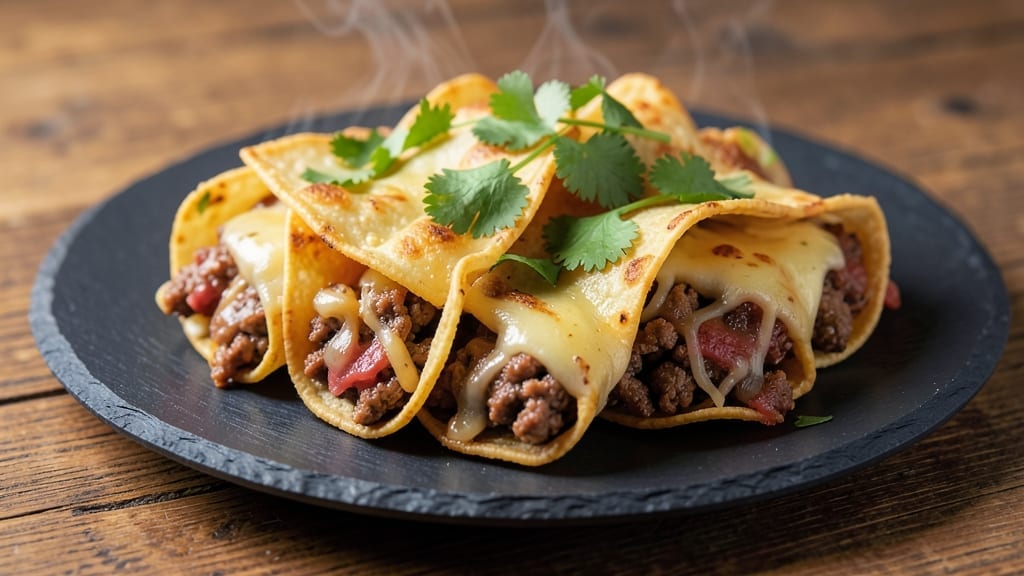
Here’s your 7-11 steak and cheese taquito recipe—the crispy, melty, savory snack you can’t stop craving. This recipe delivers the exact fast-food experience at home—no drive-thru required.
The secret lies in a simple seasoning blend that mimics their signature flavor, combined with a frying technique that ensures shells stay perfectly crispy while the cheese inside melts into gooey perfection. I’ve perfected this over countless batches, and trust me, once you try it, you’ll never buy them again.
What sets these apart is the balance of textures: golden-brown shells that shatter with each bite, tender ground beef seasoned just right, and cheese that stretches without breaking.
The process is straightforward—brown your beef with the right spices, mix in the cheese until creamy, then roll and fry (or bake for a lighter version) until the shells turn that addictive golden hue. No special equipment needed, just a few pantry staples and about 20 minutes of active time.
By the end, you’ll have a plate of taquitos that taste like you raided the 7-Eleven freezer section, complete with that satisfying crunch and melty cheese pull. Serve them with warm queso for dipping, and you’ve got a party-ready appetizer that disappears faster than you can say “extra cheese.”
The best part? These taste even better the next day, making them perfect for meal prep or game day snacks.
Ready to make crispy, cheesy taquitos that rival the convenience store originals? Let’s get started—your taste buds (and leftovers) will thank you. The recipe includes both frying and baking methods, so you can choose what works best for your kitchen.
Just don’t blame me if you find yourself sneaking seconds straight from the pan.
Ingredients for 7 11 steak and cheese taquito
Crispy shells, melty cheese, and that addictive fast-food flavor—all made with these 13 ingredients.
| Ingredient | Amount | Notes |
|---|---|---|
| Ground Beef (80/20) 🥩 | 1 ½ lb | Lean but fatty enough for flavor |
| Medium Taquitos Shells 🌯 | 24 pieces | Store-bought or homemade tortillas |
| Shredded Monterey Jack Cheese 🧀 | 2 cups | Sharp cheddar works too |
| All-Purpose Flour 🌾 | ½ cup | For dredging shells |
| Large Eggs 🥚 | 2 whole | Beaten for binding |
| Vegetable Oil 🫒 | 2 cups | For deep frying |
| Taco Seasoning 🌶️ | 2 tbsp | Homemade or store-bought |
| Salt 🧂 | ½ tsp | Kosher or sea salt |
| Ground Black Pepper 🌶️ | ¼ tsp | Freshly ground preferred |
| Minced Garlic 🧄 | 1 tbsp | Freshly minced |
| Sour Cream 🥛 | ½ cup | For dipping sauce |
| Salsa 🍅 | 1 cup | Store-bought or homemade |
| Hot Sauce 🔥 | 2 tbsp | Optional for serving |
The ground beef is where the magic happens—80/20 fat ratio gives you that juicy, flavorful bite you crave from 7-Eleven. Walmart or Costco usually have it pre-packaged in 1.5 lb bags, which is perfect for this recipe. If you’re buying a whole pack, grab the chuck roast and grind it yourself for the best texture. The taquito shells? Mission brand is my go-to—they’re sturdy enough to hold the filling without breaking. Keep them in a cool, dry place until ready to use, or freeze them for up to 6 months if you’re prepping ahead.
No taco seasoning? Mix 1 tbsp chili powder, 1 tsp cumin, 1 tsp paprika, and ½ tsp garlic powder—it’s a game-changer. The cheese is non-negotiable for that stretchy, melty perfection. Monterey Jack is the classic choice, but sharp cheddar or a blend of both works too. For the dipping sauce, sour cream and salsa are a must—add a splash of lime juice if you’ve got it. The hot sauce is totally optional, but trust me, it takes these to the next level. If you’re frying, use a deep fry thermometer to keep the oil at 375°F—any hotter and the shells burn before the cheese melts.
Fry the shells in small batches so the oil doesn’t get overloaded—that’s how you get that perfect golden color. Keep them warm in a 200°F oven while you fry the rest. These reheat beautifully—350°F for 10 minutes brings them back to crispy perfection. Store leftovers in an airtight container for 3 days, or freeze them for 2 months. Pro tip: Freeze them uncooked in a single layer first, then transfer to a bag. They’ll stay crispy when fried straight from frozen—no thawing needed.
Why You’ll Love This Recipe
- I swear by this trick: just mix the crumbled beef, cheese, and a beaten egg with a splash of water—no fancy binders. The flour’s there to help the shells crisp up, but honestly, it’s more about the squeeze-and-go method than anything else. My kids help roll them, and we’re done before the first commercial break.
- No-Fuss Assembly: I swear by this trick: just mix the crumbled beef, cheese, and a beaten egg with a splash of water—no fancy binders. The flour’s there to help the shells crisp up, but honestly, it’s more about the squeeze-and-go method than anything else. My kids help roll them, and we’re done before the first commercial break.
- That Crispy-Creamy Magic: The secret’s in the 80/20 beef—juicy, fatty, and so satisfying when it melts the Monterey Jack into gooey rivers. Between us, the shells get perfectly golden in the air fryer (or oven) while the filling stays warm and stretchy. It’s the kind of bite that makes you pause mid-conversation.
- Tailgate or Taco Tuesday: These disappear at parties—no one cares if they’re “fancy.” Serve them with sour cream and salsa for a crowd, or pack a cooler full for a game day. I’ve even reheated leftovers straight from the freezer (yes, really) and they still taste like a drive-thru win.
Step-by-step instructions for crispy steak and cheese taquitos
Here’s how to make taquitos with that perfect crunchy shell and melty cheese center!
Cook the Seasoned Ground Beef
In a large skillet over medium-high heat, combine the 1.5 lb ground beef (80/20) with the 2 tbsp taco seasoning, 0.5 tsp salt, 0.25 tsp ground black pepper, and 1 tbsp minced garlic. Break it apart with a wooden spoon as it cooks, stirring frequently for 5-6 minutes until it loses its raw color and becomes nicely browned.
You’ll know it’s ready when the beef releases easily from the pan and has a slightly crispy texture. Drain any excess fat if needed, but leave about 1 tablespoon in the pan for flavor. Let the beef cool for 5 minutes before mixing with the cheese—this prevents the cheese from melting too early and making a messy filling.
Prepare the Cheese Filling
In a medium bowl, combine the cooled ground beef with the 2 cups shredded Monterey Jack cheese. Mix gently with your hands or a fork until evenly distributed. The cheese should coat the beef evenly, creating a smooth, melty filling. If the mixture feels too dry, add 1 teaspoon of water to help it bind together.
This is where the magic happens—the cheese will melt perfectly during frying, creating that gooey center we all love. Don’t skip this step, as it ensures every bite has that classic 7-11 steak and cheese experience. Cover the bowl and set aside while you prepare the taquitos shells.
Assemble and Fry the Taquitos
Heat the 2 cups vegetable oil in a deep fryer or heavy pot to 375°F. While the oil heats, beat the 2 whole large eggs in a shallow bowl and season with 0.25 tsp salt and 0.125 tsp black pepper. In another shallow bowl, place the 0.5 cup all-purpose flour.
Dip each of the 24 medium taquitos shells into the flour, shaking off any excess, then dip into the beaten egg, letting any excess drip off. Fill each shell with about 1 tablespoon of the beef-cheese mixture, fold the sides in to seal, and place on a wire rack. Repeat until all shells are filled and sealed tightly.
Fry to Golden Perfection
Carefully place the filled taquitos in the hot oil, 4-5 at a time, being sure not to overcrowd the pan. Fry for 2-3 minutes per side until they’re a deep golden brown color. The shells should be crispy and the cheese should be fully melted inside—you’ll see it through the shell when it’s ready.
Use a slotted spoon to remove the taquitos and drain on paper towels. Keep them warm in a 200°F oven while you fry the remaining batches. If any shells open during frying, simply press them closed with a fork—they’ll still taste great, just with slightly less crunch.
Serve with Classic Dipping Sauces
Once all taquitos are fried, arrange them on a serving platter. For serving, mix the 0.5 cup sour cream with 1 tbsp hot sauce (if using) and set aside. Serve the taquitos with the sour cream mixture and 1 cup salsa on the side for dipping.
These taquitos are best served immediately while the shells are crispy and the cheese is still melty. The combination of the crispy shell, savory beef, and gooey cheese creates that perfect bite that makes these taquitos so addictive. Enjoy with your favorite cold beverage for the ultimate snack experience!
Pro Tips For Making 7 11 Steak And Cheese Taquito
- BROWN THE BEEF: Hit that beef with a hot pan—no rushing. I learned this the hard way: undercooked ground beef turns mushy when wrapped, and the taquitos end up soggy. Break it into small crumbles, let them sear until they release fat and develop a crust, then finish cooking. That’s what makes the filling hold up when fried.
- DRY THE SHELLS: Pull the taquito shells straight from the bag and spread them on a wire rack for 10 minutes. I used to skip this, and the cheese would leak out like a sad, greasy mess. Dry shells fry better and stay crispy longer—trust me, it’s worth the wait.
- DON’T OVERMIX THE FILLING: Once the beef is cooked, just stir in the cheese and seasoning—no need to turn it into a paste. Overworking it makes the filling dense, and those taquitos will feel like eating a meatloaf roll. Keep it loose, just combined enough to coat the shells.
- FRY IN BATCHES: Crowd the oil, and you’ll end up with greasy, half-cooked taquitos. Fry them in single layers, 4-5 at a time, for even browning. Use a thermometer—350°F is your sweet spot. Too hot, they burn before the cheese melts; too cool, they turn greasy.
Make-ahead tips for this 7 11 steak and cheese taquito
Prep Ahead Like a Pro
Make the beef-cheese filling up to 2 days ahead and store it in an airtight container in the fridge. The flavors deepen overnight, making each bite even more delicious. Just reheat the mixture in the microwave for 30 seconds before assembling—it’ll be warm and ready to roll. 💪
Freezer-Friendly Filling
Freeze the beef-cheese mixture in 1-tablespoon portions on a parchment-lined tray for 1 hour to solidify. Transfer to a freezer bag for up to 3 months. Thaw overnight in the fridge before using—no microwave needed, and the texture stays perfect.
Shell Prep Shortcut
Save time by pre-dredging the taquito shells in flour and eggs 1 day ahead. Store them in a sealed container at room temperature, and they’ll stay crispy when you fry them later. Just fill and fry as directed—no extra prep needed!
Fry or Bake?
For the baked version, brush shells with oil, bake at 400°F for 12-15 minutes, and broil for 2 minutes to crisp. Prep the filling and dipping sauces ahead, then bake straight from frozen—just add 5 extra minutes. The cheese melts beautifully without frying.
Dipping Sauce Prep
Mix the sour cream and hot sauce a day ahead and store in the fridge. The flavors meld perfectly, and you can even freeze it for 1 month. Thaw overnight before serving—no reheating needed. Keep the salsa separate until serving to maintain freshness. 🥛
Game Day Strategy
Assemble all taquitos (uncooked) and freeze them on a tray for 1 hour, then transfer to a bag. Fry straight from frozen—add 1 extra minute per side to ensure crispiness. Keep them warm in a 200°F oven while serving, and they’ll stay perfect for hours. No last-minute stress!
Nutrition facts
Frequently asked questions
Can I use ground turkey instead of beef?
Yes, but expect a slightly leaner texture. Ground turkey works well if you add 1 teaspoon olive oil to the pan while browning to compensate for the lower fat content. The seasoning blend stays the same, but turkey may require 1 extra minute of cooking time to fully brown. For the best 7-Eleven taste, stick with 80/20 ground beef—the fat is key for that signature flavor and juiciness!
Why did my taquitos open while frying?
This usually happens when the filling is too wet or the shells aren’t sealed tightly. Let the beef-cool completely before mixing with cheese, and press the edges firmly when folding. For extra security, use a toothpick to hold each taquito closed during frying. If they do open, press them back together—they’ll still taste amazing, just with slightly less crunch.
What’s the best cheese substitute if I don’t have Monterey Jack?
Sharp cheddar or a blend of cheddar and pepper jack works perfectly! For extra stretchiness, add 1/4 cup sour cream to the cheese mixture. Avoid pre-shredded cheese (it contains anti-caking agents that prevent proper melting). If you’re feeling adventurous, try Oaxaca or Chihuahua cheese for a Mexican-style twist that melts beautifully.
Can I make these in an air fryer?
Preheat your air fryer to 375°F and spray the taquitos lightly with oil after dredging. Cook in batches for 4-5 minutes, flipping halfway, until golden brown. The air fryer version won’t be quite as crispy as deep-frying, but it’s a great lighter alternative. For extra crunch, broil for 1-2 minutes at the end.
How do I keep the taquitos crispy when reheating?
Reheat in a 400°F oven for 8-10 minutes on a wire rack to maintain crispiness. For the microwave, place them on a paper towel and cover with another paper towel, then zap for 20-30 seconds. Never reheat in the fridge—they’ll turn soggy. The secret is high heat and quick cooking to restore that perfect crunch!

- 12 Bean Chili Recipe: Hearty Slow-Cooked Depth With 12 Legumes - October 17, 2026
- 5 Seed Bread Recipe: Nutty Crunch and Artisan Flavor in One Loaf - October 17, 2026
- 1 Lb Macaroni Salad Recipe: Bold, Crunchy, and Crowd-Pleasing - October 17, 2026