
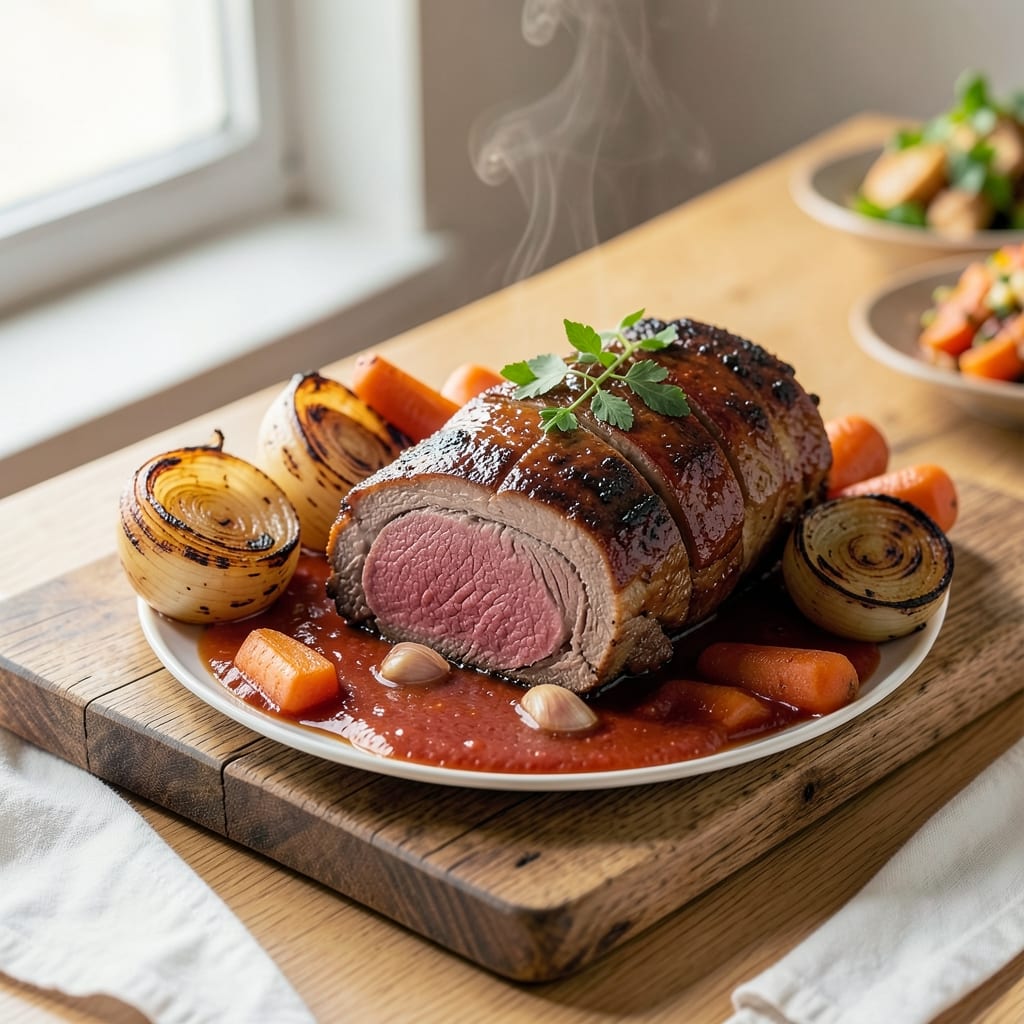
Transforming a tough cut into melt-in-your-mouth perfection, this 7-blade chuck roast recipe delivers restaurant-quality results with minimal effort. I developed this method after years of experimenting with slow-braising techniques that guarantee tender, flavorful meat every time—no guesswork involved.
The secret lies in low-and-slow cooking paired with a simple yet powerful spice blend that penetrates deep into the meat.
What sets this recipe apart is its versatility—whether you’re planning a Sunday dinner for the family or prepping for meal prep, this chuck roast delivers.
The slow-braising process transforms even the toughest cuts into shreds that fall apart at the touch of a fork, making it perfect for sandwiches, tacos, or hearty stews. With just 3 hours of active cooking time (plus resting), you’ll have a dish that’s rich, deeply flavorful, and impossible to resist.
By the time you’re done, you’ll have a chuck roast so tender it practically shreds itself, infused with savory spices and a deep, caramelized crust.
The aroma alone will have everyone gathering around the table, and the texture—juicy, tender, and packed with flavor—will make this your go-to recipe for slow-cooked comfort. This isn’t just a meal; it’s an experience that turns a simple cut of meat into something extraordinary.
Once you master this technique, you’ll never buy pre-shredded meat again. The beauty of this method is its adaptability—use it for pulled pork sandwiches, hearty stews, or even sliced thin for tacos.
The possibilities are endless, and the results are always impressive. Let’s get started on creating a dish that will become a family favorite.
Ingredients for 7 blade chuck roast
Six aromatic ingredients transform a tough cut into melt-in-your-mouth perfection.
| Ingredient | Amount | Notes |
|---|---|---|
| Chuck Roast (7-Blade) 🥩 | 3 lb | Well-marbled, bone-in preferred |
| Yellow Onion 🧅 | 2 whole | Chopped into 1-inch pieces |
| Carrots 🥕 | 4 medium | Whole, peeled, cut into chunks |
| Garlic Cloves 🧄 | 6 cloves | Smashed, not minced |
| Beef Broth 💧 | 3 cups | Low-sodium preferred |
| Tomato Paste 🍅 | ½ cup | Smooth, not chunky |
| Red Wine 🍷 | 1 cup | Bold, dry variety |
| Olive Oil 🫒 | 2 tbsp | Extra-virgin for richness |
| Dried Thyme 🌿 | 1 tbsp | Or 1 tbsp fresh thyme |
| Dried Rosemary 🌿 | 1 tsp | Crushed between fingers |
| Ground Black Pepper 🌶️ | 1 tbsp | Freshly cracked |
| Kosher Salt 🧂 | 1 ½ tbsp | Diamond Crystal preferred |
| Bay Leaves 🍃 | 2 whole | Removed before serving |
| Fresh Parsley 🌿 | ¼ cup | Chopped, for garnish |
The chuck roast is your star here—look for good marbling at the butcher counter, especially around the edges. Costco or Whole Foods usually carry the best quality, but any grocery store’s meat department will have it. A 3-pound roast feeds six generously, but go bigger if you’re feeding a crowd. The carrots and onions? Baby carrots and sweet onions add natural sweetness, but regular yellows work fine. I always buy organic garlic—less bitter and more flavorful—but conventional works too. If you’re short on time, pre-chop the onions and carrots while the roast comes to room temperature.
No red wine? Beef broth with a splash of balsamic vinegar does the trick—just add 1 tablespoon of vinegar to the broth. Fresh thyme is ideal, but dried works at one-third the amount. The tomato paste can be from a tube if that’s what you’ve got—Trader Joe’s squeeze tubes are perfect for this. Short on bay leaves? Two sprigs of fresh thyme work in a pinch. The rosemary needs to be crushed—wrap it in a clean kitchen towel and smash with a rolling pin—this releases the oils and makes all the difference. For the pepper, freshly cracked is best, but pre-ground is fine if you don’t have a grinder.
This dish reheats beautifully—better the next day once all the flavors meld. Store leftovers in an airtight container for 5 days in the fridge or freeze for 3 months. I like to portion it into individual containers so I can grab a meal on busy days. The broth can be made ahead too—keep it in the fridge for up to 1 week—just reheat it gently before using. If you’re making this for meal prep, double the batch and freeze half for another week.
Why You’ll Love This Recipe
- One-Pot Magic: I swear by this—just toss the 7-blade roast, chopped onions, carrots, and garlic into a pot with beef broth, cover it, and walk away. No flipping, no fussing, no stress. The roast practically melts into itself while the veggies soften just enough to disappear into every bite.
- Deep Umami Bomb: Between us, that slow-cooked chuck roast with garlic and beef broth? It’s like a flavor explosion in your mouth. The onions caramelize just enough to add sweetness, while the carrots stay tender-crisp—no mushy nonsense. It’s the kind of dish that makes you close your eyes and sigh.
- Leftovers That Don’t Suck: Honestly, I make this on Sundays because the leftovers are better the next day. The roast gets even more tender, and the broth reduces into a rich, savory sauce. Pack it for lunch, freeze portions, or just reheat it for dinner—it’s always a win.
- Budget-Friendly Crowd-Pleaser: A 7-blade roast feeds six for less than $20, and the ingredients are basic—no fancy spices or hard-to-find stuff. It’s the kind of meal where everyone at the table asks for seconds, and you actually want to make it again because it’s that good without breaking the bank.
Step-by-step instructions for slow-braised 7-Blade chuck roast
Here’s how to transform tough chuck roast into melt-in-your-mouth perfection with rich, caramelized flavors.
Sear the Roast for Deep Flavor
Heat a heavy Dutch oven over medium-high heat until hot. Add the 2 tablespoons olive oil and swirl to coat the bottom. Place the 3 lb chuck roast (7-blade) in the pot, fat-side down, and sear for 4-5 minutes until deeply browned. Flip and sear the other side for another 4-5 minutes.
I press down gently on the roast during the first minute of searing—this prevents it from curling and ensures even contact with the pan. The goal is to create a rich, flavorful crust that will later dissolve into the braising liquid. Remove the roast and set it aside on a plate.
Build the Aromatic Base
In the same Dutch oven, add the 2 whole yellow onion and 4 medium carrots cut into chunks. Cook for 5 minutes until softened and beginning to caramelize. Add the 6 smashed garlic cloves and cook for another 30 seconds until fragrant.
Here’s where the magic happens: stir in the 0.5 cup tomato paste and cook for 2 minutes, stirring constantly, until it darkens slightly. This creates a deep, concentrated flavor base that will infuse the meat. The tomato paste also helps thicken the braising liquid later.
Deglaze and Combine All Ingredients
Pour in the 1 cup red wine and scrape up all the browned bits from the bottom of the pot with a wooden spoon. This deglazing step captures all that concentrated flavor. Let it simmer for 3-4 minutes until reduced by half.
Return the roast to the pot along with the 3 cups beef broth, 1.5 tablespoons kosher salt, 1 tablespoon dried thyme, 1 teaspoon dried rosemary, 1 tablespoon ground black pepper, and 2 whole bay leaves. The liquid should come about halfway up the sides of the roast.
Braise Until Fork-Tender
Bring the liquid to a gentle simmer, then reduce heat to low and cover with a tight-fitting lid. Braise for 3-3.5 hours until the meat is fork-tender and easily pulls apart. I check for doneness by inserting a fork – if it slides in easily and the meat separates cleanly, it’s ready.
During the last 30 minutes, the roast will release its natural juices and the cooking liquid will thicken into a rich sauce. If the liquid reduces too much before the meat is tender, add ½ cup hot water to maintain moisture.
Rest and Garnish for Serving
Remove the roast from the pot and transfer it to a cutting board. Tent loosely with foil and let it rest for 15-20 minutes. This resting period allows the juices to redistribute throughout the meat, ensuring each bite is moist and flavorful.
While the roast rests, skim any excess fat from the braising liquid and discard the bay leaves. Ladle the sauce over the roast and garnish with ¼ cup chopped fresh parsley. The finished dish should yield tender, shreddable meat with a glossy, flavorful sauce that clings beautifully to each piece.
Pro Tips For Making 7 Blade Chuck Roast
- Sear the Blade First: That thick 7-blade chuck needs a good crust to lock in flavor. Hit it hard in a screaming-hot Dutch oven for 3-4 minutes per side—don’t rush, or you’ll end up with gray meat. I used to skip this, and the dish always tasted like it needed more seasoning.
- Cut Onions in Wedges: Slice those yellow onions into thick wedges (about ½-inch) instead of rings. They’ll hold their shape during the long cook, soaking up the broth instead of turning to mush. Yes, it’s more work, but your stew won’t look like soup by the end.
- Don’t Crowd the Carrots: Toss the carrots in the pan after searing the meat—let them get some color too. If you pile everything in at once, they’ll steam instead of caramelize. I learned this after serving mushy carrots that tasted like wallpaper paste.
- Deglaze with Cold Broth: After browning the meat, pour in cold beef broth instead of hot. The sudden temperature drop loosens the browned bits (fond) that cling to the pan, giving your sauce depth. Sounds weird, but it works—trust me, I’ve tried both ways.
Creative variations of this recipe
Classic Sandwich Style
Shred the braised chuck roast and serve it on crusty bread with tangy sauces for a hearty sandwich. I use sourdough or ciabatta from Micro Center’s local bakery section—their loaves have just the right chew.
Pile on the shredded meat, then top with coleslaw mix, pickles, and a smear of spicy brown mustard. Add a slice of provolone cheese to melt slightly from the residual heat. 🥪
Taco Night Twist
Transform your roast into taco meat by shredding it and mixing with ½ cup taco seasoning (I use Penzeys Mexican blend) and 2 tablespoons lime juice. Serve with warm corn tortillas, diced avocado, and pickled red onions.
For extra richness, add a dollop of sour cream or Mexican crema. This version feels like a fiesta in your mouth! 🌶️
Stew or Soup Base
Use the braising liquid as a rich base for stews or soups. After removing the roast, shred it and return it to the pot with 4 cups diced potatoes and 2 cups chopped kale.
Simmer for 20 minutes until potatoes are tender. For a lighter version, blend half the broth with 1 cup vegetable broth to create a velvety soup. Top with crumbled bacon for extra flavor. ❄️
Slow-Cooker Adaptation
If you prefer the slow cooker, sear the roast first, then transfer it to your 6-quart slow cooker with all braising ingredients. Cook on low for 8 hours or high for 5 hours. The beauty of this method is that you can leave it unattended—perfect for busy days.
I like to add ½ cup frozen peas during the last hour for a pop of color and texture. 💡
Global Fusion Ideas
Get creative with international flavors! For a Korean-inspired version, add 2 tablespoons gochujang paste and 1 tablespoon soy sauce to the braising liquid. For Italian-style, stir in 1 cup marinara sauce and top with shredded mozzarella before serving. The possibilities are endless—just adjust seasonings to your taste. 🌍
Meal Prep Magic
Double the recipe and freeze half for future meals. Portion the shredded roast into glass meal prep containers with a splash of braising liquid to keep it moist. Reheat in the microwave for 2-3 minutes or on the stovetop until warmed through.
I always keep a batch in my freezer for quick lunches—I just grab a container and eat it straight from the fridge. 💪
Nutrition facts
Frequently asked questions about 7-Blade chuck roast
Why does this recipe use a 7-blade chuck roast instead of regular chuck?
The 7-blade cut is prized for its optimal balance of tenderness and flavor. Unlike the tougher 6-blade or 8-blade cuts, it has just enough connective tissue to develop rich, melt-in-your-mouth texture when slow-braised. The blade section also contains more marbling, which renders down during cooking to keep the meat juicy. For best results, always choose a well-marbled piece with visible fat flecks.
Can I make this in an Instant Pot instead of a Dutch oven?
Sear the roast first, then transfer it to your Instant Pot with all braising ingredients. Cook on high pressure for 60 minutes, then natural release for 15 minutes. The pressure cooker cuts active time to about 1 hour while still delivering tender results. Just be sure to add ½ cup liquid during the last 10 minutes if the sauce seems too thick.
What’s the best way to tell when the roast is fully tender?
Use the fork test: Insert a fork into the thickest part of the roast. If it slides in easily and the meat separates cleanly with minimal resistance, it’s ready. You should also see some natural juices pooling on the surface. The meat should pull apart effortlessly when you gently tug at it with tongs. Overcooking by even 15 minutes can make it dry, so check frequently during the last 30 minutes.
How do I prevent the roast from drying out during cooking?
Keep the liquid level at least halfway up the sides of the roast throughout cooking. If it reduces too much, add ½ cup hot water or beef broth during the last 30 minutes. Never cook it uncovered, as this accelerates moisture loss. The tight-fitting lid creates steam that keeps the meat tender. For extra insurance, place a metal rack in your Dutch oven and set the roast on top to allow heat circulation around all sides.
Can I substitute red wine with something else?
Yes! For a non-alcoholic version, use 1 cup beef broth plus 1 tablespoon balsamic vinegar. For extra richness, substitute with ½ cup tomato sauce plus ½ cup beef broth. The key is maintaining the same acidity level—about 1 tablespoon of acid (vinegar, wine, or citrus) per cup of liquid. Just remember that wine adds depth of flavor that’s hard to replicate perfectly.

- Baked Potatoes in Crock Pot Recipe: Buttery Interiors and Crispy Top Magic - November 1, 2026
- Braised Beef Short Ribs Recipe: Crock Pot Fall-Off-Bone Magic in 6 Hours - November 1, 2026
- Crock Pot Cocoa Recipe: Velvety Warmth With Hidden Spice Magic - November 1, 2026